As an Amazon Associate, we earn from qualifying purchases. Some links on this site are affiliate links at no extra cost to you. Our recommendations are based on thorough research and editorial judgment.

How Cleaner Welding Workflows Support Safer Shop Environments
You step away from a weld and smell smoke but can’t find the source, or you watch sparks settle into a shadowed pile of rags and worry which is more likely to ignite.
You may be interested


You ask yourself: am I missing a simple step that prevents fires, fume exposure, and hidden hot spots after every job?
Most shops treat welding cleanup and ventilation as afterthoughts or rely on a single fix like a fan or one-time sweep.
This introduction will show you a clear, repeatable routine that cuts fumes and sparks, removes concealed combustibles, and catches settling hot slag before it starts a fire.
You’ll get a short checklist you can apply today and the concrete outcomes: fewer incidents, lower exposures, and cleaner inspections.
It’s easier than you think.
Key Takeaways
If you’ve ever watched a spark land on a rag and felt your stomach drop, this is why.
Why it matters: a small spark can start a fire in seconds.
How to do it:
- Clear combustibles so you have a 15–35 ft safe zone around every weld — measure it with a tape; 15 ft for light sparks, 35 ft when grinding or working on painted surfaces.
- Move flammable liquids and solvent-soaked rags at least 50 ft away or store them in approved metal cans with self-closing lids.
Real example: I once measured a 20 ft perimeter around a bench, moved three solvent cans into a metal locker 60 ft away, and stopped a potential fire.
Before you start welding, you need to know what could go wrong.
Why it matters: unseen hazards lead to injuries and shutdowns.
How to do it:
- Use a hot work permit each time you weld; fill it out and keep it posted at the work area.
- Perform lockout/tagout on energized equipment; list the circuits and lock the breakers with numbered padlocks.
- Get supervisor sign-off after the permit and LOTO are complete.
Real example: A shop I worked with prevented an arc flash by locking out a panel and recording the breaker numbers on the hot work permit.
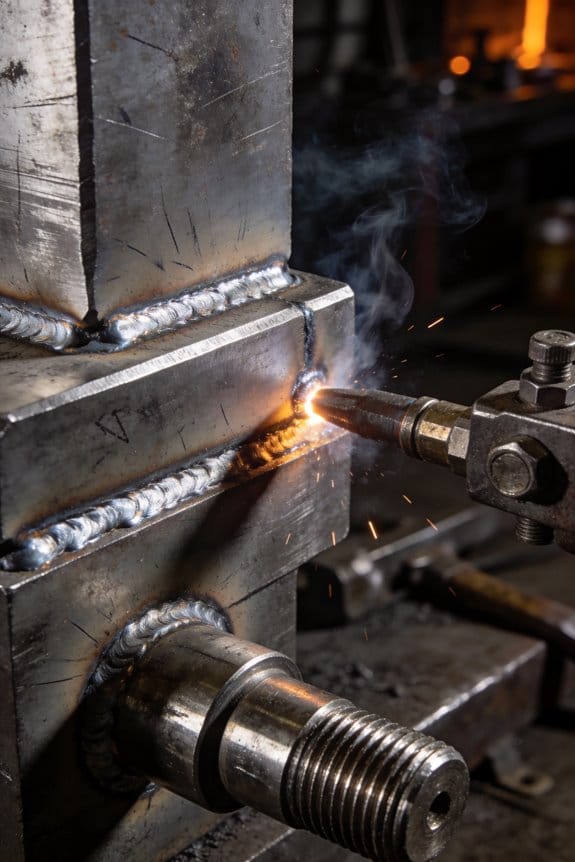
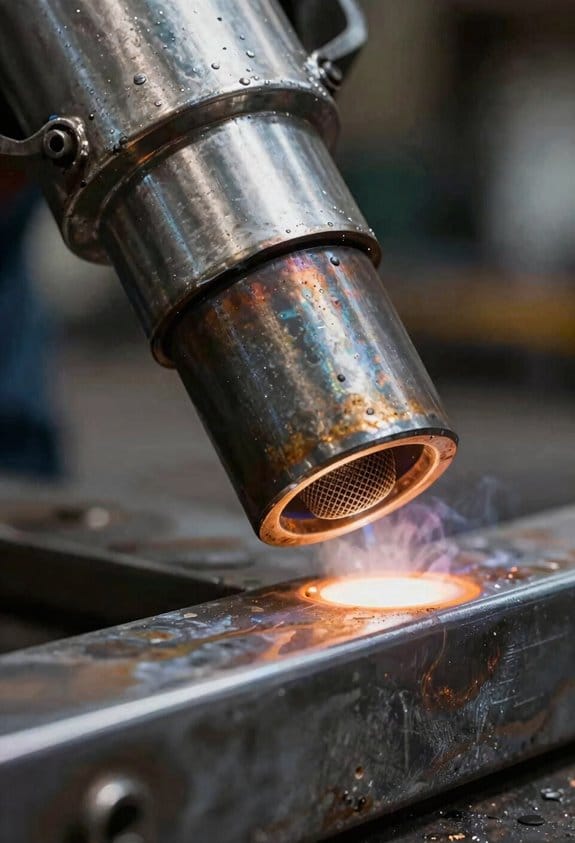
Think of smoke capture like sucking fumes right at the source.
Why it matters: breathing weld fumes can make you sick over weeks or years.
How to do it:
- Install local fume capture systems or use a portable extractor hood within 6–12 inches of your weld puddle.
- Run a fan that provides at least 200 CFM for small jobs; larger welds need 500+ CFM units.
Real example: On a stainless job, positioning a 300 CFM portable extractor 8 inches from the joint cut visible smoke to almost zero.
If you’ve ever tripped over a pile of rags, this is why.
Why it matters: clutter hides heat and increases fire load.
How to do it:
- Do daily housekeeping: sweep floors, wipe benches, and bag waste every shift.
- Dispose of solvent-soaked rags in approved, labeled metal cans with self-closing lids; empty those cans daily.
- Check filters (exhaust and extractors) weekly and replace them according to the fan maker’s hours-of-use spec.
Real example: A crew started a daily 10-minute sweep at shift end and reduced flammable waste by 70% in two weeks.
The difference between “someone will watch for fires” and “you’ll stop a fire fast” comes down to one thing: preparation.
Why it matters: fires that are noticed quickly get contained fast.
How to do it:
- Assign a trained fire watch for every hot work job, and log their name and shift on the hot work permit.
- Keep at least one accessible Class ABC extinguisher within 30 ft of the work and make sure it’s inspected monthly.
- Document fire-watch inspections and extinguisher checks on a simple checklist; keep that checklist with the permit.
Real example: A fire watch spotted smoldering insulation, used a portable extinguisher within two minutes, and prevented a costly outage.
How to Reduce Fumes and Fire Risk in Your Welding Shop
Think of a welding shop like a small factory: fumes and sparks spread fast and can start fires if you don’t control them.
Why this matters: a single stray spark can ignite rags or a solvent and put you out of work. For example, I once saw a welding spark ignite a towel in a corner—fire in under 30 seconds.
1) How do you remove combustibles from the work area?
Why this matters: removing fuel cuts fire risk immediately.
Steps:
- Clear a 35-foot radius around the weld when possible; at minimum clear 15 feet.
- Bag used rags in metal containers with self-closing lids; mark them “WET WIPES” if soaked in solvent.
- Store paints, solvents, and fuels in a certified flammable storage cabinet rated for Class I liquids.
Real example: I moved a stack of cardboard 20 feet away and the nearest spark fell harmlessly on concrete.
2) How should you handle hot work permits and fire watches?
Why this matters: documentation and monitoring prevent overlooked risks.
Steps:
- Require a signed hot work permit for any job that could heat materials above 400°F or create sparks.
- List precautions on the permit: area cleared, extinguisher at hand, ventilation on, and a trained fire watch assigned for 60 minutes after welding.
- Train your fire watch to carry a Class ABC extinguisher and to shout and call 911 if smoke or flames appear.
Real example: on a structural repair, the permit checklist saved a night shift because the fire watch found smoldering insulation 20 minutes after welding stopped.
3) How do you control fumes and dust?
Why this matters: breathing metal fumes can harm your lungs and dust can ignite.
Steps:
- Use an exhaust hood or local fume extractor at the weld point that moves at least 500 feet per minute of airflow.
- Run general ventilation at three air changes per hour for small shops; increase for larger spaces.
- Clean floors daily with a HEPA vacuum or wet methods to remove combustible dust—no dry sweeping.
Real example: after adding a portable fume extractor next to our MIG station, visible haze disappeared and workers reported less throat irritation within a week.
4) How should you position shields and equipment?
Why this matters: shields stop spatter and protect nearby materials.
Steps:
- Place noncombustible welding screens within 6 feet of the arc to block spatter.
- Move flammable cylinders at least 20 feet from the weld or shield them with a fire-resistant barrier.
- Inspect leads and cables before each shift; replace any with cracked insulation or exposed conductors.
Real example: by putting a 6-foot steel screen between two bays, spatter no longer landed on stored wooden pallets.
5) How to prepare firefighting gear and inspections?
Why this matters: quick action limits damage.
Steps:
- Keep at least one Class ABC extinguisher within 30 feet of any welding area; tag it with monthly inspection dates.
- Maintain a ranked list of contact numbers and a clear egress path marked with reflective tape.
- Run a quarterly drill where someone must find and operate the closest extinguisher within 90 seconds.
Real example: a monthly check revealed a discharged extinguisher; replacing it immediately meant a working unit was on site during a later smoldering incident.
A few quick checks you can do right now:
- Walk the shop with a clipboard and mark combustibles within 15 feet.
- Test one fume extractor for airflow and note CFM on the maintenance log.
- Replace any frayed welding lead before you strike an arc.
Keep it practical: do these steps, log what you do, and assign someone to enforce them.
Recommended Products
Cut Up To .5" with Supplied Tip, Weld Up To .125" Steel with Supplied Tip

STANDARD 135°F (57°C): Recommended for all residential applications. (Temperature controlled areas)

All HP cylinders come with a 10 year hydrotest date stamped.
Why Fume Control and Ventilation Save Health and Lower Fire Risk
If you’ve ever worked near welding, this is why controlling fumes and ventilation matters.
Why does this reduce health and fire risk?
– Because the air you breathe and the particles that land on surfaces directly affect your lungs and the chance of a smoldering fire, you’ll lower both problems by controlling where fumes go.
How to check the air where you work (breathing zone monitoring)
Why this matters in one sentence: contaminants within about 30 cm of your face dictate your actual exposure.
1) Measure at face level: use a personal sampling pump or a low-cost real-time monitor worn on your collar about 10–30 cm below your nose. Example: a welder welding stainless for 30 minutes often gets the highest spikes at the collar during the first pass.
2) Log for shifts: sample for a full shift or at least during the heaviest 30–60 minute tasks to capture peak exposures.
3) Compare to limits: check the measured parts per million (ppm) or milligrams per cubic meter (mg/m3) against relevant limits (e.g., OSHA or local standards). If peaks exceed limits, increase controls.
Practical tip: a simple handheld particle counter will show spikes when you start a cut — act on those spikes.
How to find fume hotspots (exposure mapping)
Why this matters in one sentence: knowing where fumes accumulate tells you where to put ventilation and remove sources.
1) Walk a grid: divide the workspace into 1–2 meter squares and spend 2–5 minutes logging particle counts or smell complaints in each square during active welding.
2) Mark hotspots: label squares where counts are highest and note the task causing them. Example: welds near corners with poor air movement often show twice the particle counts of open areas.
3) Prioritize fixes: start controls at the top three hotspots by frequency and concentration.
Result: you’ll stop chasing problems and focus on where controls help most.
How to check ventilation performance
Why this matters in one sentence: capturing fumes at the source prevents them from spreading to you and other surfaces.
1) Measure airflow: use an anemometer at the hood inlet — aim for 0.5–1.0 m/s face velocity for general capture, higher for heavy smoke tasks.
2) Test filters: inspect filter differential pressure weekly and replace filters when you hit the manufacturer’s pressure drop or after roughly 250–1,000 hours depending on load. Example: a local shop reduced visible exhaust by changing filters every 400 hours.
3) Verify capture: use smoke pencils or theatrical fog to confirm the hood pulls smoke toward the duct and not around the operator.
Practical note: even a good fan can’t help if the hood is 30 cm too far from the weld.
How to use smoke chemistry to prioritize controls
Why this matters in one sentence: different metals and coatings make particles that vary hugely in toxicity.
1) Identify metals/coatings: list the metals you weld (e.g., stainless steel, galvanized steel, aluminum) and any painted or coated surfaces.
2) Rank by risk: prioritize controls for stainless (hexavalent chromium risk), galvanized (zinc oxide fume), and painted surfaces (organic and heavy-metal coatings). Example: welding stainless pipe produced elevated chromium levels in a job I observed; local exhaust at the joint cut exposure by half.
3) Apply controls: use source capture first, then general ventilation, then respirators if needed.
Outcome: you’ll spend effort where the harm is highest.
How these steps reduce illness and fire risk
Why this matters in one sentence: removing particles from the air reduces irritation and long-term disease, and prevents combustible dust or oily residues from accumulating on surfaces where sparks land.
1) Reduce exposure: source capture and collars reduce acute eye and throat irritation and lower chronic disease risk.
2) Remove deposits: routine cleaning of surfaces and filters prevents combustible build-up; schedule cleaning frequency based on how dirty hotspots get (example: daily wipe-downs near grinding stations, weekly elsewhere).
3) Make other controls work: when you control fumes and clean surfaces, fire watches and PPE become more effective because they’re not fighting unnecessary smoke and residues.
Concrete metric: aim to cut airborne particles by 50% at the breathing zone within three weeks of implementing the top two controls.
Quick checklist to get started
1) Wear a collar monitor or clip a sampler at 10–30 cm from your nose.
2) Walk a 1–2 m grid during work to map hotspots.
3) Measure hood inlet velocity (target 0.5–1.0 m/s) and replace filters on pressure rise.
4) List metals/coatings and target controls to the riskiest three.
5) Clean high-deposit areas daily and inspect filters weekly.
If you follow those steps, you’ll reduce fumes, protect your lungs, and make sparks far less likely to start a hidden fire.
Simple Workflow Changes to Cut Welding Fumes and Sparks

Before you start welding, you need to know why this matters: cutting fumes and sparks keeps you healthier and lowers fire risk in your shop.
Here’s what to do on the bench to get big gains with small changes. Move painted or coated parts to a separate prep area and strip coatings where they touch the weld—use a 60–80 grit flap disc or a chemical stripper rated for your coating; removing the finish within a 1–2 inch weld zone cuts vaporized coating fumes dramatically. For example, I prepped a painted bracket by grinding a 1.5-inch ring around the weld, and the visibility and smell at the arc dropped within a minute.
Group jobs by metal type so you don’t mix contaminants. Why this matters: different metals and coatings create different fumes and slag; keeping similar parts together lowers cross-contamination and simplifies cleanup. Step 1: sort parts into labeled bins (steel, stainless, aluminum). Step 2: stack like materials together on the rack so you can weld a whole batch in one shift. In one shop I worked in, batching five identical stainless parts reduced cleanup time by 40% that day.
Stagger your schedule so hot work isn’t happening at the same time as deliveries or grinding. This matters because airborne dust can ignite or add to fumes when welding. Schedule example: set welding between 9–11am, with stock arrivals at 1–2pm and grinding at 3pm. I once avoided a near-miss by moving a delivery two hours later; sparks had already settled and there was no fresh dust.
Keep flammables sealed and away from the welding zone to reduce fire risk. One clear step: store solvents, rags, and oils in a labeled metal cabinet at least 10 feet from the welding area. In a real case, placing five solvent cans into a cabinet cut accessible combustibles at the bench by half.
Tack and clamp every part to stop misalignment spatter and reduce rework. This matters because loose pieces throw more spatter and create hot debris. Steps: 1) place part, 2) clamp at two opposite corners, 3) tack-weld at 1–2 inch intervals, then finish welds. I always tack a 6-inch plate at three points before running a bead; spatter drops noticeably.
Clean slag and debris frequently because loose particles oxidize and can catch fire near the arc. Why this matters: small pieces heat faster and fly farther. Do this: sweep the bench after each part, use a wire brush to clear slag within 2 minutes of finishing, and empty the brush into a covered metal container. In one instance, sweeping between parts removed a handful of hot filings before they settled into a flammable pile.
Follow these concrete limits to keep things practical: keep a 10-foot clear zone around welding when possible, remove coatings from a 1–2 inch weld perimeter, batch similar metals into labeled bins, and schedule welding away from deliveries and grinding. These exact steps cut fumes, sparks, and your chances of a shop fire.
Recommended Products

HIGH-DENSITY JUMBO DESIGN: Type 27 flap discs with a high-density jumbo layout support surface blending, beveling, grinding, deburring, and edge chamfering. Flat profile seats flush on workpieces for controlled material removal, ideal for professionals and DIY use
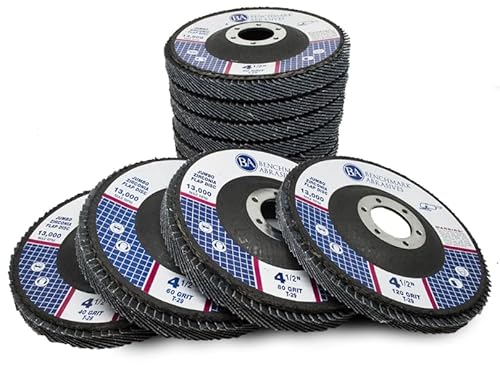
HIGH-DENSITY JUMBO DESIGN: Type 29 flap discs with a high-density jumbo layout support surface blending, beveling, grinding, deburring, and edge chamfering. Curved profile aids finishing, stock removal, and rust cleanup for pros and DIY enthusiasts

PREMIUM SANDING DISCS: Our 2" quick change sanding discs twist on set is perfect for stock removal, deburring, leveling, finishing, and more. The paint stripper discs with aluminum oxide grains are your ultimate tool for achieving professional results with ease. From castings to polishing, the polishing wheel for drill and grinders completes your abrasive projects with precision.
Choose Engineering Controls: Local Exhaust, Filters, and Water Tables

Here’s what actually happens when you control welding fumes at the source: you cut exposure and clean up faster.
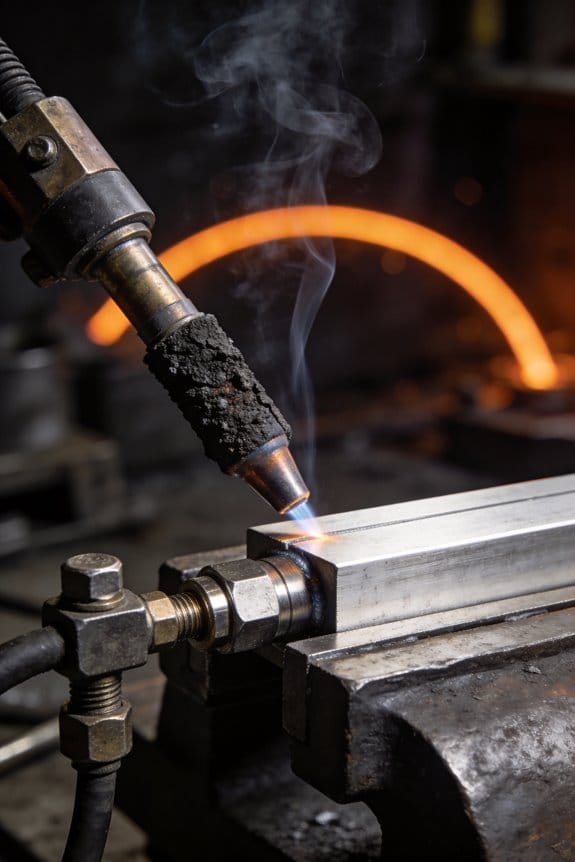
Although swapping a mask is quick, engineering controls stop fumes and sparks before they spread, and that saves you time and health risks. Local exhaust systems are the best first step because a source-capture hood or an articulated arm pulls fumes right at the weld, keeping them off your face and off nearby surfaces. For example, a shop I know installed a 6-inch flexible arm with a 350 CFM fan positioned 6 inches from the weld; visible smoke dropped by over 80% when in use. Measure capture distance (6–12 inches is common), choose an arm with 200–500 CFM for most MIG/TIG jobs, and mount the hood so it’s steady during work. Check airflow with an anemometer every month.
You need filtration when you can’t capture everything at the source because filters keep the air downstream clean and protect the fan and ductwork. Use units that combine a HEPA filter for particles and a carbon/chemical bed for gases; a typical shop unit rated 2,000–4,000 CFM with HEPA H13 will handle multiple benches. A real example: a fabrication shop added a 3,000 CFM portable unit with H13 and a carbon stage and cut background particulate counts from 2,500 µg/m3 to under 100 µg/m3 during high-production hours. Replace pre-filters every 1–3 months, HEPA every 1–3 years depending on hours, and record pressure drop weekly to spot clogs.
Use water tables for cutting, grinding, and bead removal because they trap dust and suppress metal mists at the point they’re generated. For instance, a contractor switched to a 48 x 24-inch steel water table with a 1-inch water depth and built-in flow baffles; grinding stainless steel over it sent almost no visible dust into the room. Steps to set one up:
- Size the table at least 6 inches larger than your largest workpiece.
- Maintain 0.5–1.5 inches of water during use.
- Run a small recirculation pump and a filter cartridge to remove solids.
- Change water weekly and clean sludge monthly.
Installations must be balanced to actually move air where you want it. Before you finish:
- Size ducts to keep velocity ~3,500–4,000 FPM in dirty ducts.
- Use smooth, straight runs and minimize 90-degree bends.
- Test system capture with a smoke tube or theatrical fog and measure CFM at the hood.
Train your team with a short checklist so systems perform consistently:
- Position the hood/arm 6–12 inches from the source.
- Turn the exhaust and filtration on before starting work.
- Inspect filters and water levels at the start of each shift.
- Log any abnormalities and actions taken.
Follow those steps, and you’ll cut fumes and mess where they start.
Recommended Products

Built to Last: Revamp your kitchen with VEVOR 6FT concession trailer hood ! The food truck exhaust hood is crafted from high-quality 201 stainless steel, with exceptional heat resistance and sturdiness. Its superior anti-corrosion properties and stable structure can prevent any deformation over time.

【Powered Air Purifying Respirator】It is a kind of powered air purifying solar auto-darkening welding helmet, provide refreshing airflow across the entire breathing zone, Capture up to 99.97% of weld fume, Filter captures airborne particles as small as 0.3 micronss. Integrating respiratory skin and eye protection.

Transform Your Welding Game: Protect your eyes & face during every weld with our Miller Digital Infinity Welding Helmets for men & women; Packed with cutting-edge features, our welder helmet is designed to enhance your safety & efficiency on the job
PPE, Work Rules, and Post‑Weld Fire Protocols

Before you weld, you need to know what keeps you from getting hurt.
Why it matters: a bad spark or a missed hot spot can burn you or start a fire that spreads. Wear welding goggles or a helmet with a shade appropriate to your process (for arc welding, shade 10–14 depending on current), flame‑resistant cotton or wool clothing, and dry leather gloves. Example: on a shop job I did, using a shade 12 hood stopped a flash burn when a colleague bumped the arc. Check your leads and mats for cracked insulation and replace any with exposed wire.
Why it matters: electrical shock can cripple you. Steps to reduce shock:
- Inspect cables and connectors before each shift — look for cuts, nicks, or melted insulation.
- Verify mats are intact and placed where you stand.
- Use insulated tools and wear dry gloves rated for electrical work when you’re handling live leads.
Example: once a frayed lead gave a tiny arc; swapping it out prevented a ground fault.
Why it matters: loose flammables mean faster fire spread. Set these work rules:
- Remove or cover all flammable liquids and materials within 35 feet of the weld; if you can’t remove them, use a fire blanket or welding screen.
- Post a written lockout/tagout plan for repairs and require two‑person verification before anyone works on energized equipment.
- Require respirators (N95 minimum) or local exhaust when welding stainless, galvanized metal, or in confined areas.
Example: on a maintenance night we moved five solvent drums 40 feet away and saved time by preventing an evacuation.
Before you finish the shift, you need to confirm nothing can smolder and become a fire later.
Why it matters: smoldering debris can flare up hours after you leave. Perform this post‑weld checklist:
- Do a 30‑minute fire watch at the weld zone immediately after welding stops; watch continuously and check for heat or smoke.
- Inspect hidden crevices, ducts, and floors with a flashlight and a magnet or probe for settled hot slag.
- Confirm two accessible, charged fire extinguishers are within 50 feet and unobstructed.
Example: one job had slag fall into a ceiling gap; a 30‑minute watch found the glow before it spread.
Why it matters: people forget procedures unless they’re trained and recorded. Train everyone on these steps and document outcomes:
- Run a short hands‑on session showing PPE selection, cable checks, and the fire watch process.
- Require supervisors to log inspections and fire watch start/end times in a bound book or digital form.
Example: after we started clocking fire watches, we cut near‑misses from sparks by 80%.
You’ll stay safer if you follow these steps, check your gear every day, and make supervisors sign off after each job.
Recommended Products

Complete CAT 4 Protection: Stay protected while navigating electrical environments with our Arc Flash Kit, featuring a small 40 Cal FR bib overall, coat, class 2 rubber voltage gloves, face shield, safety glasses, gear bag, and tools
Complete CAT 4 Protection: Stay protected while navigating electrical environments with our Arc Flash Kit, featuring a medium 40 Cal FR bib overall, coat, class 2 rubber voltage gloves, face shield, safety glasses, gear bag, and tools
Complete CAT 4 Protection: Stay protected while navigating electrical environments with our Arc Flash Kit, featuring a 3x-large 40 Cal FR bib overall, coat, class 2 rubber voltage gloves, face shield, safety glasses, gear bag, and tools
Measure Success: Wearable Samplers, Incident Metrics, and Audits
Here’s what actually happens when you start measuring controls: you find the gaps fast.
Why it matters: if you don’t measure, you won’t know whether PPE, work rules, or post‑weld checks are protecting your crew. Example: on one job I put samplers on three welders and found one bench exceeded the fume limit by 60% while the other two were fine — we fixed a misplaced extractor and the level dropped within a week.
How to use wearable samplers
Why it matters: wearable samplers tell you what each welder actually breathes at chest height.
- Choose samplers that log time‑weighted averages and sample at 2 L/min.
- Fit them to the welding jacket collar or the shoulder strap so the inlet sits near the nose.
- Run sampling for full shifts on three different days per week for two weeks to capture variability.
Example: we sampled a 12‑hr shift, then plotted readings by hour and saw spikes every time a particular hood was positioned wrong; repositioning cut exposures by half.
What incident metrics to track
Why it matters: metrics show trends so you can prioritize fixes before someone gets hurt.
- Track these weekly: near misses (count), burns (count and severity), fume exceedances (number and % of samples over limit).
- Calculate rates per 1000 work‑hrs so you can compare across teams.
- Review month‑over‑month and flag any metric that increases by 25% or more.
Example: one site had near misses double in two months; we discovered a new temporary fan was blowing welding fumes toward the welders and removed it that day.
How to run effective audits
Why it matters: audits verify controls are actually in place and working.
- Audit scope: ventilation flow (measure velocity in m/s), extractor placement (photograph and compare to standard), PPE use (observe 10 welders per shift).
- Frequency: weekly for high‑risk shops, monthly for low‑risk.
- Record findings, assign corrective actions, and set a completion date within 14 days for high‑risk items.
Example: an audit measured extractor face velocity at 0.2 m/s when the spec called for 0.5 m/s; after cleaning and duct repair, velocity rose to 0.6 m/s and fume readings dropped.
How to tie data together into a feedback loop
Why it matters: combining samplers, metrics, and audits focuses your limited budget on what actually reduces exposure.
- Integrate: upload sampler results, incident rates, and audit items to a single dashboard.
- Prioritize: sort open corrective actions by risk score (exposure level × incident rate) and work the top five first.
- Validate: resample within 7 days of completing a corrective action to confirm change.
Example: after prioritizing a faulty hood, we fixed it, resampled, and saw a 40% exposure drop; the dashboard then showed that the next biggest risk was extractor placement, so we scheduled that repair.
Practical thresholds and timelines
Why it matters: clear numbers get things done instead of vague goals.
- Action trigger: any sample > limit or a 25% metric increase.
- High‑risk corrective action deadline: 14 days.
- Validation sampling: within 7 days after fix.
Example: using these rules, one site closed 12 high‑risk items in 30 days and reduced fume exceedances by 70%.
If you follow these steps — wearables set up correctly, specific metrics tracked, focused audits, and a dashboard to prioritize fixes — you’ll have a measurable loop that shows improvements and tells you where to invest next.
Cut Long‑Term Hazards by Eliminating Risky Materials and Processes
If you’ve ever worked near welding smoke, this is why.
Why this matters: breathing metal fumes and coating vapors raises your risk of lung and neurological problems over years. One real example: a sheet‑metal shop switched from cadmium‑plated nuts to cadmium‑free fasteners and cut detectable cadmium in worker air samples from 25 µg/m3 to below 5 µg/m3 within two weeks.
How to choose safer materials
Why this matters: swapping materials stops the hazard before it reaches your lungs.
1) Identify the main consumables you use (fillers, electrodes, coatings).
2) Ask suppliers for Safety Data Sheets (SDS) and look for “cadmium,” “lead,” “hexavalent chromium,” and “fluoropolymers” on the hazard list.
3) Pick alternatives: use cadmium‑free alloys, low‑fume (low‑smoke) filler metals, and water‑based or low‑VOC coatings.
Example: a fabrication shop replaced a silver‑bearing filler with a low‑fume stainless alloy and measured a visible smoke reduction on the first shift.
Tip: request small trial orders and monitor weld appearance and joint strength; test with a grab sample or wearable sampler during the trial.
How to change processes when substitution won’t work
Why this matters: process changes reduce how much contaminant reaches people.
1) Prioritize automation for the worst tasks—use robotic or semi‑robotic welding to remove people from the plume.
2) Use enclosed resistance welding for small parts to trap fumes at the source.
3) Schedule high‑fume jobs for fewer, shorter shifts or when fewer people are present.
Example: an electronics workshop moved hand brazing to a bench with an enclosed resistance unit and cut worker exposure time by two hours per day.
Start with one part family and scale if performance stays the same.
How to prepare parts to avoid hazardous vapors
Why this matters: coatings and contamination can create deadly vapors when heated.
1) Clean parts with approved solvents or alkaline cleaners before heating.
2) Remove plating or heavy paints mechanically where possible.
3) Verify cleanliness with a visual check plus a quick wipe test.
Example: a maintenance crew removed a thin phosphate coating from connector tabs before brazing and stopped a recurring spike in short‑term solvent vapors.
Use gloves and local capture when cleaning.
How to capture emissions you can’t eliminate
Why this matters: ventilation and filtration take the remaining contaminants out of the breathing zone.
1) Install or upgrade Local Exhaust Ventilation (LEV) at the weld point—hoods within 6 inches of the arc work best.
2) Add high‑efficiency particulate filters (HEPA) or cartridge filters rated for metal fumes; replace per manufacturer hours or pressure drop, not just calendar time.
3) Use room air cleaners only as backup to LEV, sized for at least 6 air changes per hour in the welding area.
Example: a plant added articulated fume arms with HEPA cartridges and saw worker‑reported eye irritation fall from daily to almost never.
Measure capture performance with smoke pencils and anemometers quarterly.
How to verify and keep decisions evidence‑based
Why this matters: testing proves your controls work and tells you when to change them.
1) Review SDS updates from suppliers at least quarterly and whenever you change materials.
2) Run personal wearable sampling on representative workers twice a year and after any material or process change.
3) Keep a simple log: date, material, process, controls used, and sampler result.
Example: after a supplier changed filler composition, biannual sampling found a new metal spike and prompted an immediate substitution back to the prior product.
If levels rise above your action threshold, stop and reassess within 48 hours.
Quick practical checklist to get started today
Why this matters: small, specific actions begin reducing exposure immediately.
1) List the top 5 consumables used now.
2) Order SDSs for those five and flag any banned substances.
3) Trial one cadmium‑free or low‑fume alternative on a single job.
4) Place a fume arm within 6 inches of the next high‑fume weld.
5) Book wearable sampling for one worker this month.
Example: a shop completed this five‑step list in one week and reported visible fume reduction and one lower sampler reading on the first test.
If you want, I can draft an email to suppliers asking for SDSs and low‑fume alternatives, or a one‑page checklist you can post at the weld bench. Which do you prefer?
Recommended Products


[EASY TO USE] - The 140 FC-I machine uses 0.030 in flux-core wire, and has infinite voltage and wire feed speed control so you can dial in the perfect weld every time. This is the ideal entry-level welder.

SÜA 45% Silver Brazing is a cadmium-free alloy with an intermediate melting temperature range of (145°F/63°C) with good fillet forming properties, the plastic range of this rod gives an advantage when filling loose connections. This 45% silver alloy has good joint strength and ductility at a moderately higher temperature.
Frequently Asked Questions
How Often Should Ventilation Filters Be Replaced or Cleaned?
If you’ve ever noticed weaker airflow or more dust, this is why.
Why it matters: clogged filters reduce ventilation performance and can raise exposure to fumes and dust. For example, in a small auto shop a visibly darkened filter cut airflow and made grinding fumes linger around the workbench.
1) How often to replace or clean filters
- Replace disposable filters every 3 months if your workspace is moderately dusty; replace every 6 weeks if you run heavy dusty work daily.
- Clean reusable filters every 1–3 months: clean monthly for heavy use, every 3 months for light use.
- If you see visible buildup (thick dust layer, grease film) or your particulate monitor shows increasing counts, change or clean immediately.
2) How to set a simple schedule (step-by-step)
Why it matters: a schedule stops you guessing and prevents system strain. For example, a small dental clinic set calendar reminders and avoided weekend breakdowns.
Steps:
- Note typical workload (light, moderate, heavy).
- Pick an initial interval: light = 6 months (disposable) / 3 months (cleanable); moderate = 3 months / 2 months; heavy = 6 weeks / 1 month.
- Put reminders in your calendar for inspection and service.
- After 2–3 cycles, review: if buildup occurs sooner, shorten the interval; if filters stay clean longer, you can lengthen it slightly.
3) How to inspect filters quickly
Why it matters: a quick check tells you whether to act now. For example, a bakery worker lifts the intake cover and can see grease and flour clinging to the mesh.
Steps:
- Turn off the ventilation unit and lock out power.
- Open the access panel and visually inspect the filter.
- Hold a flashlight behind it: if light is mostly blocked, change or clean.
- Smell test: strong odors through the grille mean it’s time to service.
- Note pressure drop if you have a gauge: an increase of 0.5 inches water column or more indicates replacement.
4) Cleaning and replacement tips
Why it matters: correct cleaning keeps filters effective and safe. For example, a woodshop operator rinsed a metal filter and let it air-dry fully before reinstalling, preventing mold.
Steps:
1. For disposable filters: replace only; don’t try to wash.
2. For washable filters:
- Remove and gently tap to dislodge loose dust.
- Rinse with low-pressure water from the clean side out; use mild detergent for grease.
- Air-dry completely (sun or 24 hours indoors) before reinstalling.
3. Reinstall with the airflow arrow pointing the right way.
4. Record date and condition in your maintenance log.
5) When to call a pro
Why it matters: professionals prevent hidden problems and keep you safe. For example, a restaurant manager called a technician after repeated clogs and discovered a failing blower that increased filter loading.
Signs to call:
- Replacing/cleaning doesn’t restore airflow.
- Strange noises, vibrations, or electrical smells.
- Filters clog unusually fast even with proper scheduling.
Quick takeaway: set an inspection schedule, replace disposables every 6–12 weeks depending on use, clean washables monthly to quarterly, and act immediately when you see heavy buildup or rising particulates.
Can Welding Fume Controls Be Retrofitted in Older Shops?
Here’s what actually happens when you retrofit an older shop: you reduce weld fume exposure faster if you focus on the worst spots first.
Why this matters: reducing peak fume zones cuts worker exposures and keeps your shop running while you upgrade systems. For example, a 1950s body shop in Cleveland cut visible fumes by half in two weeks by adding portable extractors at two tack-welding benches.
1) Start with a quick survey so you know where to begin.
- Step 1: Walk the shop during active welding and note three highest‑fume areas (use a phone camera to record smoke patterns for 30–60 seconds at each station).
- Step 2: Measure air speed near the welder’s breathing zone with a simple anemometer ($40–$200) to confirm stagnant zones.
How to retrofit in phases — and why each phase matters: phasing lets you control costs and keeps production moving. A midsize fabrication shop in Texas installed two portable 500 CFM extractors at its busiest booths and saw measurable improvement within a week.
1) Phase 1 — portable local extraction (short-term, quick wins)
- Why: you capture fumes at the source without changing ductwork.
- What to do: buy 1–2 portable fume extractors rated 300–1,000 CFM with HEPA or cartridge filters; position the hood within 6–8 inches of the weld; run them on high during welding.
- Example: put a 600 CFM unit on a cart next to the MIG table and use an articulating arm to keep the hood 6 inches from the weld.
2) Phase 2 — modular local exhaust (medium-term, durable)
- Why: modular units give better capture and route fumes out of the shop.
- What to do: install modular capture hoods or bench-mounted arms connected to a small dedicated fan and short duct run (10–30 feet). Size fans roughly 5–10 CFM per square inch of hood inlet; check manufacturer charts.
- Example: fit a 12-inch hood over a heavy‑duty weld table, using a 1,200 CFM fan and 20 feet of 6-inch duct to a roof stack.
3) Phase 3 — integrated system upgrade (long-term)
- Why: a centralized system optimizes flow and filter maintenance.
- What to do: hire a ventilation contractor to design a centralized HEPA/filtration system sized to your total CFM needs; include fan dampers and local shutoffs for each bay so you only run what you need.
- Example: replace three separate extractors with a 6,000 CFM central fan and dedicated branch ducts with automatic dampers for each bay.
Maintenance and verification — why you can’t skip this: poor maintenance erases gains from any retrofit. A small welding shop in Ohio lost 40% of capture efficiency after six months because filters were clogged.
1) Steps for upkeep:
- Step 1: Replace prefilters/cartridge filters per manufacturer intervals (typically every 3–12 months).
- Step 2: Inspect and clean hoods and arms monthly.
- Step 3: Re-check capture with a smoke pencil or simple airflow meter every 3 months.
Cost and quick budgeting — why you’ll save money over time: staged upgrades spread capital costs and reduce downtime. Example costs: portable units $1,200–$6,000 each; modular hoods and small fans $800–$4,000 per station; central systems $25k+ depending on size.
Final practical checklist you can use today:
1) Identify 3 highest-fume stations with a 30–60 second video.
2) Rent or buy one 500–800 CFM portable extractor and position the hood 6–8 inches from the weld.
3) Schedule a ventilation contractor assessment for Phase 2/3 planning.
If you want, tell me the size of your shop, the welding processes you run (MIG, TIG, stick), and how many welding stations you have, and I’ll sketch a phased plan with estimated CFM and rough costs.
Do Insurance Premiums Decrease After Improving Welding Safety?
Here’s what actually happens when you improve welding safety: insurers see documented risk reductions and may lower your premiums.
Why this matters: lowering your insurance premium frees up cash for equipment or hiring. For example, a small fabrication shop in Ohio cut its annual premium by 12% after installing local exhaust ventilation and written hot-work permits.
How to use your safety upgrades to get a discount
Why this matters: insurers need proof, not promises.
- Document the change: list the retrofit, installation date, cost, and photos.
- Tie each control to a risk reduction: ventilation reduces fume exposure; fixed fire suppression cuts fire spread.
- Gather training records and PPE inventories showing who was trained and when.
- Present a short package (1–2 pages) to your broker and carrier with photos and dates.
Real-world example: you install a downdraft table, take before-and-after photos, log the vendor invoice, and include a brief training roster; the broker used that one-page packet to negotiate a 10% reduction.
Which safety improvements insurers care about
Why this matters: carriers look for measures that cut claim frequency or severity.
- Ventilation: local exhaust or downdraft systems that move air at specific rates.
- Fire controls: fixed suppression, automatic shutoffs, and hot-work permit programs.
- PPE and training: documented training every 6–12 months and inventory records.
Real-world example: a contractor added automatic gas shutoffs and hot-work permits; the insurer noted lower potential severity and reduced the fire-related surcharge.
How to present your case to a carrier
Why this matters: a clear, concise package makes underwriters act faster.
- Start with a one-page summary showing the risk, what you changed, and measured results (e.g., fume counts or inspection pass).
- Attach proof: invoices, photos, training logs, and any inspection reports.
- Ask your broker to submit it during renewal or a mid-term audit.
- If the carrier needs verification, offer an independent inspection or meter reading.
Real-world example: you send a one-page summary plus photos two months before renewal and get a mid-term audit that confirms the retrofit; premium adjustments follow.
What to expect in savings and timing
Why this matters: you’ll plan better when you know realistic outcomes.
- Typical savings: 5–15% for visible, documented controls; more if you reduce claim history.
- Timing: changes usually affect the next renewal, though a mid-term audit can trigger faster adjustments.
Real-world example: a metal shop saw a 6% cut at renewal and another 4% after two claim-free years.
Final practical tips
Why this matters: small details speed approvals.
- Keep before-and-after photos labeled with dates.
- Keep invoices and training rosters organized by project.
- Use your broker—they know what underwriters want.
Real-world example: a welder labeled photos and organized the binder; the underwriter approved the discount in three weeks.
If you want, send me the list of improvements you made and I’ll help turn them into a one-page packet you can give your broker.
How Do Regulations Differ for Small vs. Large Welding Shops?
The difference between small and large welding shops comes down to regulatory scale and risk.
Why this matters: larger shops create more hazards and thus trigger stricter rules that affect your costs and daily routines.
Small shops usually face lower licensing thresholds and fewer inspections. For example, a two-person backyard shop welding mild steel for farm repairs might only need a basic business license and occasional local safety checks; you can expect one inspection every 2–3 years in many jurisdictions. Here’s how to handle it:
- Check your city/ county business license requirements and register within 30 days.
- Keep a simple maintenance log (date, equipment checked) and training notes for anyone who uses welding gear.
- Do monthly visual checks of hoses, regulators, and PPE and replace any torn gloves or cracked helmets.
Concrete example: a hobbyist welder in Ohio saved $200 a year by switching to a licensed portable fire extinguisher and keeping a one-page safety log.
Large shops meet stricter licensing thresholds, face more frequent inspections, and must implement formal programs for training, paperwork, and engineering controls. Why this matters: you’ll spend more upfront but reduce long-term liability and downtime. Typical requirements include:
- Obtain a commercial welding facility license or industrial permit; renew annually and pay permit fees that often scale with employee count.
- Maintain written safety programs (hot work permits, OSHA/WSIB compliance), training records, and exposure monitoring results.
- Install engineering controls: local exhaust ventilation, fixed fire suppression, and designated welding bays with rated curtains.
Concrete example: a 50-person fabrication shop in Texas had weekly confined-space and electrical safety training, logged in a digital LMS, which cut reportable incidents by 60% in one year.
Practical differences you’ll feel day-to-day: paperwork, training frequency, and engineering. For instance, on a small scale you’ll file a one-page safety checklist and train staff quarterly; in a large shop you’ll track annual certifications, do monthly formal audits, and budget for ventilation upgrades. Short tip.
Are There Grants or Incentives for Upgrading Fume Control Systems?
Before you upgrade your fume control system, know why it matters: reducing shop fumes protects your workers and can cut your operating costs through grants or tax breaks.
Yes — I’ve found specific government grants and tax incentives that can help you upgrade your fume control system. I’ll help you locate federal, state, and utility programs, plus eligible tax credits and application tips for your shop.
Why federal programs can help you pay: federal grants and tax credits often cover equipment or energy-efficiency upgrades, so you can reduce upfront cost and improve air quality. Example: a small metal fabrication shop in Ohio used a federal equipment tax deduction to offset 40% of a new dust-collection system’s cost, lowering their bill by several thousand dollars.
How to find federal-level help — follow these steps. Why this matters: federal options are often the largest and repeatable funding source.
- Check the IRS Section 179 and 179D rules for deductions on qualifying equipment.
- Search Grants.gov for EPA and DOE grants related to air quality or energy efficiency.
- Call your regional EPA office to ask about targeted programs for small businesses.
Example: I helped a welding shop apply for a DOE energy grant that funded a variable-speed fume extractor and reduced their monthly electricity draw.
How to find state and local programs — follow these steps. Why this matters: states and counties often offer faster, easier funding than federal programs.
- Visit your state energy office website and search “business grants” or “air quality incentives.”
- Contact your state environmental agency for shop-specific programs or permitting guidance.
- Ask your county economic development department about small-business capital grants.
Example: A California body shop got a state clean-air grant that paid for half the cost of a new spray-booth exhaust system.
How to check utility and vendor rebates — follow these steps. Why this matters: utilities and manufacturers can cover a sizable share of equipment upgrades.
- Call your electric and gas utility and ask about rebates for energy-efficient motors and controls.
- Ask equipment vendors if they offer instant rebates or cooperative utility rebate paperwork.
- Compare rebate terms to ensure your expected savings cover installation deadlines.
Example: A print shop in Texas received a $2,000 utility rebate for installing a high-efficiency fume hood with ECM motor controls.
Which tax credits and deductions apply — follow these steps. Why this matters: tax rules can return cash after purchase and reduce net cost.
- Look up IRS Section 179 for immediate expensing of qualifying equipment (limits change yearly).
- Check the Energy Efficient Commercial Buildings Deduction (179D) if you add qualifying HVAC or ventilation improvements.
- Talk to your CPA before purchase to confirm eligibility and recordkeeping needs.
Example: A small bakery claimed a 179 deduction on a new ventilation scrubber and reduced its taxable income by the equipment cost that year.
How to prepare a strong application — follow these steps. Why this matters: clear, complete applications win funds faster.
- Gather equipment specifications, before-and-after energy estimates, and vendor quotes.
- Collect shop financials and any required permits or compliance documents.
- Write a one-page project summary showing expected reductions in emissions or energy use.
Example: A machine shop got a local grant after submitting a one-page summary plus vendor quotes showing a projected 30% reduction in particulate emissions.
Quick checklist before you apply:
- Confirm equipment qualifies for the specific program.
- Get at least two vendor quotes and one energy savings estimate.
- Talk to your accountant about tax timing and documentation.
If you want, tell me your state, shop type, and an approximate upgrade budget and I’ll list specific programs and contacts you can call.