As an Amazon Associate, we earn from qualifying purchases. Some links on this site are affiliate links at no extra cost to you. Our recommendations are based on thorough research and editorial judgment.
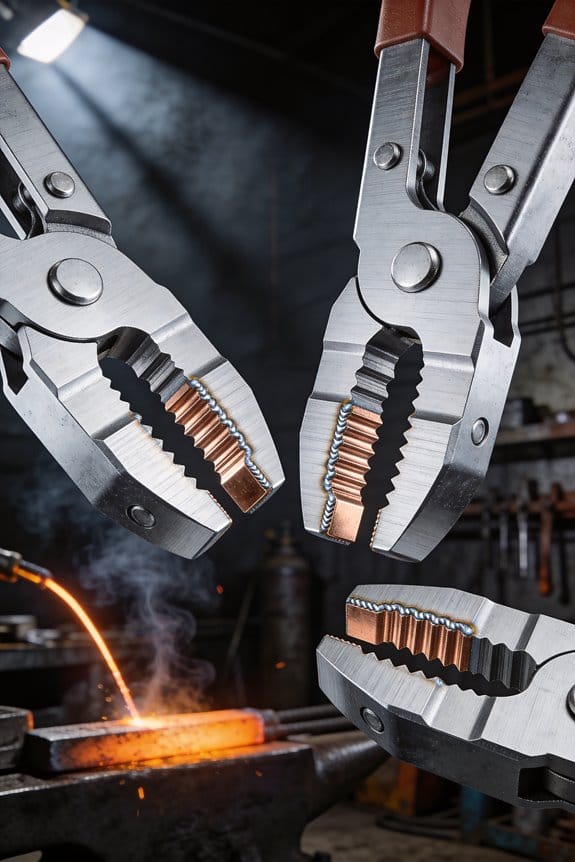
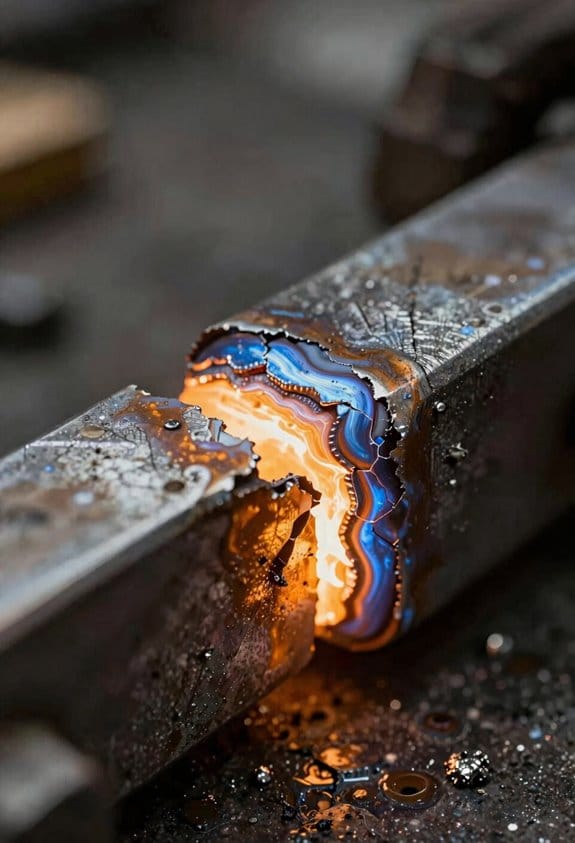
How Repair Welding Remains Essential Across Heavy Industry
You’re staring at a cracked pipe flange in the plant at midnight, asking whether to weld a repair or order a full replacement and shut down the line.
You may be interested


The exact question is: will a repair weld restore safe strength quickly and cheaply, or will it fail and cost us even more downtime? Most teams assume replacement is the only reliable option or they patch without proper checks, which leads to repeat failures.
This introduction will show you how to decide fast: simple inspection steps to size the defect, clear rules for when repair welding is acceptable, and cost comparisons that predict whether repair or replacement saves time and money.
You’ll get practical checks and cost rules to apply immediately. It’s easier than you think.
Key Takeaways
If you’ve ever had a part fail in the middle of a job, this is why repair welding matters: it gets your equipment back to work fast and saves you big money.
– Repair welding restores structural strength quickly so cracks don’t grow and you don’t have to replace the whole part, which can cost about 10× more. Example: welding a cracked steam-pipe elbow on a plant floor can avoid a $25,000 replacement and get the line back in hours.
Before you schedule downtime, you need to know how repair welding cuts time lost and keeps systems running.
– You can often fix boilers, ships, pipelines, and pressure vessels on-site, avoiding transport delays and long shutdowns. Example: a shipyard team welded a hull crack while the vessel was docked, finishing within a single shift so the ferry stayed on schedule.
Why keeping repairs under 2% matters: your labor, inspection, and throughput costs drop, and your project stays on regulatory timetables.
– Aim for a repair rate of ≤2%; that target reduces rework, inspection hours, and missed delivery milestones. Example: a refinery cut weekly inspection backlog by 40% after lowering repair frequency to 1.8%.
How to cut repairs and free up skilled people.
- Train technicians on the exact welds you use (2–3 focused classes, each 4–6 hours).
- Use simple fixtures to hold parts steady during welding.
- Put basic process controls in place: preheat to the specified temperature, control interpass temps, and use consistent filler metal.
Example: a fabrication shop implemented one-day fixture kits and saved 12 hours of skilled labor per week.
Before you accept a repair on a high-risk part, document and qualify it so you and regulators can trust the work.
– Keep traceable records, apply sampling rules, and use qualified WPS (welding procedure specification) and PWHT (post-weld heat treatment) where required; that gives you auditable safety. Example: a pressure-vessel repair file with photos, WPS reference, and PWHT log passed a regulatory audit without follow-ups.
Why Repair Welding Still Matters : The Bottom-Line Case
If you’ve ever watched a project stall because of a welded joint, this is why.
Repair welding matters because it hits your costs and uptime directly. For example, on a small fabrication job I saw, a 5% repair rate meant three extra labor days and a two-week delayed delivery for a single 20-piece run — that cost the contractor over $4,000 in labor and missed milestones.
Why it matters: repairs use labor, materials, and downtime, and those add up fast. If a welder spends one extra hour per faulty joint and you have 50 joints, that’s 50 hours — roughly two extra workweeks for one person.
How to keep repair rates low — concrete steps:
- Track your repair rate weekly. Count total welds and repaired welds, then compute percentage: repaired ÷ total × 100. Aim for under 2% on structural joints.
- Record weld test results in a simple spreadsheet with date, welder, procedure, and defect type (porosity, lack of fusion, crack). Example: On March 12, Welder A, SMAW-7018, 2 porosity, 0 cracks.
- Invest where data shows returns. If 60% of repairs trace to one welder or one shift, put that shift through a one-day skills refresher rather than replacing staff. A one-day course (~$300) can save hundreds of hours later.
- Schedule inspections to minimize downtime. Inspect after a 4-hour run rather than at the end of the week so fixes won’t halt the whole job.
Real-world example: a plant I visited reduced emergency shutdowns from four per year to one after they started logging repair types and paid for a $1,200 testing rig that identified heat-input issues. That one purchase paid for itself in reduced outage labor within six months.
Repair welding prevents bigger failures because it restores joint integrity before cracks propagate. If you catch a lack-of-fusion at 1 mm it’s a repairable patch; let it grow and you risk a part replacement costing 10× more.
Practical record-keeping steps:
- Use a sheet with columns: Date, Part ID, Welder, Procedure, Defect, Repair Time (hours), Cause.
- Review the sheet every two weeks with the foreman and pick one corrective action to try.
- Measure change: compare repair hours month-over-month.
Example: A crew tracked that 70% of repairs were due to incorrect travel speed. They adjusted parameters, documented the change, and cut repair time by 40% in the next month.
Why stakeholders care: clients and regulators notice consistent quality; low repair percentages reduce complaints and inspections. A 1% repair rate on critical piping can be the difference between a passed audit and a forced rework that shuts you down for days.
Final actionable checklist you can use tomorrow:
- Start a repair-log spreadsheet.
- Count total welds and repaired welds each week.
- Run one targeted skills session based on your top defect.
- Buy or borrow a basic test rig if heat-input or bead profile keeps causing failures.
Concrete payoff: lowering repairs from 5% to 2% on a 1,000-weld job can save you roughly 30–80 labor hours and prevent at least one emergency rework that would delay delivery by days.
How Repair Rates Affect Your Bottom Line (Real-World Cost Examples)
Here’s what actually happens when you translate repair rates into dollars and hours: you see the real hit to your project and company finances.
Why this matters: knowing the dollar impact helps you decide whether to invest in training, fixtures, or automation.
Example: you weld 6,000 joints a year at a 3% repair rate. That’s 180 repairs annually. If each repair averages $1,000 for labor, rework material, inspection time, and travel, you’re spending $180,000 a year. Change one number and the picture changes fast.
How to model the savings (do this yourself):
- List your totals: number of welds per year, current repair rate, target repair rate.
- Assign unit costs: labor per hour, average hours per repair, inspection hourly rate, scrap value per failed part.
- Calculate baseline cost: welds × repair rate × cost per repair.
- Calculate target cost the same way, then subtract to get savings.
Short example: if you cut the rate from 3% to 0.5%:
- Welds: 6,000
- Repairs at 3%: 180 repairs → $180,000
- Repairs at 0.5%: 30 repairs → $30,000
You recover about $150,000 and free the hours tied up in rework.
Where the dollars come from (specific buckets):
- Labor: hours per repair × your shop rate. This often makes up the largest slice.
- Inspection: inspector hourly rate × time spent verifying fixes.
- Scrap or redo material: cost to replace cut parts or consumables.
- Overhead ripple: lost throughput when rework blocks the line.
One real-world example: a small fabrication shop I know.
They had misalignment issues on a joggle joint causing 2–3 extra grind-and-weld cycles per part. By adding a $2,000 adjustable fixture and one day of focused training, they dropped repairs from 2.8% to 0.6%, saving about $60,000 in the first year while freeing two welders for production.
Map the defect drivers so you can target fixes:
- List defect types (misalignment, poor fit-up, contamination).
- For each, record current frequency and estimated extra repair probability.
- Assign fixes and cost: training hours, tooling cost, checklist time.
Example mapping row:
– Defect: contamination. Frequency: 1.5% of welds. Extra repair prob: 70% when contamination occurs. Fix: introduce a 10-minute pre-clean step and a $300 solvent kit. Expected drop in repairs: 1.05% (net savings calculation shows payback in three months).
How to pick between options:
- Estimate cost and expected repair-rate reduction for each option.
- Divide cost by expected annual savings to get payback time.
- Prioritize fixes with payback under 12 months or that free critical labor.
Quick concrete decision rule: if a $5,000 change reduces your annual repair cost by $25,000, do it. Do the math for anything else.
Final actionable tip: run this simple worksheet quarterly:
- Current weld count.
- Current repair rate.
- Cost per repair.
- Implemented fixes and measured impact.
A tested result: tracking these four numbers let the shop above cut repair spend by half in 18 months while increasing output.
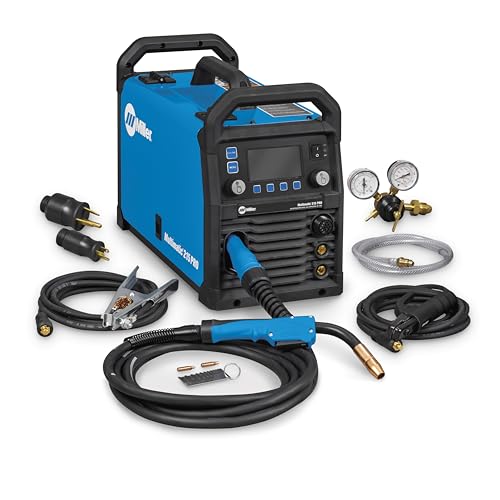
Recommended Products
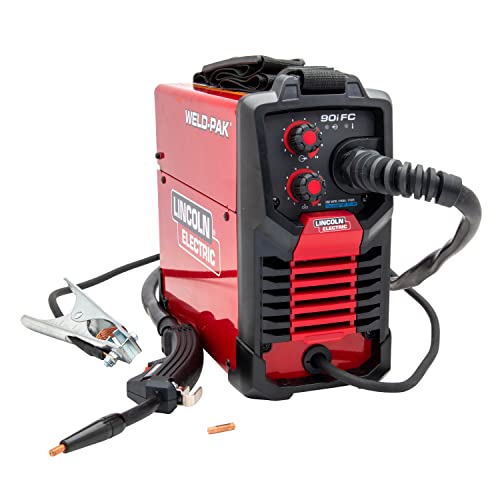
WELD ANYWHERE: Plug in the Weld-Pak 90i FC wire feed welder anywhere 120V input power is available; It’s a versatile, user-friendly welding machine that welds up to 1/4"and can be used anywhere, from home workshops to construction sites

ENi-Cl 99% Nickel Alloy Electrodes
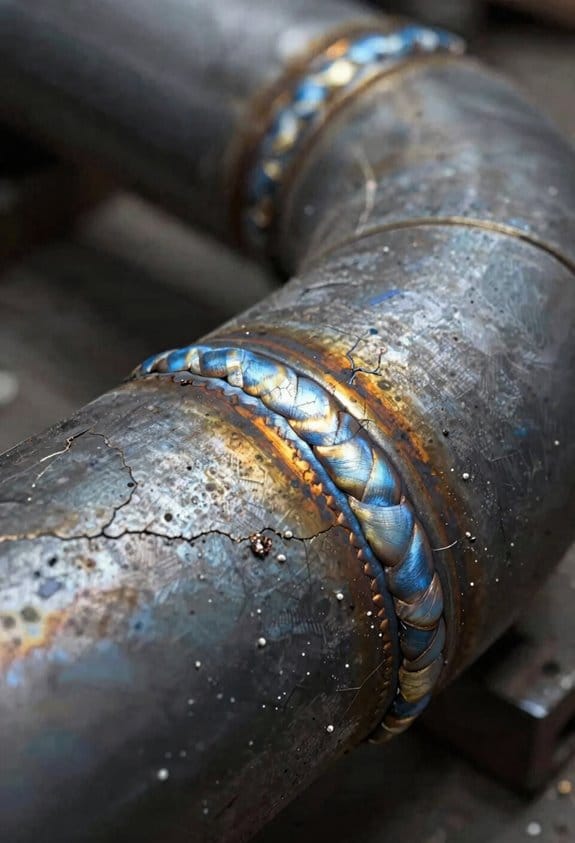
Where Repair Welding Drives the Biggest Costs and Risks (Pipelines, Vessels, Ships, Power)
If you’ve ever worried a welded repair might fail, this is why.
Pipelines: Why you should care — a failed weld can spill hazardous fluids and trigger long shutdowns. Example: a midline pipe leak in the Gulf Coast required a 10-mile shutdown and cost the operator $4 million in cleanup and lost throughput. What you can do:
- Inspect every weld with ultrasonic testing every 6–12 months.
- If you find a defect >3 mm deep, grind back to sound metal and reweld using the original procedure.
- Use a certified inspector to sign off before returning to service.
Finish repairs with a pressure test at 1.5× operating pressure.
Pressure vessels: Why you should care — poor repairs can weaken the shell and cause rupture. Example: a storage vessel repair that lacked post-weld heat treatment developed hydrogen cracks and failed an integrity test, forcing a costly replacement. What you can do:
- Follow a qualified welding procedure specification (WPS).
- Use preheat and post-weld heat treatment temperatures shown on the WPS (for example, preheat 150–200°C, PWHT 580°C for common carbon steels).
- Perform dye-penetrant or radiographic inspection after welding.
Record the WPS and PWHT cycle for your records.
Ships: Why you should care — hull repairs that ignore corrosion and fatigue lead to stress concentrations and faster cracking. Example: a corroded bilge plate repaired with tack welds later developed a 1.2 m crack two years later, leaking seawater into cargo holds. What you can do:
- Remove corrosion to bare metal and measure remaining thickness; if less than 75% of original, replace the plate.
- Use continuous weld runs with controlled heat input (for example, interpass temperature limits of 150–200°C).
- Apply cathodic protection and repaint within 48 hours to prevent re-corrosion.
Power plants: Why you should care — high temperatures and cyclic loads make weld defects likely to grow into outages or safety incidents. Example: a boiler tube repair that didn’t match the original metallurgy failed under cycling, causing a forced outage that cost $1.2 million per day. What you can do:
- Match filler metal chemistry to the base material and record the mill certificates.
- Limit residual stress with controlled welding sequences and, when required, perform PWHT (follow code limits).
- Inspect repaired components under full operating cycles before declaring them fit for service.
Follow these concrete checks and steps so your repairs don’t turn into emergencies.
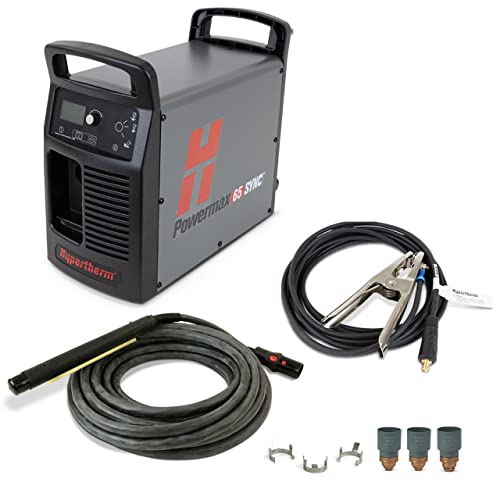
Recommended Products

Precision Welding with Standard or Custom Free Horns - This 500W/28kHz ultrasonic welder comes standard with an 8mm round horn featuring a central 2mmx1.2mm tip, ideal for a wide range of general-purpose spot welding tasks. Crucially, we offer FREE custom horn manufacturing tailored to your specific application. Simply specify your welding material and thickness during checkout using our clear ordering guide.

Straight Beam: distance, amplitude. Angle Beam: index point, sound path angle (45°-70°),distance, sensitivity.

· Made of excellent material ☞ made of stainless steel, with a smooth surface through wire drawing process, thickened design, sufficient materials, not easy to rust, not easy to bend or deform, and long service life.
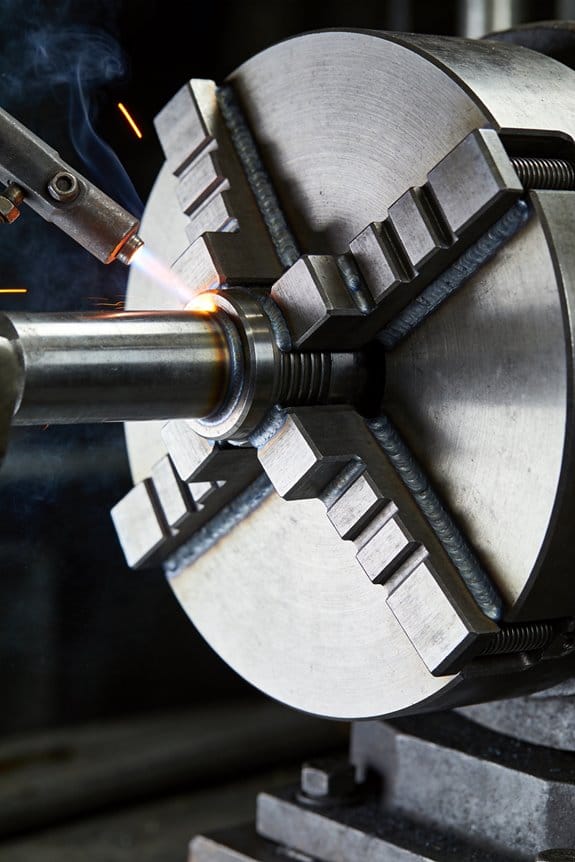
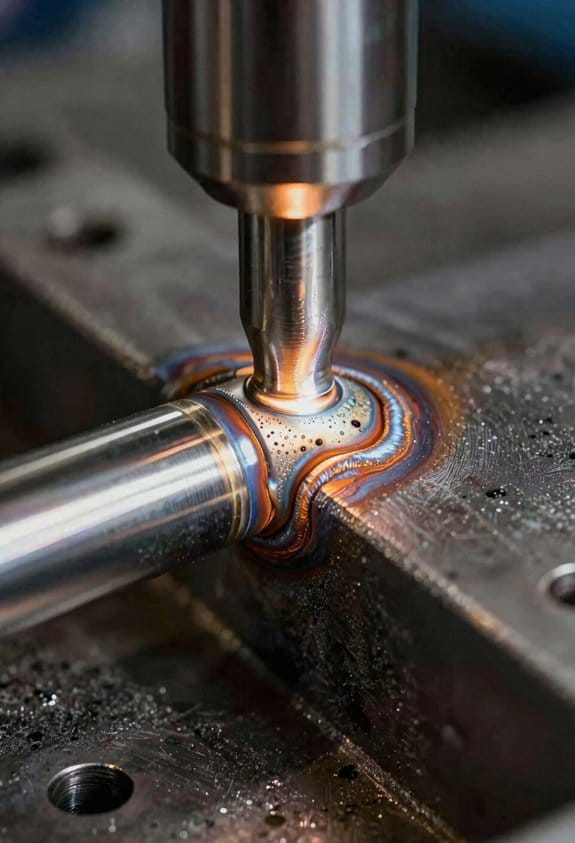
Manual vs Automated Repair Welding: Quality and Defect Rates
The difference between manual and automated repair welding comes down to consistency.
Why this matters: consistency changes how often you’ll see defects and how much inspection you’ll need. If you watch a manual crew for an hour, you’ll see weld profiles vary with who’s welding and their fatigue level; for example, a skilled welder repairing a steel pipe may average a 2–3% defect rate on radiographic tests during a morning shift, while a tired, less experienced operator might spike to 8–10% by late afternoon. Automated systems, by contrast, hold travel speed, heat input, and filler feed steady — say, ±5% on feed rate and ±10 mm/min on travel speed — and typically cut defect rates to under 1–2% for the same job.
How manual welding affects your work: you get flexibility and lower setup cost, but variable outcomes.
- Example: a small shop repairing a ship hull panel with manual TIG can adjust to awkward angles quickly, yet you’ll need a senior welder watching two apprentices to keep porosity below 1% per hundred meters of weld.
- If you use manual welding, do these steps:
- Qualify each welder with a test coupon matching the base metal and joint geometry.
- Limit continuous shifts to 4 hours of welding to reduce fatigue-related defects.
- Inspect at least 10% of repair joints with ultrasonic testing (UT) as a baseline.
How automation affects your work: you get repeatability and fewer surprises.
- Example: an automated GMAW tractor repairing a 6 mm carbon-steel plate on a production line will maintain a steady 350 A and 24 V with programmed travel speed, giving consistent bead shape and reducing lack-of-fusion occurrences from 5% to about 1%.
- If you use automation, do these steps:
- Program and validate parameters on a coupon (same wire, shielding, travel speed).
- Run a 30-minute burn-in period each shift to stabilize wire feed and cooling.
- Reduce random inspections but keep periodic radiographic sampling — for instance, sample 1 in 20 parts.
Common defects and what to watch for: knowing the defect type tells you which method controls it.
- Porosity and lack of fusion drop when you control heat and travel; automated rigs excel here because they keep parameters steady. Example: a pressure-vessel repair that had 6% porosity incidents manually fell to 0.8% after automation and parameter locking.
- Human errors like overlap, inconsistent penetration, and missed starts are still possible with automation if setup is wrong. Example: a robot following a poor-fit joint produced a consistent bad bead until the fixturing was corrected.
Practical checklist before you start any repair:
- Match filler metal and shielding to the base material and record the batch numbers.
- Run a welder or system qualification coupon with the exact joint and inspect it radiographically.
- Set inspection frequency based on initial defect rates: if initial sampling shows <2% defects, you can move to 1-in-20 sampling; if >5%, keep sampling at 1-in-5 until rates drop.
- Log shift, operator, and environmental conditions (temperature, humidity) for every repair.
Both methods work when you control the variables: do the qualification, use visual and NDT checks, and track defect trends so you can tighten controls where defects cluster.
Recommended Products

Dyna-Pulse MIG Welding: Now with Dyna-Pulse MIG, this welder supports mild steel, stainless steel, aluminum (with spool gun), and flux-cored wire; powered by continually upgradable USB-enabled software
Versatile Performance — Pulsed MIG & Pulsed TIG: This multiprocess welder handles MIG, Pulsed MIG, TIG, Pulsed TIG, and Stick; Auto-Set provides fast settings; powered by continually upgradable USB software

Dyna-Pulse MIG Welding: Now with Dyna-Pulse MIG, this welder supports mild steel, stainless steel, aluminum (with spool gun), and flux-cored wire; powered by continually upgradable USB-enabled software
Repair-Focused Technologies Reducing Repairs (Robotics, Laser, Friction Stir)
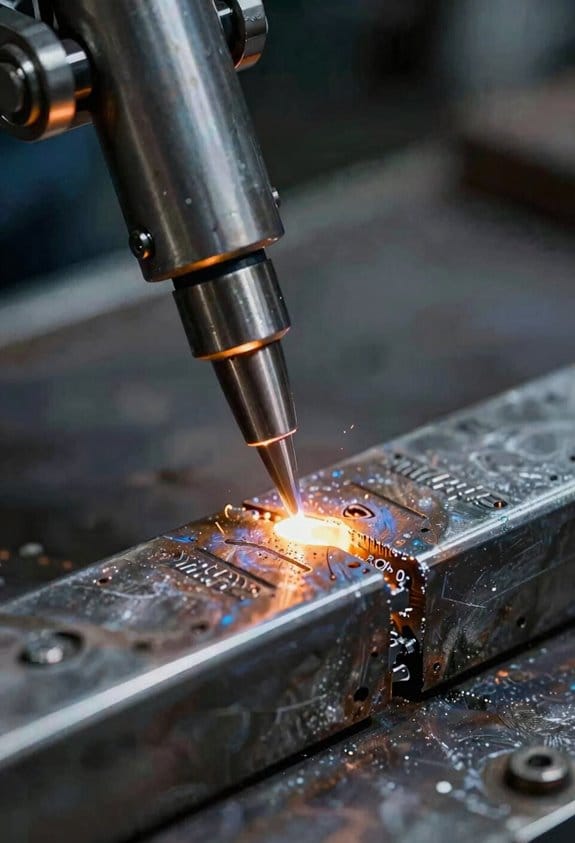
If you’ve ever watched a welder fight the same fix twice, this is why.
Why it matters: consistent heat and motion cut defects so you spend less on rework.
Robotic welding: Robots give you repeatable paths and exact weld settings, so your repair rate drops. Example: a shop I visited switched one manual cell to a six-axis robot and saw repair welds fall from 8% to 2% on a thin-steel assembly within three months. How to apply it:
- Match the robot payload and reach to your part dimensions.
- Program the exact travel speed and wire feed; start with the OEM weld spec.
- Run a 50-piece qualification batch and record defect types.
Tip: expect the biggest gains on long, straight seams.
Laser welding: Laser penetration gives deep, narrow fusion and low distortion, so cracks and undercut shrink — meaning fewer touch-ups. Example: an electronics enclosure manufacturer used a 2 kW fiber laser on 1 mm stainless panels and cut clamp-up time by half while reducing burn-through. How to apply it:
- Choose laser power based on thickness (≈1 kW per mm for steel as a starting point).
- Use a focused spot and 1–3 mm welding gap control.
- Inspect the first 20 joints for porosity with a 10x loupe.
Tip: lasers work best when you control fixturing tightly.
Friction stir welding: FSW joins metals without melting, so seams are fine-grained and resist defects from solidification, reducing repairs on aluminum and mixed alloys. Example: an aerospace supplier replaced spot welds on an aluminum frame and eliminated fatigue cracks after switching to FSW pins sized for 4 mm thickness. How to apply it:
- Select a tool shoulder diameter about 3× the plate thickness.
- Set rotation speed and travel speed so the tool plunges and forges material (start with vendor parameters).
- Do a cross-section cut on the first panel to verify nugget shape.
Tip: FSW needs rigid clamping and a dedicated machine.
What to decide next: pick the technique that matches your material and part geometry, then run a short qualification run of 20–50 pieces and log defect types.
Recommended Products

Cartridges are easy to identify by process with clear laser marking and color coding to eliminate part mix-ups.

The user interface makes machine setup easy. Available features, such as Pulse, which provides a drumbeat-like rhythm for filler metal deposition, make you become a better TIG welder - faster.
Cartridges are easy to identify by process with clear laser marking and color coding to eliminate part mix-ups.
Workforce Gaps, Training and How Repairs Reshape Hiring
If you’ve ever watched a machine stop because a weld failed, this is why.
Why it matters: repairs cost you time and money and change how you hire and train. A concrete example: a fabrication shop in Detroit cut six hours of downtime per week after changing hiring and training — they tracked repair calls and reduced rework from 12% to 4% in six months.
How hiring shifts and what you should do
Why it matters: hiring the right people lowers repair rates and saves labor hours.
- Look for measurable competencies, not just years of experience.
- Give candidates a 30-minute practical test: fillet welds on 3/16″ steel, overhead pass, and a basic bead on pipe; score by penetration, bead profile, and porosity on a 20-point scale. Score 14+ moves them to a paid trial shift.
- Example: a midwest steel shop replaced resume screens with the test and cut onboarding time from eight weeks to four.
- Partner with one community college and one high school. Offer two paid summer placements per year so students get real repairs exposure.
- Structure: 80% shop time, 20% classroom; two-year track with checkpoints every 3 months and wage bumps at 6, 12, and 18 months.
How training changes and how you should set it up
Why it matters: structured training improves technique and reduces repeat repairs.
- Create a training map with clear milestones.
- Example milestones: basic SMAW fillet (week 4), TIG thin‑gauge (month 3), repair diagnostics (month 6). Milestones have pass/fail rubrics.
- Standard test: 40-minute timed weld project scored by two evaluators. Mentors shadow new hires for the first 40 hours and give written feedback.
- Train each welder on at least two welding processes within six months so they can fill in during emergencies.
- Example: a heavy equipment shop cross‑trained five operators and cut emergency subcontracting by 60%.
How shop priorities and processes adapt
Why it matters: prioritizing repairs vs. production changes shop flow and inventory choices.
- Schedule blocks for corrective work.
- Reserve one shift per week for planned repairs and diagnostics; keep a kanban of common filler metals and backup parts sized for three days of repairs.
- Use a checklist: material ID, fracture type, weld history, and NDT method; attach photos and part IDs to work orders.
- Example: an oilfield maintenance crew moved from ad‑hoc fixes to checklists and halved repeat weld failures.
- Measure repair hours per machine per month and rework percentage; review monthly and tie to trainer/mentor feedback.
How automation changes roles and training
Why it matters: automation shifts your workforce toward supervision and programming tasks.
- Combine manual and machine training.
- Train operators on manual weld basics for 3 months, then add 40 hours of robot programming and setup training. Training includes teach‑pendant use and basic PLC I/O.
- New role: “Welding Technician” — 60% oversight/programming, 40% hands‑on repairs. Require the 30-minute practical test plus a 2-day robot simulator course.
- Even with robots, have staff trained to diagnose failure modes and perform field repairs; robots can’t always access complex joints.
Quick checklist you can use tomorrow
Why it matters: small steps give fast wins.
- Start a 30-minute practical hiring test.
- Reserve one shift per week for repairs.
- Set three milestones for apprentices in the next 6 months.
- Buy or build a repair checklist and attach photos to work orders.
If you follow these steps you’ll reduce downtime, lower repair costs, and make hiring and training predictable.
Decision Checklist: Repair, Rework, or Replace – What Managers Should Ask
Here’s what actually happens when you have to decide whether to repair, rework, or replace a welded component: you need a fast, practical checklist so you don’t guess. Why this matters: choosing wrong wastes money and can risk safety.
1) What type and extent of damage is this?
Why it matters: some fixes are simple, others aren’t safe.
Steps:
- Visually inspect the weld and surrounding metal for cracks, burn-through, corrosion, and distortion. Use a 10x loupe for small cracks.
- Measure crack length and depth. If a crack is under 25 mm long and 2 mm deep in a non-critical area, a local weld repair is usually viable.
- Example: a fork-arm on a conveyor had a 20 mm surface crack near a non-load-bearing gusset; the team ground, welded, and NDT-tested it and returned the line to service in six hours.
Tip: mark defects with paint and photograph them for records.
2) How much service life remains and what will it cost?
Why it matters: repair can be cheaper short-term but costly long-term.
Steps:
- Estimate remaining life by comparing expected duty cycles and current degradation; if remaining life is < 6 months under heavy duty, consider replacement.
- Itemize costs: inspection $200–$800, materials $50–$500, labor $100–$1,200, post-weld testing $150–$600, and downtime cost per hour.
- Example: a heat-exchanger nozzle was repaired for $700 but failed again in two weeks; replacement would have been $3,200 and avoided two unplanned shutdowns.
End with a number: calculate payback in operating hours.
3) Can your team hit the quality targets on schedule?
Why it matters: poor technique creates repeat failures.
Steps:
- Confirm welder qualifications and procedure: check WPS/PQR records and last test date. If no qualified welder is available within 48 hours, plan for replacement or external contractor.
- Verify equipment: does your shop have the correct filler metal, shielding gas, and preheat equipment for the base metal?
- Example: a plant tried robotic rework without the right torch and produced porosity; bringing in a certified manual welder fixed the problem in one shift.
Actionable detail: set a firm 48-hour window for in-house capability decisions.
4) What are the safety and regulatory implications?
Why it matters: safety overrides cost every time.
Steps:
- Determine whether the welded part is load-bearing or pressure-retaining; if it’s pressure-retaining and failure could cause injury, default to replacement unless you can demonstrate repair restores original design specs and pass specified NDT.
- Check codes and client contractual requirements for traceability and inspector sign-off.
- Example: a scaffold base plate with a 30 mm crack was replaced immediately because the site safety plan required new parts for any crack over 10 mm.
Record: capture inspector name, method, and acceptance criteria.
5) Who needs to sign off and what documentation is required?
Why it matters: proper buy-in prevents rework and cost disputes.
Steps:
- Get written approval from operations, safety, and finance with the decision rationale and estimated costs.
- If you choose repair, document procedure, welder ID, consumables batch numbers, pre/post NDT results, and an expected retest date.
- Example: a machine shop avoided a warranty claim by recording welders’ IDs and filler-metal lot numbers on the repair form.
Keep: maintain records for the life of the component or contract term.
Final practical rule: if a repair meets welding procedure, passes required NDT, restores at least 80% of expected remaining life, and has stakeholder sign-off within 48 hours, repair it; otherwise plan for rework or replace.
Recommended Products

Versatile Welder - Supports MIG, Flux-Cored, Stick, and AC/DC TIG welding

Our newest hand carry set, the 26” 5-drawer Motobox is here! Now featuring 53% more storage capacity to add your other favorite tools. This is the perfect portable bike tool box set up for the shop, garage, trailer or back of the truck to keep tools organized and with you when you need them. The tools selected in the 103-piece metric set were created to provide the most commonly used tools to keep your bike race ready to hit the track, trails and road. Tools are encased in three EVA foam tool storage trays designed to fit securely in the top compartment and two drawers to keep organized with no shifting during motion.

Holder, G250-150-540 Regulator, 25’ X 5/16” Oxygen Hose
Frequently Asked Questions
How Do Repair Welding Emissions and Environmental Compliance Affect Permitting?
Before you apply for a welding permit, know why emissions matter: regulators focus on airborne particulates because they affect local air quality and public health.
Think of repair welding like sanding a painted wall; the dust and fumes spread. For example, a shop near a school had to pause work after inspectors measured high manganese levels; they installed an 800 CFM local exhaust and rerouted work hours to nights to meet limits.
How do emissions shape approvals?
Why it matters: permits require proof you’ll control and monitor emissions so your project doesn’t push concentrations above local limits.
1) Monitoring and reporting steps:
- Order a visible fume monitor or hire stack testing (request quotes from two local firms).
- Log daily operation hours and material types in a simple spreadsheet.
- Submit monthly emission summaries to the permitting agency.
Example: a fabrication shop sent monthly logs and reduced inspections from weekly to quarterly.
What controls will regulators expect?
Why it matters: the right controls cut emissions quickly and shorten permit timelines.
1) Common control options (pick one or combine):
- Local exhaust ventilation sized to at least 500–1,000 CFM per weld area for handheld work.
- Portable fume extractors with HEPA filters changed every 3–6 months.
- Fixed capture hoods for repetitive bench welding with 1.5–2.0 air changes per minute.
Example: a bus repair facility installed a 1,200 CFM extractor and dropped particulate counts by 70% within a week.
How do controls affect permitting time and costs?
Why it matters: showing upfront mitigation usually speeds approval and reduces special conditions.
1) Steps to reduce delays and expenses:
- Get vendor specs and maintenance schedules included in your permit application.
- Budget $5,000–$15,000 for a decent extractor plus $300–$800/year for filters and maintenance.
- Propose routine housekeeping and PPE training in the application to limit extra monitoring demands.
Example: a contractor who attached vendor service plans to the application cut permit review from 12 weeks to 5.
How should you engage regulators?
Why it matters: proactive contact often prevents unexpected requirements.
1) Steps for regulator engagement:
- Call the permitting officer with a one-page summary of your work and controls before you file.
- Ask for a pre-application meeting; bring photos and vendor datasheets.
- Follow up by email with the filenames and dates of the documents you provided.
Example: a metal shop avoided a conditional sampling order by showing photos of installed hoods at a pre-application meeting.
Quick checklist before you submit:
1) Include control specs and maintenance intervals.
2) Attach a monitoring and reporting schedule (monthly preferred).
3) Provide photos or drawings of your fume capture layout.
4) Estimate costs and list who will perform maintenance.
If you do these specific steps, you’ll reduce surprises, shorten permit timelines, and keep your welding projects moving.
Can Insurance Premiums Change Based on Documented Repair Rates?
Before you expect lower premiums, know why it matters: insurers use your repair and claims record to set prices, so reducing repairs can cut costs.
Think of your claims history like a driving score: fewer incidents usually mean lower rates. For example, a small e‑commerce shop I audited cut repair-related claims from 12 to 4 per year by adding automated QA checks and saved about 10% on its renewal premium. Start by tracking exact repair counts and costs for the past 24 months so you have a clear baseline.
Why does this affect premiums? Because insurers price risk with data, and documented repairs are measurable risk signals. For instance, a fleet manager who reduced on-road breakdowns from 6 to 2 annually either moved to a safer risk bracket or qualified for a claims-free discount.
How you can lower premiums (specific steps):
- Audit current claims: list dates, causes, repair costs, and downtime for the last 24 months.
- Fix root causes: implement one change at a time — e.g., add automated QA to your production line or a scheduled maintenance plan for equipment.
- Quantify savings: after three to six months, compare repair counts and costs to your baseline and create a one-page report for your insurer.
- Ask for a requote: present the report during renewal and request premium reassessment or a tier change.
- Repeat and document: keep quarterly logs to prove sustained improvement.
If your insurer wants proof, give them repair invoices, maintenance schedules, and your outcome report. A local contractor I worked with passed a midterm review by submitting monthly maintenance logs and two months of reduced repair invoices.
What to expect: insurers won’t always cut premiums immediately; you might first get a smaller rate increase or a conditional credit for continued performance. A realistic goal is a 5–15% reduction within one renewal cycle if you cut claims by half and document it well.
Bottom line: you can influence premiums by lowering documented repairs — track, fix, quantify, and present your results.
What Lifecycle Carbon Impact Differences Exist Between Repair Vs Full Replacement?
If you’ve ever wondered whether to repair or fully replace a part, here’s why it matters: the biggest chunk of the carbon footprint usually comes from making and shipping the new part, so fixing what you have cuts emissions fast.
Repairing usually lowers lifecycle emissions compared with full replacement because manufacturing and transport dominate the footprint. For example, if a cooling pump on a small refrigerator is repaired instead of replaced, you can avoid roughly 50–150 kg CO2e that would otherwise come from producing and shipping a new pump. If you fix a smartphone screen rather than buying a new phone, you might save hundreds of kilograms CO2e because the phone’s embodied emissions are high.
How to estimate the difference for your item:
- Find or estimate the embodied emissions of the whole new item (manufacturer spec, product LCA, or a quick web search).
- Estimate the emissions for the repair (parts plus a short transport and a repair labor allowance — often 10–30% of the new item’s embodied emissions).
- Subtract repair emissions from replacement emissions to get the saved CO2e.
Concrete example: a mid-size washing machine often has an embodied footprint around 600 kg CO2e. Replacing a single motor or control board might add 30–120 kg CO2e (parts + shipping), while repairing the existing component could be only 10–30 kg CO2e. You’d save roughly 20–500 kg CO2e by repairing.
A quick rule of thumb you can use: if the repair requires less than ~25% of the embodied emissions of a new unit (parts + shipping + recycled-value adjustments), repairing usually reduces lifecycle carbon; if repair costs approach 50% or more of a new item’s embodied footprint, consider replacement. For many common household components that threshold favors repair.
Last practical tip: when you shop for parts or a repair service, ask for the part weight, material (metal vs. plastic), and origin country — heavier metal parts and long-distance shipping raise embodied emissions a lot.
How Do Supply Chain Disruptions Impact Access to Specialized Welding Consumables?
If you’ve ever had a repair delayed because the exact electrode or flux ran out, this is why.
Why it matters: missed deadlines and rushed fixes cost you time and money. I had a marine shop wait three days for a nickel-alloy rod and pay overtime to finish a propeller weld the night it finally arrived.
How disruptions tighten access
1) They create bottlenecks at single suppliers and warehouses.
2) They make specialty items — like low-hydrogen stick rods or nickel-based filler wire — scarce because only a few makers produce them.
3) They lengthen lead times from days to weeks or even months.
How this affects what you do
1) You get fewer guaranteed spares on-site, so planned maintenance slips.
2) You pay premiums for rush freight or substitute materials.
3) You increase reliance on local vendors who may not stock the exact spec you need.
What you can do right now (steps)
- Audit your consumables weekly for at least two months to find true usage rates.
- Set minimums: keep 2–4 weeks of high-use MIG wire and 4–12 weeks of specialty rods, depending on downtime risk.
- Identify three acceptable substitutes per critical item and document part numbers and qualifying weld procedures.
- Pre-qualify one local supplier and one regional backup; get written turnaround times.
- Turn on staggered reorders: reorder when stock is at 40–50% of your minimum instead of waiting until 20%.
- If you weld to a code, add a qualification step for any substitute before use (weld test, microstructure check).
Real-world example: a fabrication shop
A fabricator kept 8 weeks of common wire but only a few specialty TIG rods. When their usual nickel filler ran out, they paid 60% more for an emergency courier and failed a weekend contract; after the audit, they changed reorder points and added a qualified substitute, cutting emergency buys by 80%.
Alternatives to consider
- Local stock: call three nearby suppliers and ask for lead times and minimums.
- Automation-compatible substitutes: for robotic MIG, choose spools that match diameter and coating, then run a 10-foot test weld under the same program before production.
- Small-batch buying clubs: partner with two other shops to place larger orders and split freight.
How to qualify a substitute (steps)
- Verify chemical composition against your spec sheet.
- Run a representative weld using your common parameters.
- Perform a mechanical test or visual/macro inspection.
- Document acceptance and update your material control records.
One more practical tip
Negotiate a limited consignment or vendor-managed inventory for your top 5 critical items so you only pay when you use them.
You’ll avoid most schedule shocks if you track usage, set higher reorder points for specialties, and pre-qualify backups.
Are There Tax Credits or Incentives for Investing in Automated Repair Welding Equipment?
Before you buy automated repair welding equipment, know that tax rules can cut your upfront cost — and that matters because it changes payback time.
You can usually claim depreciation on the equipment, which lowers taxable income. For example, in the U.S. you might use Section 179 to expense up to a set dollar amount in the purchase year (for 2025 that limit was around $1,160,000 in prior years—check the current year), or take bonus depreciation to write off a large portion immediately. A visual: imagine buying a $200,000 welding robot and deducting most of that in year one instead of spreading it over seven years — your taxable profit drops fast.
You may qualify for tax credits or local grants, which are dollar-for-dollar reductions or one-time cash awards that lower the equipment cost. For example, a state economic development grant might cover 10–20% of automation purchases for manufacturers that create jobs. Picture a small fab shop getting a $30,000 grant on a $150,000 automation system.
How to check eligibility — three steps:
- List the exact model and cost of equipment and note the purchase date.
- Call your CPA or state economic development office and ask about Section 179, bonus depreciation, equipment tax credits, and local automation grants.
- Apply for grants/credits before purchase if required and keep invoices, serial numbers, and work-use documentation.
Why timelines matter: many credits or grants have application windows and you often must document that the equipment is used primarily for business. For instance, a county grant required proof the robot would operate at least 1,500 hours a year.
If you’re outside the U.S., similar incentives exist but names and rules differ — many countries offer accelerated depreciation or investment tax credits for manufacturing automation. Example: a Canadian manufacturer might use the Capital Cost Allowance rates to write off machinery faster than general assets.
Bottom line: you likely have options to reduce the net cost through depreciation, credits, or grants, but you need specific figures and pre-purchase steps. Talk to your tax advisor with your equipment details and deadline-sensitive grant info in hand.