As an Amazon Associate, we earn from qualifying purchases. Some links on this site are affiliate links at no extra cost to you. Our recommendations are based on thorough research and editorial judgment.

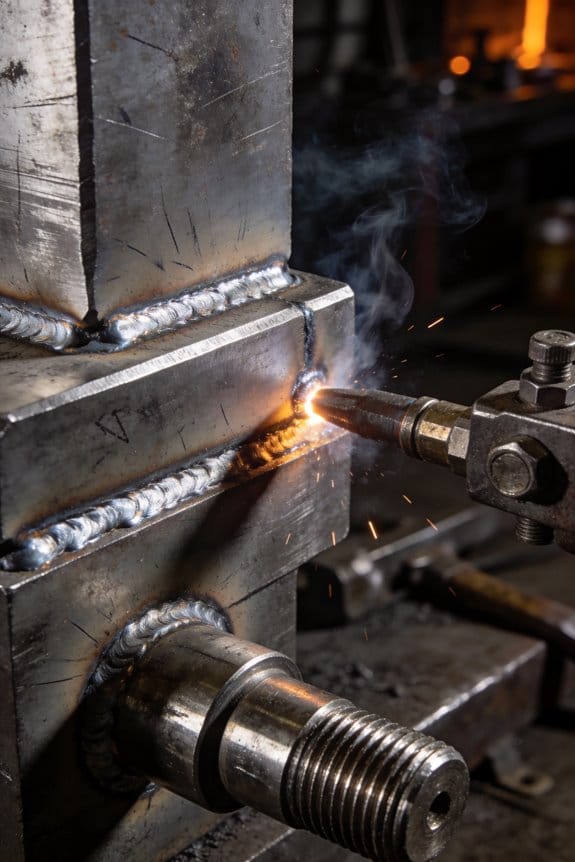
How Industrial Maintenance Uses Welding Differently From Fabrication

You’re standing at a factory line with a cracked bracket and a supervisor asking, “Can you weld this now?” You need a safe, fast repair that won’t shut down production—or a clear reason to pull the part into the shop.
You may be interested


Most people assume shop welding methods and standards apply to every fix, or they treat field repairs like permanent fabrication.
This article shows exactly how maintenance welding decisions differ from fabrication: what portable processes work for quick, compliant field fixes; when to insist on shop methods for strength and certification; and a simple checklist you can use on the spot.
You’ll finish knowing which process to pick and why. It’s easier than it looks.
Key Takeaways
The difference between maintenance and fabrication comes down to speed versus permanence.
Why this matters: if you’re fixing a running plant, stopping production for a perfect part can cost thousands per hour, so you prioritize getting equipment back online. For example, when a boiler tube leaks at 2 a.m., you’ll tack a patch that holds pressure for the next 48 hours so operators can finish the run.
– Maintenance prioritizes speed and restoring function, often using temporary welded patches instead of permanent, dimension-controlled parts. In practice you’ll cut a 100 mm by 150 mm plate, bevel the edges roughly 30–45°, tack it in place, and run a quick fillet weld around the perimeter to stop leaks for the short term.
If you’ve ever worked outside, this is why portable methods matter.
– You favor portable, rugged processes like SMAW (stick), FCAW, or self-shielded flux-cored for field access and bad weather because they run from small generators and tolerate wind. A real example: on a forklift mast repair in an unheated yard, you’ll use 7018/6010 rods with a 100–150 A range rather than trying to set up GMAW gear.
Before you weld, know when certification and documentation are non-negotiable.
Why this matters: if the part carries load or affects pressure systems, regulators and insurers will require traceable procedures and certified welders. For instance, replacing a pressure-vessel nozzle demands a WPS, a qualified welder on file, and records kept for at least the life of the vessel.
– Fabrication requires controlled procedures, certified welders, and documentation whenever parts affect load paths, pressure, or safety certification; you’ll follow a written WPS and collect weld logs and NDT results.
Think of repair tempo like triage.
Why this matters: quick fixes buy time, but untreated issues can worsen and become costlier later. In a pump shaft repair, you’ll accept a simpler joint and lower deposition rate now, then schedule shop work that removes and machines the shaft later.
– Maintenance accepts simpler joints and lower-deposition on-site welding for immediate fixes, then schedules follow-up shop fabrication if the part needs precise fit-up or higher strength.
Here’s what actually happens when you build new parts in the shop.
Why this matters: shop fabrication gives you repeatability and strength that field fixes can’t match, and it reduces downtime when you swap in the finished piece. Example: making a steel bracket for a conveyor, you’ll fixture the plate, use GMAW or SAW at 300–500 mm/min deposition rates, and run robotic or semi-automatic passes to hit tight tolerances.
– Fabrication emphasizes repeatability, tight tolerances, and higher-deposition shop methods such as GMAW, SAW, or robotic welding, plus prototypes and fixturing to ensure parts meet dimensions before installation.
Quick, actionable steps for choosing between maintenance welding and fabrication:
- Assess risk: if the piece affects pressure, structural load, or safety, route to fabrication; otherwise, proceed with maintenance.
- Choose process: pick SMAW/FCAW/self-shielded for field work; choose GMAW/SAW/robotics for shop parts.
- Document: for fabrication, prepare a WPS and hold welder qualifications; for maintenance, record materials, electrodes, amps, and date.
- Schedule follow-up: set a deadline (commonly 24–72 hours for temporary patches) to inspect or replace the repair.
End fact: temporary field welds commonly use fillet sizes of 6–10 mm and are inspected visually and with leak tests, while shop-fabricated welds often get NDT like RT or UT before installation.
Maintenance Vs Fabrication : The Decision Framework
If you’ve ever tried to choose between fixing a broken weld and making a new part, this is why.
Why this matters: picking the wrong route can cost you hours, unsafe work, or a part that fails under load. Use this practical framework to decide quickly.
Purpose: When should you do maintenance versus fabrication?
Why this matters: the job goal determines speed, precision, and inspection needs.
1) If you need to restore function fast — like a fork lift bracket cracked during a shift — choose maintenance.
2) If you must meet a drawing or tolerance — for example, a new steel frame member for a trailer — choose fabrication.
Example: A cracked lifting eye on a warehouse hoist needs a temporary welded patch within 2–4 hours to get operations back up. Fabrication would take days.
Materials and thickness: How does the metal affect the process?
Why this matters: wrong method makes weak welds or burns holes.
1) Match process to thickness: use SMAW (stick) for >6 mm steel in the field; use GMAW (MIG) for 1–6 mm in shop work; use GTAW (TIG) for thin stainless or where you need a clean, precise bead.
2) Check filler match: use an ER70S-6 wire for mild steel; use 308L filler for 304 stainless.
Example: For a 3 mm stainless bracket on a food machine, you’ll use TIG with 308L rod and 8–12 A per mm of thickness to avoid warping.
Risk, safety, and regulations: What should you evaluate first?
Why this matters: safety and codes determine weld acceptance and liability.
1) Run a risk quick-check: list hazards, potential downtime, and whether NDT (dye penetrant, radiography) or pressure testing is required.
2) Verify regulations: pressure vessels need certified welders and documented procedures; structural repairs often need inspector sign-off.
Example: Repairing a steam line requires you to shut down, purge, perform a pressure test to the working pressure plus 10%, and have a qualified welder sign the record.
Access and skill: How do working conditions change your choice?
Why this matters: field constraints limit process options and build quality.
1) Assess access and environment: if you’re outside in the rain or cramped under a machine, avoid TIG and prefer stick or flux-cored MIG.
2) Match skill to task: if only one certified welder is available and the part needs a precision root pass, schedule fabrication in the shop.
Example: Welding a boat hull plate under an overhang at the dock means you’ll pick flux-cored wire with a 0.9–1.2 mm wire, 18–30 V, because you can work faster and tolerate the environment.
Decision steps: How to make the call fast
Why this matters: a simple checklist gets you to the right choice without second-guessing.
1) Define the end goal (restore function now or meet spec later).
2) Identify material and thickness.
3) Run the safety/regulatory quick-check.
4) Check access and available skill/equipment.
5) Choose process and prepare consumables.
Example: You arrive at a site, see a 10 mm cracked axle bracket on a mobile crane. You follow the 5 steps and pick SMAW with 4.0 mm rutile electrode, preheat to 150–200°C, and book a shop rebuild for the long-term fix.
Final practical tip: If the repair affects pressure, load path, or certification, treat it as fabrication—document, follow procedure, and use certified welders.
How Portability And Environment Change Process Choice
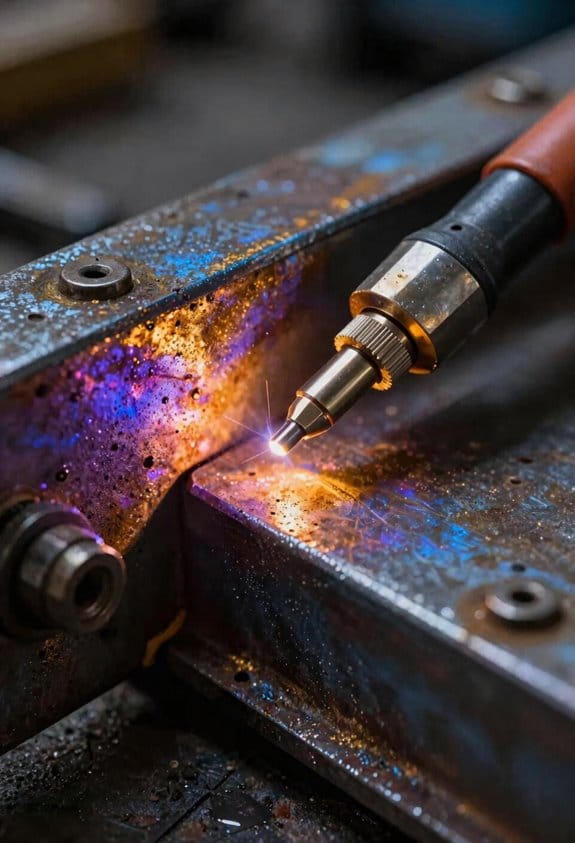
If you’ve ever had to carry welding gear up a muddy hill, this is why portability matters: you can’t get a good weld if your kit never makes it to the work.
Why this matters: if your equipment is heavy or needs a steady gas feed, you may not be able to finish the job. For example, I once had to repair a tractor hitch 200 yards from the truck through tall grass; I left the gas welder in the truck and used a stick setup instead.
How to choose by portability (steps):
- Assess the walk distance and terrain. If it’s over 100 yards or rough footing, rule out gas-shielded MIG setups.
- Check power availability. If you have only a small generator (3–5 kW), pick a machine that runs on 120 V or a low-amp inverter.
- Count the items to carry: machine, ground clamp, electrode holder or torch, safety gear, filler material, and gas cylinder if used. Aim for fewer than 6 items for long hauls.
Practical examples: take a lightweight inverter stick welder that weighs 15–25 lb and a 5 lb toolbox; you can carry that 300 yards without a cart. A MIG with a 20 lb gas cylinder plus welder will need a cart.
You need to know how weather affects process choice: wind and moisture wreck gas shields and raise defect rates.
Why this matters: welding in wind or rain makes porosity and lack of fusion much more likely. I soldered a rain-damp chain-link fence once using gas MIG and got porosity across every bead; switching to flux‑cored fixed it on the next pass.
How to pick by weather (steps):
- If wind exceeds 10–15 mph, avoid gas‑shielded MIG unless you have a windbreak.
- If humidity or rain is present, choose stick or self‑shielded flux‑cored electrodes that tolerate moisture.
- Bring a simple windscreen: a 3 ft x 4 ft sheet of plywood or metal panel will reduce draft enough for short MIG runs.
Example gear choice: on an exposed construction deck with gusts around 20 mph, I used self‑shielded flux‑cored wire in a 3/16 in diameter on 1/4 in plate and ran 80–90 amps, finishing in one pass.
When you’re remote, pick tolerant methods even if slower so you get a reliable repair.
Why this matters: speed doesn’t help if the weld fails the next day. For a broken gate hinge 400 yards from the road, I carried a 20 lb stick welder, two 5 lb electrode packs (3/16 in 7018 and 1/8 in 6011), and finished the hinge in under an hour with guaranteed strength.
Steps for remote repairs:
- Prioritize processes that need minimal setup: stick or self‑shielded flux‑cored.
- Pack extra consumables: at least twice the expected filler needed.
- Test a short bead on scrap before committing to the repair.
In sheltered shops you can favor processes needing steady gas or controlled conditions because they give cleaner welds on thin or critical parts.
Why this matters: precision jobs require consistent shielding and controlled heat input to avoid warping or burn-through. I welded a 1/8 in stainless exhaust bracket in a shop using MIG with argon mix at 15–18 SCFH and a 0.030 in wire, producing small, controllable beads.
How to choose for shop work (steps):
- Match process to material thickness: MIG/TIG for thin metal (under 3/16 in), stick or flux‑cored for thicker sections.
- Set shielding flow: 15–20 SCFH for MIG on small parts, measure with a flow meter.
- Use proper fixtures or clamps to control distortion: tack every 2–3 in on thin pieces.
Example setup: for a 12 in x 4 in thin aluminum panel, I used TIG at 80–100 amps with a 1/16 in filler and argon at 20 SCFH, producing a tidy, low-distortion weld.
Quick cheat-sheet:
- Remote/rough terrain: go stick or self‑shielded flux‑cored; pack double consumables.
- Windy/wet conditions: avoid gas‑shielded MIG unless sheltered; use flux‑cored or stick.
- Short walk and shop: use MIG/TIG for cleaner, controlled welds; set flow to 15–20 SCFH.
Follow those practical steps and examples, and you’ll pick the right process for where you’re working.
Welding Methods For Maintenance: Who, Where, Why
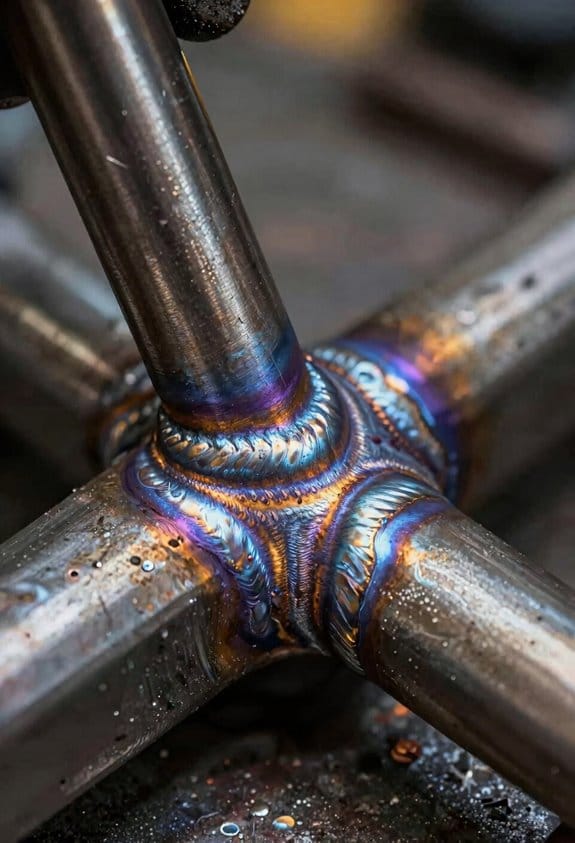
Before you pick a welding method, know why it matters: the wrong choice wastes time, risks the repair, and can mean rework.
I often recommend SMAW for outdoor, heavy repairs because it’s portable and handles wind well. Real-world example: repairing a rusted 3/8″ steel beam on a farm gate at night — you can run SMAW from a small generator and lay 1/8″ E7018 rods with 70–90 amps to fill the crack. Steps:
- Clean paint and rust 2″ around the defect.
- Preheat to 200–300°F for thicker steel over 1/2″.
- Tack, then run stringer beads with 1/8″ rods at 70–90 amps.
- Inspect visually and with a 6″ fillet gauge.
If you need speed and field durability, use FCAW when you want self-shielding and faster deposition. That matters because you cut downtime and finish patches quicker. Example: patching a 1/4″ dumpster side panel during a service call — set the machine to 300–400 inches/minute wire feed with a 0.035″ flux-cored wire, use 18–22 volts, and run at a 10–15° push angle. Steps:
- Clean edges with a grinder.
- Pre-fit and tack every 3–4″.
- Run welds with 1/8″ beads overlapping by 30%.
- Knock slag and check for lack of fusion.
For thin or safety-critical parts, GTAW gives the control you need because it minimizes distortion and lets you see the puddle. Example: fixing a 16-gauge stainless exhaust flange — use a 1.6mm tungsten, 30–60 watts, filler rod 1.2mm 308L, and hold a 2–3 mm arc length. Steps:
- Clamp to prevent warping.
- Use argon at 10–15 CFH.
- Run small forward circles, adding rod every 2–3 seconds.
- Cool on a heat sink or tempered block.
Mobile brazing fits when you need low heat and a neat joint without big rigs; it matters because you preserve thin materials and adjacent components. Example: bonding a 0.060″ copper plumbing fitting on a trailer — use a propane torch, stay flux, and 45% silver solder, heating to 600–700°F and capillary-feed for a clean joint. Steps:
- Clean with emery cloth.
- Apply flux and preheat evenly.
- Touch solder to the joint, not the flame.
- Quench or cool slowly depending on alloy.
Before you plan work, include post-weld checks so you confirm joint integrity in measurable ways. For a visual and thermal check on a repair, use a pocket infrared thermometer to scan for hotspots and a dye-penetrant test on visible cracks. Steps:
- Let the weld cool to ambient.
- Run a 3″ dye-penetrant strip over the bead.
- Use an IR gun to look for 10–20°F anomalies across the joint.
- Record results in your job log.
Match methods to skill, access, and downtime so you can schedule realistic repairs. For example, if your techs are entry-level and you have a 4-hour window, choose FCAW for speed with 0.035″ wire and 75–95 amps rather than GTAW which needs more time and finesse. Steps:
- List each tech’s certifications and experience.
- Estimate access constraints (hand tools only, 2′ clearance, etc.).
- Pick the method that fits skill and time.
- Reserve tools and consumables before travel.
You don’t need heavy equipment in every job if portability and planning cover the variables that matter: skill, location, and the joint’s function.
Recommended Products

Excellent low cost rod for moderate abrasion and low impact application in all positions
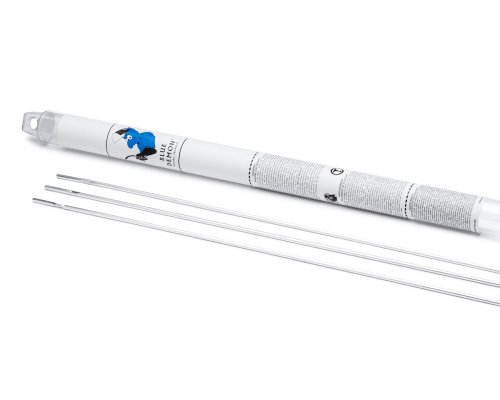
It produces superior joints with the maximum tensile strengths offered by these alloys
It produces superior joints with the maximum tensile strengths offered by these alloys
Welding Methods For Fabrication: Who, Where, Why
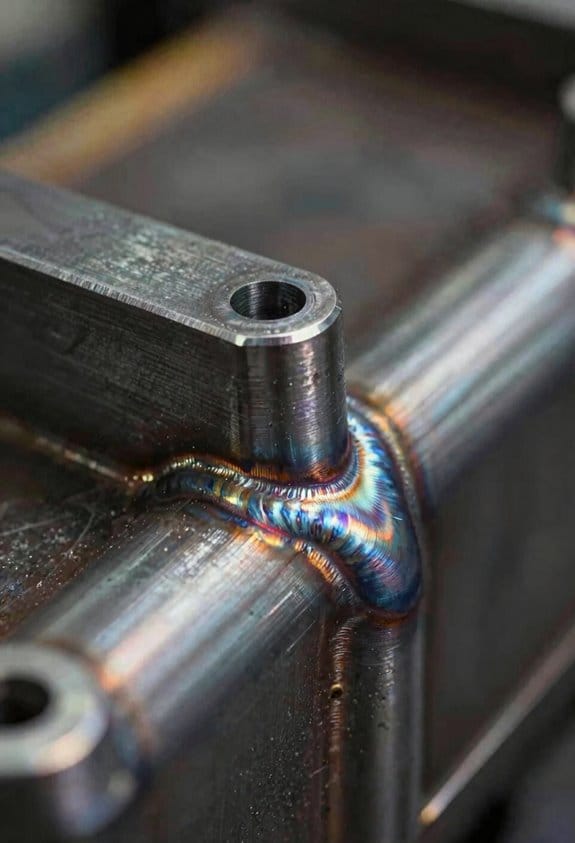
If you’ve ever had to pick a welding method, this is why.
Why it matters: the method you pick changes cost, strength, and how fast you get parts out the door. For example, a small sheet-metal bracket for a coffee machine will cost more time if you use a slow manual process instead of a faster automatic one.
Who will weld it?
Why it matters: the skill level of the person welding determines which processes are realistic for your shop.
- If you have a skilled welder who can TIG weld aluminum and stainless, you’ll get *clean, precise* welds for visible or thin parts. Example: a bike frame builder uses TIG by hand to avoid burn-through on 1.5 mm tubing.
- If you only have general fabrication staff, choose GMAW (MIG) or SMAW (stick) because they’re faster to learn and tolerate fit-up variations.
- If you can hire or program a robot, use robotic GMAW or SAW for high-volume repeat jobs; robots repeat bead placement within ±1 mm.
Where the work happens?
Why it matters: the environment affects safety, quality, and equipment choice.
- Shop floor with fixtures and crane: use SAW for long, heavy seams because it runs continuously and needs space for wire feeders and flux handling. Example: a pressure-vessel shop runs SAW on 20-meter shell seams at 1–3 mm/s deposition.
- Small bench or field site: choose GMAW or SMAW because they’re portable and need less setup; avoid SAW and heavy FSW rigs. Example: a mechanic repairing an industrial conveyor uses a MIG gun at the machine.
- Controlled clean area: pick TIG or laser for cosmetic or thin materials since contamination and drafts ruin thin welds. Example: an electronics enclosure is TIG welded in a vented booth.
Why the part will be used?
Why it matters: your final use dictates acceptable strength, appearance, and heat input.
- For thin-sheet, visible panels (0.8–3 mm): use GMAW with short-circuit transfer or pulse MIG, or TIG for best finish. Example: an appliance door gets pulse MIG at 6–10 A for low spatter.
- For long, structural seams in thick plate (>10 mm): use SAW or multi-pass SMAW to deposit lots of weld metal quickly and with deep penetration. Example: a bridge girder web gets SAW at 20–30 mm/s.
- For high-precision, low-distortion joints: use friction stir welding (FSW) or laser welding to keep tolerances and repeatability tight. Example: aerospace panels use FSW to avoid warping on 2–6 mm aluminum skins.
Material compatibility and heat effects?
Why it matters: metals react differently to heat and filler choices affect corrosion and toughness.
- Aluminum: avoid SMAW for thin parts; prefer TIG, pulse MIG, FSW, or laser because they control heat and porosity. Example: a 3 mm aluminum housing is FSW-welded to eliminate filler and distortion.
- Stainless steel: choose low-heat methods (pulse TIG/MIG, laser) for thin parts to prevent sensitization; use matching filler to avoid corrosion. Example: a 2 mm food-grade bracket is TIG welded with 308L filler.
- High-strength steel: preheat and select compatible filler to prevent cracking; consider SAW or controlled multi-pass processes for thick sections. Example: a 20 mm AHSS plate gets preheat to 50–150°C depending on grade.
How seam layout and automation fit together?
Why it matters: seam shape decides if you can automate and how fast you go.
- Long, straight seams: automate with SAW, robotic GMAW, or laser; you get steady travel speeds and high deposition. Example: a 5-meter tank seam runs under a robot at 0.5–1.2 m/min.
- Short, complex joints: use manual TIG or skilled robotic path programming; expect lower speed and higher labor or programming time. Example: a complex bracket with 8 intersecting joints is hand-TIG welded in 15–25 minute cycles.
Practical steps to choose a method
Why it matters: follow these steps to pick the best method quickly.
- Define the part use: cosmetic, structural, or high-precision.
- List material and thickness ranges.
- Note your shop constraints: skilled labor, automation, booth space, and budget.
- Match process to need: TIG for finish, GMAW for speed on thin sheets, SAW for heavy automated seams, FSW/laser for precision.
- Prototype one weld and measure distortion, strength, and cycle time.
Example: if you need a cosmetic 2 mm stainless panel produced at 200 units/month with one skilled welder, choose TIG for prototypes, then evaluate pulse MIG for production if finish and cycle time are acceptable.
Final takeaway: pick a process that matches who’s welding, where it’s done, and what the part must do — then validate with a test weld and simple measurements.
How Material Thickness And Joint Access Drive Selection
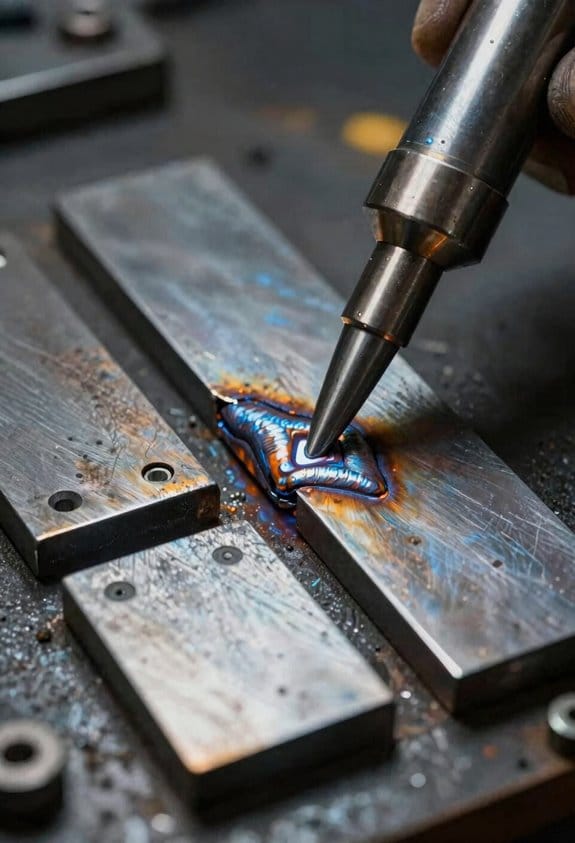
Before you pick a welding process, know how thickness and access change the result.
Thin metals need low heat so the part doesn’t warp; that’s why you use GTAW (TIG) or carefully controlled GMAW (MIG). For a 1–3 mm stainless-steel bracket on a bicycle frame, set TIG at 50–80 A with a 2–3 mm tungsten and use pulsed current if you have it. Example: I once welded a thin 2 mm stainless seatstay—TIG at 65 A and a 0.8 mm filler rod kept the edges flat. Use short weld lengths (50–80 mm) and back-step your beads to control distortion.
Thick sections need deep penetration, so choose SMAW (stick), FCAW, or SAW to get fusion without endless thin passes. For a 12–20 mm mild-steel flange, use stick with E7018 at 120–160 A per electrode size, or SAW with a 120–200 A range per bead, and plan 6–12 mm bevels for single-V joints. Example: I welded a 16 mm plate girder with SMAW using 3.2 mm E7018 at 140 A; three proper passes produced full fusion without overheating. Prep the joint with a consistent bevel and use interpass temperatures (keep below 250°C for common steels).
If the joint is hard to reach, portability beats shop-only methods because you can’t drag a SAW rig into a tank. Choose stick or self-shielded FCAW and bring 2–3 electrode options and a handheld grinder. Example: on a pipe repair 1.5 m off the ground inside a skid, I used 2.5 mm rutile electrodes at 90–110 A and finished with a flap disc—quick, strong, and portable. Keep weld runs short (100–150 mm) and rest between runs to avoid overheating nearby structure.
How to match technique to thickness and access — quick steps:
- Measure the thinnest and thickest sections in millimeters and note accessibility (shop, field, confined).
- If thickness ≤ 3 mm, choose TIG or controlled MIG; set current by material and thickness (refer to torch charts).
- If thickness ≥ 8 mm, choose SMAW/FCAW/SAW and prep bevels 6–12 mm depending on joint.
- For limited access or fieldwork, choose stick or self-shielded FCAW and pack portable grinding and filler.
- Plan bead sequence to minimize residual stress: use short runs, back-step beads, and control interpass temperature.
Match technique to thickness and access, then document settings and joint prep for repeatability.
Speed & Deposition: Production Vs Repair Priorities
Think of production versus repair like choosing between a sprint and a toolbox.
Balancing speed and deposition matters because the wrong choice can cost you hours or make a repair fail. In fabrication, you usually need to put down a lot of metal quickly so your line keeps moving and parts meet tolerance. For example: on a structural beam line, using GMAW at 8–15 lb/hr deposition cuts cycle time compared with SMAW at 1–3 lb/hr, and you can run it on a robot with consistent travel speeds of 30–60 ipm. Use GMAW or SAW when you want high deposition rates, predictable bead geometry, and lower per-pound labor.
Before you pick a repair process, know why portability and heat control matter in the field. Repairs often happen in tight spaces or on assemblies you can’t move, and excessive heat can warp parts or ruin coatings. For example: fixing a corroded hull plate on a service truck roadside, you’ll prefer SMAW with a 1/8″ electrode or FCAW with a .045″ wire because those let you work with handheld gear and control weld puddle without bringing a power-feed cart into traffic. Choose SMAW or FCAW when you need access, simple setup, and deliberate heat input.
Why you should weigh downtime cost now: downtime drives whether you favor speed or quality. If a plant outage costs $10,000/hour, a faster high-deposition method with slightly higher prep time likely pays for itself. If a field repair is expected to be a temporary patch, accept a smaller bead and plan a scheduled follow-up.
How to decide in three steps:
- Measure the real cost of delay — dollars per hour or lost throughput per shift.
- Match bead size and deposition rate to part geometry: aim for 0.1–0.3 in bead thickness for thin-sheet repairs, 0.25–0.75 in for structural builds.
- Assess rework risk and heat sensitivity: if distortion tolerance is ±0.02 in, use lower heat input methods.
Example for practice: you have a forklift mast crack that stops operations. If moving the mast to the shop costs a full shift, pick FCAW with 0.045″ wire and set travel at 20–30 ipm to balance deposition (5–8 lb/hr) and control; tack, weld from the root outward, then peen or apply controlled chilling if needed.
Practical tips you can use immediately:
- If you’re automating, specify GMAW or SAW and target deposition >8 lb/hr.
- If you’re in the field, carry SMAW rods 1/8″ and a compact FCAW setup.
- Measure post-weld distortion: clamp and cool in stages to keep warpage under 0.05 in over 12 in.
End with a clear trade-off: faster deposition saves cycle time but needs setup and fixtures; portable, lower-deposition methods save setup time and access but cost more labor per pound.
When You Need GTAW, Laser, Or Other Precision Processes
Before you pick GTAW or laser welding, know why it matters: you need tight heat control to avoid distortion and keep metallurgy clean.
Think of welding thin stainless tubing like sewing with hot thread: you need a tiny, steady stitch so the fabric doesn’t pucker. For example, when I welded 0.035″ stainless brake lines for a vintage car, I ran GTAW at 8–12 A with a 1.6 mm tungsten and argon at 15–20 CFH to keep the tube round and leak-free.
Why GTAW helps your thin parts
- GTAW gives you slow, precise heat so you don’t burn through thin metal.
- Use DCEN for steel and AC for aluminum, and set amperage to about 0.5–1.0 A per 0.001″ of thickness as a starting point.
- Keep filler rod diameter small — 0.5–1.6 mm — and feed it steadily at a 10–15° angle.
Real-world example: I joined 0.035″ 304 stainless fittings by tacking with 6–8 A, then filling at 10 A; the joints needed zero post-cleaning.
How to run GTAW, step by step
Why this matters: following steps prevents porosity and warping.
- Prep the joint: clean with acetone, then clamp so parts gap ≤0.1 mm.
- Set equipment: use a 1.6–2.4 mm tungsten for thin sections, argon flow 15–20 CFH, and the amperage rule above.
- Strike the arc with a high-frequency start, hold a 2–3 mm arc length, and move at 2–10 mm/s depending on size.
- Add filler in consistent short pushes; let puddle solidify between passes.
- Inspect with a 10x loupe for undercut or lack of fusion.
Short tip: keep your torch hand steady.
Why laser welding might be better for speed
Laser welding matters when you need extremely low heat input and minimal cleanup, because it makes very narrow, deep welds fast.
Think of laser welding like using a focused flashlight to melt a tiny line through metal. For instance, I used a 1 kW fiber laser to join 0.5 mm stainless overlap panels at 2–6 m/min, producing a 0.3 mm wide fusion with almost no distortion.
How to do laser/beam welding, step by step
Why this matters: correct setup avoids porosity and misalignment.
- Prepare the joint: gap should be 0–0.05 mm and surfaces cleaned to shiny metal.
- Configure the laser: start with 200–500 W for thin stainless, 1 kW+ for thicker parts, and pulse or continuous mode per material.
- Fixturing: clamp rigidly; lateral movement <0.02 mm during the weld.
- Perform test runs on scrap, inspect cross-sections, then adjust speed and power to get a 0.2–0.5 mm weld width.
Use protective eyewear rated for your laser class.
What both processes need from you
Why this matters: skill and prep are what make the weld repeatable.
- Skilled operator: practice bead control and torch angle until you can replicate a 2 mm long weld with no spatters.
- Tight fixturing: use clamps or fixtures that hold parts within 0.05 mm.
- Joint prep: clean to bare metal, remove oils and oxides with solvent and light grinding.
Example: on a thin titanium bracket, poor clamping caused warping of 0.4 mm after TIG; re-clamping to 0.02 mm tolerance eliminated the issue.
Final checklist before you start
Why this matters: the checklist prevents wasted parts.
- Clean parts and correct gap.
- Set gas, amperage/power, and torch focus per material.
- Clamp to <0.05 mm movement.
- Run a scrap test and inspect.
One last tip: if you can’t hold tolerances or repeat the joint on scrap, don’t weld production parts.
Recommended Products

[What You Get] - You will get 6pcs different sizes tubes in 300mm length: 1mm*0.15mm/2mm*0.15mm/3mm*0.6mm/4mm*0.6mm/5mm*0.6mm/6mm*0.6mm(OD*Thickness)

Made of 304 stainless steel for high strength, weldability
![M METERXITY 2-Pack 300mm 316 Stainless Steel Tube, 5mm OD 0.5mm Wall Thickness Seamless Stainless Steel Tubing for Construction/Machining/DIY Crafting, Metal Straight Pipe [0.2x0.02x11.8IN]](https://m.media-amazon.com/images/I/31IU2EWAfLL._SL500_.jpg)
[Multipurpose Use] - Good for industrial applications such as construction, manufacturing, machining, and structural, providing reliability and versatility. This seamless 304 stainless steel pipe is also suited for outdoor gardening, DIY projects, wind chimes, architectural models, etc.
On-Site Vs Shop: Safety, Consumables, And Logistics
If you’ve ever shown up to a job and found the workspace nothing like you expected, this is why.
Safety: Why it matters and how to set zones
Why it matters: Unsafe setups cause injuries and stop work for days.
1) Mark and control zones. Use 3 different colored tape lines: red for no-go, yellow for restricted, and green for equipment staging.
- Example: On a piping repair at a refinery, I used red tape and a safety marshal to keep non-essential crews 10 meters away from hot work; that prevented interference and kept the permit valid.
- Concrete step: Place a visible hot-work sign every 5 meters around the perimeter and update it each shift.
2) Check ventilation and access. Measure airflow with a handheld anemometer; aim for 0.5 m/s crossflow at the weld when indoors or in confined spaces.
– Example: In a ship’s bilge job, I measured 0.6 m/s and added a 1,000 CFM fan when it fell to 0.2 m/s.
3) Secure cylinders and fittings. Chain cylinders upright within 1 meter of the work and test regulators with a 10 psi soap-bubble check before transport.
End with: Record the zone layout and readings on the permit.
Consumables: Why it matters and what to stock
Why it matters: Running out or using the wrong consumable ruins welds and wastes hours.
1) Match consumables to process and material. Keep three sizes/types: filler rods for the alloy, two contact-tip sizes (0.8 mm and 1.2 mm), and one reserve spool per shift.
– Example: On a stainless repair, I carried 3 different filler rods (ER308L, ER316L, ER309L) and avoided a new weld that would have corroded within months.
2) Count and label. Use a simple checklist: rods by length/diameter, gas bottles by size and PSI, spare tips and nozzles. Reorder when stock reaches 25% of normal use.
3) Protect from damage. Store rods in sealed containers with silica packets and keep flux in a dry bin at <20% relative humidity.
End with: Keep a photo inventory on your phone for quick reorders.
Logistics: Why it matters and how to move gear safely
Why it matters: Poor transport creates hazards and delays that are easy to prevent.
1) Pack and test before you leave. Fast checklist: torch, leads, regulator, one full cylinder, spare PPE, and a toolkit. Test torch continuity and regulator outlet at 50 psi.
– Example: I once swapped a flange at night; pre-testing the regulator saved me a two-hour refill trip.
2) Secure mounts and use rated tie-downs. Use ratchet straps rated for the cylinder weight and pad metal-to-metal contact with rubber. Fasten cylinders so they can’t move more than 5 cm in transit.
3) Plan access and schedule realistically. Walk the site when possible and note ladder heights, scaffold openings, and vehicle access; add 30–60 minutes for unexpected access hurdles.
End with: Log the transport checks on your job sheet.
Adapting procedures for consistent weld quality
Why it matters: Environmental changes change heat input and weld shape, so you need specific adjustments.
1) Measure conditions, then adjust. If ambient temperature drops below 5°C, preheat to the metal’s recommended temperature (for common carbon steel, 100–150°C). Reduce travel speed 10–20% in high wind for spray transfer.
– Example: On an outdoor structural splice in 0°C and 15 km/h wind I preheated to 120°C and slowed travel by 15%, producing an even bead.
2) Use the right shielding strategy. For MIG in drafty areas use larger flow (15–20 L/min) and a longer gas nozzle; for TIG in confined spots use backup gas purging and trailing shields.
End with: Record your condition, settings, and outcome for the next similar job.
Communication with operations staff
Why it matters: Poor coordination wrecks schedules and raises risk.
1) Brief and confirm. Give a 5-minute pre-job brief with operations: list hazards, access windows, and contact points, then get a verbal confirmation from the ops lead.
– Example: On a turnaround outage I briefed ops at 06:45, they confirmed a 09:00 access window, and we completed the weld during that slot with no interruptions.
2) Use single-point contacts. Identify one ops contact and one safety contact, share phone numbers, and confirm ETA updates if delayed more than 15 minutes.
End with: Put contact names and numbers on the permit.
Final practical checklist (one-page)
Why it matters: A compact checklist stops omissions that cost time.
1) Safety signage and zone lines placed every 5 m.
2) Ventilation measured; aim for 0.5 m/s crossflow.
3) Cylinders chained and pressure-tested at 10 psi for leaks.
4) Consumables counted; reorder at 25% stock.
5) Pre-trip torch and regulator test at 50 psi.
6) Ratchet straps and padding; limit cylinder movement to 5 cm.
7) Pre-job 5-minute brief with ops and verbal confirmations.
End with: Keep this one-page checklist on your phone and on the permit.
Recommended Products

All-in-one CNC plasma cutting solution includes 4×4 CNC table, 60-amp cutter, CNC torch, and consumables

2.8 in. LCD Screen – For an easier and user friendly user interface.

7-in-1 Multifunctional Welding System:Professional-grade MIG/CUT/FLUX-Cored/CO2/TIG-HF/MMA/PULSE welding modes with dual voltage 110V/220V auto-sensing. Seamlessly switch between aluminum welding (MIG-Alu), precision TIG projects, heavy-duty MMA tasks, and plasma cutting - all with one compact machine.
Cost Trade-Offs: Equipment, Downtime, And Operator Skill
If you’ve ever fixed a broken pipe or rebuilt a bracket on short notice, this is why the welding choice matters.
Why it matters: your decision changes real dollars on equipment, lost production, and labor rework. I’ll show you what to check and give specific numbers so you can pick the least-cost option.
Equipment: what to compare and how to amortize
Why it matters: equipment cost per job can flip your choice from shop work to field work.
1) Do this quick math: divide purchase price by expected useful jobs to get cost per job. For example, a portable stick rig that costs $3,000 and you expect to use 300 times costs $10 per job; a $150,000 automated SAW unit used for 500 projects costs $300 per job.
2) Match equipment to the part size: use portable SMAW/FCAW for small repairs under 2 hours or under 30 lb of weld metal; use SAW/laser for repetitive long seams over 10 m where setup pays off.
Real-world example: a maintenance crew replaced a 0.5 m stiffener by taking a stick welder onsite—$10 for equipment amortization and 2 hours labor—versus trucking the assembly to the shop and adding $400 in machine amortization.
Downtime: how to value time and pick the fastest path
Why it matters: downtime often costs more than the weld itself.
1) Put a dollar value on downtime per hour before you choose location: if your line loses $2,000/hour, an extra 3 hours onsite equals $6,000 lost.
2) Compare total elapsed time: include teardown, transport, weld time, and reassembly. If shop GMAW cuts welding time from 4 hours to 1 hour and saves 1 hour of prep and 2 hours of rework, that’s 6 hours saved.
Real-world example: a plant shut down a conveyor and paid an outside crew $5,000 to finish a GMAW repair in 90 minutes; trying to do it with portable gear would have taken the in-house crew 6 hours and cost the plant $12,000 in lost output.
Operator skill: when to pay for talent
Why it matters: skilled welders reduce rework and hidden costs.
1) Rate the task difficulty: for welds needing <1 mm tolerance or cosmetic finish, plan for GTAW/TIG and a skilled operator; for structural butt welds with 5–10 mm tolerance, FCAW or SMAW with a certified welder is often fine.
2) Count rework probability: inexperienced operators can double defect rates. If a rework costs $800 on average, paying a $50/hour certified operator who finishes the job in 3 hours ($150) is cheaper than risking rework.
Real-world example: a pressure-vessel repair required GTAW by a certified welder; the company avoided a $4,500 NDT requalification by using one certified operator for a 4-hour job.
How to pick the cheapest path—step-by-step
Why it matters: a simple decision routine keeps costs low and consistent.
1) Calculate equipment cost per job (purchase price ÷ expected uses).
2) Estimate total downtime cost (hours out × $/hour).
3) Estimate labor cost including skill premium (hours × rate).
4) Add likely rework cost (probability × rework cost).
5) Choose the option with the lowest total.
Real-world example: using those steps, a facility chose a $400 mobile FCAW repair (total cost $1,000) over shipping a part for SAW ($3,200) because downtime and transport added $1,800 to the shop option.
Practical rules of thumb you can apply now
Why it matters: quick heuristics get you close when you don’t have time for full math.
- If downtime > $1,000/hour, favor the fastest shop method even if equipment cost is higher.
- If the job is under 2 hours and under 30 lb of weld, favor portable stick/FCAW.
- If tolerances <1 mm or visible finish matters, pay for GTAW/TIG and a certified operator.
Real-world example: a mill with $1,500/hour downtime now sends anything requiring over 3 hours of work to the shop after weighing these heuristics.
Follow these steps and you’ll make choices that save money, not just feel right.
Recommended Products

200 A output on AC mains (230V)

Dual voltage input supply - flexibility to use any place on single phase plug

COMPACT IGBT INVERTER DESIGN: Delivers maximum performance in a lightweight, portable package.
Practical Checklist: Choose Maintenance Or Fabrication Welding
Before you choose maintenance-style welding or shop fabrication, you need to know this: the right pick saves you time, money, and repeat work.
Start with location: why it matters — because weather and travel change what tools and consumables you can use. If you’re working outdoors, on a roof, or at a remote site, pick portable processes like SMAW (stick) or FCAW (flux-cored) since they don’t require shielding gas. Example: repairing a farm gate 20 miles from town, in wind and dust — bring a stick welder, 7018 rods, and a 3 kg backup spool; you won’t be able to use a gas bottle reliably.
Precision needs: why it matters — poor fit-up or heat control ruins thin parts and critical joints. For thin sheet, stainless, or aerospace brackets, use GTAW (TIG) or shop-based laser welding for tighter control and cleaner beads. Example: joining two 1.5 mm stainless panels for a food cart — use TIG with a 1.6 mm filler rod and a 2–4 A/mm travel speed to avoid burn-through.
Speed and volume: why it matters — cycle time affects labor and costing directly. For repetitive production or long seams, choose GMAW (MIG) or automated SAW (submerged arc) to hit production targets. Example: welding 200 fence panels per week — set up a GMAW line with 0.9 mm wire, 18–22 V, and a 6 m/min wire feed to maintain 30–45 seconds per panel.
Material type: why it matters — different alloys need different heat and filler choices to avoid cracking or corrosion. Some aluminum and dissimilar-metal joins demand TIG or FSW (friction stir). Example: repairing an aluminum boat hull panel — use TIG with 4043 filler and preheat only if thicker than 6 mm.
Downtime limits and access: why it matters — long shutdowns cost production, so choose faster or on-site-friendly methods when time is tight. If you have an 8-hour window to restore a conveyor, pick GMAW for speed and portability; if you can remove parts and bring them to a shop, shop fabrication often gives better quality control. Example: a plant line stops at 7 a.m.; you have until 3 p.m. — plan a portable MIG repair with two welders working shifts.
Operator skill and training: why it matters — qualifications change weld quality and rework rates. Match the process to your team’s certifications and schedule quick training for processes you need. Steps:
- List operator certifications and hours of experience.
- Identify gaps for the chosen process.
- Schedule a 4-hour hands-on session for a new technique.
Example: your team has two TIG-certified techs and three MIG-only welders; reserve TIG for critical joins and MIG for structural fill.
Consumables and spares: why it matters — running out mid-job causes delays and risky substitutions. Run an inventory audit before committing. Steps:
- Count current stock of electrodes, wire, filler rods, gas bottles, and tips.
- Calculate burn rate per job (kg/hour or electrodes/day).
- Order 20–30% extra for contingencies.
Example: a month-long bridge repair estimates 50 kg of FCAW wire; stock 65 kg and three extra contact tips.
Final decision checklist — why it matters: this gives you a repeatable decision path. Follow these steps:
- Rate location (shop/onsite/remote).
- Score precision needed (low/medium/high).
- Estimate volume and speed needs (single/short run/production).
- Confirm material compatibility (steel/aluminum/other).
- Check downtime limits (hours/days).
- Match operator skill and training availability.
- Audit consumables and spares.
If the majority point to portability and simplicity, choose maintenance-style welding (SMAW, FCAW, GMAW). If precision, repeatability, and finish quality dominate, choose shop fabrication (GTAW, laser, FSW, automated SAW).
Recommended Products
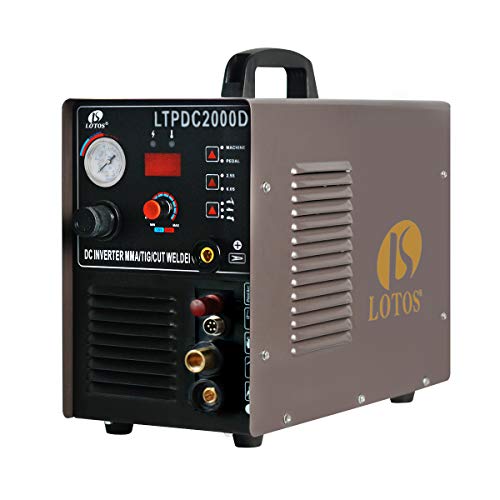
3-in-1 Multi-Process Inverter Performance: Seamlessly integrates a robust 50-amp plasma metal cutting machine, a 200-amp DC TIG welding workstation, and a 200-amp heavy-duty Stick/MMA electrical arc runner into one mobile brown framework.

Dual Voltage Flexibility: The Stickmate 160 runs on both 120V and 240V. Switch easily between voltages using the included adapter—no tools needed—making it perfect for garage or workshop welding.

Dual-Voltage DC Stick/TIG Welder (120V/230V): Offers a 10–225 amp output range, supporting a wide variety of welding applications in both light and heavy-duty settings
Frequently Asked Questions
Can Emergency Field Welds Be Certified to the Same Standards as Shop Welds?
Before you assume emergency field welds match shop welds, know why it matters: inspectors and codes care about traceability and testing.
Think of certification like a paper trail for strength. If you make an emergency weld on a structural beam at a roadside job, you’ll need documented procedures, photos, and weld maps so an inspector can confirm what you did. Example: a contractor welded a cracked trailer tongue in an emergency; they photographed the weld, logged time/temperature, and later had the part rechecked in the shop.
Here’s what actually happens when you want the same standard as a shop weld: codes often allow temporary field repairs, but they require post-repair validation, written procedures, and sometimes supplemental shop rework. For a bridge repair, crews must follow a procedure, perform visual and nondestructive tests, and submit records before final sign-off.
How to make your emergency field weld more likely to be accepted:
Why this matters: if you skip steps, your repair may be rejected and require rework.
- Follow a written procedure that references the applicable code or standard (ASME, AWS, or local code).
- Record weld parameters: electrode type, amperage, preheat temperature, and interpass temperature.
- Photograph the joint before, during, and after welding; include a scale or ruler.
- Perform required tests: at minimum visual inspection; add magnetic particle or dye penetrant if the code calls for it.
- Tag and log the repair so the shop can locate it for any later rework.
Example: a pipeline crew did an emergency field weld, logged electrode lot numbers, ran a dye-penetrant test, and attached a tag with the repair ID for the mill shop.
If the code or inspector still wants shop equivalence, you’ll likely need one of these:
- Supplemental shop rework to match shop geometry and finish.
- Laboratory or field nondestructive testing (radiography or ultrasonic) with mill-certified technicians.
Example: after an emergency weld on a crane boom, the owner sent the piece to a repair shop for stress relieving and final ultrasonic testing.
Quick practical checklist you can use on site:
- Written procedure reference and signed authorization.
- Preheat and interpass temperature measurements recorded.
- Electrode and filler metal IDs logged.
- Photos with scale.
- At least one nondestructive test result or inspector acceptance note.
Bottom line: you can often get emergency field welds certified to the same standards, but you’ll need specific documentation, tests, and sometimes follow-up shop work — and the final say rests with the governing code and the inspector.
How Do Environmental Regulations Affect Onsite Welding Consumables?
Before you pick welding consumables for an onsite job, know that environmental rules shape what you can use and how you handle them — that matters because noncompliance can stop work and cost you money.
You’ll be using low-emission rods and covered flux more often; for example, on a coastal pipeline job last summer we switched to low-hydrogen electrodes (E7018-LH equivalent) to meet VOC limits and eliminated visible smoke during fits. Store them in a sealed, labeled cabinet at 15–25°C and 40–60% humidity, and rotate stock every 12 months. Keep one bold record: label each batch with purchase date and lot number.
Why disposal rules matter: illegal dumping of flux or rod residues can trigger citations and cleanup orders when inspectors find contaminated runoff. You must follow these steps:
- Collect slag and spent flux in covered, labeled containers.
- Let heavy residues settle, then decant clear water to drain only per permit limits (often <10 mg/L metals).
- Send the concentrated waste to an authorized hazardous-waste facility and keep the manifest for at least three years.
Your tracking and recordkeeping are not optional because regulators will ask for proof during audits; a site I audited produced a handheld logbook showing daily consumable use and avoided delays. For practical tracking, do this:
- Use a simple spreadsheet or app listing consumable type, lot number, quantity used, operator initials, and date.
- Attach receipts and disposal manifests as PDFs.
- Back up records monthly to cloud storage.
Environmental monitoring affects how you work onsite; for instance, on a river-bridge retrofit we had to use local exhaust ventilation and weld during low-wind hours to meet particulate limits. Do these three things:
- Measure air emissions with a handheld particulate meter before and during welding.
- Use portable fume extractors positioned within 18 inches of the arc.
- Schedule welding during calmer periods when possible.
Follow storage and handling rules because moisture and contamination create both safety and compliance problems; on one job a rusted spool caused rework and a citation when inspectors found unlabeled drums. Store consumables in sealed bins, use desiccant packs for sensitive rods, and label containers with hazard codes visible from 10 feet.
Finally, staying compliant saves you downtime and fines; during an inspection I witnessed one site fined and shut for missing manifests while another kept a tidy log and continued operating. Keep these two simple habits: log everything daily, and review records weekly.
What Training Differences Exist for Maintenance Vs Fabrication Welders?
Think of maintenance welding like being a mechanic in a suit, and fabrication like being a factory robot.
Why it matters: the training you take shapes the problems you can fix and the tools you’ll use. Example: a maintenance welder called Sarah fixed a corroded pipe on a live industrial line using portable TIG gear and a quick welding clamp, while a fabricator at the same plant spent a week running identical MIG seams on a jig for a new skid.
Maintenance: what you learn and why
Why it matters: you need troubleshooting skills so you can restore equipment fast and safely.
1) Skills you’ll learn:
- Reading schematics and identifying failure points.
- Welding in awkward positions: overhead, vertical, tight corners.
- Multiple processes: stick (SMAW), MIG (GMAW), TIG (GTAW) and oxy-fuel cutting.
- Portable setup and rigging: clamps, magnetic holders, portable fume extraction.
Example: on a refinery turnaround, you’ll weld a temporary patch on a 2″ corroded elbow while scaffolding is limited.
2) Typical pathway:
- Apprenticeship: 3–5 years with on-the-job hours plus classroom time.
- Certifications: visual inspection, procedure qualification records (PQRs), and employer-specific weld tests.
3) What you’ll practice:
- Rapid problem assessment in under an hour.
- Making welds that balance speed and service life.
End note: maintenance training emphasizes adaptability and portability.
Fabrication: what you learn and why
Why it matters: you must produce repeatable, dimensionally precise parts for assembly lines.
1) Skills you’ll learn:
- Jig and fixture use for repeatability.
- Automated/semiautomated welding setups and parameter tuning.
- Precision measurement: calipers, micrometers, layout with 1 mm tolerances.
- Finishing and fit-up: tack patterns, root gaps, distortion control.
Example: a fabricator builds 40 identical brackets a day on a bench with a fixture, using programmed MIG settings to hit the same penetration every time.
2) Typical pathway:
- Cross-training or certificate programs lasting weeks to months.
- Employer tests for specific part qualifications and robotic teach-pendant operation.
3) What you’ll practice:
- Repetition to hit cycle times and quality metrics.
- Fine adjustments to parameters to eliminate porosity and warping.
End note: fabrication training emphasizes precision, consistency, and efficiency.
How to choose for your career
Why it matters: the choice affects pay, mobility, and daily work environment.
Steps:
1) List your priorities: mobility, variety, pay, or steady shop hours.
2) Try both: sign up for a week of each if possible or shadow a pro.
3) Get the basic certs: SMAW and GMAW first, then specialize.
Example: one month of shop shadowing showed Marcus he preferred fieldwork, so he pursued an apprenticeship instead of a production role.
One concrete tip
Why it matters: a small credential widens your options immediately.
Step:
1) Get a portable welder proficiency test (6G or position-specific) within a year.
Example: passing a 6G helped Jenna move from shop work into maintenance on offshore rigs.
If you want, tell me whether you’re aiming for fieldwork or shop work and I’ll suggest a specific 12-month training plan.
Can Robotic Welding Be Used Effectively for Maintenance Repairs?
Before you decide whether to use robotic welding for repairs, know this matters because downtime and rework cost you real money.
Here’s what actually happens when you combine robotic welding with diagnostics and adaptive fixturing: robots handle repeatable, high-precision welds quickly, while humans cover unpredictable field repairs. For example, a shipyard used a mobile robotic cell to tack and finish repeated bulkhead welds faster while keeping an on-site welder team for odd fits.
Why you’d deploy mobile cells for repeatable tasks: they move to the part, bolt down, run a preprogrammed sequence, and finish identical joints in minutes instead of hours. Use a mobile cell when you have 10+ repeated welds or when cycle time per joint needs to be under 15 minutes. A real-world case: an aircraft maintenance shop moved a cell between six nacelles and reduced per-nacelle welding time from 3 hours to 45 minutes.
How to integrate robotic diagnostics so repairs go smoothly — this matters because bad setup wastes the robot and your time. Steps:
- Scan the part (use a structured-light scanner or laser probe) to capture deviations within ±1 mm.
- Run the scan through adaptive-fixturing software to generate a corrected path.
- Run a simulated weld (dry run) on the robot controller.
- Execute the weld with weld-trace logging turned on.
One example: a rail-car repair crew scanned warped panels, adjusted paths on-site, and achieved consistent penetration without scrapping panels.
You still need skilled welders for unpredictable, field repairs because robots can’t improvise when fitment varies or access is restricted. A short, concrete rule: keep at least one certified welder per shift for every two mobile robotic cells. Example: an offshore rig used two mobile cells but kept three senior welders; when they hit corroded, misshapen pipe, the welders handled the repair that would’ve stalled the robots.
If you want to try this, follow these deployment steps so you don’t overspend:
- Pilot: pick one recurring repair type (10+ per year).
- Measure current cycle time and scrap rate.
- Rent a mobile cell for 2 weeks and run the same repairs.
- Compare labor hours, cycle time, and defect rate.
- Decide: buy, lease, or stick with manual.
A shop that ran this pilot cut annual repair labor enough that the rental cost looked reasonable against downtime saved.
Final practical tip: train your welders on robot setup and diagnostics for 8–16 hours each so they can troubleshoot on site; this keeps robots productive and prevents needless callouts.
How Are Welding Warranties Handled for Repair Work Vs New Fabrication?
Here’s what actually happens when you compare repair warranties to new-fabrication warranties: warranties for repairs are usually narrower and shorter, while new fabrication covers more and lasts longer.
Why this matters: if you don’t document limits, you’ll be surprised when a later failure isn’t covered.
How repair warranties are typically handled (answers: what’s covered, for how long)
- Repairs usually cover only the specific repaired area, not the whole part or structure.
- Duration is often short: expect 30–180 days for many shops, and up to one year in better programs.
- Exclusions are specific: heat-affected zones, prior damage, or parts beyond the weld are commonly excluded.
Real-world example: a welder patches a cracked trailer frame; the shop gives a 90-day warranty on that patched section only, not the axle or attached brackets.
Steps you should take when getting a repair
- Ask the shop to put the exact welded area in writing with dimensions or photos.
- Get the start and end date in the contract (for example: 90 days from invoice date).
- List exclusions: prior damage, other parts, post-repair modification, and loading beyond rated capacity.
- Take before-and-after photos yourself and keep them with the invoice.
How new-fabrication warranties are typically handled (answers: what’s broader, typical terms)
- New fabrication warranties often cover the entire fabricated item or assembly, not just the welds.
- Durations commonly range from one to five years, depending on materials and customer terms.
- Coverage may include workmanship and sometimes materials, but finish and misuse are still excluded.
Real-world example: a shop builds a custom steel gate and provides a two-year warranty covering weld integrity for the whole gate, but not paint failure if the gate sits by saltwater.
Steps you should take when ordering new fabrication
- Ask which parts are covered: welds, base material, fasteners, and finish.
- Get a stated warranty length (for example: 24 months from delivery).
- Request a remedy clause: specify repair, replacement, or credit and a time window for response (for example: 30 days to respond).
- Keep drawings, material specs, and delivery photos with the contract.
Practical tips that apply to both
- Always get the warranty in writing and signed.
- Keep a file: estimate, contract, photos, and correspondence.
- If you expect heavy use, negotiate longer terms or a maintenance schedule into the contract.
Example: for a business that loads a steel rack daily, add a quarterly inspection clause and extend warranty to 12 months.
One clear takeaway: get dimensions, dates, exclusions, and remedies in writing before the work starts so you know exactly what the warranty will and won’t cover.