As an Amazon Associate, we earn from qualifying purchases. Some links on this site are affiliate links at no extra cost to you. Our recommendations are based on thorough research and editorial judgment.
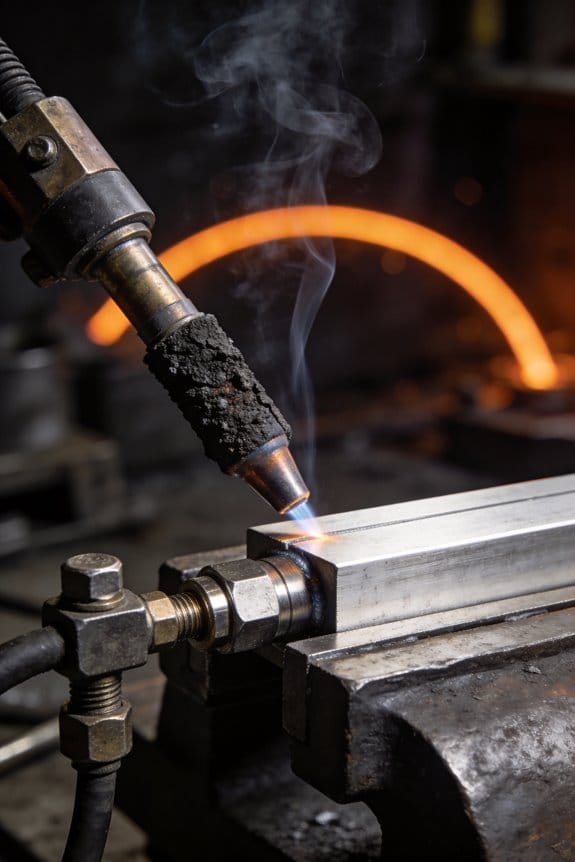
Why Infrastructure Projects Keep Welding Demand in Focus
You stood on a jobsite watching a crane lift a steel girder and asked yourself which weld specs actually matter for that connection and who verifies them. You’ve tried to track consumables, inspectors, and qualified welders and still ended up with mismatched electrodes, unclear heat numbers, or delayed radiography reports. Most people assume general welding practice is enough and underestimate how tightly specs, consumables, and NDT tie to project continuity.
This article will show you the exact procurement and staffing steps to keep certified weld outputs steady — from specifying low‑hydrogen rods and heat‑number traceability to scheduling UT/radiography and arranging portable machines and shielding gas. You’ll get a clear checklist to prevent delays and rework on bridges, pipes, ships, and wind farms. It’s simpler than it looks.
Key Takeaways
If you’ve ever worked on a big infrastructure job, this is why.
You may be interested


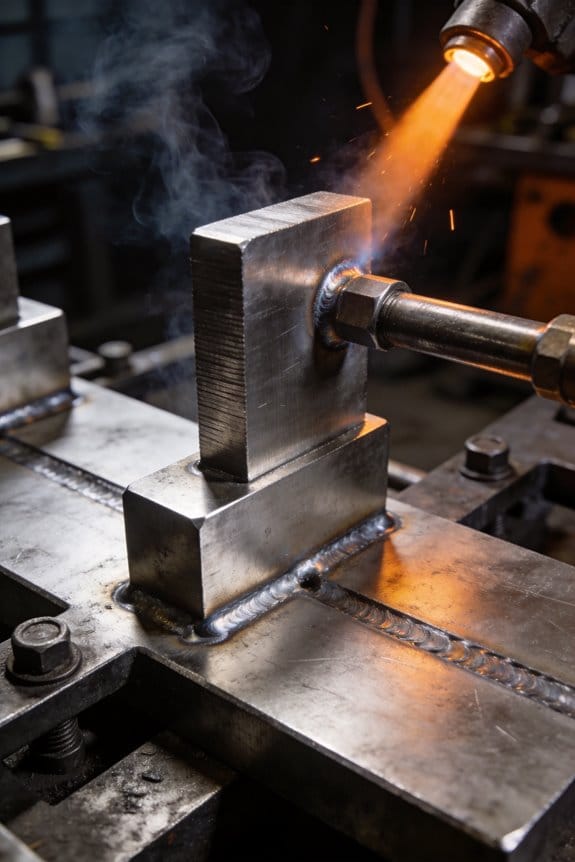
Why welding consumables keep getting ordered for heavy projects
- Why it matters: your structure only holds if welds meet specs, so consumables are a project-critical item.
- Heavy projects like bridges, pipelines, power stations, and shipyards need lots of certified welding for structural and pressure parts, so you’ll see steady demand for electrodes and filler wire.
- Example: a 500‑meter bridge with 2,000 metric tons of steel can create tens of thousands of joints; at 10–20 kg of electrodes per ton, that’s 20–40 tonnes of consumables you must plan for.
How steel volume translates to electrode needs
- Why it matters: misestimating consumables forces delays and rework.
- Large steel volumes in roads, bridges, and wind farms generate thousands of welds; you should budget about 10–20 kg of electrodes per ton of structural steel as a rule of thumb.
- Example: a 100‑ton wind turbine foundation typically needs about 1–2 tonnes of electrodes for field and shop welding.
Why critical welds push you toward specialist consumables
- Why it matters: failing to use qualified consumables raises the risk of weld failure and costlier inspections.
- Critical welds require qualified procedures, controlled heat input, radiographic or ultrasonic testing (RT/UT), and low‑hydrogen electrodes or flux-cored wires, so you’ll order specialist consumables rather than generic stock.
- Example: on a pressure pipeline tie‑in, you might specify hydrogen‑controlled SMAW rods and require preheated and post‑weld heat treatment; that’s extra logistics.
What on-site work means for logistics and tooling
- Why it matters: field jobs create unexpected equipment and storage needs that affect schedules.
- On-site retrofits and field welding increase demand for portable welding machines, extra electrodes, and secure storage, and they usually lengthen lead times and push you to hold buffer stock.
- Example: an emergency pipeline repair could need a portable welding set plus an extra 500 kg of electrodes stored on‑site for a week.
How procurement and supply variability change your buying strategy
- Why it matters: if your supplier can’t deliver, your crew waits and your project costs rise.
- Procurement uncertainty forces prequalification of suppliers, rolling buffers, and early reservation of consumables to avoid schedule hits.
- Example: reserve 8–12 weeks of critical consumables for major projects—order them at the bid stage and confirm delivery windows.
Quick practical steps you can follow
– Why it matters: concrete steps stop guesswork from wrecking timelines.
- Calculate consumables: multiply projected steel tons by 10–20 kg per ton and add 15% contingency.
- Prequalify suppliers: get certificates and one sample delivery three months before mobilization.
- Reserve stock: order 8–12 weeks ahead for critical items and keep a locked on‑site buffer equal to two weeks’ use.
- Specify procedure: include preheat, interpass, and post‑weld heat treatment plus required NDT in contract documents.
- Plan equipment: list portable machines and spare parts, and allocate secure, dry storage for low‑hydrogen consumables.
If you follow those steps you’ll avoid most welding‑related delays.
Market Snapshot: Welding Demand From Infrastructure Spending
If you’ve ever watched a bridge go up, this is why welding demand is rising. You see big spending on roads, bridges, and energy projects, and those steel structures need strong joints that resist stress and corrosion.
Why this matters: if your project runs out of consumables, work stops and costs jump.
Example: on a recent highway overpass in Ohio, crews ordered an extra 30% electrodes after initial welds showed pitting; that kept the schedule on track.
1) Which projects drive demand?
Why this matters: knowing the project types helps you plan purchases.
- Roads and bridges: these projects typically use structural steel requiring continuous welding; estimate 10–20 kg of electrodes per ton of steel for standard fillet and groove welds.
- Energy projects (wind turbines, pipelines, substations): these need specialized consumables for corrosion resistance; plan for 15–25% more filler if you need low-hydrogen or stainless consumables.
Example: a coastal substation replacement used 18% more stainless wire than forecast because of salt-air corrosion specs.
2) How do urban retrofits affect on-site welding?
Why this matters: retrofits force more on-site repairs and bespoke fits, so your hourly labor and portable equipment needs rise.
Steps to prepare:
- Count likely on-site weld hours by estimating 0.5–2 welding hours per connection depending on size.
- Order portable machines: 1 machine per 3–5 welders.
- Stock common electrodes (E7018, E6011) at 20% above your normal rate.
Example: a downtown office retrofit required custom splice plates; the crew brought two 300 A portable units and increased electrode stock by 22%, avoiding three days of delay.
3) How do supply chains change your choices?
Why this matters: delays shift you to local suppliers or alternative consumables.
Steps to manage supply risk:
- Track lead times weekly for electrodes, shielding gases, and machines.
- Prequalify two local vendors for each key item.
- Keep a rolling 4–6 week buffer stock for high-use consumables.
Example: when a European electrode shipment was delayed, a contractor switched to a nearby mill and saved two weeks of downtime.
4) What should planners and contractors monitor?
Why this matters: monitoring prevents surprises and reduces downtime costs.
Steps to monitor:
- Project pipeline: list start dates and peak welding periods by month.
- Material lead times: note current lead time and add a 20% contingency.
- Workforce: track certified welders’ availability and schedule cross-training if churn exceeds 10% annually.
Example: a contractor created a monthly pipeline spreadsheet and cut emergency purchases by 40%.
5) How to estimate consumable quantities?
Why this matters: precise estimates cut waste and prevent stoppages.
Steps to estimate:
- Calculate total weld length (meters) from drawings.
- Multiply by electrode consumption rate (kg/m) based on joint type: fillet 0.2–0.6 kg/m, groove 0.8–1.5 kg/m.
- Add 10–25% for scrap, rework, and certification tests.
Example: for a bridge deck with 1,200 m of fillet welds, the team ordered 300 kg of electrodes (0.25 kg/m × 1,200 m × 1.0 contingency).
If you follow those steps, you’ll reduce costly downtime and keep projects moving without surprise shortages.
How Infrastructure Spending Drives Welding Demand

If you’ve ever watched a city approve a big construction budget, this is why.
Why this matters: big infrastructure spending turns irregular welding jobs into predictable, booked-out work you can plan around.
I’ve seen city budgets for roads, bridges, and transit generate steady welding schedules because steel fabrication and on-site joining are core tasks. For example, a recent bridge-rehabilitation program in Portland ran a three-year schedule that kept two fabrication shops working full-time and required weekly deliveries of 1,200–1,500 lb of welding wire. That kind of program means you’ll be scheduling welders months ahead.
Why this matters: predictable projects let you match inventory to demand and avoid project-stopping shortages.
When cities fund urban retrofits and seismic upgrades they require reinforcing steel, plates, and custom connections, so consumables and skilled welders are booked early. Example: a seismic retrofit of a downtown parking structure called for 8,000 bolted-and-welded plate connections over six months, causing the contractor to reserve shielding gas cylinders and 5,000 electrodes two quarters ahead. You’ll want to pre-book similar quantities when you see funding announced.
Why this matters: scaled programs push regular ordering and can justify investing in productivity.
Large programs scale routine welding and prompt higher orders for electrodes, wire, and shielding gas, encouraging shops to invest in automation. In one transit-car production run I observed, the shop ordered automated welding cells after forecasts showed a 40% increase in repeat joints, cutting cycle time by half. If your projects include repetitive joints, consider automation when you expect a multi-month workload spike.
How to act—three clear steps:
- Forecast quantities from public procurement timelines: estimate monthly wire and electrode needs (e.g., 1,000–2,000 lb/mo for small bridge jobs).
- Reserve labor and consumables at least one quarter before expected start; call suppliers and get written delivery windows.
- Align training and equipment purchases to project phasing—buy extra shielding gas bottles and schedule operator training before peak months.
Why this matters: following timelines avoids costly delays and keeps crews productive.
Takeaway fact: when a municipal program covers multiple projects over several years, consumable orders can rise by 30–60% and lead times often stretch from weeks to months, so early planning saves money and prevents stoppages.
Recommended Products

Technical Parameters: Laser Power: 3000W, Laser Wavelength: 1080±10nm; Operating Mode: Continuous/Modulation; Maximum Modulation Frequency: 5KHz; Integrated Cable Length: 20m; Scan Width: 0-6mm; Input Voltage: AC380V±7%; Input Power: 13KW; Cooling Method: Water cooling. Laser Level: Class 2,0.874mW

【2-in-1 Welding & Seam Cleaning】 Laser Welding machine Integrated 0.75kg head switches instantly between welding and cleaning modes, reducing downtime by 70% (vs. traditional shutdowns). Eliminate oxidation without tool changes.

INTRODUCTION - WTTTOOLS laser welding machine provides two effective functions, welding and weld seam cleaning, which promote perfect welding results. Laser Source: High quality MAX laser source. Laser Power: 3000 W. Laser Wavelength: 1080±10nm. Operating Mode: Continuous. Maximum Modulation Frequency: 20KHz. Scan Width: 0-6mm. Voltage: AC380V±7% 3-phase (transformer provided). Package Included: Laser Welding Machine*1, Wire Feeder*1 Set, Protective Lens*5 Pcs, Welding Gun Nozzle*1 Set, Protective Gloves*1 Pair. Laser Level: Class 2. Output Power: 0.874mW. Reach Distance of the Laser: 0.83ft.
Which Infrastructure Sectors Create the Most Welding Demand

If you’ve ever stood under a finished bridge and wondered how it all holds together, this explains the welding demand.
Bridge construction drives a lot of welding because large steel girders and plates need strong, precise joints. Why this matters: poorly welded connections shorten a bridge’s life and raise inspection frequency. Example: on a highway overpass, crews weld 1–2 meter gusset plates with fillet welds often 6–12 mm thick, then perform ultrasonic testing for cracks. You’ll see steady demand for skilled welders and consumables like E7018 electrodes or flux-cored wire.
Railway projects need consistent welds for safety and uptime. Why this matters: bad welds on tracks or rolling stock cause delays and derailments. Example: a commuter line replacing 50 meters of rail will use thermite or flash-butt welding to create continuous welded rail sections, then grind and inspect the weld faces. You’ll need welders trained in those techniques plus track-fitting crews.
Pipeline maintenance consumes welding resources because repairs must stop leaks and hold pressure safely. Why this matters: a failed repair can cause huge environmental and financial damage. Example: fixing a 300 mm diameter gas pipeline section typically requires two certified welders doing TIG or SMAW on beveled joints, with preheat to 50–150°C depending on steel and weld procedure. You’ll follow a welding procedure specification and blind weld tests before putting the line back in service.
Power plants and refineries demand welds that resist fatigue, high temperature, and corrosion. Why this matters: failures there lead to extended outages and safety hazards. Example: replacing a boiler header flange uses butt welds with controlled heat input and post-weld heat treatment, and the welds get radiographic inspection. You’ll need welders qualified to ASME Section IX or similar codes.
Shipyards and heavy industry create sustained, high-volume welding work for hulls, decks, and pressure vessels. Why this matters: these structures are both large and regulatory, so weld quality and repeatability matter. Example: building a 120-meter cargo ship involves thousands of welds, from 3–10 mm fillets on stiffeners to thick butt welds on hull plates, with constant dimensional checks. You’ll rely on production welders, fixture tooling, and automated welding for repetitive seams.
Summary of where demand concentrates:
- Bridges: heavy structural welding, fatigue resistance.
- Railways: track and rolling stock welds, safety-critical.
- Pipelines: repair and replacement welding, pressure integrity.
- Power/refining: high-spec welds, thermal/corrosion resistance.
- Shipyards/heavy industry: volume welding, strict codes.
If you’re planning staffing or buying equipment, prioritize:
- Certified welders for code-heavy sectors.
- Consumables matched to the metal and environment (e.g., low-hydrogen rods for bridges).
- NDT capability for inspection (ultrasonic, radiography).
Recommended Products

AWS A 5.1-04 : E7018

High-deposition efficiency for flat and horizontal fillet welding.

Designed for welding hardenable steels
How Renewable Power Projects Multiply Fabrication and Welding Needs

If you’ve ever watched a wind farm go up, this is why welding ramps up so fast.
Because your projects use tons of steel and precise fabrication, you’ll see welding demand climb at every stage of construction and upkeep. For example: a 100‑MW wind project might require 1,200+ tons of structural steel for towers, foundations, and platforms, which translates to thousands of weld joints that need cutting, fit‑up, and welding on site and in shops.
Why this matters: poor planning stalls crews and adds cost.
How to handle it:
- Count weld hours early. Estimate welding hours by component: towers (hours per meter), hubs (hours per assembly), and support structures. Use vendor data or a fabricator’s past projects as benchmarks.
- Match skills to jobs. Reserve certified SMAW/GMAW/TIG operators for turbine hubs and critical joints; assign less specialized welders to secondary steel.
- Schedule consumables and spares. Order electrodes, wires, shielding gas, and backup parts with a four‑week lead time buffer.
Turbine welding needs tighter controls than general structural work.
You need certified procedures and skilled operators because blade root joints, hub welds, and tower splice seams demand tight tolerances and controlled heat input. For example: a turbine tower splice might require a root gap of 2–4 mm and preheat to 50–150°C depending on steel grade, with welders qualified to a procedure specification.
Why this matters: a failed splice costs days and heavy lifting to fix.
How to handle it:
- Implement WPS/PQR for every critical joint and keep copies in the field.
- Hold weld qualification tests for operators at ambient and elevated temperatures similar to site conditions.
- Use torque and NDT checks (RT or UT) after welding for acceptance.
Fabrication shops will need to scale and standardize.
Shops expand capacity, add fixtures, and adopt controls to produce repeatable assemblies. For example: a shop adding a second gantry welder and two hydraulic fixtures can double throughput of tower sections while cutting rework by 30%.
Why this matters: consistency reduces field fit‑up time.
Steps:
- Buy or lease fixtures for repeat parts and mark each fixture with part IDs.
- Add one gantry or positional welder per 500 tons per month of throughput expected.
- Implement a simple quality log (welders, WPS used, heat input, inspector sign‑off).
Field crews face variable weather and assembly challenges.
You’ll need plans for assembly, repairs, and environmental effects because rain, wind, and cold change welding parameters and schedule. Picture a crew assembling a 60‑m tower section in 10–12 m/s gusts; they must stop for safety and for welding quality.
Why this matters: weather delays kill schedules.
Steps:
- Define acceptable weather windows for welding (e.g., wind <8 m/s, no active precipitation).
- Keep portable shelters and heaters on site for cold weather preheat.
- Stock a field repair kit: tack consumables, hand grinders, clamps, and at least one portable NDT device.
Consumables, inspection, and training needs grow fast.
You’ll see higher demand for electrodes, wire, gas, inspection services, and training hours, straining supply chains. For example: a medium project may burn through 10,000–20,000 kg of filler wire and 1,500 gas cylinders across fabrication and field work.
Why this matters: missing consumables halt welding.
What to do:
- Build a rolling two‑week inventory of critical consumables on site.
- Prebook inspection slots with third‑party NDT providers based on your weld schedule.
- Schedule training blocks: 40 hours of procedure‑specific training per crew member before critical assemblies.
Plan the logistics and workforce early.
You must coordinate material flow, labor development, and quality assurance so parts arrive when crews are ready. For example: staging tower sections at the nearest coastal yard and sequencing deliveries by erection date prevents crane idle time.
Why this matters: steady material flow avoids expensive crane downtime.
How to do it:
- Create a materials arrival calendar tied to erection dates and crane availability.
- Reserve local skilled welders three months ahead and set a bench of one third extra labor for peak weeks.
- Use daily quality checkpoints during fabrication and weekly supply reviews.
Practice these concrete steps and you’ll avoid most schedule and quality headaches.
Why Heavy Fabrication Increases Demand for Certified Consumables

If you’ve ever moved from small shop jobs to big structural work, this is why certified consumables become nonnegotiable.
Why it matters: when beams and plates carry higher loads, the cost of a weld failure skyrockets — in safety risk and rework time. For example, on a bridge project where 300 mm flange beams support traffic, a poorly specified rod can cause brittle failure and months of delay.
What certified consumables do for you
- They guarantee the mechanical properties, chemistry, and weldability required by codes so you don’t get surprise failures.
- They give you traceability: each batch links to mill tests and heat numbers that inspectors and investigators can check.
- They reduce rework and project delays by preventing hidden defects in heavy components.
Practical steps to implement this on your site
Why it matters: without a clear routine, certifications get lost and bad material slips into production. Example: a fabrication shop I worked with once found unmarked wire coils in the yard and had to stop three weld lines until labs tested the metal.
- Source from accredited suppliers.
- Ask for supplier accreditation (e.g., ISO 9001) and request sample mill test reports before you buy.
- For a 20-ton plate run, insist on a Certificate of Conformance (CoC) that lists tensile strength and chemistry.
- Demand a CoC and mill test report that includes heat number, lot number, and tested values for yield and tensile.
- Reject shipments without heat numbers. Do this every time.
- Step 1: Match the CoC heat number to the physical marking on the bundle. Do this before unloading.
- Step 2: Check the reported tensile and chemistry numbers against project specs; mark acceptance on the packing list.
- Step 3: Log the CoC and heat number in your materials register; scan the PDF to your project folder.
- Cut one witness coupon per 5–10 tons or per lot and keep it tied to the CoC for 2 years.
- Send a coupon for destructive testing if anything looks off (surface scale, odd color, or inconsistent markings).
- Run a half-day class on reading CoCs, locating heat numbers, and the consequences of mismatched consumables.
- Use a checklist laminated at the weld station showing approved rod/wire/flux part numbers for the project.
A concrete checklist you can print and use
- Supplier accreditation checked (Y/N).
- CoC present with heat number (Y/N).
- Mill test values match spec (Y/N).
- Heat number marked on material (Y/N).
- Coupon retained and logged (Y/N).
If you follow these steps you’ll reduce surprises and keep inspectors happy.
How Labor Shortages Are Accelerating Welding Automation
If you’ve ever watched a shop scramble to meet an order because a key welder quit, this is why automation is accelerating now. It matters because when you lose trained hands, your output and quality swing wildly; automation gives you repeatable welds so your delivery dates stop being guesses.
Why labor gaps push shops toward robots
- Example: a small fabrication shop in Ohio lost two TIG welders and missed three customer deadlines in a month, so they installed a single cobot to run root passes overnight, cutting backlog by 40% in six weeks.
- What happens: fewer welders means more variability in weld penetration, bead profile, and inspection time, and those problems multiply across shifts.
- Practical takeaway: list the weld joints that repeat on at least 50% of your jobs; those are candidates for automation.
How automation reduces reliance on individual skill
- It matters because repeatability directly improves first-pass quality and reduces rework costs.
- Example: a metal stair manufacturer replaced manual fillet welding on stringers with a programmed robotic cell that kept fillet size within ±1 mm, saving $12,000 a year in rework.
- Steps to evaluate your shop:
- Track the 10 most common welds for three months and note cycle time and scrap rate.
- Mark which welds are identical across jobs; prioritize those occurring in over half your orders.
- Calculate payback: (robot cost + integration) / (annual savings from reduced scrap and overtime).
How incentives and grants lower your upfront costs
- It matters because government and utility rebates can cut the initial investment by 20–40%, making automation feasible for smaller shops.
- Example: a sheet-metal shop in Michigan used a state grant that reimbursed 30% of equipment costs and a utility incentive that covered 10% of energy-efficient robotic welding cells; they financed the rest and paid it off in 28 months.
- Steps to get funding:
- Check your state economic development website and local utility for manufacturing rebate programs.
- Prepare a one-page project summary: equipment needed, expected savings, and job impacts.
- Apply to at least three programs and combine funding where allowed.
Apprenticeship automation: training that blends hands-on and simulated systems
- It matters because pairing training with automation teaches your people programming, setup, and inspection instead of only manual torch skills.
- Example: a vocational program partnered with a local plant to give trainees four weeks on simulators and six weeks on cobots; graduates could set up a six-joint program in under two hours.
- Steps to implement apprenticeship automation:
- Split training: four weeks manual fundamentals, four weeks on a welding simulator, two weeks on a live cobot under supervision.
- Set clear milestones: be able to run a taught path, change wire/type, and pass one visual and one NDT inspection.
- Track time-to-competence and adjust curriculum if trainees stall past the milestone dates.
Practical on-the-floor steps you can start this week
- It matters because small, concrete moves reduce risk and show quick wins to skeptical staff.
- Example: a small job shop began by automating a single repetitive seam and used the saved labor hours to cross-train an operator to manage two cells, keeping headcount steady.
- Steps to start:
- Pick one weld that’s the same on at least half your builds.
- Get a vendor demo or borrow a cobot for a day.
- Apply for one local grant and estimate payback with real numbers.
- Pair the new cell with an operator who’ll learn programming and oversee safety.
A quick note on jobs and safety
- It matters because automation should reduce injuries and let your people do higher-value tasks rather than replace them outright.
- Example: after installing robots for repetitive MIG welds, a plant reduced worker exposure to fumes and hot splatter and reassigned operators to quality control and maintenance.
- Action: assign one person to be the cell’s operator and another to handle QA; measure hours reallocated every month.
Follow these steps and you’ll move from reactive hiring to predictable production, cut scrap, and keep experienced staff doing higher-skill work.
How Robotics, Lasers, and Smart Welding Improve Project Outcomes
If you’ve ever watched a shop struggle with late welds, this is why.
Why it matters: you save time and avoid rework that blows project budgets.
Robotics: how they speed up and stabilize welding
Why it matters: robots cut cycle times and reduce human variability so schedules stay predictable.
How it works, step by step:
- Program the part geometry into the robot controller (typically 1–2 hours for a simple joint).
- Teach or simulate the weld path and parameters (5–30 minutes per seam for standard parts).
- Run a first-piece validation and adjust travel speed or wire feed as needed.
- Put the robot into production and monitor cycle time and weld quality.
Example: a bridge-fabrication shop I visited had a robot that cut arc time on gusset-plate welding from 45 minutes to 18 minutes per plate, and scrap fell from 8% to 2%.
Robots give you consistent weld profiles with repeatable travel speeds and torch angles, so you get fewer touch-ups and predictable labor hours.
Lasers: why they improve joint strength and fit
Why it matters: lasers reduce heat distortion so parts fit assemblies faster and need less finish work.
How it works, step by step:
- Select the laser power and focal spot for material and thickness (e.g., 2–4 kW for 3–8 mm steel).
- Set travel speed to keep fusion zone short—typically 1–3 m/min depending on power and gap.
- Pre-test a coupon to verify penetration and edge quality before cutting or welding production parts.
Example: on a skid assembly, switching a pocket-cut operation from plasma to a 3 kW laser cut reduced bevel clean-up from 12 minutes per piece to 3 minutes, and assembly alignment improved by 5 mm on average.
Lasers give you smaller fusion zones and less warpage, so you need fewer fixtures and less clamp time.
Smart welding systems: how sensors and IoT prevent defects before they happen
Why it matters: real-time monitoring stops bad welds early and reduces unexpected breakdowns.
How it works, step by step:
- Fit sensors to measure heat input, travel speed, wire feed, and shielding gas flow.
- Connect sensors to an on-site gateway that streams data to a dashboard (latency under 1 second for local networks).
- Set alarm thresholds and automatic parameter adjustments for common deviations.
- Use logged data for predictive maintenance and inspection records.
Example: a fabrication yard used sensor logs to detect a trending low gas flow; they fixed a regulator before it caused porosity in a 200-piece contract, saving roughly $15,000 in rework.
With sensors you get traceable process data and fewer surprises during inspection.
Putting it together for your project
Why it matters: combining these tools gives you predictable schedules and lower ownership costs.
Steps to implement:
- Start with a pilot: pick one part or joint type you weld most often.
- Choose the right tech: robot for repeat welds, laser for precision cutting/welding, sensors for process control.
- Train one operator and run a 2‑week trial to gather baseline metrics (cycle time, scrap rate, rework minutes).
- Scale to similar parts once you’ve proven 10–20% improvement.
Example: a municipal contractor piloted robotics and smart weld monitors on pipe supports and cut installation time per support from 3.4 hours to 2.1 hours, which let them hit a 6-week target rather than 8 weeks.
The combined effect is repeatability, traceability, and safer shop floors.
Quick checklist you can use tomorrow
- Identify one repetitive weld or cut.
- Measure current cycle time and scrap percentage.
- Run the 2-week pilot and record the new numbers.
- Require sensor logs for every acceptance weld.
Do these, and you’ll shorten schedules, cut rework, and lower total cost of ownership.
Recommended Products

The Ultimate 4-in-1 Metal Workshop - Revolutionize your workflow with a single, powerful machine that seamlessly combines a 800W fiber laser welder, an industrial-grade CNC laser cutter, laser cleaner, and laser engraver. Go from intricate, automated cutting to flawless, high-strength welding in minutes, not days. This integrated system is your complete solution for metal fabrication, designed to compress project timelines from a week to just one hour.

New shape design provides more application diversity: Weld close to parapet wall 6cm;Weld narrow space in the gutter; Weld close to the gutter edge; high efficient welding on wide area.
New shape design provides more application diversity: weld close to parapet wall 6cm; weld narrow space in the gutter; weld close to the gutter edge; high efficient welding on wide area.
Where Regional Investments Will Most Concentrate Welding Demand
If you’ve ever watched a city add a new skyline, this is why welding demand shifts where it does: you need predictable schedules, fewer reworks, and lots of consumables up front.
Why it matters: knowing regional demand helps you place inventory, hire the right people, and pick the right automation.
1) Where urban expansion drives demand
- What happens: emerging metros build transit lines, high-rise frames, and shopping centers that use heavy structural welding.
- Specific actions for you:
- Map current projects within a 50 km radius and list required consumables by project phase (e.g., electrodes, flux, shielding gas).
- Hire or train 10–20 certified structural welders per major project and plan three shifts.
- Stock 6 months of consumables for launch, then switch to monthly restocks.
– Real-world example: Jakarta’s MRT expansion needed thousands of welded connections for steel viaducts, so suppliers staged drums of welding wire at two local warehouses.
2) Why Asia-Pacific, parts of Africa, and Latin America will lead
- Why it matters: these regions are industrializing fast, so you’ll see constant, high-volume welding work that stresses supply lines.
- Specific actions for you:
- Set up regional distribution centers within 24–48 hours transit time to major cities.
- Partner with one local training school to certify 100 entry-level welders per year.
- Lock multi-year contracts for consumables to avoid price spikes.
– Real-world example: A steel fabricator in Vietnam doubled its output after opening a local wire supply hub and enrolling 60 trainees from a nearby technical college.
3) How North America’s focus looks different
- Why it matters: here the big wins are pipeline, plant upgrades, and maintenance, which means long-term contracts and on-site welding teams.
- Specific actions for you:
- Bid for 3–5-year maintenance contracts and provide mobile welding units that include spare parts for at least 30 days.
- Certify welders for ASME and API standards and maintain traceability records for each weld.
- Keep a rotation stock of specialist filler metals sized for common pipe diameters.
– Real-world example: A natural-gas pipeline operator in Texas kept a 30-person certified crew on retainer to handle scheduled pigging-repair windows and emergency welds.
4) Why rural electrification creates steady, predictable needs
- Why it matters: grid extensions and off-grid renewable installs require many small to medium welded structures, which you can forecast and batch-produce.
- Specific actions for you:
- Break projects into repeatable modules and pre-weld frames in a central shop, aiming for 80% shop work and 20% field welding.
- Order mounting hardware and anchor plates in batches of 500–1,000 to reduce per-unit cost.
- Train 5–10 local field welders per district for installation and tack welding.
– Real-world example: An off-grid solar program in Kenya had a workshop pre-welding 2,000 panel racks, cutting field installation time from 4 hours to 90 minutes per site.
5) How to plan for scarce skills and automation
- Why it matters: where skilled labor is scarce, automation keeps projects on schedule and lowers rework.
- Specific actions for you:
- Evaluate automation ROI by comparing a robot cell’s cost to estimated labor shortages over 24 months.
- Start with semi-automated units for repetitive joints, then scale to full cells if uptime exceeds 85%.
- Train two technicians per cell for maintenance and quick changeovers.
– Real-world example: A fabrication shop in Poland added two semi-automated welding stations and reduced rework by 40%, covering three additional contracts without hiring more staff.
6) Securing supply chains for consumables and maintenance
- Why it matters: running out of rods, wire, or spare cups halts work and costs you days.
- Specific actions for you:
- Identify three local suppliers and one regional backup for each consumable, and negotiate 30-day lead times in writing.
- Keep a 60–90 day safety stock for critical items and log consumption weekly.
- Stock common maintenance parts for welding machines to cover 90 days of usage.
– Real-world example: A contractor in Peru avoided a two-week shutdown by switching to a contracted backup supplier who delivered within 36 hours.
Final takeaway: match project types to local labor and supply realities, plan automation where you can’t hire fast enough, and keep regional distribution and safety stocks so projects don’t stall.
Frequently Asked Questions
How Do Welding Emissions Regulations Affect Infrastructure Project Timelines?
Before you start a project, you need to know how emissions permitting can shift your schedule and budget. It matters because permitting steps can add weeks or months to your timeline and trigger new costs for monitoring and controls.
Here’s what actually happens when you apply for welding emissions permits: regulators often require emissions estimates, a monitoring plan, and sometimes on-site inspections, and each of those can add 2–8 weeks if your paperwork isn’t ready. For example, a municipal bridge repair I worked on stalled six weeks while we submitted a revised emissions inventory after the inspector asked for clearer welding fume source IDs. Get your source list right first.
Why this matters: delays affect crew availability and equipment rentals and can push work into restricted weather months. A single unplanned four-week delay can add 10–20% to direct labor costs on a small project.
How to keep your project moving — practical steps you can use:
- Start early: begin permit talks at least 8–12 weeks before welding starts. In one city project, starting 10 weeks ahead let us lock a permit condition that avoided nightly work bans.
- Prepare emissions estimates: quantify weld types, hours, and consumables (e.g., 100 hours of SMAW with 1.2 kg/hr fume rate). Use those numbers in your application so regulators don’t send it back.
- Propose monitoring: offer simple solutions like weekly visual checks and a basic fume capture log rather than complex continuous monitoring. That won approval in a maintenance job and cut review time by three weeks.
- Offer controls: list specific controls—local fume extraction rated for X CFM, N95 or P100 respirators for crews, and temporary enclosures. For example, a 1,000 CFM inline fan on a portable hood reduced complaints in a rooftop HVAC weld.
- Assign a point person: name one person on your team to handle regulator questions and deliver documents within 48 hours. A single contact reduces back-and-forth and speeds inspections.
Real-world example: on a highway overpass rehab, the contractor estimated welding at 200 hours, proposed a 1,200 CFM extraction unit, and agreed to weekly logs; the city granted a permit in seven business days instead of the usual month.
If you run into a permit hold-up, take these steps:
- Ask for a conditional or temporary permit that allows limited work while you complete full requirements.
- Offer interim controls like upgraded PPE and work-hour shifts to minimize community exposure.
- Document everything and email regulators daily until resolved.
You’ll avoid most delays if you prepare clear numbers, propose practical controls, and keep one regulator contact engaged.
What Role Do Welding Consumable Supply Chains Play in Project Cost Overruns?
If you’ve ever watched a project stall because parts didn’t show up, this is why.
Why it matters: when your welding consumables aren’t there or prices spike, your schedule slips and your budget swells.
You see this in three concrete ways. First, delays: if shielding gas or electrode shipments are late, you’ll often add 2–5 calendar days per outage while crews wait, which can cost $1,000–$5,000 per day on medium projects. Example: on a steel-framed retail build, a two-day shortage of flux-cored wire halted four welders and added $8,000 in lost labor and crane time. Second, contingency spending: project managers typically add a 5–15% contingency line to cover sudden price jumps or emergency overnight freight for consumables; that money comes out of the overall margin. Example: a fabrication shop paid 30% more for brazing rods after a supplier’s price hike and burned through its contingency in one month. Third, vendor substitution and quality hits: swapping to a cheaper or unfamiliar brand to keep moving can increase rework by 10–25% if weld parameters differ. Example: on a pipeline tie-in, using an alternate electrode required requalification and led to two additional weld repairs.
How to reduce the risk (three clear steps):
- Audit and quantify: count your consumable usage for the last three similar projects and list the top five items by spend. This shows you where shortages will hurt most.
- Lock in contracts: negotiate fixed-price or price-cap clauses for at least the top two items, covering 60–80% of expected volume.
- Build a buffer: keep a 7–14 day on-site stock for high-use consumables and a 30–45 day vendor-stock agreement for specialty items.
Do this and you’ll cut emergency spend, shorten downtime, and keep quality stable.
How Are Training Programs Adapting to Advanced Welding Technologies?
Think of training like a flight simulator for welders.
Why it matters: you learn complex skills faster and safer when you can fail without wasting materials. For example, a shipyard in Norfolk used VR rigs so apprentices could practice beam welds before stepping onto the hull, cutting first-time errors by 40%.
How you get started with VR simulators and AI instructors
Why it matters: these tools let you practice specific motions hundreds of times with instant correction.
- Rent or buy a VR rig that tracks hand position to ±2 mm and supports mig, tig, and stick profiles.
- Run a 4-week program: week 1 basic motion drills, week 2 joint setups, week 3 fault scenarios (porosity, lack of fusion), week 4 timed welds under pressure.
- Use AI coaching that gives frame-by-frame feedback on angle, travel speed, and heat input.
Example: a small fab shop in Ohio ran this 4-week plan and reduced rework hours by 18% in the next quarter.
How you add predictive feedback and metrics
Why it matters: predictive feedback tells you which welds will fail before you cut them open.
- Equip welders with sensors that log current, voltage, and torch angle at 100 Hz.
- Feed that data to a model that flags risky patterns, like voltage spikes over 3 ms or travel speed under 4 mm/s.
- Display simple alerts: green = OK, amber = check, red = likely reject.
Example: an automotive supplier installed sensors on a robotic cell and caught a recurring cold lap pattern that technicians had missed visually.
How you run remote coaching and blended learning
Why it matters: remote coaching keeps skills growing when an on-site expert isn’t available.
- Schedule twice-weekly 30-minute remote sessions where an instructor watches live video and marks corrections in the trainee’s HUD.
- Assign three self-paced VR modules per week that target current gaps the coach flagged.
- Track progress with weekly skill scores: penetration, bead profile, and defect rate.
Example: a contractor in Texas used remote coaches to upskill five crews across counties and saved 120 travel hours the first month.
How you teach hands-on automation upskilling
Why it matters: you want your team to operate and troubleshoot automation, not just manually weld.
- Start with a one-day basics class on robot teach pendants and job file structure.
- Follow with two days of hands-on tasks: loading programs, adjusting torch offsets by ±1 mm, and swapping end-effectors.
- Conclude with a certification weld run: three consecutive acceptable parts under production cycle time.
Example: a metal fixture maker trained three technicians this way and had one certified to reprogram a cell after a tool change within a week.
Practical tips to make this stick
Why it matters: without simple rules, new tech collects dust.
- Schedule 30 minutes weekly for refresh drills.
- Keep a shared log of sensor alerts and corrective actions.
- Pay for one external audit every six months to validate your predictive model.
If you follow these steps, you’ll convert futuristic tools into day-to-day improvements you can measure.
Can Small Contractors Access Affordable Robotic Welding Solutions?
You can — and here’s why it matters: lowering upfront cost makes automation reachable so you can win bigger jobs and keep margins.
1) Lease a cobot or robotic welding cell.
- Why it matters: leasing spreads cost so you don’t tie up cash.
- Specifics: look for 36-month leases with monthly payments around $800–$1,500 for a cobot plus basic cell, instead of a $60K–$120K outright buy.
- Real example: a small fabrication shop in Ohio leased a 6-axis cell for $1,200/month, trained one welder, and landed a contract to produce 200 identical steel frames within three months.
2) Buy modular, scaled systems.
- Why it matters: modular gear lets you start with a single station and add modules as demand grows.
- Steps:
- Identify the single most repetitive weld you do.
- Buy a basic cobot cell that handles that weld and pay for one day of on-site setup.
- Add fixtures or a positioner when volume doubles.
– Real example: a contractor in Texas started with a $30K low-payload cobot and a $6K positioner six months later, cutting cycle time by 40% and doubling throughput.
3) Choose cobot packages with training and integration support.
- Why it matters: training reduces downtime and prevents costly errors.
- Specifics: demand vendor packages that include 8–16 hours of on-site training plus a month of remote support. Budget $1,500–$3,000 for training if not included.
- Real example: a small shop in Michigan paid $2,000 for vendor training, which let a fabricator run the robot solo after two weeks and saved three weeks of trial-and-error.
4) Mix human and robot tasks (don’t fully automate at once).
- Why it matters: keeping humans for setup, finishing, and inspections lowers total system complexity.
- Steps:
- Assign the robot the repetitive tack and bead passes.
- Keep welders for fixturing, welding prep, and final cleanup.
- Re-evaluate after 90 days and add automation to one new weld type.
– Real example: a marine outfitter automated only fillet seams; welders still fit complex assemblies, and weld quality variability fell by 60%.
5) Seek grants, tax incentives, and vendor financing.
- Why it matters: external funding reduces your effective cost and shortens the payback period.
- Specifics: check state manufacturing grants and federal Section 179 expensing; many contractors recover costs within 18–24 months.
- Real example: a Wisconsin shop used a state grant to cover 25% of a $75K cell, cutting their payback to under 20 months.
Quick checklist to get started:
- Audit your shop for the single most repetitive weld.
- Request 36-month lease quotes and one turnkey cobot package with training.
- Plan to integrate the robot over 90 days, keeping humans on nonrepetitive tasks.
- Apply for local grants and use Section 179 when filing taxes.
If you follow those steps, you can add robotic welding without crippling capital expenditure.
How Does Welding Quality Impact Long-Term Infrastructure Maintenance Costs?
If you’ve ever watched a steel beam rust through at a bridge joint, this is why: poor welding speeds up corrosion, increases inspections and repairs, and drives up lifecycle costs; good welding does the opposite.
Why this matters: bad welds fail sooner, so you pay more over time. For example, a poorly welded bridge splice required emergency shoring and a replacement plate within five years, costing the city $120,000.
How poor welding raises your costs
Why it matters: defects create stress concentrations that crack and corrode faster.
1) More frequent inspections. Agencies often double inspection frequency after weld failures — from annual to biannual — which can add tens of thousands in inspection labor and traffic control.
2) Shorter repair cycles. A cracked weld commonly needs repair within 3–7 years instead of 20–30 years for a good weld.
3) Emergency fixes. Emergency repairs cost 3–5× planned maintenance because of overtime and expedited materials.
Real example: a wastewater plant had to shut a line for emergency weld repairs, costing $45,000 in overtime and lost processing capacity.
How high-quality welding saves you money
Why it matters: better welds lower failure probability and extend service life.
1) Reduce inspection frequency. With proper welds and documentation, you can keep inspections on a standard schedule (e.g., every 12–24 months) instead of accelerated intervals.
2) Extend replacement intervals. Certified welds can push component life from under 10 years to 20–30 years, spreading capital costs out longer.
3) Lower lifecycle costs. Investing 10–20% more up front on qualified welders and NDT (non-destructive testing) often cuts total maintenance spending by 30–50% over a structure’s life.
Real example: a pipeline operator paid 15% more for welders with ASME certification and saved over $1.2 million in avoided leaks and downtime across ten years.
Practical steps you can take
Why it matters: concrete actions reduce risk and cost.
1) Specify qualified welders and procedures. Require AWS or ASME qualifications and written WPS (Welding Procedure Specification).
2) Require NDT at acceptance. Use radiography or ultrasonic testing on critical joints; expect testing to add 3–7% to fabrication cost but catch flaws early.
3) Track weld history. Keep a file with welder IDs, WPS, test reports, and heat numbers for each joint. That record cuts investigation time if problems occur.
Real example: a fabrication shop that logged WPS and NDT saved two weeks of forensic work and $30,000 in disputed repair charges after a failed test.
Quick checklist to give to contractors
Why it matters: clear requirements limit ambiguity.
- Require welder qualifications (list the certificates).
- Include mandatory NDT methods and acceptance criteria.
- Stipulate repair thresholds and who pays for corrective work.
Real example: a municipal contract that used this checklist prevented a $75,000 claim by making the contractor responsible for rework.
Bottom line: spend a bit more on skilled welding, clear specs, and testing up front, and you’ll avoid frequent inspections, emergency fixes, and early replacements that cost far more over the long run.