As an Amazon Associate, we earn from qualifying purchases. Some links on this site are affiliate links at no extra cost to you. Our recommendations are based on thorough research and editorial judgment.

How Setup Discipline Improves Consistency Before the Arc Starts
You step up, sight the target, and then fumble the final adjustments—why do some attempts feel like lightning while others fall apart at the last second?
You may be interested


You can’t tell whether it’s posture, a setting tweak, or a stray thought that ruins the shot. Most people blame skill or luck and skip a repeatable pre-shot routine, so variability stays baked into every attempt.
This piece shows a short, repeatable setup discipline that fixes posture, locks one key setting, and embeds a single mental cue so each try starts from the same baseline. Do it and you’ll get steadier timing, tighter precision, and a clear way to measure real improvement.
It’s easier than it sounds.
Key Takeaways
If you’ve ever started a routine with shaky setup, this is why.
Why it matters: a consistent start reduces mistakes and makes good results repeatable.
1) Use a repeatable pre-action checklist.
- Step 1: write 6 items on a laminated card: stance, grip, sightline, gear check, breathing, and target alignment.
- Step 2: run the card aloud in the same order every time.
Example: before each archery shot, say “stance, grip, sight, release breath, nock, aim” while you set your feet and fingers.
Why it matters: measured gear is predictable and cuts guesswork.
2) Calibrate equipment with numbers and fixed checkpoints.
- Step 1: set one numeric standard (for example, bow tiller = 12 mm, sight pin = 3.5 cm left).
- Step 2: use a tape, ruler, or digital gauge to verify those numbers each session.
Example: mark your arrow rest with tape at 12 mm and photograph it; compare the photo next time to confirm it hasn’t shifted.
Why it matters: short warm-ups and single-word cues prime your body and mind so you don’t overthink.
3) Do targeted warm-ups and use one-word cues.
- Step 1: 90 seconds of movement: 30s shoulder circles, 30s band pull-aparts, 30s slow practice pulls.
- Step 2: pick one cue like “steady” or “breathe” and repeat it before each attempt.
Example: before a sprint start, jog lightly 90 seconds, then whisper “explode” as you set your blocks.
Why it matters: progressive practice finds weak links and makes reliable moves automatic.
4) Run progressive, recorded drills to lock movements.
- Step 1: record 20 reps at 50% effort, 20 reps at 75%, and 10 full-effort reps.
- Step 2: review the middle 10 of each set to spot one inconsistent detail and fix it next set.
Example: film your golf swing from down the line and correct the single bad wrist bend you see in frame 12.
Why it matters: logging performance shows trends and tells you when to adjust.
5) Track hit rates, variance, and environment readings.
- Step 1: keep a simple log with date, hits/attempts, wind, temperature, and any gear changes.
- Step 2: set thresholds (for example, hit rate under 70% or wind over 10 mph) that trigger a reset of checklist or recalibration.
Example: if your shooting accuracy drops from 90% to 65% over three sessions and wind exceeds 10 mph, recalibrate sight and repeat the pre-action checklist.
Define “Setup Discipline” and Who This Applies To
If you’ve ever fumbled right before a task, this is why.
Why it matters: when your start is consistent, your results become predictable. Setup discipline means you prepare your body, gear, and focus the same way every time, so you don’t waste mental energy or time on last-minute fixes.
What setup discipline is, in one sentence:
– A repeatable checklist of steps you follow before an action that fixes posture, calibrates equipment, and locks in mental cues.
How to do it (3 clear steps):
- Calibrate equipment — measure or set one thing every time. Example: for a camera, set ISO to 200, aperture to f/4, and white balance to daylight before you shoot; for a keyboardist, tune to A=440 Hz and check cable connections.
- Warm your body — do a 60–90 second targeted warm-up. Example: a golfer swings a weighted club for 10 slow reps, then loosens the shoulders for 30 seconds.
- Check the environment and cue your mind — spend 15 seconds scanning wind, light, or noise, then give yourself one-word cues: “steady,” “soft,” or “attack.”
Who this applies to:
- Athletes who repeat movements (sprinters, archers).
- Technicians who set devices (sound engineers, lab techs).
- Performers who need consistent starts (musicians, actors).
If you rely on repeatable outcomes, you should use it.
Simple example you can picture:
– A violinist: tune strings to A=440, do three neck stretches, glance at lighting and breathe in for two seconds while thinking “connect.”
What you’ll get:
- Less variability in starting conditions, which improves timing and precision.
- A baseline to measure progress, because when posture, settings, and mental cues are constant, differences are real.
Quick checklist you can copy:
- Equipment set: list one numeric setting or position.
- Body warm: 60–90 seconds, name the movement and reps.
- Environment scan: 15 seconds, list two factors (wind/light).
- Mental cue: one word to trigger the same focus.
Do this for two weeks before judging results.
Quick-Start Setup Checklist to Fix Timing and Alignment

If you’ve ever started and felt your timing or aim wobble, this checklist fixes that before you begin.
Why it matters: consistent setup removes guesswork so your first attempt matches your best attempt.
1) Visual cueing — pick a fixed external reference.
- Step: choose one precise target point, like the top right corner of a window frame or a numbered spot on a range target.
- How to do it: line your sights or body with that spot, then look at it once for one second to confirm alignment.
- Example: on a caravan shoot, align the front sight with the third rivet from the left on the trailer and glance for exactly one second.
2) Stance check — set your feet and hips to repeatable marks.
- Why it matters: a consistent base gives consistent motion.
- Step: place your feet at a measured distance — 12 inches between toes for neutral stance, or 18 inches for a more stable braced stance.
- How to do it: feel weight distribution; aim for 50/50 on both feet and correct any sway for two seconds.
- Example: at the gym, mark shoe positions with tape: left tape 12 inches left of center, right tape 12 inches right, then step on them the same way every time.
3) Timing breath — sync breath with your action.
- Why it matters: matching breath to movement steadies rhythm and timing.
- Step: inhale for two counts, hold for one count, then exhale as you start the motion.
- How to do it: practice once slowly before the attempt, counting aloud “one, two — go” as you exhale and move.
- Example: when swinging a bat, breathe in for two counts while settling, then exhale on the swing start to keep timing consistent.
4) Tactile anchoring — confirm hand placement by touch.
- Why it matters: touch gives immediate, repeatable feedback when visual checks aren’t possible.
- Step: place a specific finger or palm on a contact point — for example, index finger on the seam, heel of hand on the grip.
- How to do it: touch and hold for half a second, then release into the ready position.
- Example: on a camera, press the base of your thumb against the grip seam each time to ensure your hand sits the same way.
5) Reset timeout — take a short pause before you go.
- Why it matters: a brief pause lets your brain confirm everything and stops rushed starts.
- Step: hold for two full seconds after the previous checks, physically relax shoulders, then proceed.
- How to do it: count “one, two” silently while checking the previous four items are set.
- Example: before a free-throw, set visual sight, stance, breath, and touch, then count two before shooting.
Do this checklist in order every time. It takes about six seconds total and makes your first attempt repeatable.
Routines to Build Muscle Memory and Mental Focus

Here’s what actually happens when you make a short, repeatable routine part of practice: your body learns to do the movement without you thinking about it.
Why it matters: routines cut hesitation and keep you steady under pressure. Example: before a golf shot, Tiger Woods used a four-step pre-shot sequence to rebuild focus after a bad hole.
1) Define a short sequence and why each step matters.
– Step 1: set your feet shoulder-width, toes parallel — hold 2 seconds.
Example: stand on the tee box, feel both heels equally loaded.
– Step 2: set your grip with three light fingers on the club — hold 2 seconds.
Example: notice your lead hand is relaxed, not squeezing.
– Step 3: align your target by picking one spot two feet past the ball — hold 2 seconds.
Example: pick a blade of grass or a leaf as your aim point.
– Step 4: settle your head over the ball and breathe once.
Example: practice this on the driving range before playing.
Why it matters: pairing breathing with the sequence calms you so your fine motor skills work better. Real-world example: a competitive archer inhales for rhythm, which keeps their release consistent.
2) Use a simple breathing pattern to calm your nervous system.
- Before explaining how: this breathing lowers heart rate and sharpens focus in under 30 seconds.
- How to do it:
- Inhale for 2 counts through your nose.
- Hold position for 1 count.
- Exhale for 3 counts through your mouth.
Do this once before executing the movement.
Example: on a tennis serve, use this breath right after you toss the ball.
Why it matters: slow practice encodes correct mechanics so errors don’t become habits. Example: a drummer practices a fill at half speed to keep timing precise.
3) Practice slowly, then increase speed while keeping form.
- Before explaining how: slow reps let your brain and muscles learn the exact movement path.
- How to progress:
- Do 10 slow, exact reps at 50% speed.
- Do 10 reps at 75% speed while keeping the same positions and breath.
- Do 10 full-speed reps.
Track each set with a simple tally on your phone.
Example: when learning a free-throw, shoot 10 routine-based reps at 50%, then 75%, then full speed.
Why it matters: isolating unstable steps lets you fix them without redoing the whole routine. Example: a violinist identifies a shaky bow grip and drills just that motion for 5 minutes.
4) Record, isolate, and rehearse unstable steps.
- Before explaining how: targeted repetition accelerates improvement by focusing effort.
- How to do it:
- Film one practice session with your phone.
- Watch for the step that moves or feels rushed.
- Spend 5–10 minutes drilling only that step, repeating it 30 times slowly.
- Reintegrate the fixed step into the full sequence and test 10 reps.
Example: a soccer player films penalty kicks, finds foot placement varies, and practices that single placement until it’s consistent.
Follow this plan for several weeks, practicing the routine 3–5 times per session and at least 3 sessions per week, and you’ll notice less hesitation, steadier technique, and tighter focus in pressure moments.
Recommended Products

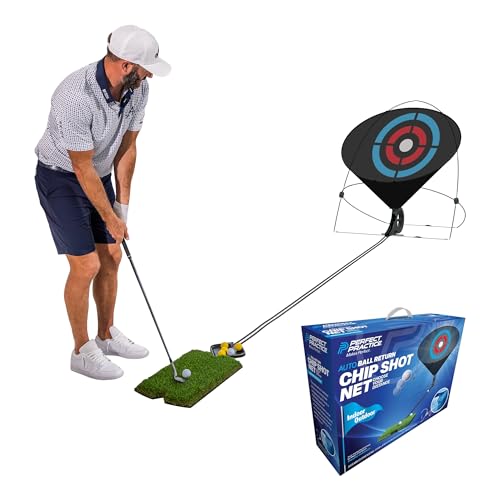
AUTOMATIC BALL RETURN: Master your rhythm with a specialized golf practice net featuring a gravity-feed system that rolls the ball back to your feet, allowing you to focus on repetition and form without constantly retrieving shots.

IMPROVE YOUR SWING: Take advantage of the Rypstick Golf Training Aid for golf practice to HIT LONGER DRIVES & SHOOT LOWER SCORES.
Measure Consistency: Drills, Metrics, and Feedback Loops

Here’s what actually happens when you start measuring consistency: you get clear data that shows whether your routine is working or just feeling good.
Why this matters: without numbers you can’t tell if tiny tweaks actually help. I use drills that isolate one element so you can repeat the exact same motion 30–50 times per session and record steady outcomes. Example: if you’re practicing a tennis serve, you focus only on toss height and do 40 serves from the same spot, counting makes and misses.
How to set it up (steps):
- Pick one element to isolate (e.g., grip, toss, or follow-through).
- Do 30–50 focused reps per session, aiming for the same setup each time.
- Log each attempt with three fields: result (hit/miss), time since last rep (seconds), and a one-line note on conditions.
Why these specific metrics matter: they turn scattered attempts into trends you can read. Track three simple numbers every session—average error (in degrees or units), variance, and hit rate—and you’ll see if changes move the needle. Example: a golfer measures clubface angle error in degrees, records average error of 3.2° and variance of 1.1 over 40 swings, then adjusts grip and watches those numbers drop.
How to keep the log useful (steps):
- Use repetition tracking—either a spreadsheet or an app—with columns for attempt number, success (1/0), error value, time gap, and a one-line error log.
- After each session, calculate: hit rate = successes/attempts, average error, and variance.
- Review weekly trends, not single sessions.
Why error logging matters: it creates the feedback loop that tells you what to change. When you log a short note every time something goes wrong—windy, tired, rushed—you’ll spot patterns in the metrics and link them to conditions. Example: a drummer notices hit rate drops by 20% whenever they skip a 5-minute warm-up; the notes show “no warm-up” on low-performance days.
How to act on the data (steps):
- Pick one small change based on a clear trend (reduce toss height by 2 cm, add a 5-minute warm-up).
- Test that change for at least one week with the same drill set (30–50 reps daily).
- Compare weekly averages and variance to decide whether to keep the change.
Practical rule of thumb: change only one variable at a time and run at least 200 total reps before judging the effect. This gives you enough data to separate noise from real improvement.
Troubleshoot Setup Discipline: Targeted Fixes and When to Change It

Here’s what actually happens when a setup routine starts to break down: you get small, repeatable errors that snowball into bigger failures, and finding the single inconsistent part saves you time and headaches.
Why this matters: fixing the right link keeps the whole chain working. Example: you notice a camera-based inspection line suddenly flags 10% more defects after a weekend; that’s a visible sign something shifted.
1) Check calibration first.
Why this matters: miscalibrated tools give consistent but wrong results. Example: if a scale is off by 5 g, every batch will be off by 5 g and your yield numbers will jump.
Steps:
1.1. Calibrate instruments against a traceable standard. Use a known weight or reference target.
1.2. Record the before-and-after readings in a log with date, time, and operator initials.
1.3. If drift exceeds your tolerance (e.g., >2% or >1 unit), tag the equipment out of service until repaired.
If calibration fixes it, document the new standard and move on. If not, keep reading.
If you’ve ever had lighting or temperature mess with results, this is why: environmental changes subtly shift human timing and machine behavior, and you can measure that effect.
Why this matters: controlling environment removes a hidden variable that causes variation. Example: a soldering station that cools 5°C overnight will change solder flow, and you’ll see a 7–10% rework increase the next morning.
Steps:
2.1. Measure lighting (lux), temperature (°C/°F), and surface conditions (cleanliness score 0–5) at the start and end of each shift.
2.2. Compare those values to your baseline limits (e.g., 300–500 lux, 20–22°C).
2.3. If values fall outside limits, adjust lighting or HVAC and mark the batch for re-check.
Isolate variables by changing one thing at a time.
Why this matters: simultaneous changes hide cause and effect. Example: swapping a nozzle and changing software at once makes you guess which change fixed the jam.
Steps:
3.1. Pick a single variable to change.
3.2. Run 10–30 repeats depending on process noise to get reliable data.
3.3. Log outcomes and compare to baseline using a simple pass/fail or mean ± SD.
If a single change restores consistency, document the new routine and train people on it. If not, simplify the routine.
The fastest way to fix a failing routine isn’t to add more steps; it’s to remove complexity. Example: a 12-step start-up checklist that operators skip becomes worse than a 6-step checklist they actually follow.
Steps:
4.1. Cut nonessential steps — keep those that directly affect quality (no more than 6 items).
4.2. Add clear checkpoints with measurable criteria (e.g., “calibration within ±1 unit”).
4.3. Retrain users with a 15-minute hands-on session and an observed competency check.
Repeat measurements until variation meets your threshold.
Why this matters: you need objective proof that the routine is stable. Example: after changes, run 50 samples and expect sigma to drop below your target (e.g., process capability Cpk ≥ 1.33).
Steps:
5.1. Define your acceptable variation numerically (± units, percent, or Cpk).
5.2. Measure in batches of 10–50 and record results.
5.3. If results meet thresholds for three consecutive runs, lock the routine; if not, return to step 3.
Final practical tip: keep a one-page log template with calibration dates, environmental readings, one variable changed, and outcome — that single sheet saves hours when you need to trace a problem.
Recommended Products

Weight Set(20), 50 kg-1 g, ASTM 1

Quality you can Trust – Adam's ASTM Weight Sets are high quality Weights that are designed for professionals. Our Weights are designed in the UK and supported locally by our US office in Connecticut. Adam scales & balances are the ideal choice for your weighing application.

Metric, OIML Class F1 calibration weight set for calibrating other weights, or electronic balances and scales
Frequently Asked Questions
How Long Before Results Appear From Setup-Discipline Training?
Before you start setup-discipline training, know why the timeline matters: it tells you when to expect real gains so you don’t quit too early.
You’ll usually see initial changes within 2–6 weeks as your nervous system adapts and basic habits form; for example, a soccer player who adds two short focused sessions per week may notice crisper passing within three weeks. Expect reliable perceptual calibration and consistent performance after about 8–12 weeks when your brain and body sync up for the new skill; a goalkeeper who practices tracking drills every other day often reaches steady improvement by the tenth week. Individual variation means some athletes progress faster or slower, so track one clear metric—like accuracy percentage or reaction time—weekly to watch trends.
Can Setup Discipline Reduce Injury Risk During Execution?
If you’ve ever felt a twinge right after starting a lift, this is why.
Why it matters: consistent setups cut your injury risk by keeping your body in safe positions before you load it.
1) What a disciplined setup looks like
- Step 1: Stand with feet hip-width, toes forward or slightly out (0–15°).
- Step 2: Hinge at the hips until shins are vertical, chest proud, and hands at the bar or implement.
- Step 3: Take one deep breath into your belly, brace your core, and hold that tension.
- Step 4: Pull your shoulders down and back, set a slight knee bend, and start the lift only once you feel stable.
Example: I coached a soccer midfielder who kept letting his hips shoot up during deadlifts; after practicing these four steps with a PVC pipe for two weeks, his form stayed constant and his lower-back pain went away.
2) How setup discipline manages load
Why it matters: setups control where force travels through your body so you don’t overload a weak link.
- Step 1: Match the weight to a setup you can hold for three seconds without wobbling.
- Step 2: Reduce load by 10–20% if you can’t maintain tightness for those three seconds.
- Step 3: Increase weight by 5% only after three clean sets at the same load across two sessions.
Example: A crossfit athlete kept increasing weight every workout and strained a shoulder; switching to these load rules reduced training load spikes and fixed her technique within a month.
3) How to spot and fix common setup faults
Why it matters: catching faults early prevents them from becoming injuries.
- Step 1: Film one rep from the side and one from the front at training weight.
- Step 2: Check for four things: rounded upper back, hips rising too fast, knees caving, or weight on the toes.
- Step 3: If any appear, reduce load 15% and practice the setup 5–10 reps with a pause at the start position.
Example: A recreational lifter had knees caving in squats; after pausing at the top of the setup for ten reps over two weeks, his knees tracked straight again.
4) Simple cues and drills to make setups automatic
Why it matters: good cues speed up learning so you don’t default to risky patterns when tired.
- Step 1: Use one-word cues: “brace,” “hip,” “pull.” Say one aloud before each rep.
- Step 2: Drill the setup with an empty bar for 3–5 minutes at the start of your session.
- Step 3: Use heavier sets only after three successful cue-led warmups.
Example: A teacher who coached gymnastics used the cue “braced” before each practice run; his students retained posture better and had fewer wrist strains.
Do this consistently: practice the four-step setup, follow the load rules, film faults, and use one-word cues. You’ll reduce sudden stress on joints and spot problems before they hurt.
Should Equipment Adjustments Be Part of Setup Discipline?
If you’ve ever picked up your gear right before a run or round, this is why.
You want equipment adjustments in your setup because they make your performance predictable. For example, when I tighten my bike’s headset by 0.5 turns and set tire pressure to 28 psi, cornering feels the same every lap.
Why it matters: small setup changes cut down variability, so your outcomes match your intentions.
How to do it, step by step:
- Check and record one number for each item: tire psi, suspension sag in millimeters, grip tension, or string tension. Example: write “29 psi front, 31 psi rear” on a sticky note and put it on the handlebar.
- Make one change at a time, then do a short test for 5–10 minutes. Example: if you loosen your racket by one notch, hit 30 practice shots and notice feel.
- Pair the adjustment with a two-minute sensory primer: five deep breaths, three slow practice movements, then go. That aligns your focus with the new setup.
- Log what worked and what didn’t immediately after the session.
Real-world example: a golfer who changes shaft length and then hits ten short chips will feel whether distance control improved; they record the result and revert or keep the change.
Quick tip: aim for repeatable numbers — pressures, tensions, angles — not vague descriptions.
How Do Teammates or Partners Affect Individual Setup Discipline?
If you’ve ever worked with others on a shared task, this is why.
Why this matters: teammates shape how reliably you prepare, and that affects safety, speed, and results.
Your teammates set communication habits that cue your setup actions. For example, on a software team that uses a daily checklist in Slack, you’ll start each morning by running three quick checks: update branches, run tests, and verify dependencies. Do these steps:
1) Read the team’s checklist message within 10 minutes of starting.
2) Run the exact commands listed (git pull; npm test) and paste results in the thread.
3) Mark the task done so others see your status.
Your routines become visible, which creates small accountability. Imagine a workshop where everyone posts a photo of their workspace before a build starts; seeing others prepared nudges you to do the same. Try this:
1) Take a single photo of your setup and share it in the group channel.
2) Note one safety or readiness item you checked.
3) Reply to two teammates’ posts so the habit sticks.
Teammates model best practices you can copy quickly. If a senior partner always labels parts and times each step, you’ll mimic that to keep pace. Practice this method:
1) Watch one teammate for a full run-through.
2) Write down their three most helpful actions.
3) Repeat those actions the next three times you set up.
Clear norms reduce second-guessing before action. In a lab that requires a pre-run sign-off, the rule removes doubt about whether you missed something. Enforce this by:
1) Agreeing on one short sign-off phrase.
2) Using it every setup.
3) Logging who signed off and when.
If your group ignores setup, you’ll slip too, so pick one corrective move you can do alone. For instance, start a private checklist you update and share weekly. Steps:
1) Create a two-column checklist: Required / Optional.
2) Complete Required before any task.
3) Share the Required column snapshot with a teammate once a week.
Real change comes from small, repeated cues your team gives and follows. Try one of the numbered actions above this week and track three consecutive days of completion.
Is Setup Discipline Different for Competition Versus Practice?
The difference between competition and practice comes down to how you manage your headspace.
Why it matters: your setup routine affects performance under pressure and skill retention. In competition, you want a compact, repeatable sequence; in practice, you want variability so your skills hold up in different situations.
How I change the setup — step-by-step:
- Competition: use mental rehearsal to tighten your routine.
- Before a round, close your eyes for 60–90 seconds and run the exact steps in order: stance, grip, breath, visual target, trigger (or equivalent).
- Example: a shooter pictures the target, counts one slow breath, sets the sights, and squeezes at the same breath point. That single-minute rehearsal reduces nerves and keeps your actions consistent.
- Change lighting, noise, and timing every 10–15 minutes so you don’t rely on one cue.
- Example: practice a golf short game with different tee positions, alternate between music on and silence, and switch from a 30-second to a 90-second routine between shots to simulate different pressures.
- Run a mock competition session with your competition mental-rehearsal routine, then immediately follow with variable-practice drills for 20–30 minutes.
- Example: after a simulated match, spend 25 minutes doing the same skill in rain, wind, or with a stopwatch to force adaptation.
- Time your mental rehearsal: 60–90 seconds works well.
- Change one variable every 10 minutes in practice.
- Keep a one-page checklist of your competition steps and rehearse it before showing up.
Quick tips you can use tomorrow:
If you do this, your competition routine gets reliable and your practice builds resilience under different conditions.