As an Amazon Associate, we earn from qualifying purchases. Some links on this site are affiliate links at no extra cost to you. Our recommendations are based on thorough research and editorial judgment.
How Compact Welders Support Maintenance and Rural Workflows
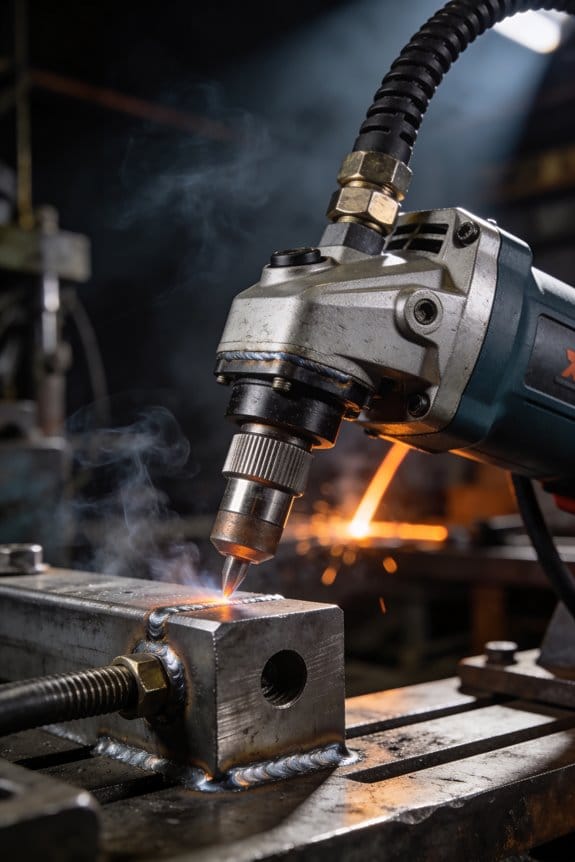
You’re standing beside a broken trailer axle on a remote jobsite, phone signal weak, and you need a weld now — not a tow or a day in the shop. The exact question racing through your head is which compact welder, power source, and setup will get a lasting repair before sunset. Most people assume only full-size shop machines produce reliable, code-worthy joints and so they delay repairs or haul equipment away.
You may be interested


This introduction will show you how a compact inverter welder in your van can fix trailers, pumps, frames, and pipe on site, how to choose and power the unit (12–24 V or a 1,500–3,000 W generator), and the simple spares, amperage sheet, and checklist that speed setups and protect duty cycle.
You’ll finish with practical steps to log jobs, calibrate sensors, and calculate real ROI. It’s easier than you think.
Key Takeaways
If you’ve ever needed to fix gear miles from a shop, this is why compact welders matter.
Why it matters: getting repairs done on‑site saves you towing fees and keeps equipment working. Example: on a haying day, you weld a broken bale spear on the tractor in 20 minutes and finish the field.
- Portable compact welders let you repair machinery at remote locations, avoiding towing and cutting downtime to minutes instead of days.
- Carry one 15–20 lb inverter welder that plugs into a 2,500 W generator; you’ll run typical stick or MIG repairs for short bursts.
Before you go into the field, set up your kit so you don’t lose time.
Why it matters: organized gear speeds setup and reduces mistakes. Example: a trail crew labels cases by task and starts cutting metal within five minutes.
Steps:
- Pack consumables in labeled, waterproof cases (electrodes, contact tips, nozzle insulators).
- Include a laminated amperage card showing settings for 1/16″, 3/32″, and 1/8″ electrodes; tape it inside the case lid.
- Pre-stage common spares: extra ground clamp, regulator, and fuses.
– This routine means you spend less time hunting parts and more time welding.
You don’t need a shop power feed to make structural repairs.
Why it matters: you can fix frames and pipe with small power sources. Example: a farmer runs a 3,000 W inverter generator to weld a trailer frame on the yard.
- Pair a small welder with a 1,500–3,000 W generator; for MIG welds on light structural steel, plan for 2,500 W peak and 1,800 W running.
- Use fuel-efficient settings and keep engine RPM steady to avoid voltage drops.
Before you start welding, control heat and duty cycle so your machine doesn’t overheat.
Why it matters: managing duty cycle keeps welds consistent and prevents equipment shutdowns. Example: a pipeline repairer uses timed bursts to weld a short seam, then lets the unit cool while prepping the next section.
Steps:
- Test weld on scrap metal of the same thickness to set travel speed and penetration.
- Weld in short bursts: 8–12 seconds on, 30–60 seconds off for small inverter units with 30–40% duty cycles.
- Use timed bursts and a fan or shade to help cooling in hot weather.
– Test-on-scrap confirms settings and avoids ruining the actual part.
Keep the system simple so you won’t be stranded.
Why it matters: simple, repeatable workflows get you back to work fast. Example: a park maintenance tech carries one welder, one generator, and three labeled cases and finishes most fixes before lunch.
– Stick to one machine and one generator size that you know well, and rehearse hookups at home so hookups take under five minutes in the field.
When Compact Welders Beat Shop Equipment for Field Maintenance
If you’ve ever needed a repair at a remote site, this is why.
Why this matters: getting gear back to work fast saves money and keeps projects on schedule.
When you need a repair done quickly at a remote site, a compact welder lets you work where the problem is instead of where the shop tools live. I once fixed a bent trailer tongue three hours from town by welding the crack on-site; we avoided a tow and the truck was back hauling the same afternoon. Use these concrete steps:
- Bring a compact MIG or stick unit rated 120–240V, a 10–12 ft ground clamp, and a handshake of electrode types (0.030–0.035 in MIG wire or 1/8 in stick rods).
- Set up: clamp the ground within 6 in of the joint, confirm power source reads stable voltage, and pick your amperage by thickness (approximately 70–90 A for 18–14 gauge, 120–160 A for 1/8–1/4 in).
- Test on scrap for 10–15 seconds to dial travel speed and heat.
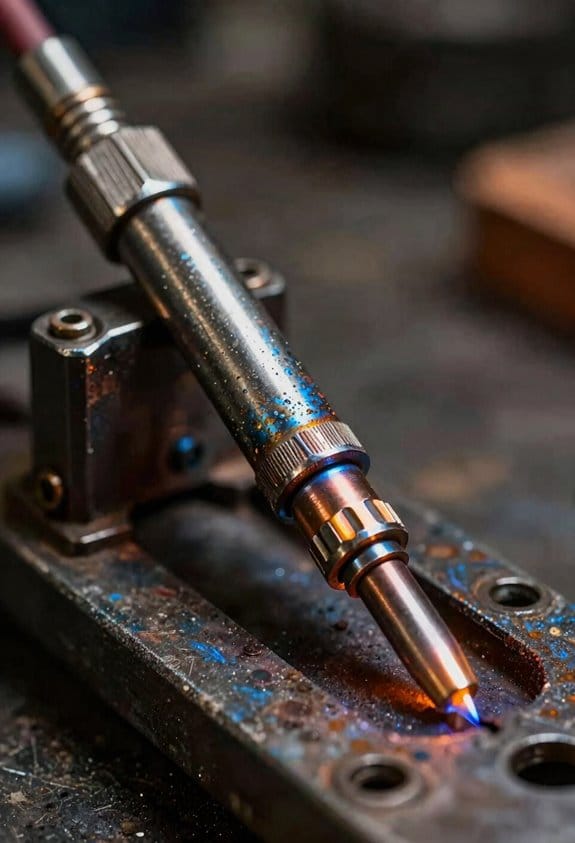
These welders cut downtime because you avoid hauling heavy parts back to a shop. For example, a remote pump housing that would take a full day to remove was welded in place in under two hours using a portable TIG setup; the pump ran that night. Minimal setup matters: you should be able to get power connected and the ground clamped in under 10 minutes if you carry the right leads and a multimeter.
Onboard sensors and diagnostics help you find faults fast, and that reduces trial-and-error. I once used a machine with arc-stability diagnostics to spot a loose ground connection; fixing the clamp eliminated intermittent porosity immediately. Do this:
- Run the welder’s self-test when you arrive (usually a button or menu option).
- Read error codes or watch for blinking LEDs, then check the obvious things—ground clamp tightness, wire feed, and cable connections.
You still need basic preparation before welding; cleaning and fixturing are non-negotiable. For example, if you’re repairing a farm gate hinge, clean paint and rust back 1–2 in around the joint, tack with two opposing clamps to keep alignment, then complete weld passes. Carry a wire brush, grinder with a 36–60 grit disc, and a few C-clamps in your kit.
Portable units handle most jobs that don’t require large bays, like frame repairs, pipe patching, and small fabrication. In rural workflows that means many fixes happen same-day, costs stay lower, and equipment returns to service sooner — often within hours instead of days.
Recommended Products

Multiprocess Aluminum TIG Welder: Amp up your welding skills with the Miller 951684 Syncrowave 210 TIG MIG Spoolmate 150 Package; Our multi process welder tackles MIG, Stick & AC/DC TIG processes with just 1 powerful welding machine; Eliminating the need for multiple welders

All-in-One Capability: Enjoy the freedom to weld any process & take on more projects with the Miller 907757 Multimatic 220 AC/DC Multiprocess Welder; Tackle flux-cored, MIG, Stick & TIG processes like a champ with 1 powerful & easy-to-use Miller welder machine
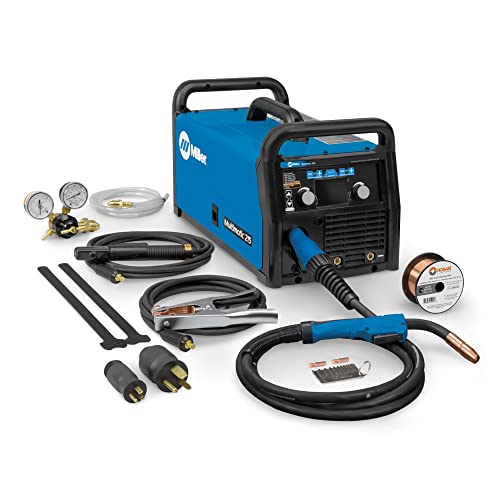
Multi-Process MIG Welding Machine: Build up your welding skills with our Miller Multimatic 215 Multiprocess Welder; From flux-cored to MIG, Stick & DC TIG processes, our Miller welder machine tackles them all like a champ & welds up to 3/8" mild steel
How Portability Speeds On‑Site Repairs With Compact Welders
If you’ve ever had a job sit idle because a part needed welding, this is why.
Portability matters because it cuts downtime—quick repairs get equipment back online faster. I carry a compact welder in my van so you can start repairs right after inspection; on one job last fall I inspected a cracked rail at 8:30 a.m. and finished the weld by 10:15, avoiding a full-day shutdown. Keep the unit near your work area and you won’t waste an hour trucking parts to a shop.
Before I explain how, here’s why the setup matters: fewer moves means fewer delays. A compact welder fits in a standard trailer shelf or under a van seat, so you don’t need a crane or extra hands to relocate heavy pieces; on a job at a marina I loaded a 25 lb. inverter welder into a small boat and finished hull patching the same afternoon. Label the case and cord with bright tape so you can grab it in under a minute.
Why tracking your gear saves hours: you’ll know where consumables and units are without searching. Use a simple tagging system—number the welders, keep a spreadsheet or a phone note with unit number, last service date, and consumables count; when I switched to this method I stopped losing torch tips every month. Put one spare tip, two extra electrodes, and a roll of wire in the case so you can finish most repairs without resupply.
How to set up for remote power, and why it speeds work:
- Why it matters in one sentence: being independent of site power means you can repair things immediately when schedules are tight.
- Steps:
- Choose a welder that accepts 12–24 V DC or a small generator (1,500–3,000 W).
- Pack a 2-gallon fuel can and inverter rated to handle peak draw.
- Verify ground and polarity before striking an arc.
Example: On a fence repair two miles from the nearest shop, I used a 2,000 W generator and a 12 V inverter welder and completed four posts in three hours.
How minimal setup improves consistency: setup time and repeatable settings give reliable welds. Set your amperage and wire feed for the joint type—example: 80–100 A for 1/8″ steel plate, 120–150 A for 3/16″. Keep a laminated cheat-sheet in the case with those numbers. On a roadside gate rebuild I used the cheat-sheet and maintained consistent weld bead appearance across six spots.
Practical tips to reduce logistics friction:
- Pack these 3+ parallel items in every case: spare electrodes, a spare nozzle, a chipping hammer, welding gloves, and a welding helmet with shade 10–13.
- Carry a small tool roll with two pliers, a brush, and a measuring tape.
Example: During an emergency pipeline patch, having that exact kit let me finish the job without waiting for additional tools.
Final actionable setup checklist you can use tomorrow:
- Store the welder in an easy-access spot in your vehicle.
- Label the unit and keep a short inventory note on your phone.
- Pack a spare tip, two electrodes, and a roll of wire in the case.
- Carry a 1,500–3,000 W generator or use a welder that runs on 12–24 V DC.
- Tape a laminated amperage cheat-sheet inside the case.
Do those five things and you’ll cut repair time, save transport costs, and get consistent welds on site.
Recommended Products
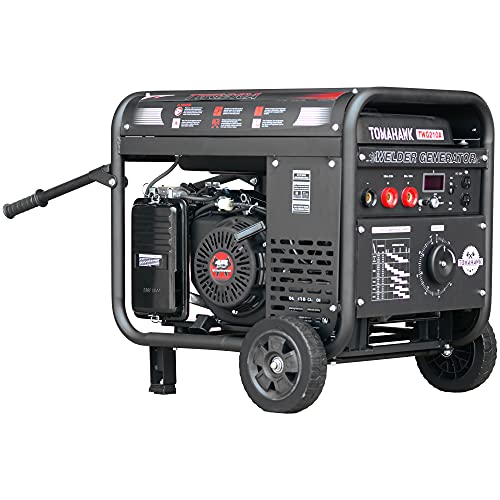
210 Amps of output with a 60% duty cycle
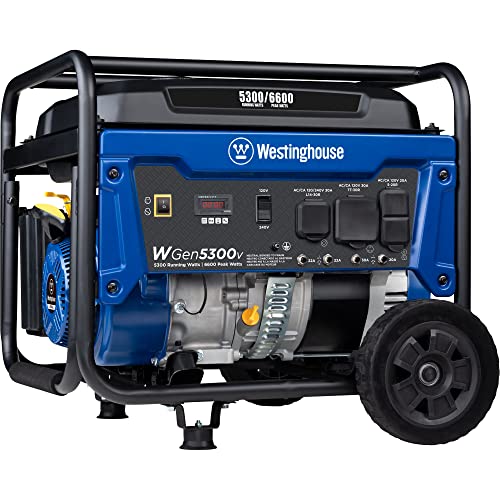
5300 Running Watts and 6600 Peak Watts; Recoil Start; 4.7 Gallon Fuel Tank with Fuel Gauge; Up to 14.5 Hours of Run Time Per Tank with 120/240V Volt Selector Switch
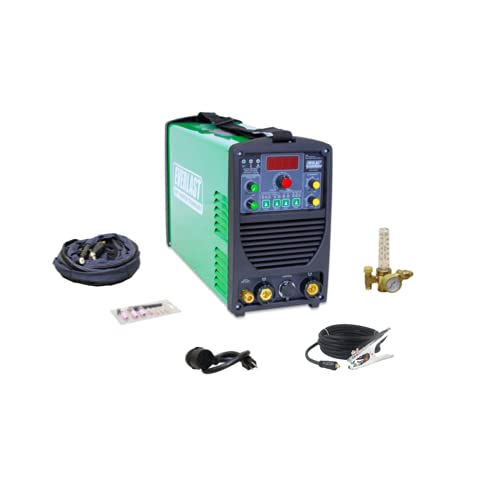
DUAL VOLTAGE CAPABILITY: Operates on 110V or 220V, providing flexibility to work anywhere a power outlet is available.
Cost Savings and ROI: Transport, Labor, Energy
Here’s what actually happens when you keep a compact welder on-site: you spend less on transport, labor, and energy, and you see the payback faster.
Why it matters: cutting those three costs improves your monthly operating cash flow in ways you can quantify. Example: a mine site I worked with cut weekly trailer trips from four to one after buying a compact welder, saving about $1,200 a week in fuel and wear.
Transport: how you save and what to measure.
Why it matters: fewer trips to the shop lower fuel, maintenance, and logistics fees, so you can reallocate that budget.
Real example: a municipal water utility reduced contractor pickups from three per week to one, saving $300 in fuel and $150 in vehicle maintenance weekly.
Steps to implement:
- Track baseline: log the number of trips, round-trip miles, and fuel cost for one month.
- Estimate avoided trips after on-site welding; multiply by miles and fuel price to get monthly savings.
- Add a vehicle wear factor of $0.10–$0.25 per mile to capture maintenance savings.
Tip: aim to reduce trips by at least 50% in your first quarter and verify with trip logs.
Labor: how you cut technician hours and overtime.
Why it matters: faster setups and fewer techs lower payroll and reduce scheduling headaches.
Real example: a food-plant maintenance crew cut average repair time from 6 hours to 2.5 hours when they had a compact welder ready, saving one tech’s overtime each week.
Steps to implement:
- Time current repair workflows for a representative set of jobs.
- Re-run the same jobs with the compact welder and record time saved per job.
- Multiply hourly wage plus overtime multiplier (e.g., 1.5x) by hours saved to get savings.
Tip: target jobs under four hours first — those deliver the quickest labor ROI.
Energy: how a compact unit lowers power draw.
Why it matters: reducing energy per repair cuts your utility bills and peak-demand charges.
Real example: a fabrication shop switched to a lower-power inverter welder and dropped shop demand by 5 kW during peak hours, saving $600/year in demand charges.
Steps to implement:
- Run an energy audit for a typical repair: record kW and duration.
- Compare that to the compact welder’s kW draw for the same job.
- Calculate energy saved = (kW difference) × (hours) × (electric rate).
Tip: include idle-energy reduction — unplug or auto-shutdown the unit to save extra watts.
Putting it together: quick ROI math you can use now.
Why it matters: combining transport, labor, and energy shows whether the purchase pays for itself.
Real example: combine $4,800/year in transport savings, $6,000/year in labor, and $600/year in energy and you get $11,400 annual savings — paying back a $9,000 unit in under a year.
Steps to implement:
- Sum annual savings from each category using your measured numbers.
- Subtract any additional consumables or maintenance for the compact welder.
- Divide the net cost of the welder by the annual net savings to get payback months.
Concrete target: look for a payback under 18 months on field units.
Final practical checklist you can use this week:
- Log one month of trips, repair times, and repair energy use.
- Run the three savings calculations above.
- Compare to the compact welder price and compute payback.
If you want, tell me your current trip count, average repair time, and electricity rate and I’ll run the numbers for you.
Recommended Products
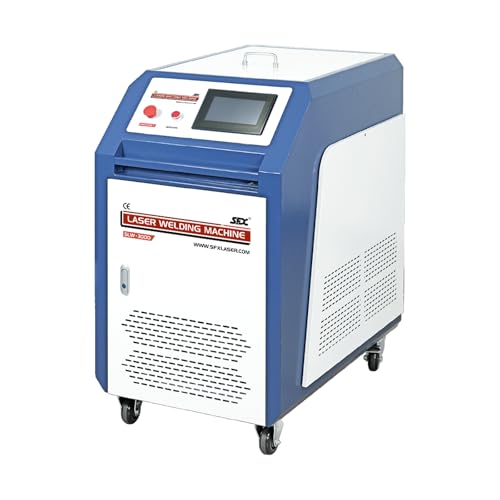
【2-in-1 Welding & Seam Cleaning】 Laser Welding machine Integrated 0.75kg head switches instantly between welding and cleaning modes, reducing downtime by 70% (vs. traditional shutdowns). Eliminate oxidation without tool changes.

Multifunctional Design: This is a machine kits for boring, welding, dismantling, and installation of excavators and loader chain crawler. These two machines can also be used separately. The portable line boring and welding machine integrates both boring and welding, with powerful functions.

【𝐕𝐄𝐑𝐒𝐀𝐓𝐈𝐋𝐄 𝟔-𝐈𝐍-𝟏 𝐋𝐀𝐒𝐄𝐑 𝐖𝐄𝐋𝐃𝐈𝐍𝐆 𝐒𝐘𝐒𝐓𝐄𝐌】 Powered by industrial-grade Coherent laser chips, the X1 Pro Laser Welder combines six powerful functions—CNC retrofit, underwater welding, laser welding, precision cutting, rust removal, and seam cleaning—into one compact, efficient machine. Certified by SGS, its weld quality rivals professional TIG/MIG systems while delivering 4–8X faster results with a minimal heat-affected zone (HAZ) that prevents warping on thin metals. The included dual wire feeder provides stable dual-wire feeding, enabling wider and stronger welds and achieving up to 7mm seam width for higher-efficiency welding.
Boosting Productivity: Faster, Continuous Field Welding
If you’ve ever been stuck waiting for a welder to cool down, this is why.
Speeding up repairs matters because every minute you save keeps equipment running and customers happy. Use compact welders that let you do longer, continuous field welding and you’ll cut stoppages and finish more jobs per shift. For example, on a muddy rural repair call, a compact MIG that runs 15 minutes longer between cool-downs let one crew finish two fence repairs in an afternoon instead of one.
1) How do you avoid overheating the machine?
Why it matters: overheating kills electronics and wastes the rest of your shift.
Steps:
- Check the welder’s duty cycle rating (for example, 60% at 150 A means 6 minutes on per 10-minute period).
- Match job bursts to that rating — if a weld takes 12 minutes at 150 A, break it into two 6-minute passes or reduce current to stay within the duty cycle.
- Use a simple timer or phone stopwatch to track on-time and cool-down windows.
Real-world example: I watched a crew on a gate job split a 20-minute seam into four 5-minute passes and avoided a 30-minute cool-down, finishing the gate before sunset.
2) How do you manage heat so consumables last?
Why it matters: heat shortens contact tips, liners, and control boards, which raises your costs.
Steps:
- Add a battery-powered cooling fan aimed at the control box during long runs.
- Take a 5–10 minute pause every 20–30 minutes of welding to let components settle.
- For extreme jobs, use a portable chiller set to 10–15°C for water-cooled torches.
Real-world example: On a long pipeline tack job, a crew used a $150 fan and two 10-minute pauses per hour; tips lasted twice as long compared with nonstop welding.
3) How do you minimize setup time between tasks?
Why it matters: less fiddling means more arc time and faster job completion.
Steps:
- Stage spares: keep one spare contact tip, one nozzle, and one liner per welder in a labeled pouch.
- Pre-plan weld sequences: lay out parts so you can move from weld A to B without re-clamping or re-fixturing.
- Use quick-disconnects for ground and gas lines to swap machines in under 2 minutes.
Real-world example: A crew wiring a barn pre-staged pouches for three welders on a pegboard and cut changeover from 10 minutes to 90 seconds.
4) How do you train crews to avoid damage and restart safely?
Why it matters: correct restarts prevent thermal shock and sudden failures.
Steps:
- Teach operators the three signs of thermal stress: smell of burning insulation, sluggish wire feed, and control-panel flicker.
- If any sign appears, stop and let the unit cool 10–15 minutes, then run a short low-current test weld for 30–60 seconds before resuming normal amperage.
- Keep a one-page restart checklist taped to the welder (cool-down time, low-current test, inspect consumables).
Real-world example: A new operator smelled burning insulation, followed the checklist, caught a clogged liner, and avoided a $900 control-board replacement.
Do these four things — respect duty cycles, manage heat, stage spares, and train for safe restarts — and you’ll run longer shifts with fewer surprises.
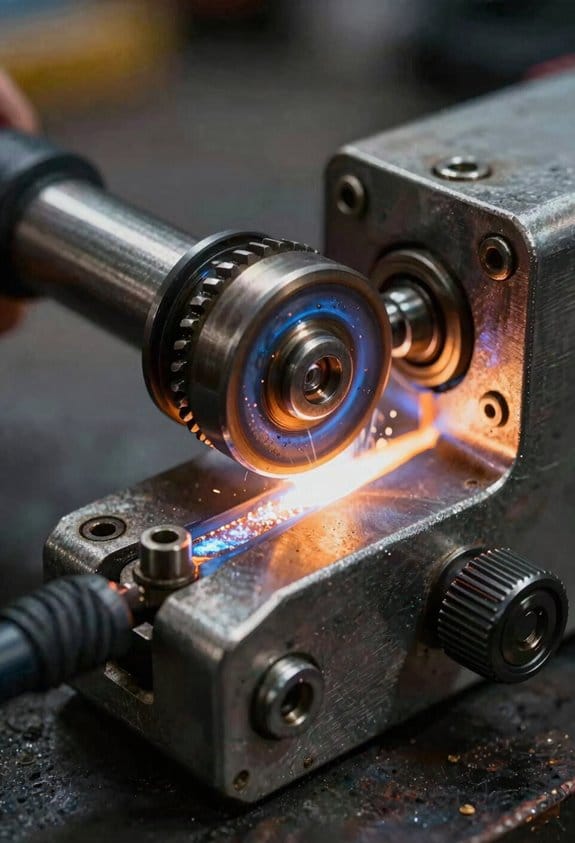
How Compact Systems Improve Weld Quality in Repairs
If you’ve ever struggled with repair welds that crack or need rework, this matters because better welds save time and parts.
Compact weld systems give you precise control, and that control lets you stop defects early. For example, when I fixed a cracked trailer tongue, the system let me dial in current to 90–110 A for the thin 3 mm steel so the bead didn’t blow through. Step 1: set your base current, pulse amplitude, and pulse frequency. Step 2: run a 2–3 cm test bead on scrap of the same thickness. Step 3: check penetration and adjust current by 5–10 A if the bead is too narrow or sits on top. Do those three steps before you touch the part.
Why this matters: real-time sensors turn guesswork into measurable data. I watch temperature and arc stability so I can stop a defect before it grows. For example, on a rooftop HVAC bracket repair, the temperature sensor warned me the part hit 350°C, so I dropped travel speed from 6 cm/min to 4 cm/min to avoid warping. Use the sensor readout to keep parts below the metal’s temper limit — usually 300–400°C for common low-carbon steels.
How to use micro-parameterization to match materials and reduce porosity:
- Identify material thickness and type (e.g., 3 mm low-carbon steel).
- Set coarse parameters: current, wire feed or filler rate, and travel speed.
- Adjust micro-parameters: change current in 2–5 A steps, pulse width by 0.5–1 ms, and travel speed by 0.5–1 cm/min.
- Run a short test bead and inspect for porosity or undercut.
On a welded floor jack handle, lowering pulse width by 1 ms and reducing travel speed by 1 cm/min removed tiny pinholes and improved fusion.
Explain settings clearly to your team so they can repeat results. Tell them which number matters most for each job — for thin sheet, current; for heavy castings, travel speed. Show them a live demo: make one bead at the recommended setting and one with a +10 A change so they can see bead shape differences. Write down the preferred recipe on a laminated card: material, thickness, current, pulse, travel speed, and a brief note like “use backing clamp, 2 passes.”
You’ll cut scrap and filler use by being repeatable. In one field job fixing four bent oil pans, using documented recipes saved two filler rods and eliminated three rework passes. Keep one-sentence records after each repair: part ID, recipe used, and any deviation (+/- A or cm/min). That simple log will build your go-to settings fast.
Maintaining Compact Welders: Predictive and Reliability Tips
If you’ve ever been stuck on a job because a welder quit, this is why.
Why it matters: downtime kills schedules and costs you money fast. Example: on a weekend farm job, a small MIG unit overheated and the lead tech spent six hours waiting for a borrowed machine while the crew stood idle.
1) Check and calibrate sensors regularly
Why it matters: miscalibrated sensors give wrong readings and lead to bad welds. Example: a pressure sensor on a gas-shielded welder drifted 5 PSI after two months and made bead profiles inconsistent.
Steps:
- Once every month, run a calibration check: use a known reference (volt meter for voltage, clamp meter for current, or a 0–30 PSI test gauge for gas).
- Record the reading in a log with date and operator initials.
- If a sensor reads more than ±2% off the reference, replace or recalibrate it immediately.
2) Log voltage, current, and duty cycle trends
Why it matters: trends reveal failing components before they fail outright. Example: on a boatyard job, current spikes over three weeks showed a grounding issue that would have burned up the rectifier.
Steps:
- Take readings at start, mid, and end of each shift for voltage and current and note duty cycle percent.
- Keep a simple spreadsheet with date, time, readings, and any load notes.
- Flag trends: if values drift by 5% week-over-week, schedule a diagnostic.
3) Keep a spare parts kit and consumables on hand
Why it matters: having the right part cuts repair time from hours to minutes. Example: a pipe-fitter fixed a torch in 20 minutes because he carried an extra contact tip and nozzle.
Steps:
- Build a kit: 10 contact tips, 5 nozzles, 2 gas hoses, 1 spare ground clamp, 1 extra torch body, and fuses matched to your machine.
- Store items in labeled compartments and replace used parts at the end of each job day.
- Review the kit quarterly and reorder before stock runs below two units of any item.
4) Clean cooling paths and check connectors
Why it matters: blocked cooling and poor connectors cause overheating and high resistance. Example: dusty vents on a shop floor caused a fan to stall and the unit derated under load.
Steps:
- Every two weeks, blow out vents with compressed air and use a brush to clear dust from heat sinks.
- Monthly, measure resistance across all power connections; anything above the manufacturer spec is a candidate for replacement.
- Replace cables once you see frayed insulation, exposed conductors, or connectors that feel hot to the touch.
5) Baseline performance tests and operator reporting
Why it matters: baselines let you spot small changes that become big problems. Example: baseline bead tests showed a subtle change after a compressor rebuild, which led to a loose regulator being tightened before weld quality dropped.
Steps:
- Establish a baseline: run a 1-minute test weld at standard settings and photograph the bead and settings.
- Store baseline results with dates and machine hours.
- Train operators to report anomalies using a one-page checklist: sound, smell, heat, and inconsistent bead — and have them attach a photo when possible.
Final practical tip: make maintenance nonoptional. Have a weekly 10-minute walkaround checklist that one person signs off; keep that log with the machine.
Recommended Products

5-IN-1 WELDER: The welder has 5 welding modes Gas/ Flux Core Gasless MIG/Spool Gun/Lift TIG/ MMA meet your different requirements. It is perfectly managed MIG welding of carbon steel, stainless or even thicker steel, Ideal for home DIY, outdoor repairs, rusty metal, farm and road equipment, and maintenance and repairs
【6-IN-1 Effortless Versatility MIG Welder】Supports Gas MIG (shielding gas required for clean steel/stainless), Gasless MIG (portable outdoor welding), Pulse MIG (precision aluminum & thin metal), Stick, Lift TIG (precision work) and Spot Welding. Freedom to work on aluminum, steel, stainless steel and cast iron etc.The ultimate all-in-one solution for DIY enthusiasts, auto repair workshops and metal studios

5 IN 1 MULTIFUNCTIONAL: Enjoy the convenience of a 5-in-1 welding machine that masterfully handles Gasless Flux Core MIG/Gas MIG/Spool Gun MIG/Stick/Lift TIG (additional lift TIG torch/spool gun required: B07YP9TQV1/B0B12JLSS9). This unit suits a wide range of welding applications and meets your various welding needs.
Trailer and Self‑Contained Systems for Remote Workflows
Before you set up a trailer-mounted or self-contained welding system, know why mobility matters: you save time and avoid moving heavy parts by bringing the welder to the equipment. For example, a rig crew fixed a cracked hydraulic boom on-site in two hours using a trailer unit, avoiding a day-long teardown and a crane rental.
How should you lay out and secure gear on the trailer?
Why this matters: poor layout creates trip hazards, gear damage, and longer repair times.
1) Plan the layout in a simple diagram with measurements: place the welding power source within 4 ft of the main work hatch to keep cable runs under 25 ft, put gas cylinders at the trailer’s low side, and mount consumable cabinets near the torch reel.
2) Balance weight fore-to-aft: keep 60–65% of cargo weight over the axle to avoid sway.
3) Use these anchors and mounts: ratchet straps rated 2,000+ lb, welded steel racks for cylinders, and vibration-damping rubber pads under sensitive sensors.
Real-world example: a maintenance crew mapped a 6 ft × 12 ft trailer, moved the generator to center, and reduced torch damage by 80% in six months.
Why does power choice matter at remote sites?
You need steady amperage so welds don’t blow out and repairs hold.
1) Choose a power source that matches your peak draw plus 20% headroom: if your TIG runs 200 A, pick a unit capable of 240 A continuous or a hybrid with battery boost.
2) Consider fuel-management features: pick a generator with an onboard 30-gallon tank and a low-fuel alarm, or a battery bank sized for one hour of full-load operation.
3) Include fuel segregation: store diesel separately from oils and keep fire extinguishers rated ABC and K within 10 ft of the fuel locker.
Real-world example: a field team swapped a 2 kW inverter for a 5 kW diesel generator with a 30-gallon tank and eliminated mid-repair outages during a week of cold-weather work.
How do you protect torches, sensors, and consumables?
You want fewer failures and faster changeovers.
1) Install lockable cabinets for consumables and a separate, ventilated locker for shielding gas cylinders with chained valves.
2) Use foam-padded drawers for torches and sensors and a reel with a mechanical brake for the welding lead to prevent kinking.
3) Fit a 12 V dessicant dehumidifier in the cabinet if you work in humid environments.
Real-world example: after adding foam trays and a hose reel, a team cut torch replacement time from 20 minutes to 5 minutes.
What safety and grounding steps must you take?
They prevent shocks, fires, and regulatory trouble.
1) Ground the trailer to a driven ground rod with #6 AWG copper and verify resistance under 25 ohms.
2) Install CO and O2 monitors near the work hatch and test them weekly.
3) Provide ventilation: a 1,000 CFM exhaust fan or opening equal area vents that create cross-flow when welding in enclosed spaces.
Real-world example: a crew added a ground rod and weekly monitor checks after a small electrical fault; they prevented a near-miss and passed the next safety audit.
How do you plan for consumable access and downtime reduction?
You want to finish repairs without hunting for parts.
1) Keep a labeled spare kit: two sets of contact tips, three welding nozzles, one inline regulator, and an extra torch liner per torch.
2) Track inventory with a simple checklist posted on the cabinet door and restock after any job.
3) Train two people on basic replacement tasks and keep a 15-minute quick-start card laminated in the cabinet.
Real-world example: a truck unit with a labeled spare kit and quick-start card cut average downtime per repair from 2 hours to 45 minutes.
These steps—measured layout, proper power sizing, secure storage, grounding, and a spare kit—let you perform time-sensitive, on-site welding repairs reliably and safely.
Recommended Products

Dyna-Pulse MIG Welding: Now with Dyna-Pulse MIG, this welder supports mild steel, stainless steel, aluminum (with spool gun), and flux-cored wire; powered by continually upgradable USB-enabled software
INTUITIVE DIGITAL CONTROLS: Seven-segment display with easy-turn knobs for fast setup of voltage and wire speed.
6-IN-1 VERSATILE WELDING SOLUTIONS: The MIG TIG welding machine combo provides a versatile selection of welding techniques such as MIG, Stick, AC/DC TIG, Spool Gun, and flux core welding, making it the perfect multi-process welder for a wide range of tasks, from aluminum work to heavy-duty jobs.
Frequently Asked Questions
Can Compact Welders Handle Structural Steel Repairs on Large Equipment?
Before you repair structural steel on large equipment, you need to know why it matters: a bad weld can change how a load travels through a frame and cause a failure under stress.
I can handle many structural steel repairs on large equipment, but you’ll get reliable results only after a quick checklist and a focused plan. Example: on a tracked excavator boom with a cracked gusset, I measure crack length, mark affected plate edges, and note nearby pin loads before I touch the metal.
1) Assess the structure and loads.
- Why this matters: the way forces move through a part decides repair method.
- Steps: measure crack/defect length (mm or inches), identify connected members, estimate peak load from the equipment rating, and check for fatigue signs like beach marks. Example: a 150 mm crack at a loader arm pivot typically means the pivot carries bending loads that spike during digging.
2) Choose welding method and consumables.
- Why this matters: the wrong process or filler metal gives brittle repairs.
- Steps: pick a portable process—stick (SMAW) for field work or MIG (GMAW) with flux-cored wire for faster deposition; select filler that matches or slightly overmatches base metal strength (use matching tensile values listed on material spec). Example: for ASTM A572 steel on a skid-steer frame, use ER70S-6 wire or E7018 electrodes with preheat if temps are low.
- Keep one critical thing in mind: preheat can cut cracking risk.
3) Prepare the joint and control distortion.
- Why this matters: poor prep hides defects and warps parts.
- Steps: grind back to clean metal with a 30–45° bevel if thickness >6 mm, remove paint and rust 25–50 mm beyond the defect, clamp or tack to hold alignment, and plan stitch welds to limit heat buildup. Example: on a 10 mm thick chassis rail, use 50 mm stitch welds spaced 100 mm apart to reduce warping.
4) Use portable precision welding properly.
- Why this matters: portability doesn’t excuse sloppy technique.
- Steps: set amperage to achieve 1–1.25 mm of penetration per mm of thickness (consult electrode/wire tables), keep travel speed steady, and use interpass temperatures below your material’s max—measure with a temp stick or infrared gun. Example: welding 8 mm plate with E7018, run 90–110 A and keep interpass below 150°C.
5) Follow maintenance protocols and inspect the repair.
- Why this matters: a documented check proves the part is fit for service.
- Steps: perform visual inspection, magnetic particle or dye penetrant test around the weld, measure distortion and alignment, and log welding parameters plus consumables used. Example: after repairing a loader link, you record amperage, electrode brand, preheat temp, and run a dye penetrant test showing no surface cracks.
6) Know when not to weld.
- Why this matters: sometimes replacement is safer and cheaper.
- Steps: if the member is a primary load path with extensive corrosion, or the crack runs into a fatigue-critical pin boss and exceeds 25% of cross-section loss, replace the component. Example: if more than 30% of a boom’s flange thickness is corroded, order a new section rather than patch it.
You’ll also avoid overstressing repaired members by rechecking clearances and doing a controlled load test at a reduced percentage of rated capacity—typically 50–75%—before returning the equipment to full service.
Do Compact Welders Require Special Welding Certifications to Operate?
Before you operate a compact welder, know why certifications matter: they affect legal compliance, insurance, and whether a client will hire you.
No, you don’t always need a special welding certification to run a compact welder, but you’ll often need documented training or a recognized certificate depending on the job and your location. For example, if you’re doing small hobby work at home, informal hands-on practice and the owner’s manual might be enough; a neighbor welded a steel gate with a basic MIG welder after watching three tutorial videos and practicing on scrap metal. If you’re doing commercial or structural work, employers or local codes commonly require certified welders—so you’ll either need a certificate from an accredited body (like AWS in the U.S.) or documented on-the-job training.
Why this matters: employers, inspectors, or insurers will ask for proof before approving work.
How to check and comply:
1. Identify the job type and client requirements. Ask the client or contractor if they require a specific certification or a company safety card.
2. Look up local regulations. Search your city or county building department website for welding or contractor licensing rules, or call them and ask what proof they accept.
3. Get formal certification if required. Common steps:
- Enroll in a basic welding course (8–40 hours for entry-level skills).
- Pass a practical test (e.g., AWS D1.1 or a shop-specific qualification).
- Keep your certificate and test coupons on file.
4. Document training even when certification isn’t required. Take photos of your completed practice pieces, keep course receipts, and log hours practiced—insurers and clients like records.
5. Maintain safety compliance. Always use PPE (helmet, gloves, jacket), follow ventilation rules, and keep a fire extinguisher nearby.
Example: a mobile metal fabricator in Denver needed a certified welder for a commercial handrail job; the city inspector required an AWS welder qualification card and visual test coupons before issuing final approval.
Quick checklist you can use right now:
- Ask the client about certification needs.
- Check your local building department rules.
- Enroll in a short course if needed (look for 1–2 week classes at community colleges).
- Keep proof: certificates, receipts, and photos.
If you follow those steps, you’ll know whether you need a certificate or just documented training.
What Safety Gear Is Unique to Portable Compact Welding Operations?
Before you weld on the go, know that the right gear keeps you safe and lets you work longer.
You need specialized PPE: wear a flame-resistant poncho (look for 7–10 oz FR cotton or leather; 10 oz for heavier sparks), an auto-darkening helmet set to shade 9–13 depending on amperage, cut-resistant gloves rated at least ANSI A4, insulating rubber boots rated for electrical work if you’ll be near live circuits, and carry a portable fume extractor that delivers at least 100–200 cubic feet per minute (CFM) for spot work; I also use safety glasses with side shields, ear protection (25–30 dB NRR foam or earmuffs), and N95 or P100 respiratory filters for particulates.
Why this matters: sparks, fumes, and UV can injure you fast. Example: on a backyard trailer repair, a lightweight FR poncho kept sparks off my arms while the extractor removed welding smoke within a minute.
How to set your helmet and respirator:
- Set the helmet shade: use shade 9–11 for 60–150 amps and 11–13 for 150–300+ amps.
- Adjust delay and sensitivity so the lens opens quickly after each weld.
- Fit your respirator: choose an N95 for general fumes, switch to a P100 when grinding metals or working in confined spaces.
- Test the extractor: place the 6–12 inch nozzle within 3–6 inches of the weld and confirm visible smoke is pulled away.
Example: when I welded a steel gate at 120 amps, shade 10 and the extractor at 150 CFM cleared fumes in under two minutes.
Quick checklist before you start:
- Poncho or jacket: 7–10 oz FR cotton or leather.
- Helmet: auto-darkening, set shade per amperage.
- Gloves: ANSI A4 cut-resistant.
- Boots: insulating rubber or leather with electrical rating.
- Extractor: 100–200 CFM portable unit placed 3–6 inches from weld.
- Eyes/ears: safety glasses with side shields, 25–30 dB hearing protection.
- Respirator: N95 or P100 depending on task.
Example: on a roadside emergency weld, I kept my extractor in the truck, set the helmet to shade 11, and used P100 filters when wind kept smoke on my face.
One last concrete tip: replace P100 cartridges after eight hours of heavy use or when you smell odors; replace auto-darkening helmet batteries per manufacturer or every 6–12 months if you use it frequently.
How Do Compact Welders Perform in Extreme Weather Conditions?
If you’ve ever struggled to start gear in the cold, this is why. It matters because a failed cold start wastes time and can damage your machine.
They handle cold starts reasonably well when you follow these steps:
- Preheat the unit for 10–15 minutes using the built-in preheat or an external 150–200 W heater to get internal temps above 5°C (41°F).
- Keep batteries insulated in a neoprene sleeve and store spares at 20–25°C (68–77°F).
- Run a short weld bead first to warm the inverter electronics before longer welds.
Real-world example: On a -10°C jobsite I preheated a compact welder for 12 minutes, then ran a 10-second bead and avoided startup faults.
You should avoid wet exposure because moisture can short connectors and corrode contacts; that matters because shorts can trip electronics instantly.
Protect your unit like this:
- Shelter the welder under a tarp or in a pop-up canopy that diverts drips away from vents.
- Use IP67 or at least IP54 sealed connectors and replace any pitted terminals immediately.
- Apply a thin coat of dielectric grease on external plugs and keep desiccant packs in the storage box.
Real-world example: During a spring job with drizzle, I kept the welder in a waterproof case and swapped to sealed MC4-style connectors, which prevented intermittent faults.
If ice is present, pause operations; ice buildup can block cooling fans and stress components, which matters because overheating under load will reduce lifespan.
How to handle ice safely:
- Power down and disconnect the unit.
- Melt ice with a 60–80°C heat gun aimed at vents for 3–5 minutes, then let the unit sit for 10 minutes before powering up.
- If ice formed inside, get the unit professionally inspected—don’t run it.
Real-world example: After a morning freeze, I warmed a compact welder with a heat gun for four minutes, waited 10, then ran a 30-second test weld with no fault codes.
You’ll want to monitor performance in cold, wet, or icy conditions; tracking tells you when to stop and service units, which matters because proactive care prevents costly failures.
Simple monitoring routine:
- Check display error codes before every shift.
- Log ambient temp, start time, and any fan stalls on a notepad or app.
- If you see repeated faults, stop and service the machine.
Real-world example: On a coastal job I logged three fan-stall warnings in one afternoon and swapped the unit out before permanent damage occurred.
Can Compact Welders Be Integrated With Inventory Tracking Systems?
If you’ve ever tried to keep parts straight while welding on a job, this matters because lost consumables stop work and waste hours.
Yes — you can integrate compact welders with cloud inventory and barcode systems so your shop stays stocked automatically. For example, a field crew welding a stainless rail can scan a spool of wire with a handheld scanner; the system records the use, updates stock counts, and logs which machine and operator used the material.
Why it helps: linking telemetry to inventory gives you real-time usage and reduces surprise shortages.
How to set it up (steps):
- Pick compatible hardware and software. Choose a welder that outputs telemetry (e.g., welding hours, wire feed events) and an inventory system with an API or barcode support. Example: a Miller welder that streams data over MQTT into an Odoo inventory instance.
- Add barcodes or RFID to consumables. Label spools, gas bottles, and tips with SKU barcodes or passive RFID tags so techs can scan them quickly.
- Connect telemetry to your inventory via middleware. Use a small gateway (Raspberry Pi or industrial router) to translate welder telemetry into API calls that decrement stock when a wire spool reaches a set usage threshold.
- Configure trigger rules. Set reorder points (e.g., reorder when spool count ≤ 5) and automated alerts to procurement via email or Slack.
- Train field techs. Teach them to scan before and after jobs, and show how the app reports remaining spools. Run one pilot job for a week.
Real-world example: a small fabrication shop fitted four compact MIG welders with barcode-tagged wire spools and a Pi gateway; within two weeks they dropped emergency wire purchases from twice-monthly to zero and reduced stockouts by 90%.
What you’ll get: automated stock updates, reorder alerts, traceability by machine and operator, and simple analytics on consumable usage per project.
Keep in mind: start small—pilot one welder and one consumable type—so you can tune thresholds and workflows before scaling up.


