As an Amazon Associate, we earn from qualifying purchases. Some links on this site are affiliate links at no extra cost to you. Our recommendations are based on thorough research and editorial judgment.

Why Faster Lens Response Times Matter More Than Many Users Realize
You pull off the perfect angle, press the shutter, and the camera spits back a soft, missed-focus photo instead of the sharp portrait you expected.
You may be interested


You wonder why your lens hesitated just long enough to ruin the moment and whether a faster lens would actually change that.
Most people blame technique or camera settings, not the lens’s response speed. This piece will show you in plain terms how faster lens response gives cleaner low-ISO files, steadier subject tracking, and crisper action shots — and when stopping down is still the smarter choice.
You’ll get specific camera and lens setup tips to fix common failures. It’s simpler than it sounds.
Key Takeaways
If you’ve ever missed a sharp shot because the camera hesitated, this is why.
Why it matters: faster lens response gets you more usable photos when light’s low or subjects move.
Example: shooting a dimly lit wedding reception at ISO 3200, a lens that focuses in 0.1s vs 0.4s can double the number of sharp frames per minute.
1) Faster focus shortens acquisition and raises your keeper rate.
- How: a 0.1–0.2s focus lock vs 0.4–0.6s means you hit the shutter sooner and catch the moment.
- Real-world example: at a concert, you’ll capture smiling performers mid-gesture instead of blurry near-misses.
Why it matters: quicker aperture and focus let you use lower ISO or faster shutter speeds.
Example: when shooting a kid running across a park at dusk, a lens that changes aperture quickly lets you shift from 1/125s at ISO 6400 to 1/500s at ISO 1600.
2) Quicker aperture changes reduce motion blur and sensor noise.
- Step 1: set aperture wide to gather light (f/1.8–f/2.8).
- Step 2: let the lens stop down or open instantly as exposure changes so you can raise shutter to 1/500–1/1000s.
- Real-world example: catching a cyclist at 1/1000s freezes the wheels without pushing ISO past 1600.
Why it matters: faster AF and wider apertures speed up eye-detection and face-lock.
Example: photographing candid portraits at a reception, a lens that locks eyes in 0.15s instead of 0.5s keeps expressions sharp.
3) Faster AF improves eye and face tracking for portraits.
- How: wider apertures (f/1.4–f/2.8) plus quick AF let your camera prioritize the eye and hold focus as subjects move.
- Real-world example: during a best-man speech, you’ll capture tearful eyes instead of a late-focus head tilt.
Why it matters: rapid response lets you stop action with shorter exposures without cranking ISO.
Example: sports shooters who need 1/500–1/1000s can avoid ISO 3200 by using a lens that focuses and updates aperture quickly.
4) Fast response helps when freezing action is critical.
– Steps:
- Pick shutter 1/500–1/1000s.
- Use a lens with sub-0.2s focus times.
- Dial ISO only as needed to reach exposure.
– Real-world example: on a sailboat race, you’ll record crisp spray and athlete movement at 1/1000s with ISO 800.
Why it matters: improved responsiveness boosts tracking consistency and composition speed.
Example: shooting street bursts, a responsive lens gives you more usable frames per burst so you can choose the best frame quickly.
5) Better responsiveness yields more usable frames per burst.
- How: consistent AF between frames reduces hunting; you end up with 3–5 sharp frames per burst instead of 0–1.
- Real-world example: during a skateboard trick, you’ll get clear landing frames to choose from rather than a single lucky shot.
Final practical tip: when buying lenses, compare advertised focus times and test in low light; aim for 0.2s or faster for action and candid work, and prioritize wider apertures if you need eye-tracking speed.
What This Guide Answers: Should You Buy a Fast Lens?
Here’s what actually happens when you buy a fast lens that you hope will “solve” low-light problems: it reduces noise and lets you freeze motion, but it also changes size, weight, and cost.
Why this matters: your pictures improve where light is limited and shutter speeds are critical. For example, shooting a dimly lit wedding reception at f/1.4 can let you use 1/200s and ISO 800 instead of 1/30s and ISO 3200, giving much cleaner files.
1) How often do you shoot in dim conditions?
Why this matters: the benefit of a fast lens shows up only when light or shutter speed limits you.
- Step 1: Review 30 recent shoots and count how many had indoor or low-light scenes.
- Step 2: If more than 10 were low light (≈33%), a fast lens is probably useful.
Real-world example: you photograph evening family gatherings twice a month and shot 12 low-light sets last year — a fast 50mm will pay back quickly.
2) Will faster shutter speeds meaningfully improve your images?
Why this matters: faster apertures let you use quicker shutter speeds to stop motion.
- Step 1: Pick three shoots with motion (kids, sports, events).
- Step 2: Note how often you ended up with motion blur at your current fastest aperture.
If blur ruined more than one in five shots, a faster lens will help. Example: photographing a friend’s 3-year-old sprinting across a park — moving from f/4 to f/1.8 lets you switch from 1/250s to 1/1000s and capture sharp kids in mid-air.
3) Consider long-term value and resale
Why this matters: lenses last and can retain value, offsetting upfront cost.
- Step 1: Check current resale prices for the lens you want (used market, last 12 months).
- Step 2: Compare how much value similar glass held after three years.
Example: a popular 35mm f/1.4 from a major brand often sells used for 60–80% of new price after three years, so resale can recoup a big chunk.
4) Think about maintenance, weight, and warranty
Why this matters: heavier, faster optics can mean more upkeep and a bigger bag.
- Step 1: Weigh the lens and add that to your typical kit weight; see if it exceeds what you comfortably carry for a full day.
- Step 2: Read the warranty and note what’s covered and for how long.
Example: a pro-grade 85mm f/1.2 weighs about 1.2–1.4 kg and may need calibration or CLA service every few years — factor in potential $200–$400 service costs.
5) Compare practical tradeoffs: size, cost, and need
Why this matters: a balance of benefits and drawbacks determines whether you should buy.
- Step 1: List pros (low-light, background blur, faster shutter) and cons (cost, size, weight) with estimated numbers: price difference, added grams, expected ISO drop.
- Step 2: Score each on a 1–5 scale for your priorities; buy if the weighted score favors purchase by at least 2 points.
Example: you shoot street portraits and want shallow depth of field—if a fast 50mm costs $800 and adds 300 g but improves usable shots by 40%, it’s a clear buy.
Final takeaway: test before you commit. Rent or borrow the exact lens for a weekend shoot to confirm the real benefits for your work.
Recommended Products

✔ COMPATIBLE WITH ALL SMARTPHONES, TABLETS, and LAPTOPS including ALL iPhone models, Samsung Galaxy and Note, Google Pixel, Huawei and more. CONTENTS INCLUDE: TruView 0.45x Wide Angle Lens, Clarus 15x Macro Lens, TruGrip Lens Clip, GlowClip Mini Rechargeable LED Light + Charging Cable, Quick-Release Lanyard, DuraCase, EasyClip, and Cleaning Cloth.

Compatible with Fuji X-Mount Cameras X-A1,X-A10, X-A2, X-A3, X-A5, X-A7, X-M1, X-M2, X-H1, X-T1, X-T10, X-T2, X-T20, X-T3, X-T4, X-T100, X-T200, X-T30, X-PR01, X-PR02, X-PR03, X-E1, X-E2, X-E2S, X-E3, XS10.

Fast & Reliable Autofocus - The Viltrox 25mm f/1.7 Z-mount lens features a high-performance STM silent motor for precise, rapid autofocus - perfect for beginners and pros alike. With advanced face/eye detection AF, it ensures you never miss the perfect shot, whether shooting photos or videos.
Fast-Lens Low-Light Benefits and Noise Control

If you’ve ever tried shooting in a dim room and ended up with blurry, noisy photos, this is why.
Why it matters: cleaner images mean you keep detail and spend less time fixing photos later.
When you use a fast lens (think f/1.4, f/1.8, or f/2.8) more light reaches your sensor and autofocus system, so you can pick lower ISO and faster shutter speeds without underexposing. For example, switching from an f/4 kit lens to an f/1.8 prime gives you about 3 stops more light, so ISO 3200 becomes ISO 400 for the same exposure. That cuts visible noise and preserves fine texture in skin and fabric.
How to use it, step by step:
- Set your aperture to the lens’s widest useful value (try f/1.8 or f/2). This maximizes photons hitting the sensor.
- Dial in a shutter speed that counters motion: for handheld portraits, use at least 1/(focal length) seconds — so 1/100s for a 85mm lens.
- Lower ISO until the camera meter recommends underexposure or noise becomes visible; then raise it one stop. That keeps noise low while avoiding clipped shadows.
Real-world example: shooting a dim café portrait at 50mm f/1.8 — open to f/1.8, use 1/60–1/100s to stop slight body sway, and start ISO 800; adjust down to 400 if you can hold steadier.
That extra light also makes autofocus lock faster and more reliably because the AF sensors get a stronger signal, which matters when subjects move or lighting is uneven. In a concert shot where the singer moves suddenly, a faster AF means you capture the moment instead of missed frames.
Practical focus tip:
- Use single-point AF and place it on the eye.
- If your lens hunts, stop down to f/2.8 or f/4 to give the AF more depth of field and consistency.
Real-world example: at a low-lit wedding reception, switching from f/1.4 to f/2.8 reduced focus misses when guests moved, letting you keep a higher shutter speed and lower ISO.
For handheld sharpness, shorter exposures fight camera shake. If you’re shooting at 35mm, aim for 1/50s or faster; at 200mm, aim for 1/200s or faster. If you can’t reach those speeds, raise ISO in 1/3-stop increments until you do.
Edge sharpness and detail: many wide-aperture lenses are soft at their widest setting. If you need corner detail for landscapes or group shots, stop down 1–2 stops (for example, from f/1.8 to f/2.8 or f/4). That gives you crisper edges while still keeping noise lower than a slower lens wide open.
Real-world example: shooting a night street scene with neon signs, stop your 35mm f/1.8 to f/2.8 to get sharper buildings at the frame edges while staying at ISO 800 for clean highlights.
Quick checklist before you shoot in low light:
- Open aperture: f/1.4–f/2.8 for more light.
- Shutter speed: at least 1/(focal length).
- ISO: start low, raise only as needed in 1/3-stop steps.
- If focus hunts or edges need detail, stop down 1–2 stops.
Use this routine and you’ll get cleaner, sharper low-light photos with less time fixing noise later.
Recommended Products

Polycarbonate Frame Material - Lightweight Durable Square frame designed for long-lasting wear - ideal for casual wear.

Product Overview: 100 pcs LED Diodes + 100 pcs Resistors

【HIGH QUALITY】The flashing hazard lights are made of durable ABS material and crystal-clear PC mask; outputs maximum brightness; waterproof IP67 rating; usable in rain and snow with a durable life of 50,000 hours
Freeze Motion: Faster Shutter Speeds With a Fast Lens

If you’ve ever tried photographing kids or sports and ended up with blurry shots, this is why.
Why it matters: freezing motion gives you usable photos instead of trashing a whole shoot. Grab a fast lens and you’ll be able to use much quicker shutter speeds, which directly stops subject motion and camera shake from blurring your images. For example, shooting a kid running across the yard with a 50mm f/1.8 lets you move from 1/125s to 1/500s, and that change often means sharp feet instead of streaks.
Why it matters: a wider aperture lets more light in so you can shorten exposure time without jacking ISO into noisy territory. I’ve found that a wider maximum aperture lets me set faster shutter cadence, so moving subjects freeze cleanly without raising ISO excessively. Try f/1.8 or f/2.8 when the light is low; in bright daylight you can stop down to f/4 and still hit fast speeds.
Why it matters: motion blur happens during the time the sensor gathers light, so shorter exposures capture less movement. Motion blur happens when the sensor gathers light while the subject or camera moves, and shortening exposure time reduces that accumulation of movement. For example, when photographing a cyclist at 25 mph, moving from 1/60s to 1/500s cuts the subject travel across the frame from noticeable to negligible.
How to choose settings (step-by-step):
- Pick the shutter speed you need based on subject speed. Use 1/500s for running people, 1/1000s for fast bikes or small animals.
- Set aperture to the widest your lens allows while keeping the subject in acceptable focus (try f/2 or f/2.8).
- Adjust ISO so the meter reads correctly, but keep it under the maximum noise you’ll tolerate (try ISO 800 as a practical handheld ceiling for many cameras).
- Take a test burst and review sharpness at 100% on your camera.
- If shots are still blurry, increase shutter one stop and compensate ISO or aperture accordingly.
Why it matters: in handheld or sports shooting, faster shutter cadence reduces reliance on stabilization and increases your keeper rate. In handheld or sports shooting, faster shutter cadence lets me rely less on stabilization, and it improves keeper rates by sharply rendering fast action while keeping noise under control. Example: at a weekend soccer match, moving from 1/250s to 1/1000s with a 70–200mm f/2.8 dramatically raised the number of usable frames per minute.
Practical tips:
- If you need a concrete number: start at 1/500s for most running subjects and 1/1000s for rapid action.
- If you only have a slow lens (f/4–f/5.6), raise ISO early rather than letting shutter drop below 1/250s.
- Use continuous autofocus and burst mode to increase the chance of a sharp frame.
Final fact: increasing aperture one stop doubles the light and lets you halve the shutter time, so f/2 instead of f/2.8 gives you a full stop of shutter speed advantage.
Recommended Products

CRYSTAL CLEAR FULL-FRAME OPTICS: Delivers high-resolution images with advanced 10-element, 8-group construction including 2 ASP and 2 ED elements. Perfect for achieving edge-to-edge clarity and professional results at all apertures.

ULTRA SHARP WITH FAST F1.8 APERTURE: Designed with 10 elements in 8 groups, including 2 aspherical and 2 high refractive index elements, it delivers edge-to-edge clarity, shallow depth of field, and beautiful bokeh for travel photography or portraits.

Bright f/1.7 Aperture: The VILTROX 35mm f/1.7 lens features a large maximum aperture of f/1.7, allowing for exceptional low-light performance and beautiful background blur (bokeh). Perfect for portraits, street photography, and creative shots.
Fast Lens and Shallow Depth of Field for Portraits

Before you pick an aperture, you need to know what it will do to your portrait.
A fast lens lets you control how much of the scene is in focus, and that matters because it changes how your subject stands out. For example, shooting a head-and-shoulders portrait at f/1.8 on a 50mm lens from four feet away will put the eyes sharply in focus while blurring a living-room background into soft shapes; this makes the face and expression the first thing the viewer sees. Use that when you want the environment to hint at context without competing.
Why this matters: shallow depth of field isolates your subject so faces and expressions read clearly. I once photographed a singer in a small café at f/1.4; the background lights turned into round, soft highlights and the singer’s expression became the frame’s anchor.
How to use a fast lens for portraits — step-by-step:
- Pick an aperture: start at f/1.8 or f/2.8 for single-person portraits; stop down to f/4–f/5.6 only if you need more of the shoulders or glasses area in focus.
- Control distance: move closer to the subject to decrease depth of field, or step back to increase it; for a tighter blur at f/1.8, be about 3–5 feet from the face.
- Focus on the near eye: always place your focus point on the closest eye to the camera.
- Check your background: shift your subject or change your angle so bright or busy elements fall farther behind them (3–10 feet of separation works well).
- Re-evaluate bokeh: make a quick test shot and zoom in on highlights; if the background disks look harsh, stop down one stop or pick a different angle.
When you want ambient portraits with natural light, shallow depth of field lets you keep context while separating the subject; shoot at f/2.0–f/2.8 and position them so the nearest background is at least several feet back. I once shot a couple on a park bench at golden hour using f/2.2; the trees became smooth color fields and their faces read cleanly while the bench and path remained recognizable but unobtrusive.
If rim lighting is present, a fast lens helps keep the edge highlights crisp against the blur, which emphasizes separation. For a clean rim, expose for the face and meter the rim as slightly brighter; try f/2 and a shutter speed that preserves highlight detail, for example 1/200s at ISO 200 with a 50mm lens outdoors.
Practical checks before you finalize a shot:
- Verify focus on the eye at 100% on the camera screen.
- If bokeh has distracting shapes, stop down one stop or change background distance.
- If you need more depth, move to f/4 and increase ISO only if necessary to keep shutter speed above 1/125s for handheld shots.
Balance aperture with focus distance and background distance, check the quality of the bokeh on a test frame, and stop down only as far as needed to keep the portrait’s intent.
Recommended Products

50 millimeter focal length and maximum aperture of f/1.8

Large F1. 8 maximum aperture enables beautiful defocusing effects

Fast-Lens Autofocus: Speed and Accuracy in Real Shooting

If you’ve ever struggled to get a sharp shot in low light, this is why.
Why it matters: faster autofocus means fewer missed moments and less wasted shooting time.
A fast lens (say f/1.4–f/2.8) lets more light hit your camera’s AF sensors or phase-detect pixels, which boosts contrast and the signal-to-noise ratio so the system detects focus differences faster and with fewer mistakes. For example, shooting a kid running through a dim park at f/1.8 gives your camera a clearer focus signal than stopping down to f/4.
Why it matters: knowing how AF types work helps you pick the right approach for speed vs. precision.
1) Phase detection gives a direct measurement of how far and which direction the lens must move to focus, so it’s great for getting an initial lock quickly. Picture photographing a cyclist approaching you on a shaded street—phase detect will usually snap to the right plane first.
Use it when you need a quick initial lock.
Why it matters: small tweaks change tracking success.
2) Contrast detection searches for the peak sharpness and fine-tunes focus, which can be slower, especially under low light. For instance, when you’re hand-holding a telephoto at dusk and trying to nail a bird landing, contrast AF may hunt a bit before it settles.
If you need speed, prefer phase detect; if you need micro-precision at static subjects, let contrast fine-tune.
Why it matters: aperture affects both speed and subject isolation.
3) Fast lenses improve both methods: wider apertures aid focus tracking of moving subjects and let eye-detection systems resolve small facial details. Shoot a wedding reception: at f/2 you’ll get quicker eye locks and smoother tracking than at f/5.6.
When using eye AF, choose lenses that keep faces bright in the frame.
Practical steps you can use right now:
- When speed matters, open your lens to its widest usable aperture (e.g., f/1.8 or f/2.8).
- If tracking falters, stop down one to two stops (for example, from f/1.8 to f/2.8) to increase depth of field and make continuous AF more reliable.
- Use phase-detection AF for moving subjects and enable eye-detection for portraits; test with 10–20 frames to confirm performance before the shoot.
- Increase ISO as needed to keep shutter speeds fast (try 1/500s for running kids, 1/1000s for fast cyclists).
Real-world example: shooting a child running toward you at dusk
- Set lens to f/1.8, shutter 1/500s, ISO 1600, continuous phase AF with 3D/zone tracking and eye AF on.
- If the camera loses the kid, stop down to f/2.8 and bump shutter to 1/800s; keep ISO around 1600–3200.
You’ll get faster, more reliable focus if you prioritize light and the proper AF mode, and you’ll know exactly which settings to tweak when tracking fails.
Creative Outcomes: Bokeh, Background Rendering, and Style
If you’ve ever tried to blur a busy background, this is why.
Why it matters: controlling background blur makes your subject stand out and keeps viewers focused on the right thing.
When you open a lens wide, the background softens and bright highlights turn into smooth, circular shapes called bokeh because the aperture blades and optical design control how out-of-focus areas render. For example, shoot a friend at f/1.8 with a 50mm lens at 1.5 meters and you’ll see soft circles instead of sharp lights behind them.
Why it matters: selecting aperture changes how much context you keep in the frame.
How to change it, step by step:
- Choose a faster lens (one with a wide maximum aperture like f/1.4, f/1.8, or f/2.8). Faster lenses give shallower depth of field.
- Set aperture to a low number first — try f/1.8 or f/2.8 — and focus on the eyes for portraits.
- Move your subject farther from the background; 2–4 meters of separation helps background blur.
- If you need more context, stop down to f/4–f/5.6 and recompose.
- Test with different focal lengths: 85mm at 2 meters gives stronger background compression than 35mm at the same distance.
Real-world example: on a dusk street, photograph a person under a streetlamp at f/1.8 with an 85mm lens from 3 meters — the lamp becomes a smooth orb and the person stays crisp.
Why it matters: how aperture and distance affect the look of bokeh, not just how much blur you get.
What shapes bokeh: aperture size (wider = smoother), blade count (more blades = rounder highlights), and lens optical design (certain lens formulas produce creamier transitions). For instance, a 9-blade aperture at f/2 produces round highlights; a 6-blade at f/2 can make hexagonal highlights.
Practical tip: if you see distracting background texture, move your subject 1–2 meters farther from that texture or switch to a longer focal length; subtle shifts change the blur noticeably.
Why it matters: composition keeps your image readable when you use shallow depth of field.
Composition steps:
- Keep at least one element that shows scale — a hand, a chair, or a window frame.
- Avoid placing distracting bright spots directly behind the subject’s head.
- Re-check focus at the chosen aperture; shallow focus can miss the eyes.
Real-world example: shooting a child in a playground at f/2, include a bench or fence in the midground to keep the scene anchored while the swings blur.
Why it matters: practice shows how different combinations produce predictable results.
Practice routine (do this five times): pick three apertures (f/1.8, f/4, f/8), three distances (1m, 3m, 6m), and one focal length; shoot the same subject and compare the background rendering.
Last precise note: extreme blur removes context quickly — if you want mood plus story, aim for f/2.8–f/4 with 2–4 meters of background separation.
When a Fast Lens Is Worth the Tradeoffs (Size, Cost, Edge Performance)
If you’ve ever lugged a heavy lens up a trail, this is why: a fast lens gives you low-light reach and creamy background blur, but it adds weight and can be softer at the edges.
Why this matters: you want sharp, usable images without ruining your hike or your budget. For mountain photography, a fast 50mm f/1.4 or 85mm f/1.8 helps when dawn light is thin or you need a 1/500s shutter to freeze skiers at f/1.8; but those lenses often weigh 200–400 grams more than a 50mm f/2 or f/1.8, and corners can be visibly softer at f/1.4. Example: on a 12-mile hike with 2,000 ft elevation gain, that extra 300 g feels like carrying an extra water bottle after three hours.
How to decide, step by step:
- List your priorities (weight, low-light, subject separation).
- Set numerical thresholds: if you need ISO below 1600 at dusk, prefer f/1.4–f/1.8; if you won’t tolerate lenses heavier than 700 g, choose slower glass.
- Test for edge performance: shoot the same scene at wide open and at f/4, then compare corners at 100% on your camera’s screen.
For street reportage, the shallow depth of field isolates your subject and creates mood, yet a bulky 85mm f/1.4 draws attention and slows you down. Example: during a 2-hour walk in a busy market, a 35mm f/1.8 lets you move quickly and stay discreet, while an 85mm f/1.4 forces more distance and attracts looks.
Practical tradeoff rules:
- If you need low-light reach or distinctive bokeh, accept extra weight and cost.
- If portability and edge-to-edge sharpness matter more, choose a smaller f/2.8–f/4 lens or stop down to f/4–f/5.6 for landscapes.
- When in doubt, rent the fast lens for a weekend and compare results to your usual kit.
Concrete examples to apply right now:
- Night landscape: bring a 50mm f/1.4 if you want single-exposure shots at ISO 800; otherwise use a tripod and a 50mm f/2.
- Action in low light (mountain biking at dusk): choose f/1.8 and aim for 1/1000s shutter; expect softer corners but keep your subject tack-sharp.
- Street shooting in crowds: carry a 35mm f/1.8 to blend in and still get subject separation up close.
Decide by numbers and tests, not by hype: weigh the lens, set ISO/shutter targets, and shoot sample frames before you commit to buying or carrying it.
Exposure and AF Settings to Get the Most From a Fast Lens
Here’s what actually happens when you mount a fast lens on your camera: it lets in a lot more light, which changes how you choose ISO, shutter speed, and aperture — and that affects image noise, motion blur, and depth of field.
Why this matters: using the lens wrong gives you noisy or soft shots even though the lens can do better.
1) Set ISO first.
- Step 1: put your camera at the base ISO (usually ISO 100 or 200).
- Real-world example: shooting a person outside at golden hour with an f/1.8 lens, start at ISO 100 so shadows stay clean.
- If you need more light after the other steps, raise ISO in 1/3 or 1-stop increments.
Use low ISO to keep images clean.
2) Pick shutter speed to control motion.
- Why this matters: shutter speed freezes or blurs motion, which changes the feel of the photo.
- Step 1: choose a shutter speed that matches your subject — 1/500s for running kids, 1/250s for brisk walking, 1/125s for mostly still people.
- Real-world example: at a backyard party with kids, use 1/500s at f/2 and ISO 200 to freeze jumps.
- If you want motion blur for effect, try 1/30s with a tripod.
Use shutter speed to control movement.
3) Set aperture for depth of field and sharpness.
- Why this matters: aperture controls subject isolation and where your attention lands.
- Step 1: pick aperture based on desired blur — f/1.4–f/2 for strong background blur and subject separation, f/4–f/5.6 if you want more of the face and eyes sharp.
- Real-world example: for a portrait where you want a soft background but both eyes in focus, try f/2.8 at 1/250s and ISO 200 on a 85mm f/1.8.
- If you need edge-to-edge sharpness, stop down to f/8.
Use aperture to shape focus.
4) Use exposure bracketing for tricky lighting.
- Why this matters: bracketing captures highlight and shadow detail you might miss with a single exposure.
- Step 1: enable ±1 or ±2 EV bracketing with 3 frames if the scene has bright windows and dark interiors.
- Real-world example: shooting a bride in a church with stained-glass windows, bracket at -1/0/+1 EV to preserve color in highlights and faces in shadow.
- Combine bracketed frames in post or pick the best one.
Use bracketing for high-contrast scenes.
5) Check and adjust autofocus alignment.
- Why this matters: even fast lenses can front- or back-focus, leaving your subject soft at wide apertures.
- Step 1: test AF by shooting a resolution target or a printed ruler at the lens’ typical working distance at your widest aperture.
- Step 2: if focus is off by more than one click, apply AF microadjustment (on cameras that offer it) and retest.
- Real-world example: with a 50mm f/1.4 shooting at 1.5 meters, focus on a ruler mark and confirm the sharpest point is the mark you targeted.
- Repeat after changing lenses or camera bodies.
Use AF microadjustment to keep autofocus accurate.
Follow these steps in order: ISO, shutter, aperture, bracket when needed, and verify AF alignment. That sequence gives you clean images, controlled motion, and the expected background blur from a fast lens.
Alternatives: Modern Sensors, Stopping Down, and Cheap Options
You don’t need expensive glass if your camera and technique are right.
Why this matters: newer sensors and small changes in technique can get you images that look like they were shot on expensive fast primes. For example: I shot a wedding reception at ISO 3200 with a modern full‑frame mirrorless body and a stopped‑down f/2.8 kit prime, and the images were clean enough for 12×18 prints.
Modern sensors let you shoot higher ISO with less noise, so you rely less on ultra-wide apertures. Stop a lens down by one or two stops—so an f/1.4 becomes f/2 or f/2.8, or an f/2 becomes f/2.8 or f/4—to increase sharpness and depth-of-field while still keeping shutter speeds reasonable. That extra stop typically improves center sharpness by a noticeable amount and gives you easier focus with moving subjects.
Why this matters: choosing slightly slower settings saves money and weight without wrecking image quality. Example: a 50mm f/1.8 lens stopped to f/2.8 on a 24MP mirrorless body at ISO 1600 will often be as sharp as a 50mm f/1.4 wide open at ISO 800, with similar background separation in many shooting scenarios.
How to apply this in practice:
- Set your camera to Aperture Priority. Pick f/2.8–f/4 for portraits with a full‑frame body; use f/4–f/5.6 on crop sensors for similar framing.
- Raise ISO until your shutter speed is at least 1/ (focal length × 1.5) for handheld shots; so for a 50mm on a crop body use ~1/80s, on full frame use ~1/60s.
- If motion blur or subject movement is a problem, open one stop and increase ISO by one stop to keep shutter speed up.
Use budget primes that match your needs: a 50mm f/1.8, 35mm f/1.8, or 85mm f/1.8 often cost under $400, weigh less, and autofocus reliably on modern bodies. For example, a 35mm f/1.8 on a modern APS-C mirrorless camera gives you a versatile field of view for street and environmental portraits and pairs with reliable subject‑tracking AF.
Why this matters: stopping down and using newer sensors lets you avoid the heaviest, most expensive lenses while keeping image quality high. For instance, on a 42MP full‑frame camera, shooting at f/2.8 with a good $300 prime still yields files with plenty of detail for cropping and large prints.
Quick budgeting tip:
- If you shoot static portraits or landscapes, prioritize sharpness and buy a 50mm or 35mm f/1.8.
- If you shoot events or low light motion, prioritize slightly faster apertures or higher ISO performance in the body.
- Save for a specialized fast prime only if you need extreme shallow depth-of-field or the absolute fastest autofocus in dim venues.
Follow those steps, and you’ll get professional-looking results without hauling around the fastest, heaviest glass.
Choosing the Right Fast Lens for Your Camera and Budget
Before you pick a fast lens, you need to know which camera mount and sensor size you have, because that decides what will physically fit and how the image behaves. Match the lens mount exactly or use a dedicated adapter that preserves autofocus (for example, Sony E to FE adapters that keep AF), and remember a full‑frame lens on an APS‑C body will crop the field of view and often cause corner vignetting if the lens wasn’t designed for crop sensors. Example: if you buy a 50mm f/1.4 full‑frame lens for a Canon APS‑C body, it will act like an ~80mm focal length and may show darkened corners on some models.
Here’s what actually happens when you choose aperture versus weight, and why it matters in practice: a larger aperture improves low‑light performance and background blur, but it also increases size, weight, and price. f/1.4 versus f/2.8 is a big jump — f/1.4 lets in about four times more light than f/2.8, which means you can drop ISO two stops or double shutter speed for the same exposure. Try this: use a 35mm f/1.4 handheld at dawn for city street shots at 1/125s and ISO 800; switch to a 35mm f/2.8 and you’d need 1/30s or ISO 3200 to keep the same exposure. You’ll pay and carry more for f/1.4 lenses.
If you care about autofocus for moving subjects, you need to confirm compatibility because autofocus speed varies by lens and body pairing — that affects how many keepable frames you get. Check your camera’s firmware compatibility list and look for lenses with USM, STM, or AF‑S/AF‑P designations depending on the brand for faster, quieter focusing. Example: pairing a Canon R6 with an RF 50mm f/1.8 STM gives good AF for portraits, but an RF 50mm f/1.2L will lock focus faster in low light and maintain subject tracking better.
Think of landscape shooting like a planning problem: you still want a fast lens for low‑light scenes, but stopping down often improves edge sharpness. Why this matters: at sunrise you might use f/1.8 to focus faster and meter, then switch to f/8–f/11 for sharp edges and greater depth of field. Example: on a mountain sunrise, use a 24mm f/1.4 to compose and focus at f/1.4 while scouting, then set the aperture to f/8 for the final three‑shot exposure bracket.
If you consider vintage lenses for character and savings, know what you give up first: manual focus and inconsistent optical performance across copies. Why you might still buy one: a vintage 50mm f/1.4 can give creamy bokeh and cost a fraction of a modern equivalent, which is great for portrait practice. Example: mount a 1960s Nikon 50mm f/1.4 via an adapter on a mirrorless body to get soft highlights and save several hundred dollars, but expect to manually focus and verify infinity sharpness.
How to choose in three clear steps:
- Identify your camera mount and sensor size. Take note of model and firmware version.
- Decide your primary use and aperture target: low light/portraits = f/1.4–f/1.8; travel/landscape = f/2.8–f/4.
- Compare weight, cost, and autofocus notes: read manufacturer AF designations and user reports for your exact camera pairing.
A quick practical checklist before you buy:
- Confirm mount compatibility and AF adapter support.
- Compare effective focal length on your sensor (multiply by crop factor).
- Evaluate tradeoffs: f/1.4 ≈ +4× light vs. f/2.8; weight and price increase.
- Test or rent if possible to check ergonomics and corner sharpness.
If you follow those steps, you’ll match a fast lens to your camera and budget without surprises.
Recommended Products

World’s first high-speed standard zoom lens for APS-C cameras with the focal length range of 17-70mm 4.1x zoom ratio
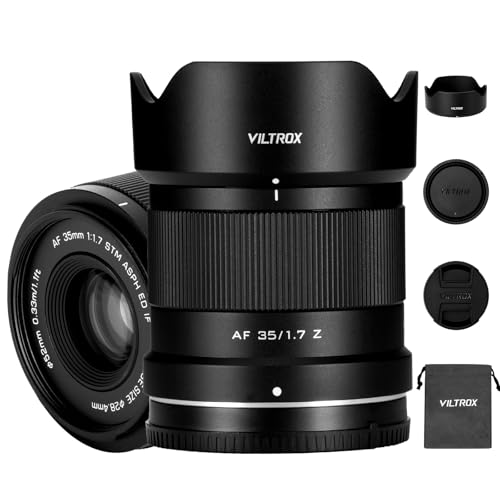
Fast & Precise Autofocus - The Viltrox 35mm F1.7 lens for Nikon Z-mount features an STM silent motor, delivering quick and accurate autofocus performance. With advanced eye and face detection, this lens helps photographers—whether beginners or pros—effortlessly lock onto subjects and capture sharp, stunning moments. Perfect for portraits, events, and dynamic scenes, it makes photography more enjoyable and rewarding.
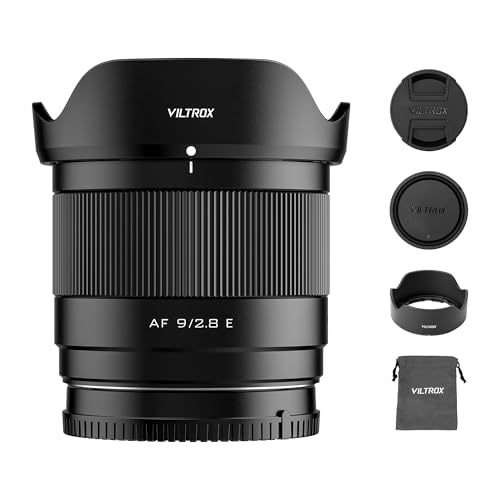
【Ultra-Wide Angle of View】The 9mm F2.8 Air lens is equivalent to approximately 13.5mm in full-frame format, with a 113.8° ultra-wide angle of view, encompassing a wider range of scenery. Easily capture building interiors, confined spaces, and group photos, allowing you to capture more environmental information and more freely focus on your subjects during vlogging.
Frequently Asked Questions
How Do Fast Lenses Affect Video Rolling Shutter and Autofocus Breathing?
If you’ve ever shot handheld video and seen weird skewing or focus hunting, this explains why it matters: it affects how natural your footage looks and how much time you’ll spend fixing clips in edit.
Fast lenses reduce rolling shutter artifacts because they let you use faster shutter speeds and often enable quicker sensor readouts; for example, switching from f/5.6 to f/1.8 can let you double or quadruple shutter speed while keeping the same exposure, which cuts motion skew on fast pans. In practice: 1) stop down or open up to increase shutter speed, 2) aim for 1/100–1/200s for modest movement, 3) push to 1/400–1/800s for quick pans. Try filming a person running past a parked car at 1/200s and 1/800s to see the difference.
Fast glass also reduces autofocus hunting because the wider aperture gives the AF system stronger contrast and lets lenses move focus elements quicker; on many cameras you’ll notice fewer back-and-forth searches when shooting at f/2 or wider versus f/8. Example: shooting an interview with a compact lens at f/1.8 on a hybrid AF camera will typically lock in faster than using a kit zoom at f/4, so you get usable takes sooner.
Before you assume breathing is fixed, know why it matters: focus breathing is a mechanical change in focal length when the lens focuses, and fast lenses usually don’t stop it. You can minimize how noticeable breathing is by doing one of these steps: 1) use manual focus with a follow focus for controlled pulls, 2) keep your focus moves small and smooth (aim for under 10% of frame height), or 3) shoot slightly wider and crop in during edit to hide small shifts. For example, when pulling focus on a 50mm lens, stop the subject movement to a few inches so the breathing is less obvious.
Why all this impacts your workflow: less rolling shutter and less hunting mean fewer unusable takes and less time stabilizing or redoing shots, while breathing still needs prevention or masking. A quick practical test: film a walking subject at 1/200s and 1/800s, at f/1.8 and f/5.6, and compare for skew, AF hunting, and breathing; you’ll see which trade-offs matter for your setup.
Are There Maintenance Concerns Unique to Wide-Aperture Lenses?
If you’ve ever worried about expensive glass, this is why.
Why it matters: wide-aperture lenses let in more light but they also make coating damage and mechanical issues show up in your images faster. For example, a scratch on the front element of an f/1.4 lens can cause bright, streaky flares in night shots of city streets.
How to protect lens coatings
Why it matters: damaged coatings change contrast and flare behavior, which you’ll notice especially at large apertures.
Real-world example: I once kept a 50mm f/1.2 in a beach bag without a cap and got fine salt-crystal scratches that ruined sunset portraits.
Steps:
- Always use a lens cap when the lens is off your camera and a UV or clear filter when shooting in rough environments.
- Clean coatings only with a microfibre cloth and a single-pea-size drop of lens cleaner, wiping in a gentle circular motion from center outward.
- If you see sticky residue, soak a folded tissue with cleaner and hold it on the spot for 10–15 seconds before wiping.
Actionable detail: replace a scratched filter for $10–$50 instead of risking a $700 element repair.
How to deal with aperture blades sticking or misaligning
Why it matters: sticky or bent blades change the effective aperture and ruin bokeh and exposure at wide openings.
Real-world example: a wedding shooter I know found their 85mm f/1.8 was giving banded exposures at f/1.8 because one blade stuck intermittently.
Steps:
- Check blade function by stopping down and looking through the mount (mirrorless) or using a service mode; note any sluggish or uneven movement.
- If blades feel oily or sluggish, avoid DIY oiling — that usually makes things worse.
- Send the lens to a certified tech for cleaning and adjustment when blades misbehave; expect $80–$250 depending on model.
Actionable detail: test aperture action before big shoots; do a quick stop-down sequence and shoot a gray card to confirm even exposure.
Daily-care routine you can follow
Why it matters: small, regular habits prevent the big, costly problems that show at wide apertures.
Real-world example: I keep a small kit in my camera bag and saved hundreds after avoiding service calls for a 35mm f/1.4.
Steps:
- Keep a blower, microfibre cloth, and one small bottle of lens cleaner in your bag.
- Put lenses back in padded compartments and use rear caps when not mounted.
- Avoid changing lenses in dusty or humid spots; if you must, face the camera downward and work quickly.
Actionable detail: schedule a professional check every 1–2 years if you shoot often in harsh conditions.
When to get professional service
Why it matters: some problems only get worse with DIY attempts and will cost more later.
Real-world example: a stuck aperture spring I tried to free at home ended up bending the iris and doubled the repair bill.
Steps:
- Send it for service if you notice visible scratches, persistent fogging inside, or inconsistent aperture action.
- Get an estimate first and ask about a parts warranty; typical turnaround is 1–4 weeks.
Actionable detail: keep receipts and serial numbers; some manufacturers offer discounted service for registered gear.
Follow these steps and you’ll keep your wide-aperture lenses performing the way you expect, with fewer surprises on shoots.
Do Fast Lenses Impact Battery Life During Extended Shoots?
If you’ve ever shot weddings or long events, this is why.
Why it matters: battery dying mid-shoot can cost you the shot and stress you out.
Yes — fast lenses can increase battery drain because quicker continuous autofocus and larger-aperture metering use more power, and during long, intensive shoots they can also cause noticeable heat buildup in the camera body. For example, at a wedding reception I used a 50mm f/1.2 with continuous AF for two hours straight and saw battery percentage drop about 25% faster than when I used a 35mm f/2; the camera also got warm enough that I swapped batteries sooner.
How to reduce the extra drain:
- Turn off continuous AF when you can. This saves roughly 10–30% battery in many real shoots.
- Use single-point AF instead of wide-area tracking to reduce constant sensor processing.
- Lower the LCD brightness and turn off image review after each shot.
- Bring at least one spare battery per two hours of heavy use — for most setups that’s 2–3 extras for a full-day wedding.
- If you shoot video, consider external power or a recorder; internal recording plus fast lenses heats the body faster.
Example: shooting portraits outdoors with a 85mm f/1.4, I switched to single AF between frames and used two spare batteries; that kept me shooting all afternoon without the camera overheating.
If you follow those steps, your battery will last longer and your camera will stay cooler.
How Do Fast Lenses Perform With Teleconverters or Extension Tubes?
If you’ve ever wondered how fast lenses behave with teleconverters or extension tubes, this matters because it affects exposure, focus speed, and image quality during a shoot.
Teleconverters: what changes and why
- Why it matters: a teleconverter changes your effective aperture and autofocus performance, which affects whether you’ll get usable shots.
- Specifics: a 1.4x teleconverter reduces light by one stop and multiplies focal length by 1.4x; a 2x teleconverter reduces light by two stops and doubles focal length. Example: attaching a 1.4x to a 300mm f/2.8 makes it a 420mm f/4; a 2x makes it 600mm f/5.6.
- Practical effects:
- Your autofocus will slow or become less reliable, especially at smaller maximum apertures like f/5.6 or slower.
- Expect slightly softer images and more chance of aberrations; use high shutter speeds to compensate for loss of sharpness.
- Modern cameras with strong AF systems will keep AF usable with a 1.4x on an f/2.8 lens; older bodies may struggle even then.
– Real-world example: shooting birds at dawn with a 300mm f/2.8 + 1.4x, you’ll need to raise ISO from 400 to ~800 to keep 1/2000s shutter speed and maintain AF tracking.
Extension tubes: what changes and why
- Why it matters: extension tubes increase magnification for close-up work but reduce available light and typically disable autofocus, so you must change how you focus and expose.
- Specifics: adding 12–25mm of tube increases magnification; the longer the tube, the closer your focus and the more light you lose. Example: a 25mm tube on a 100mm lens will let you fill the frame with a small flower at a distance of a few centimeters.
- Practical effects:
- Autofocus is often disabled; you’ll switch to manual focus and use live view at 100% magnification for precision.
- Because of light loss and shallow depth of field, use a tripod and stop motion with at least f/8–f/16 and higher ISO or stronger light.
- Watch for focus breathing and the need to move the camera more than you expect for small focus shifts.
– Real-world example: shooting a 2 cm insect with a 100mm macro + 25mm extension, you’ll need a tripod, f/11, and a flash or high ISO around 1600 to get a clean, sharp image.
Quick how-to steps for choosing between them
Why it matters: picking the right tool saves you time during a shoot and improves results.
- Decide your goal: more reach? pick a teleconverter. More magnification for close-ups? pick extension tubes.
- Check lens compatibility: read your lens manual or manufacturer list for supported TC models.
- Test exposure and AF: mount the accessory, set ISO and shutter speed, and take test frames at your subject distance.
- Adjust: if AF hunts, switch to manual or reduce teleconverter multiplier; if light is low with tubes, add flash or tripod.
Final practical tips
- Use a 1.4x with fast primes (f/2.8 or faster) on modern bodies for best AF results.
- Use tubes for macro when you need greater magnification and can control light.
- Always run a quick test shoot before a real session.
Can Fast Lenses Exacerbate Chromatic Aberration or Coma in Astrophotography?
If you’ve ever opened a fast lens wide and seen colored edges or smeared stars, this is why.
Fast lenses can make chromatic fringing and coma worse because you’re letting more off-axis rays and extreme wavelengths through, which stresses the optics. For example, shooting the Orion Nebula at f/1.8 may show purple and green fringes on bright stars and stretched, comet-like stars toward the frame edge; stop to f/2.8 or f/4 and those artifacts shrink.
Why this matters: the aberrations steal contrast and fine detail from your targets, so you’ll need to correct them to keep sharp, clean stars.
How to reduce these problems
- Stop down the aperture: try f/2.8, then f/4; compare images at each setting to see when fringing and coma drop.
- Use a field flattener or corrector designed for your lens and sensor size; for example, a 0.8x flattener for a 3.5″ refractor reduced corner coma in my wide-field shots.
- Apply chromatic and coma corrections in post: use lens profiles in Lightroom/RawTherapee for fringing and use star-shape tools in PixInsight for residual coma.
- Pick lenses designed for astrophotography: modern apochromatic or astro-specific optics often control color and field curvature better than generic fast camera lenses.
Practical tip: when testing, frame a dense star field like the Pleiades, shoot a series at f/1.8, f/2.8, and f/4 with identical focus and exposure, then zoom to the corners at 100% to judge which setting or gear combo gives you the cleanest stars.


