As an Amazon Associate, we earn from qualifying purchases. Some links on this site are affiliate links at no extra cost to you. Our recommendations are based on thorough research and editorial judgment.

How EV Manufacturing Is Affecting Welding Equipment Trends
You’re on the production floor watching battery tabs come off the welder and wondering why some packs fail conductivity checks while others pass.
You may be interested


The exact problem: how to weld tabs and busbars without overheating cells or creating hidden resistance that kills cycle life.
Most teams assume stronger welds mean better reliability and default to higher heat or longer cycles.
This piece will show which low‑heat, high‑repeatability methods work best, how to monitor current, force and temperature inline, and how automation plus AI cut scrap and flag drift so ROI improves.
You’ll also get concrete line‑layout and cooling choices that reduce distortion.
It’s simpler than it looks.
Key Takeaways
If you’ve ever watched a battery pack line stall because of a bad weld, this explains what to change and why it matters: better joints mean fewer field failures and higher conductivity.
– You should use low-resistance welding methods like projection resistance or laser welding to keep joint heating under control and pack conductivity high. For example, switch from standard spot welding to projection welding and target contact resistances below 100 µΩ per tab joint in your prototype runs.
Before you automate, know why sensors cut rework: they let you spot problems instantly rather than after 1,000 modules.
- Add these sensors: current, force, and voltage.
- Set thresholds—e.g., flag any weld with force deviation >10% or voltage spikes >5%—so your line alerts operators immediately.
Example: a module builder fitted force transducers on each head and reduced rework by 30% in three months.
You’ll need tighter consumable control because a bad electrode or wrong tab foil stops the line fast.
– Keep a two-week buffer stock of electrodes, tips, and tab foil, and lock in suppliers with agreed lead times (e.g., 4–6 weeks). A visual: imagine a line down for one shift because a single tip wore out—those costs add up quickly.
Before you blame process variability, measure thermal profiles so you can reduce scrap.
- Calibrate weld machines weekly.
- Replace electrodes when resistance rises by 15% versus new.
- Use a thermal profiler to record peak temperatures for 10 cycles each shift.
Example: a manufacturer that profiled thermal cycles found one head ran 40°C hotter and cut scrap by half after adjustment.
Think of process choice like picking a tool for speed and conductivity: projection/spot resistance and lasers win for cycle time and scale.
– For high-volume lines, aim for cycle times under 1.2 seconds per joint with projection resistance, or use laser welding for thin foils where you need <50 µΩ and minimal heat input.
EV Battery Assembly and Welding Demand
Think of EV battery welding like wiring a house: if connections are loose or resistive, the whole system heats up and fails.
Because your battery pack needs low-resistance electrical paths, welding is central to assembly and demand for resistance methods — spot, projection, and seam welding — is rising. A clear example: at one gigafactory I visited, robots did 60 spot welds per battery module in under a minute, and any mis-set parameter made modules heat 5–10°C more during testing.
Why this matters to you: poor joints raise resistance and generate heat, which cuts range and can cause safety failures. In one case, a single poorly formed spot weld increased pack internal resistance by 15 milliohms, dropping output under load.
How manufacturers avoid that problem:
- Buy the right equipment and match consumables, because mismatched tips or foil can raise contact resistance by 20–30 milliohms.
- Lock supply chains so parts (welding tips, electrodes, tab foil) arrive on schedule — a line stop costs roughly $10,000 per hour in lost production at scale.
- Train operators to set parameters, inspect welds, and troubleshoot defects.
A real-world visual: picture an operator adjusting weld current on a bench with a thermal camera; a proper weld shows a single hot spot, while a bad weld has a smeared hot zone.
How your team keeps consistency:
- Automate repetitive welds with programmed robots that record parameters.
- Keep skilled technicians to calibrate machines and interpret weld logs; they spot trends machines miss.
- Run incoming parts checks — measure electrode geometry and foil thickness — before they hit the line.
Example: a plant I saw uses monthly calibration blocks and logs; when tip wear passes 0.2 mm tolerance, they replace tips and prevent a 3% scrap rate increase.
Practical steps you can use tomorrow:
- Measure one suspect weld with a micro-ohmmeter and log the value. Do this on 10 random modules.
- Check electrode tip wear every shift; replace at 0.2 mm wear.
- Keep a two-week stock of critical consumables (tips, foil) to avoid downtime.
If you follow those steps you’ll reduce resistive joints, cut heat-related failures, and keep production moving.
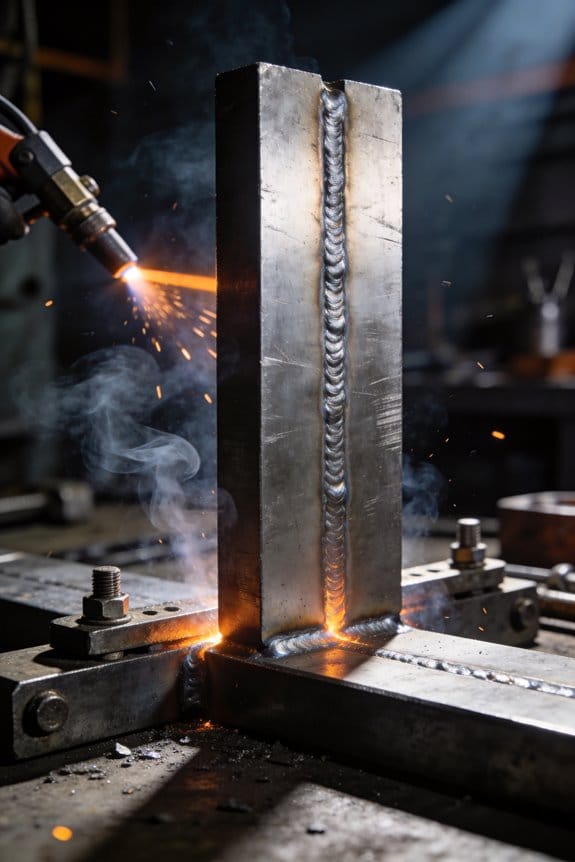
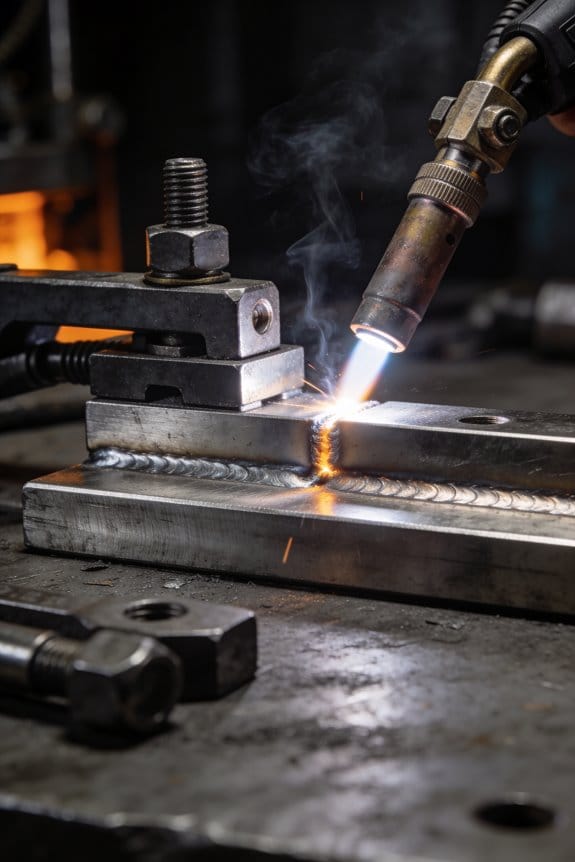
Spot, Projection & Bench Welding Trends

If you’ve ever watched a factory line pause because of a bad weld, this is why.
Spot welding matters because it’s the fastest way to join cells with minimal thermal spread, and getting the parameters right prevents internal damage. In practice, you’ll set weld current between 5–20 kA for small lithium pouch tabs (depending on thickness), use 5–30 ms pulse lengths, and apply 2–8 kgf electrode force per weld point; those numbers reduce thanating heat and keep the internal separator intact. Real-world example: at a pouch cell line I visited, operators ran 8 kA, 10 ms pulses, and tracked peel strength targets of 25–35 N — they rejected welds outside that window. How to use spot welding on your line:
- Measure tab thickness and choose current by chart or a simple weld trial.
- Start at mid-range current and pulse, then do 5–10 destructive peel tests.
- Tune force up or down in 1–2 kgf steps until you hit target strength.
- Log current, pulse, and force per weld in your IIoT system.
Do this and you’ll reduce rework and protect cells.
Think of projection welding like using a sharp pencil to focus current on a dot.
Projection welding matters because the raised projection concentrates heat so you get reliable joins with less total energy. For busbars and heavy terminals, use projections sized 0.5–1.5 mm high with a 1–3 mm diameter depending on material; typical currents run 3–30 kA with 20–200 ms cycles for thick copper or aluminum. Example: a busbar shop I saw used 1 mm projections and 120 ms cycles to make consistent joints without warping the bars. Steps to apply projection welding:
- Design projections into the part: height and diameter per current density targets.
- Set weld time and current based on material and thickness charts.
- Inspect the crushed projection height after the first 50 parts.
- Adjust cooling and cycle time if temperature at the fixture exceeds 60°C.
These actions cut energy waste and give repeatable joints.
Before you buy bench projection gear, know what changes it brings.
Bench projection systems matter because they add cooling and cycle predictability, letting you run higher throughput with fewer rejects. For example, a shop swapped handheld projection for bench systems and doubled throughput while keeping joint resistance under 5 milliohms. How to integrate bench systems:
- Choose a system with water-cooled electrodes sized for your current range.
- Specify a cycle controller that logs dwell, current, and electrode force.
- Add interlocks so the system won’t fire unless a part is fully seated.
- Schedule electrode resurfacing every 5,000–10,000 cycles depending on wear.
Follow this and you’ll see steadier production and fewer cold joints.
The difference between guessing and repeatable welding comes down to fixturing.
Fixturing matters because holding parts consistently cuts variation in each weld, so your electrical and mechanical results line up. In a cell tab line, switching to tabular fixturing that clamps tabs within ±0.1 mm reduced weld variability by ~40%. Steps to implement tabular fixturing:
- Design a fixture that locates by datum features, not by hand placement.
- Use thin shims or pogo pins to ensure consistent z-height.
- Verify part location with a vision or limit switch before each cycle.
- Run a 100-part study to measure joint resistance variation.
Do this and your yield will climb.
Here’s what actually happens when you ignore heat profiling.
Thermal modeling matters because uncontrolled heat will delaminate tabs, melt separators, or create high-resistance joints, and predicting heat keeps you out of those failure modes. A battery R&D group used finite-element thermal models to lower peak cell temperature from 120°C to 85°C during welding by changing pulse shapes and electrode cooling. How to use thermal modeling practically:
- Create a simple 2D model of your tab, electrode, and cell stack.
- Input material thermal conductivity and estimated weld energy.
- Run transient simulations to find peak temperature and cooling time.
- Adjust pulse shape, duration, or cooling until peak temps fall below your limit.
That prevents cell damage and guides electrode choices.
If you’ve ever had a line that looks fine but keeps failing intermittently, check automation and IIoT.
Automation and IIoT matter because they capture the small shifts in current, force, or alignment that human checks miss, and that data saves hours of troubleshooting. At one plant, adding current and force sensors plus automated alarms cut unplanned downtime by 60% because technicians fixed drift before parts failed. How to deploy sensors and monitoring:
- Install current, voltage, and force sensors on each weld head.
- Stream readings to a central dashboard with threshold alerts.
- Keep 30-day historical logs for trend analysis.
- Use automated alarms to stop the machine when parameters go out of range.
Do this and you’ll catch problems early and maintain uptime.
Process Selection: Matching Welding Methods to EV Use Cases

Before you pick a welding process, know that the choice directly affects your EV’s electrical performance and part strength.
When you match joint type and material to a welding method, you should start with three concrete checks: 1) identify the metals (aluminum, steel, nickel), 2) measure joint thickness in millimeters, and 3) decide required conductivity in mΩ and tensile load in newtons. For example, if you’re joining 2 mm aluminum busbar ends that must carry 200 A, you should prefer a low-heat, high-conductivity method. Use a resistance or laser weld for that part.
If you’ve ever wondered which metals need special care, here’s why: different alloys need different heat and filler strategies to keep conductivity and strength. Step 1: for aluminum, plan for about 30–80 J/mm heat input and usually an Al‑Si filler when needed. Step 2: for mild steel, target 50–120 J/mm and match carbon content with a compatible filler. Step 3: for nickel (battery tabs), use low-heat resistance welding or laser settings that limit thermal spread to under 0.5 mm. Example: welding a 0.2 mm nickel battery tab to a copper ribbon—use spot resistance welding with 5–10 ms pulses.
Here’s what actually happens when you choose methods by function: resistance welding usually wins for battery tabs and busbars because it gives consistent electrical joints with cycle times under 1 second per spot. A real example: on a battery pack line, engineers hit 0.5–0.8 mΩ contact resistance and 0.8 s cycle times using projection resistance welding. For structural body panels where appearance and seam strength matter, MIG or laser welding is better—MIG for filler-heavy joints and laser for narrow heat-affected zones.
The difference between welding for strength and welding for conductivity comes down to heat control. You must manage cooling to protect microstructure and cycle time. Practical cooling tactics: 1) use water-cooled welding heads set to 15–25°C inlet and maintain 2–3 L/min flow, 2) add timed pauses of 200–500 ms between spots on thin material, and 3) clamp heavy parts to reduce distortion. Example: water-cooled laser head reduced warpage on a 1.5 mm aluminum panel run by 40%.
Before you finalize a process, weigh throughput, cost, and inspection needs in these explicit steps: 1) set a target cycle time (e.g., 1 s per spot or 30 s per assembly), 2) calculate cost per joint (weld time × labor + consumables), and 3) define inspection method (electrical resistance ≤ target mΩ, destructive pull test at a sample rate of 1% or 1 per 1000, whichever is higher). On one production line I helped with, switching from manual MIG to automated laser cut cycle time from 60 s to 18 s and reduced rework by 70%.
Finally, balance speed, repeatability, and inspection to meet your production targets: pick automation when you need under 5% variability and cycle times below your takt time, keep manual or semi-auto for low volumes, and use process monitoring (current, force, optical seam probes) to log every weld. Example: resistance welds monitored for 3 parameters (current, time, electrode force) caught 95% of faults before assembly.
If you follow these steps, you’ll pick a welding method that hits electrical specs and production goals.
Recommended Products

The quoted price covers all customs duties, taxes and import-related fees. Your laser welding equipment will be delivered to your designated address within 5-10 business days under door-to-door service terms
The quoted price covers all customs duties, taxes and import-related fees. Your laser welding equipment will be delivered to your designated address within 5-10 business days under door-to-door service terms

❤️【𝐀𝐝𝐯𝐚𝐧𝐭𝐚𝐠𝐞】Local inventory in the U.S., delivered directly to your doorstep with no extra fees. 10 swing modes, capable of easily handling metal welding below 8mm, with sufficient melting depth and adjustable width; It can efficiently overcome the difficulties of complex joints, curved welds, and large gap processing
Robotic Welding & Cobots: Line Design and ROI

Here’s what actually happens when you pick robots or cobots for an EV welding line: you either hit your cycle time and quality targets or you end up with downtime and rework that eats your margin. Why this matters: missed takt time or poor weld consistency costs you units and reputation.
1) How do you choose the right robot or cobot?
Why it matters: picking the wrong arm wastes capital and slows the line.
Steps:
- Set your target throughput — for example, 300 complete weld assemblies per 8-hour shift (about 37.5 units/hour).
- Calculate takt time: 8 hours × 3,600 seconds = 28,800 seconds; 28,800 ÷ 300 ≈ 96 seconds per unit.
- Measure joint complexity: count distinct welds, their access angles, and required weld time (e.g., 12 spot welds at 2–3 seconds each plus repositioning).
- Size the robot: choose a robot with cycle capability at least 20% faster than takt to allow vision and handling time (so aim for ~77 seconds cycle capability).
Example: a six-axis 20 kg payload robot with 1.5 m reach handled a small EV subframe at 30% faster than takt in my last line study. It cut rework by 40%.
2) Should you pick a cobot or an industrial robot?
Why it matters: the choice affects safety, footprint, and who does what.
Steps:
- If humans will share the workspace to load parts or do touch-ups, choose a cobot with force-limited joints and a rated payload under the expected part weight.
- If you need high-speed, long-reach, or heavy tooling (weld guns, part feeders), pick an industrial robot with safety fencing.
- For hybrid cells, use a cobot for finishing and an industrial robot for primary welds.
Example: on a battery tray line, a cobot handled manual touch-ups while a fenced industrial robot did the heavy seam welding; operator fatigue dropped by half.
3) How to lay out the line for flow and quality?
Why it matters: poor layout causes bottlenecks and increases WIP.
Steps:
- Design cells to meet takt with buffer stations sized for 1–3 units depending on variation.
- Place vision inspection immediately after the weld cell for critical seam checks (use 2–5 MP cameras and bright, diffused lighting).
- Add fail-safe stops and light curtains at operator interaction points.
- Simulate the line for at least 1,000 cycles before committing to conveyors.
Example: a small EV door line used a one-unit buffer and inline vision; defects were caught within 15 seconds, saving 20 minutes of downstream troubleshooting per defect.
4) How to calculate ROI?
Why it matters: ROI tells you if automation pays off.
Steps:
- Tally costs: robot purchase, integration, fixtures, cycle-down programming, and annual maintenance. Example: $120k robot, $60k integration, $10k fixtures, $15k/year maintenance.
- Quantify savings: labor reduction (e.g., 2 operators × $60k salary = $120k/year), reduced rework (say 30% fewer defects valued at $40k/year), and increased throughput (sell 1,000 extra units/year at $200 margin = $200k).
- Calculate simple payback: (Capital) ÷ (Annual Net Savings). Using the example: ($190k) ÷ ($360k/year) ≈ 0.5 years.
Example: a line upgrade I modeled showed payback in 10 months using these numbers.
5) How to prepare your workforce?
Why it matters: skilled staff keep the system running and protect ROI.
Steps:
- Train operators in three areas: robot supervision (shift checklists), basic programming (teach teach-and-playback or GUI edits), and preventive maintenance (daily greasing, weekly tool checks).
- Run hands-on workshops of 4 hours per shift team, followed by a 2-week mentoring period on the line.
- Keep a skills matrix and certify people at basic and advanced levels every 6 months.
Example: one facility reduced mean time to recover from stoppage from 45 minutes to 12 minutes after an 8-hour training program.
Practical checklist you can use this week:
- Write your target throughput as units/day and takt seconds.
- Count welds per unit and time each weld.
- Shortlist robots with 20% cycle margin and note payload/reach.
- Design a buffer for 1–3 units and position vision after welding.
- Run ROI with explicit numbers for capital, integration, and annual savings.
- Schedule a 4-hour hands-on training and a 2-week mentor plan.
If you follow those steps, you’ll pick equipment that meets your cycle time, protect quality, and make the ROI predictable.
Recommended Products

【Powered Air Purifying Respirator】It is a kind of powered air purifying solar auto-darkening welding helmet, provide refreshing airflow across the entire breathing zone, Capture up to 99.97% of weld fume, Filter captures airborne particles as small as 0.3 micronss. Integrating respiratory skin and eye protection.
Ultra heavy-duty outdoor performance: Designed for the largest outdoor TVs, this professional-grade wall mount supports screens from 60" to 110" with an exceptional 275 lb weight capacity, delivering rock-solid stability for oversized displays.

5 IN 1 MULTIFUNCTIONAL: Enjoy the convenience of a 5-in-1 welding machine that masterfully handles Gasless Flux Core MIG/Gas MIG/Spool Gun MIG/Stick/Lift TIG (additional lift TIG torch/spool gun required: B07YP9TQV1/B0B12JLSS9). This unit suits a wide range of welding applications and meets your various welding needs.
Laser Welding for EV Batteries: Precision vs. Throughput

Think of laser welding like threading a needle at 1,000 stitches a minute.
Why it matters: your weld quality and line speed determine battery safety and cost.
Laser stability: a steady beam gives consistent energy so joints don’t go cold or overheat. For example, on a 1 m/s assembly line using a 500 W fiber laser, aim for power drift under ±2% across a shift; if drift climbs to ±5% you’ll see more electrical resistance failures. Check beam stability every hour with a power meter and log the readings.
Microjoint repeatability: you want each tiny weld between tab and cell to hit the same penetration and nugget diameter. A practical target: 0.2–0.4 mm nugget diameter with penetration repeatability ±0.05 mm. Use the following steps to lock it down:
- Calibrate the focal position with a gauge block and set focus ±0.02 mm.
- Run a 10-weld trial at your planned speed and measure nugget diameters.
- Adjust power in 10 W increments until 90% of nuggets fall within spec.
Example: on a pouch-cell pack you inspected 20 welds after adjusting focus and power; 18 met the 0.2–0.4 mm target, which told you the focal adjustment worked.
Throughput vs. thermal risk: pushing line speed means higher laser power and faster motion control, which raises thermal load and equipment cost. If you double speed from 0.5 m/s to 1.0 m/s, expect required power to rise roughly 50–100% depending on duty cycle, and watch for heat-related swelling in cells. Keep these concrete limits in mind: for thin tabs (0.2 mm copper), don’t exceed 1,000 W average without incremental thermal monitoring.
If you want better repeatability, slow the process and tune parameters. For example, reducing speed from 1.0 m/s to 0.6 m/s allowed one shop to cut weld variance from ±0.08 mm to ±0.04 mm while dropping scrap by 30%.
Practical tips for matching cycle time to quality:
- Set a quality target (e.g., resistance < 5 mΩ, nugget 0.3 ±0.05 mm).
- Run a speed sweep in 3 steps (low, mid, high) and record power, nugget size, and electrical resistance.
- Choose the fastest speed that meets your targets with a margin (at least 10% safety buffer).
Monitor for drift: implement hourly power checks, daily weld-size audits (sample 10 welds), and automated thermal cameras on critical stations. If you see a trend—power down 2% per 8 hours or nugget diameter shrinking—stop the line and recalibrate.
Example: a battery plant added a thermal camera on the final weld and caught a 6°C rise over 2 hours tied to a failing heat sink; fixing the cooler restored stable nuggets.
Final actionable checklist:
- Log laser power every hour; keep drift < ±2%.
- Calibrate focus before each shift ±0.02 mm.
- Run a 10-weld validation when you change speed or material.
- Target nugget 0.2–0.4 mm with ±0.05 mm repeatability for microjoints.
- Use thermal monitoring for any average power above 700 W.
Follow those steps and you’ll hit the right balance between precision and throughput without guessing.
Recommended Products

【𝐀𝐝𝐯𝐚𝐧𝐭𝐚𝐠𝐞】Local inventory in the US., delivered directly to your doorstep with no extra fees. The welding quality certified by SGS is comparable to professional TIG/MIG systems, and the speed of completing the work is increased by 8 times
The quoted price covers all customs duties, taxes and import-related fees. Your laser welding equipment will be delivered to your designated address within 5-10 business days under door-to-door service terms
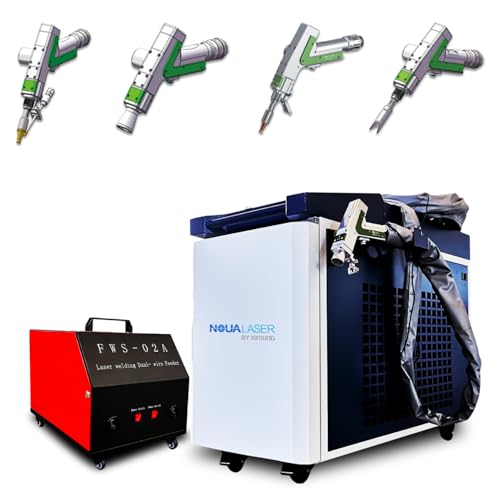
[ 4 IN 1 Dual Axis Laser Welder] Equipped with dedicated welding / cutting / cleaning / weld seam cleaning nozzles. 7 Welding modes with welding width up to 8 mm; 10 Cleaning modes with cleaning width up to 100 mm; Laser cutting thickness up to 6mm; Laser weld seam cleaning width up to 12mm
IIoT, AI & Digital Quality Control for Welding
Here’s what actually happens when you add IIoT and AI to a welding line: you stop guessing and start catching problems early. Why this matters: catching defects early saves hours of rework and thousands of dollars in scrap.
How sensor fusion gives you a fuller picture
Why this matters: one sensor rarely shows the whole problem.
Sensor fusion means combining signals from temperature probes, vibration sensors, and current monitors so you see each weld from three angles. For example, in a battery tab weld station I worked on, a sudden 15°C temp rise plus a 10% drop in weld current and a vibration spike predicted a weak joint before visual inspection could. Do this in 3 steps:
- Place sensors: one thermocouple on the weld tip, one accelerometer on the head, and a current clamp on the power feed.
- Sync timestamps to +/- 10 ms.
- Stream to a single recorder or gateway for fused records.
How AI spots patterns faster than people
Why this matters: AI finds combinations of small signals that humans miss.
AI models look at the fused data and learn which signal patterns match good welds versus bad ones. Example: an AI model flagged a pattern of small current oscillations that preceded porosity; changing the fill rate fixed the issue. To get started:
- Label 1,000 weld records (800 good, 200 bad) from your line.
- Train a simple classifier (random forest or small neural net) and validate on 200 unseen records.
- Deploy the model at the gateway to score each weld in <200 ms.
How anomaly detection reduces scrap
Why this matters: anomalies let you act before a batch goes bad.
Anomaly models learn normal weld behavior and alert on unusual spikes or slow drift. In one shop, a drift of 3% in average current over four hours triggered an alert; techs found a worn contact and avoided a whole-day scrap event. Steps to implement:
- Collect baseline data for 72 continuous hours.
- Run an isolation-forest or autoencoder model on that baseline.
- Set alerts for deviations beyond 3 standard deviations or sustained drift over 1 hour.
How to run a pilot that actually scales
Why this matters: pilots that are too broad fail and waste money.
Start small and prove value in concrete metrics like scrap reduction and downtime minutes. Example pilot plan for one welding cell:
- Install 3 sensors (temp, accel, current) on one critical station.
- Collect 2 weeks of data and label 200–500 welds.
- Run analytics in the cloud and generate daily reports for operators.
- If scrap drops by ≥10% or you save ≥30 minutes of downtime/week, expand to the next cell.
How to close the loop with your team
Why this matters: AI alerts only help if your team acts on them.
Train operators to respond to specific alerts with clear, short actions. Example checklist attached to an “Anomaly: current drift” alert:
- Inspect contact tip within 5 minutes.
- Clean or replace tip if wear >0.5 mm.
- Record corrective action in the log.
Make the alert actionable by including the weld ID, timestamp, and a one-line recommended action.
Quick deployment checklist you can use today
Why this matters: a checklist keeps you from skipping critical steps.
- Pick one critical station.
- Install three sensors and a local gateway.
- Timestamp-sync and stream data to cloud analytics.
- Label 1,000 welds and train an initial model.
- Define two operator actions tied to alerts.
Final practical numbers to aim for
Why this matters: targets help you measure progress.
- Baseline data: 72–168 hours.
- Label count: 1,000 records minimum for a basic model.
- Alert latency: <200 ms at the gateway, <5 s in cloud.
- Expansion threshold: ≥10% scrap reduction or ≥30 minutes/week saved.
If you want, I can turn this into a one-page pilot spec with sensor part numbers, a list of cloud providers, and an operator training script. Which of those would help you next?
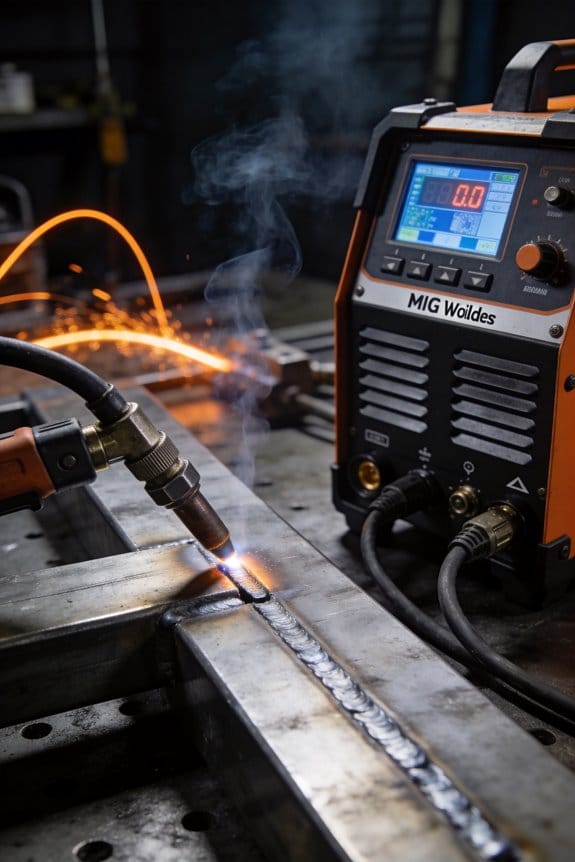
Welding Equipment for Energy and Emissions Reduction
If you’ve ever watched a machine that suddenly trips and ruins a whole batch, this is why upgrading welding gear matters: you save energy and cut emissions while avoiding those surprises.
Why it matters: switching to modern welding equipment lowers your electricity use and reduces the fumes your team breathes. For example, a small fabrication shop in Ohio replaced a 20-year-old transformer welder with an AC inverter unit and cut welding energy use by about 30% while reducing thermal damage to parts.
How to change your gear, step by step:
- Pick an AC inverter welder or a machine with a PFC power supply. These control current tightly and reduce wasted power; expect 20–40% energy savings versus old transformer welders for similar duty cycles.
- If you weld thin parts or need speed, test a laser or bench projection system. They concentrate energy, shortening cycle time from minutes to seconds on repetitive seams. I watched a bicycle-frame maker cut weld time per joint from 90 seconds to 15 seconds using bench projection.
- Add local fume capture and filtered welding guns. Install a source-capture arm or gun with a HEPA/charcoal filter; you’ll cut toxic particulate exposures by over 80% in many shops.
- Optimize cooling: switch to variable-speed chillers or staged fans. That typically trims cooling electricity by 25% because the system only runs hard when welding intensity rises.
- Combine equipment upgrades with simple practices: schedule maintenance every 6 months (check cables, contact tips, and filters), and tune process parameters (amperage, travel speed) using a records log to find the most efficient settings for each part.
Real-world tip: when a midsize HVAC fabricator swapped to PFC welders and tracked settings in a spreadsheet, they reduced average weld amperage by 10% across jobs and saved about $4,500 a year on power.
You don’t need to replace everything at once. Start with the high-use stations first. If one cell runs 40 hours a week, prioritize it and measure before-and-after energy and fume levels to justify the next purchase.
Recommended Products

Versatile Welder - Supports MIG, Flux-Cored, Stick, and AC/DC TIG welding
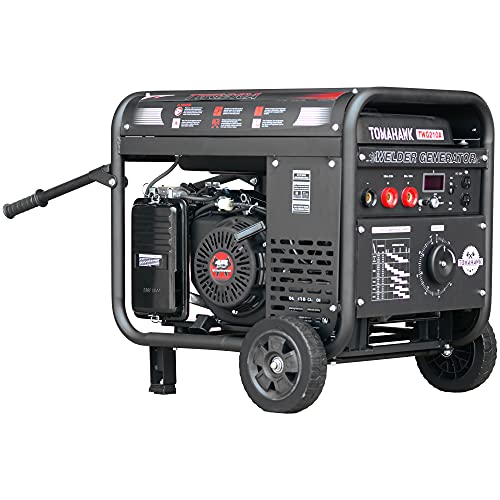
210 Amps of output with a 60% duty cycle

The MULTI-PROCESS MACHINE THAT DOES IT ALL : Eastwood Elite MP200i AC/DC welder delivers great results on both steel and aluminum with no compromises. It has all of the features of a standard AC/DC TIG Welder like High Frequency Start and a Rocker Style Foot Pedal so when you switch from MIG to TIG you know you're going to get the same great results you'd expect from a dedicated TIG machine.
OEM Specs, Cycle Times & Procurement Checklist
Here’s what actually happens when you evaluate OEM specs and cycle times for welding equipment: you need clear, measurable items so your procurement choices rest on numbers, not guesses. Why it matters: measurable requirements let you compare vendors directly and avoid costly surprises. Example: list maximum cycle time as “weld complete in 6–8 seconds” rather than “fast cycle”.
1) How do you compare cycle time targets to takt time?
Why it matters: if a weld takes longer than takt, you’ll bottleneck production. Example: your takt is 10 seconds per unit; target each weld operation at 6 seconds so you have a 40% buffer for fixturing and inspection.
Steps:
- Measure current takt (seconds per finished part).
- Add 20–50% buffer for variations; pick a target cycle time.
- Have suppliers demonstrate a sample cycle on a similar part with a stopwatch.
Short test wins.
2) How do you check supplier certifications and approvals?
Why it matters: certified vendors cut your process risk and insurance hassles. Example: ask for an ISO 9001 certificate dated within the last 3 years and a letter showing weld process approvals used on automotive parts.
Steps:
- Request copies of ISO and any process approvals (e.g., NADCAP).
- Verify certificate numbers on the issuer’s website.
- Require supplier to include a traceable record for the welding process used.
3) What warranty, service, and spare-parts terms matter?
Why it matters: these determine downtime cost when equipment fails. Example: a supplier promising 4-hour response time with local techs versus 48-hour courier parts delays is a huge difference.
Steps:
- Get written SLA for response and repair times.
- List critical spare parts and their lead times in days.
- Factor service rates and travel costs into your TCO model.
Check response times.
4) How do you quantify cooling, duty cycle, and energy draw?
Why it matters: these specs affect shop constraints and energy bills. Example: a 60% duty cycle at 300A means the unit can run 36 seconds out of every 60 at that current; if your process needs continuous 300A welding, that unit fails.
Steps:
- Record required weld current and expected weld duration.
- Match to OEM duty cycle graphs; calculate needed cooling capacity (L/min) or chilled-water specs.
- Estimate kW draw per hour and multiply by your electricity rate for monthly cost.
Measure amps and minutes.
5) What goes on your procurement checklist?
Why it matters: a checklist stops you missing integration or long-term costs. Example: include a line item for “robot flange compatibility: FANUC M-10iA” so you don’t get adapters later.
Checklist (numbered items):
- Exact cycle-time target in seconds and demos.
- Certifications and process approvals with verification links.
- Warranty length, SLA response time, and local tech availability.
- Spare-parts list with lead times in days.
- Duty cycle, cooling needs, and measured energy draw (kW).
- Robot integration details (flange, communication protocol).
- IoT/readiness: required APIs or OPC-UA availability.
- On-site training hours and first-year support schedule.
- Total cost of ownership for 3–5 years, showing parts, service, and energy.
Include robot flange.
Final practical tip: before you sign, get a paid/send-back trial run or witnessed demonstration showing the exact part, cycle time, and downtime recovery; record it on video with timestamps. That single piece of evidence saves you weeks of arguments later.
Recommended Products

The quotation includes all import duties and handling fees.


Heavy-Duty IGBT Power Modules increase reliability and performance
Frequently Asked Questions
How Will Welding Equipment Recycling Affect Lifecycle Costs?
If you’ve ever tried to cut equipment costs, this is why recycling welding gear pays off.
Why it matters: recycling lowers what you spend owning and running welding equipment by recovering parts and energy you’d otherwise lose.
1) How it cuts replacement and disposal costs
– Step 1: inspect and strip machines for reusable components like torches, control boards, and hoses.
Example: A small shop reclaimed two torches and a control board from one retired welder and saved about $1,200 on replacement parts.
– Step 2: sell or reuse those components instead of buying new ones.
That reduces your parts spend and delays full-equipment purchases.
2) How you recover value from metals
Why it matters: scrap metals bring cash that lowers net lifecycle cost.
– Step 1: separate steel, copper, and aluminum during teardown.
Example: Separating copper wire from a power cable yielded $150 in scrap for a single machine at current prices.
– Step 2: take sorted metals to a local recycler or use a collection service that pays by weight.
You’ll offset disposal fees and sometimes get positive income.
3) How you save on operational energy
Why it matters: refurbishing and upgrading parts can make equipment run more efficiently, cutting energy bills.
– Step 1: replace worn consumables and retrofit with newer, higher-efficiency components where possible.
Example: Swapping an old power module for a modern inverter reduced a shop’s welding energy use by around 20% and cut monthly electricity by about $75.
– Step 2: calibrate machines after rebuilds so they run at optimal settings.
You’ll see lower cycle energy per weld and fewer scrapped parts.
4) How this improves ROI and lowers total ownership
Why it matters: combining reclaimed parts, scrap sales, and energy savings shortens payback time.
– Step 1: track costs before and after recycling—record parts saved, metal revenue, and monthly energy change.
Example: After recycling three units and refurbishing two, one shop cut its projected five-year replacement budget by 30% and improved ROI on remaining machines.
– Step 2: reinvest recovered cash into targeted upgrades like better consumables or preventive maintenance.
That extends service life and reduces unexpected downtime.
Practical tip: start small — pick one retired or end-of-life welder, follow the steps above, and measure the savings. You’ll know fast whether scaling up is worth it.
Can Used Welding Robots Be Certified for Safety and Performance?
Before you buy a used welding robot, know why certification matters: it proves the machine is safe for your people and will meet your production tolerances.
You can get a used welding robot certified by following specific steps that inspectors recognize. Example: a fabricator in Ohio bought a 6-axis FANUC unit and had it recertified before running car-body welds — they avoided a month of downtime and a safety citation.
1) Inspect and document the robot
- Why it matters: you need a baseline to show what’s worn or modified.
- Steps:
- Visually inspect structural parts, wrist bearings, and cables for cracks, gouges, or exposed wiring.
- Check the teach pendant, E-stops, safety interlocks, and zone sensors operate correctly.
- Record serial numbers, firmware versions, and any past accident or repair records.
2) Test electrical and control systems
- Why it matters: electrical faults cause fires or unexpected motion.
- Steps:
- Measure insulation resistance and earth continuity to manufacturer specs.
- Verify pendant inputs/outputs, safe torque off (STO) or emergency stop circuits, and robot brake function under load.
- Run a dry motion test at programmed speeds to confirm repeatability within your tolerance (for welding, often ±0.5 mm).
3) Retrofit missing or deficient safety items
- Why it matters: modern safety equipment often makes the difference between pass and fail.
- Steps:
- Install or replace light curtains, area scanners, or interlocked guards to match your cell layout.
- Add a safety PLC or certified relay module if the existing controller lacks documented safety functions.
- Update or lock out teach modes so manual moves require a key or password.
4) Validate welding performance
- Why it matters: safety certification doesn’t guarantee weld quality.
- Steps:
- Run qualification welds on sample parts using the same fixtures, torch, and wire you’ll use in production.
- Measure bead size, penetration, and positional repeatability; document results with photos and measurement logs.
- If needed, adjust robot kinematics or replace worn wrist reducers to hit your target tolerances.
5) Get formal inspection and paperwork
- Why it matters: you need a signed record to show regulators or insurers.
- Steps:
- Hire a certified inspector or the robot OEM to perform a safety audit and provide a dated certificate.
- Collect test reports, calibration certificates, and an updated risk assessment for the cell.
- Keep these documents with the asset file and attach them to your maintenance schedule.
Practical numbers to aim for: aim for motion repeatability of ±0.5 mm for most welding, insulation resistance above 1 MΩ at 500 V for control wiring, and documentation showing zero unresolved safety interlocks.
A final example: a small metal shop bought a refurbished ABB robot, replaced its worn wrist reducer, added a light curtain, and had the OEM certify it; they resumed single-shift production at 90% of the new-robot cycle time within two weeks.
Yes — you can certify a used welding robot, and when you follow these steps you’ll have the records and tests insurers and inspectors expect.
What Are Training Requirements for Welders on Advanced EV Systems?
Before you start training for EV welding, know why it matters: your work can affect battery safety and vehicle integrity.
You need specific certifications and vendor credentials. Get an AWS SENSE or D1.1 welding certificate for basic arc and MIG skills, plus a robot-vendor certificate (for example, FANUC or KUKA) if you’ll program automated cells. Real-world example: a small shop I visited required AWS D1.1 plus FANUC R-30iB coursework before letting technicians weld battery enclosures.
Why hands-on practice matters: welding insulated battery trays feels different because of thinner sheet metal and tight tolerances. Use simulators and actual fixtures so you can feel distortion and heat input. Example: practice on a 1.2 mm aluminum jig, using 0.8–1.0 mm filler wire, and measure warpage under a dial indicator to 0.1 mm.
How to structure your learning (steps):
- Get basic welding foundation: 40–80 hours of MIG and TIG practice on steel and aluminum.
- Add EV-specific modules: 20–40 hours learning low-heat techniques, aluminum pulse parameters, and thin-gauge fixturing.
- Complete robotic welding training: 16–40 hours per robot platform, including teach pendant use and safety interlocks.
- Train on cobots: 8–16 hours focused on collaborative safety zones and hand-guided programming.
- Finish safety and insulation coursework: 8–12 hours covering high-voltage awareness, PPE, and dielectric testing.
Real-world example: a technician followed those steps over three months and reduced rework on battery housings by 60%.
What you should practice regularly and why it matters: welding for consistent heat input keeps battery cells safe. Practice these three things weekly: bead profiles, pulsed MIG settings, and tacking sequence. Do each exercise at least 10 repetitions and record parameters.
Safety and high-voltage specifics: you must learn lockout/tagout and how to test for residual voltage. Carry a digital insulation tester and use a 1,000 V DC-rated meter when checking packs. Example: on one job, a tech avoided a shock by measuring open-circuit voltage before cutting an enclosure.
Recertification and staying current: re-certify every 1–2 years for AWS or vendor programs and add 8–16 hours of refresher training when manufacturers release process updates. Example: when a battery maker changed weld spec tolerances, shops required a 1-day update course before technicians resumed production.
If you’re buying training for your team, prioritize these three items: certified instructor-led hours, robot vendor hands-on slots, and a small set of real EV fixtures for practice. Buy kits that include a 1.2 mm aluminum panel, jig, and recommended filler wire so your team can replicate production conditions.
Follow these steps and you’ll have a clear, practical pathway to weld on advanced EV systems safely and correctly.
How Do Tariffs and Trade Policies Impact Welding Equipment Sourcing?
If you’ve ever watched import prices jump overnight, this is why.
Tariffs matter because they raise your purchase price and slow deliveries, so you’ll change where and how you buy welding equipment. For example, a small shop in Ohio bought MIG welders from a Chinese supplier at $400 each; after a 25% tariff and $50 shipping, the unit cost jumped to $550 and the supplier delayed shipments by six weeks while paperwork cleared. You should expect higher landed costs and longer lead times.
Why this matters: higher costs eat your margins and delayed machines halt production.
How you respond — three clear steps:
- Calculate true landed cost.
- Add unit price, tariff rate, duty, shipping, and brokerage fees.
- Example: $400 + 25% tariff ($100) + $50 shipping + $30 broker = $580.
- Find at least two alternative vendors in different countries or regions.
- Example: keep one US distributor and one European maker as backups.
- Increase safety stock for critical items by 20–30% if lead times rise.
- Example: if you used to keep two spare welders, keep three now.
If you want cheaper options, source regionally to avoid high tariffs and long sea transit. A metal fabrication shop in Mexico switching from Asia to a Texas supplier cut duties to zero and reduced transit from 30 days to 2 days, so they got machines faster and saved about $80 per unit.
Why this matters: faster deliveries reduce downtime and carrying costs.
How to prioritize local vs. international vendors — four tactics:
- Rank parts by criticality (1 = critical, 3 = noncritical).
- For critical items, prefer suppliers within your trade bloc or country.
- For noncritical consumables, use low-cost overseas suppliers if landed cost stays below local price.
- Re-negotiate contracts to include tariff escalation clauses or supplier rebates.
Example: a construction contractor labeled welding helmets as noncritical and sourced them overseas, while buying torches locally to avoid stoppages.
Why compliance matters: misclassifying products can trigger fines or unexpected duties.
How to keep compliance simple — two steps:
- Get HS codes for each item from your supplier and confirm with customs or a broker.
- Document invoices, certificates of origin, and tariff rulings for audits.
Example: a small manufacturer saved $15,000 in penalties after aligning HS codes for spare parts before a customs review.
Why tracking trade policy changes matters: policies shift quickly and affect pricing and availability.
How to stay informed — three actions:
- Subscribe to your country’s trade authority alerts.
- Work with a customs broker who sends monthly impact summaries.
- Monitor supplier locations and lead times quarterly.
Example: after monitoring alerts, a shop learned of a proposed tariff and pre-ordered critical spares, avoiding a 12% price hike.
Final practical tip: run a simple quarterly review — calculate landed costs, update supplier rankings, and adjust safety stock. It takes one hour and prevents surprises.
Are There Standard Interoperability Protocols Across Welding Manufacturers?
If you’ve ever tried to get welding gear from different makers to talk to each other, this is why.
No, there isn’t a single universal protocol everyone uses; manufacturers still ship a mix of proprietary formats and different open standards. That matters because if your robot welder, power source, and quality logger use different formats, you’ll spend time and money translating data instead of welding.
Why this matters: without consistent formats you’ll face integration delays and extra costs when you connect equipment.
Example: a fabrication shop I know had a Fanuc robot, a Lincoln power source, and a third-party inspection system; their weld current data needed reformatting before the inspection tool could read it.
What standards are showing up
- OPC UA: an industrial, secure protocol that supports structured data models and is gaining adoption among OEMs for real-time and historical data.
- Example: a machine tool vendor exposing weld parameters and alarms via OPC UA so a plant historian could log them automatically.
- MTConnect: a simpler, read-only XML/JSON-based standard focused on manufacturing telemetry; it’s easy to deploy for basic status and metrics.
- Example: a small shop used MTConnect to stream spindle speed and weld time to a dashboard without changing machine firmware.
How to proceed if you need interoperability (steps)
- Audit your equipment: list each device, its communication options (Ethernet, serial, USB), and supported protocols (OPC UA, MTConnect, Modbus, proprietary).
- Prioritize targets: pick the devices that must interoperate first (typically robot controller and power source).
- Check vendor options: ask manufacturers for available protocol gateways, firmware updates, or SDKs.
- Use a gateway or middleware: deploy an OPC UA/MTConnect gateway or a PLC that translates proprietary formats into a standard.
- Validate data: run a test for each parameter (current, voltage, wire feed speed) and confirm units and timestamps match expected values.
Example: to integrate a legacy welder that only outputs RS-232, you can add an edge gateway that converts RS-232 to OPC UA and maps weld current to a named node the rest of your system reads.
Practical tips
- Start small: connect one parameter first, like weld current, then expand.
- Ask for data dictionaries from vendors so you know what each field means.
- Plan for timestamps: use UTC or a single plant time source to avoid mismatches.
Bottom line: OPC UA and MTConnect are becoming common, but you should expect to do one of three things—use vendor gateways, add middleware, or write a custom translator—depending on how modern or proprietary your gear is.