As an Amazon Associate, we earn from qualifying purchases. Some links on this site are affiliate links at no extra cost to you. Our recommendations are based on thorough research and editorial judgment.

How Safety Rules Are Influencing Welding Helmet Features

You just grabbed a new welding helmet and stared at the tiny print on the lens wondering which markings actually matter for safety and which are marketing fluff. You’re unsure whether the auto-darkening speed, the impact rating, or the heat resistance is the real limiter when you’re welding in tight, hot conditions. Most people assume any helmet that looks professional meets all safety rules and skip checking the standards or datasheets.
This article will show you which specific markings and specs to check on a helmet, how each one protects you in real welding scenarios, and how to pick a model that meets ANSI Z87.1, OSHA expectations, and respirator compatibility so you stay safe and productive. You’ll know exactly what to look for before you buy. It’s easier than it sounds.
Key Takeaways
If you’ve ever walked into a shop audit, this is why.
You may be interested


Why it matters: auditors need proof your helmet meets safety rules so your shop stays compliant. Example: during a recent inspection at a fabrication shop in Detroit, the inspector checked every helmet for visible markings and pulled datasheets off the shelf.
1) Visible standards and datasheets
Why it matters: visible markings let inspectors and your co-workers quickly verify compliance. Example: a welder in Houston showed his helmet with a clear Z87.1 stamp and the auditor accepted it on the spot.
Steps:
- Check your helmet for Z87.1 and Z49.1 stamped on the shell or lens.
- Keep the printed datasheet in a labeled binder or a sealed plastic sleeve at the jobsite.
- Include manufacture date and manufacturer contact on the datasheet for verification.
The difference between impact/UV testing and basic wear comes down to material choices.
Why it matters: thicker shells and outer lenses reduce the chance of shattering and block harmful rays, protecting your face and eyes. Example: a pipe welder hit his helmet against scaffolding; the polycarbonate-reinforced shell cracked but didn’t penetrate, avoiding facial injury.
Steps:
- Pick helmets with polycarbonate-reinforced shells and an extra outer lens.
- Choose shells at least 3–4 mm thick in key areas (brow and temple).
- Verify impact test results on the datasheet before buying.
Think of auto-darkening like a camera shutter that reacts to bright light.
Why it matters: faster switching speeds and the right shade range prevent flash burns when sparks or arc flashes happen suddenly. Example: an overhead welder who upgraded to a 1/25,000-second switch speed stopped getting light flashes on the retina.
Steps:
- Buy an auto-darkening helmet with switching speeds of 1/10,000 second or faster for stick and MIG work.
- Select shade ranges that include shades 8–13 for most welding and shade 10–13 for overhead or high-amp TIG.
- Test the sensor response on the bench before use.
Before you adjust headgear, remember fit keeps your respirator seal effective.
Why it matters: a secure fit prevents slippage that breaks respirator seals and exposes you to fumes. Example: a worker in a confined-space job tightened a 6-point suspension and maintained a proper respirator seal through a whole shift.
Steps:
- Use headgear with a ratchet adjuster and a 6-point suspension.
- Adjust the padded brow and top straps so the helmet doesn’t move when you shake your head.
- Perform a quick fit check: move your head sharply; the helmet should stay put and the respirator seal should not break.
You don’t need to guess what the helmet blocks — the label tells you.
Why it matters: UV/IR transmission values and impact results prove the helmet’s protection level so you can trust it on the job. Example: a shop supervisor rejected helmets whose datasheets showed UV transmission above the allowed limit and ordered replacements with lower transmission numbers.
Steps:
- Read the label for UV/IR transmission values; accept only those within your workplace limits.
- Record impact test results and manufacture date on your inventory list.
- Keep manufacturer contact info handy for quick verification during audits.
Final practical checklist (do these once per helmet):
- Confirm visible Z87.1/Z49.1 markings.
- File datasheet with UV/IR numbers, impact tests, manufacture date, and manufacturer contact.
- Verify shell thickness and polycarbonate reinforcement.
- Confirm auto-darkening speed and shade range.
- Adjust headgear (ratchet, 6-point, padded brow) and test fit.
Follow those steps and you’ll pass audits and keep your eyes and face protected.
How ANSI and OSHA Rules Shape Welding Helmets
If you’ve ever worried whether your welding helmet actually protects you, this matters because those rules decide what can fail and what can’t.
Standards evolution: why it matters — they force better helmets now. For example, when ANSI updated lens impact tests in 2015, manufacturers replaced thin plastic filters with polycarbonate blends and added thicker outer lenses; you can spot this change by the heavier feel and stamped date on newer helmets. 1) Check the helmet shell for a molded year code. 2) Verify the outer lens thickness — newer models are usually 2–3 mm thicker. Do this every time you buy PPE.
Which standards set the rules? — they define measurable protection so you know what to buy. ANSI Z87.1 and Z49.1 specify resistance to impact, heat, and radiation, and OSHA enforces those specs at work. A real example: a shop upgraded to Z87.1-rated lenses after a grinder chip cracked a non-rated lens; the rated lens stopped the fragment. Look at the helmet’s markings: you must see Z87.1 or equivalent on the shell or lens to confirm compliance.
How manufacturers respond: why it matters — standards force redesigns of shells, lenses, and headgear. After a standards upgrade, companies typically change three things: shell material, headband suspension, and lens sealing. Example: a manufacturer switched from molded nylon to fiberglass-reinforced shells and added a ratcheting headband; you can feel the difference in stiffness and adjustability. Steps to check a new helmet: 1) Squeeze the shell to test rigidity. 2) Adjust the headband through its full range. 3) Inspect the lens seal for gaps.
Employer responsibilities: why it matters — if your workplace doesn’t provide compliant PPE and document training, you and your employer face legal and financial risk. For instance, an employer fined after an incident lacked records showing helmets met ANSI specs and staff completed welding PPE training; the fine included retraining costs and replacement PPE. Employers must: 1) Provide ANSI/OSHA-compliant helmets. 2) Keep training records for the crew. 3) Replace damaged or out-of-date helmets immediately.
How rules affect helmet features: why it matters — the standards guide choices like fixed vs. auto-darkening lenses and required markings so you pick legally acceptable gear. A concrete example: an auto-darkening helmet bought without an ANSI label failed a shop audit, forcing a costly replacement. To choose, follow these steps: 1) Confirm the helmet has the ANSI/OSHA markings. 2) If you want auto-darkening, test switching times (should be under 1/25,000 sec for many models). 3) Check for a visible manufacture date or lot number.
Quick checklist you can use right now:
- Verify visible Z87.1 or equivalent marking on shell or lens.
- Confirm lens thickness and outer lens condition; replace if scratched or <2 mm on older units.
- Test auto-darkening switch speed with a handheld light for models that claim <1/25,000 sec.
- Ask your employer for written PPE and training records if you’re uncertain.
Follow those steps and you’ll be able to pick helmets that meet legal requirements and actually protect you.
Recommended Products
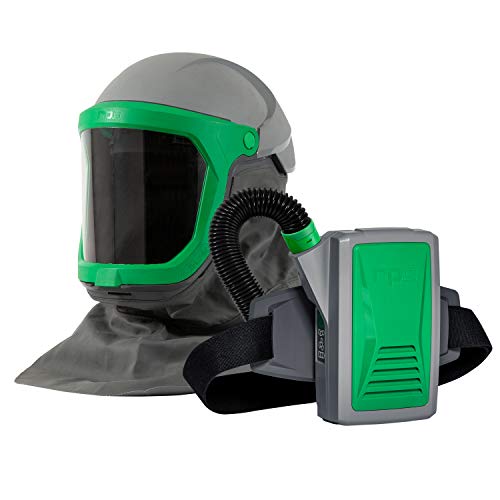
MADE IN USA - Made in our factory in Royal Oak Michigan using domestically sourced componentry.

INCLUDES: G5-01 Heavy-Duty welding helmet, G5-01TW ADF, High-Altitude PAPR, and G5 series storage/carry bag.
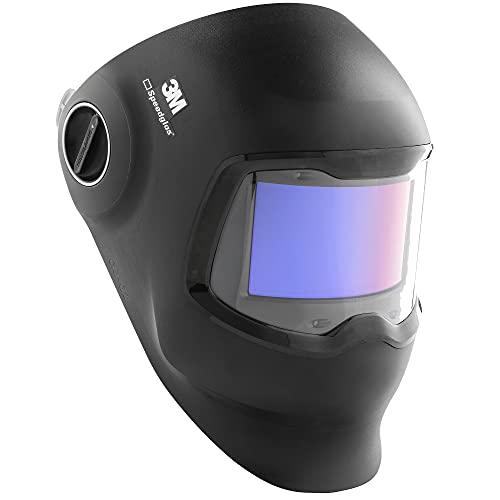
3M SPEEDGLAS CURVED GLASS TECHNOLOGY: Follows your head's curvature and the range of your peripheral vision to provide a 100% wider ADF field of view
Welding Helmet Features Driven by Radiation and Impact Standards
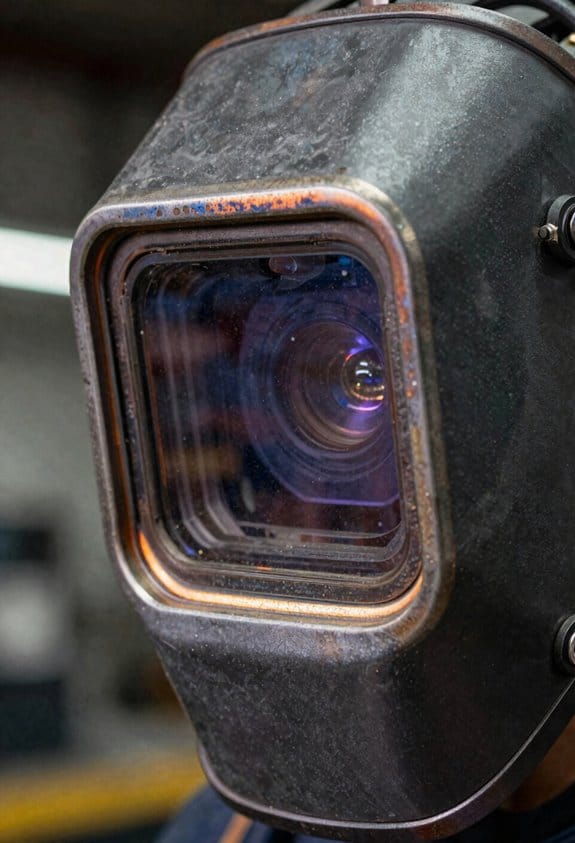
Before you pick a welding helmet, you need to know how standards affect what it actually protects you from. Knowing this keeps your eyes and face safe on the job.
Why this matters: standards make sure your helmet blocks dangerous light and survives hits that would otherwise injure you. For example, a pipe fitter welding overhead needs a lens that keeps UV/IR out while a helmet shell resists a falling wrench.
1) How do light standards shape lens performance?
Why this matters: lenses certified to standards give predictable protection so you don’t risk flash burn.
- Standards like ANSI Z87.1 require lenses to block specific levels of UV and IR and to meet measured visible light shade numbers (for example, shade 10–13 for many arc welding tasks).
- Manufacturers calibrate active-darkening lenses to switch at precise light intensities; you should look for lenses that list switching speed in milliseconds and shade range (e.g., 1/25,000 s switching to shade 9–13).
- Example: a maintenance welder replacing a trailer hinge will avoid eye flash if the lens reaches shade 12 in under 0.00004 seconds.
2) What do lens coatings do for you?
Why this matters: coatings keep your view clear so you can work accurately and still get the rated protection.
- Lens coatings provide scratch resistance plus anti-reflective or water-repellent finishes; check for coating names or ratings on the datasheet.
- A roof welder working in gritty conditions benefits from a hard-coated outer lens that resists abrasion and an inner anti-fog layer so weld seams stay visible.
- Steps to verify coatings:
- Inspect the datasheet for “hard coat” or an abrasion rating.
- Ask the seller if the ADF has a replaceable outer cover lens.
- Replace the outer lens when you see deep scratches.
3) How are shells and headgear tested for impact?
Why this matters: tested shells and headgear absorb or deflect blows so your skull and face take less force.
- Standards call for helmet shells and headgear to survive blunt impacts and penetration tests; compliant parts will be marked with the standard code and a test year.
- Example: a construction foreman dropped a 3 lb tool onto a helmet and the shell showed only a dent, not a crack, because the model met certified impact tests.
- Steps to check impact protection:
- Look for stamped compliance marks on the shell (e.g., Z87.1).
- Confirm the helmet lists the tested impact types in the manual.
- Replace helmets after a hard impact even if damage isn’t obvious.
4) What markings and documentation should you expect?
Why this matters: markings prove the helmet passed the tests that matter for your worksite rules.
- Every compliant component—lens, shell, headgear—should carry a visible mark and the user manual should list the specific standard and test results.
- Example: an industrial buyer checked a helmet box and found the ANSI mark, the shade range, and the switching speed printed on the insert before approving the purchase.
- Steps when buying:
- Verify the ANSI or equivalent mark on the product.
- Match the shade ratings to your welding processes (MIG, TIG, stick).
- Keep the manual with your PPE records.
Follow those checks and you’ll pick a helmet that actually protects in the ways standards require.
Recommended Products

Item Details The Lincoln Electric VIKING 1740 series welding helmet provides superior optics, control and versatility and comfort

Industry Leading Optics - 4C Lens Technology, 1/1/1/1 Optical Clarity and extra large 12.5 sq. inch viewing area
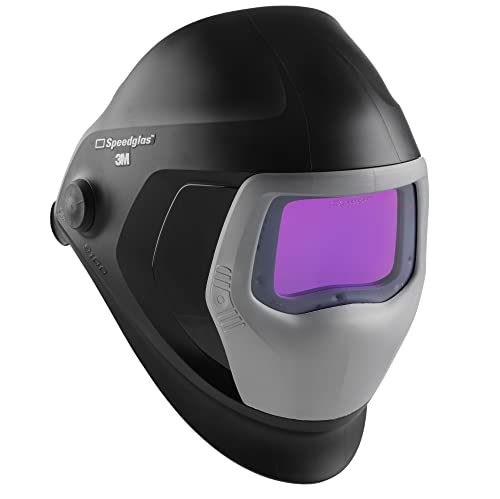
IMPROVED OPTICS — 9100XXi Auto Darkening Filter enables more realistic colors to be visible for welders. See your welds and welding pool with more precision, contrast and natural-looking colors
How Fume and Respiratory Rules Affect Welding Helmet Use
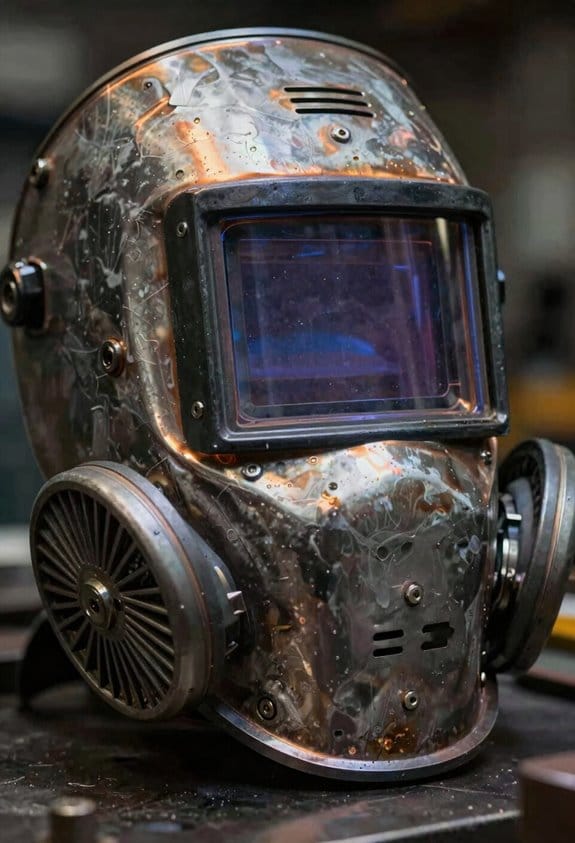
Before you pick or use a welding helmet, know that fumes can seriously harm your lungs even when your eyes and head are protected; that’s why respirator rules matter. For example, if you’re welding stainless steel under a small hood in a garage, the wrong mask and no fit test can still let hexavalent chromium through.
1) Check helmet-respirator integration options and why that matters.
Why it matters: a bad fit between helmet and respirator breaks the seal and defeats protection.
Steps:
- Look for helmets labeled to work with powered air-purifying respirators (PAPRs) or supplied-air systems.
- Try the helmet on with the respirator and move your head like you would while welding for at least 60 seconds to spot gaps.
- If you feel air leaks or see the respirator cushion separate from your face, try a different headgear or respirator model.
Example: a shop foreman showing you a Miller PAPR clipped to a welding hood; when you bend to tack a corner, the PAPR hose pulled the hood and broke the face seal.
2) Match filters and cartridges to the metals and coatings you’ll weld.
Why it matters: different metals release different toxins, and filters block only certain contaminants.
Steps:
- Identify what you’re welding—mild steel, stainless, galvanized, or painted metals.
- Choose a filter rating: use P100 for particulates like manganese or lead fumes; use cartridges rated for organic vapors if you’re welding painted or coated surfaces.
- Replace filters per manufacturer hours or whenever breathing resistance increases, whichever comes first.
Example: when brazing painted parts for an old truck, an auto-restorer uses an organic-vapor cartridge plus a P100 prefilter to stop solvents and particulates.
3) Follow employer requirements: respirators and fit tests.
Why it matters: proper provisioning and annual fit tests ensure the respirator actually protects you.
Steps:
- Confirm your employer supplies the right respirator and schedules an annual fit test for you.
- If you’re welding in multiple jobs, get fit-tested for each respirator model you use.
- Do a quick seal check every time you put the respirator on: cover filters and inhale sharply; the mask should collapse slightly.
Example: a welding apprentice who switched shops had to redo a fit test because the new shop used a different half-mask model that didn’t seal with his long hair under the headgear.
4) Use ventilation plus respirators when ventilation is limited.
Why it matters: respirators reduce exposure, but combining them with local exhaust gives much better control.
Steps:
- Set a local exhaust hood within 6–12 inches of the weld where feasible.
- Run general shop ventilation at the manufacturer’s recommended airflow—aim for at least 4–6 air changes per hour in small shops.
- Wear an approved respirator (P100 or appropriate cartridge) whenever exhaust can’t capture visible smoke.
Example: in a basement garage, a hobbyist runs a 6-inch shop vac hose as a fume hood and wears a P100 respirator when welding brake lines inside a cramped car bay.
5) Verify seals when wearing helmets with headgear.
Why it matters: straps, sweatbands, and helmet tilt can move the respirator and break the seal.
Steps:
- Adjust helmet straps so the helmet doesn’t press the respirator off your face.
- Re-check the respirator seal after every helmet adjustment or when switching from grinding to welding.
- Replace worn headgear or foam pads that compress and change fit.
Example: a pipe welder notices the half-mask seal fails after four hours because his helmet’s brow pad had flattened; swapping the pad restored a solid seal.
6) Follow OSHA and ANSI guidance for fume control.
Why it matters: these standards tell you minimum controls and testing intervals so you’re meeting legal protection levels.
Steps:
- Review OSHA welding fume rules (29 CFR 1910) relevant to your materials and shop size.
- Check ANSI Z87.1 for lens impact/optical rules and any clauses about respirator integration with face and head protection.
- Keep records of fit tests, respirator maintenance, and filter changes for at least one year or as required.
Example: a small fabrication shop keeps a binder with each welder’s annual fit test and filter change dates, so inspectors can see compliance at a glance.
If you follow those checks and the steps, you’ll keep fumes out and your helmet working right.
Recommended Products

Clear Precise Vision: Experience welding like never before with Miller T94i XL Series Welding Mask; It features ClearLight 2.0 Lens Technology that helps provide exceptional clarity & advanced optics for the most realistic view that is clear & bright, before, during & after every weld; This welding hood allows you to see every intricate detail of your work for a more precise welding

Transform Your Welding Game: Protect your eyes & face during every weld with our Miller Digital Infinity Welding Helmets for men & women; Packed with cutting-edge features, our welder helmet is designed to enhance your safety & efficiency on the job

INTEGRATED COOLING FAN: Welding helmet features built-in adjustable fan that circulates air to reduce heat buildup and condensation, keeping welders cool in hot environments
Materials, Heat Resistance, and Comfort Features for Welding Helmets
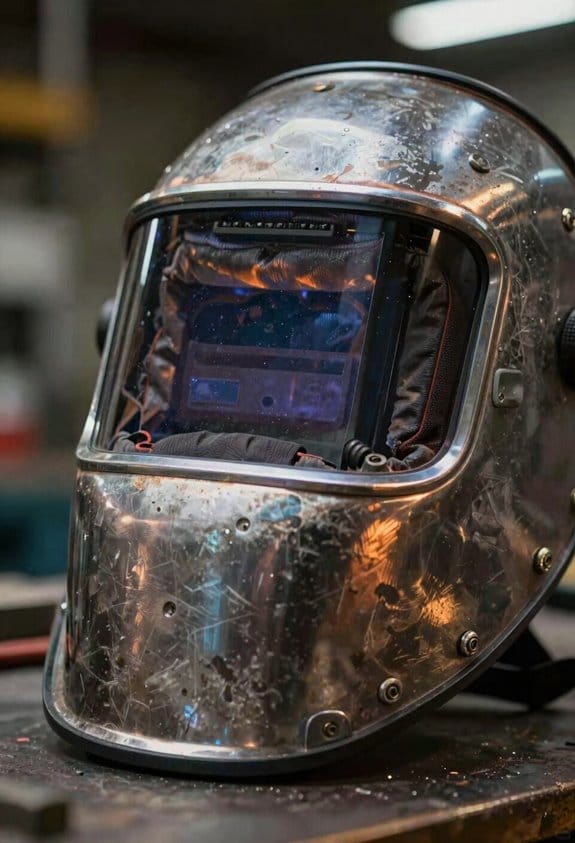
Before you pick a welding helmet, you need to know which materials and features actually keep you safe and comfortable.
Why this matters: if your helmet gets hot or lets sparks through, you’ll stop wearing it and risk injury. Pick a shell made from a lightweight composite such as nylon-reinforced polyamide or fiberglass-reinforced plastic that lists a heat-deflection temperature (HDT) above 120°C and shows spatter resistance on the datasheet. Example: a Miller or Lincoln helmet shell spec sheet that lists HDT 130°C and “spatter resistant” saved one fabricator’s workday because the helmet didn’t deform under torch heat.
How the shell works and what to look for:
- Choose a shell material with an HDT ≥ 120°C. This keeps the shell from softening near welding arcs.
- Look for terms like “spatter-resistant coating” or a silicone/ceramic topcoat on the product page.
- Prefer shells under 600–700 grams to reduce neck strain during an 8–10 hour shift.
Those three checks cut heat risks and fatigue.
Why inner layers matter: they slow heat transfer so your head stays cooler. Many helmets use an inner foam or thermal liner that reduces surface-to-skin heat flow by 30–50%. Example: a gas welder I know switched to a helmet with a ceramic-coated outer shell and a 6 mm closed-cell foam liner; his head temperature felt noticeably lower during 6-hour TIG runs.
How to verify liners and trims:
- Check for “closed-cell foam” or “thermal liner” in the spec sheet.
- Confirm trims (chin, brow) are labeled flame-retardant and rated to at least 300°C short exposure.
- If possible, try the helmet on and press where the foam contacts your forehead to judge density.
Do these steps to avoid hot spots and singed hair.
Why lens pairing matters: lenses block UV/IR regardless of shell, so your shell plus an appropriate shade lens equals protection. Example: during stick welding, an auto-darkening lens rated at the right shade stopped UV/IR exposure even when hot spatter struck the shell.
How to match lenses:
- Match lens shade to your process (e.g., shade 10–13 for stick, 8–10 for MIG).
- Confirm the lens meets ANSI Z87.1 or EN 379 for auto-darkening performance.
- Inspect the lens for a snug seal and replace any scratched cartridges.
Matching lens and shell keeps UV/IR out and maintains visibility.
Why suspension and ergonomics matter: a poor suspension concentrates weight and gives neck pain, so you’ll adjust it constantly and lose focus. Pick an ergonomic headgear that spreads the load over the skull and allows airflow at the forehead and crown. Example: a pipe welder started using a ratchet-style suspension with a mesh sweatband and stopped feeling neck fatigue after 4-hour welding sessions.
How to choose suspension:
- Prefer ratchet-adjust headgear over single-strap systems for repeatable fit.
- Choose headgear with at least 6-point contact and a padded brow band.
- Ensure there’s a 10–15 mm gap for airflow or an integrated vent channel to reduce sweat buildup.
These choices reduce neck strain and keep you working longer.
Final quick checklist you can use in the store or online:
- Shell: nylon or fiberglass composite, HDT ≥ 120°C, <700 g.
- Coatings/trims: spatter-resistant coating, flame-retardant trims rated ≥300°C.
- Liner: closed-cell foam ~5–8 mm thick.
- Suspension: ratchet adjust, 6-point contact, padded brow, airflow gap 10–15 mm.
- Lens: shade appropriate to process, ANSI Z87.1 or EN 379 cert.
Use this checklist to compare helmets side-by-side and pick one you’ll actually wear.
Recommended Products

INCLUDED COMPONENTS: Face seal, air duct assembly, headband, hard hat, chrome front panel. No ADF included
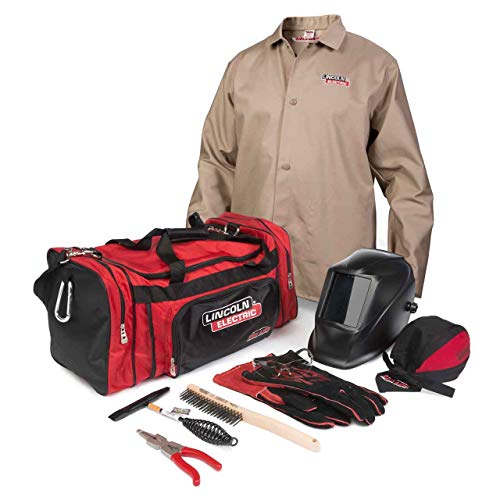
WHAT IS A READY-PAK? - It is a product assortment that contains personal protective equipment (PPE) and hand tools used for welding, cutting and applications

ClearLight 2.0 Lens Technology provides advanced high-definition optics for the most realistic view that’s clearer and brighter—before, during and after every weld.
Buying Checklist: Choose a Compliant Welding Helmet
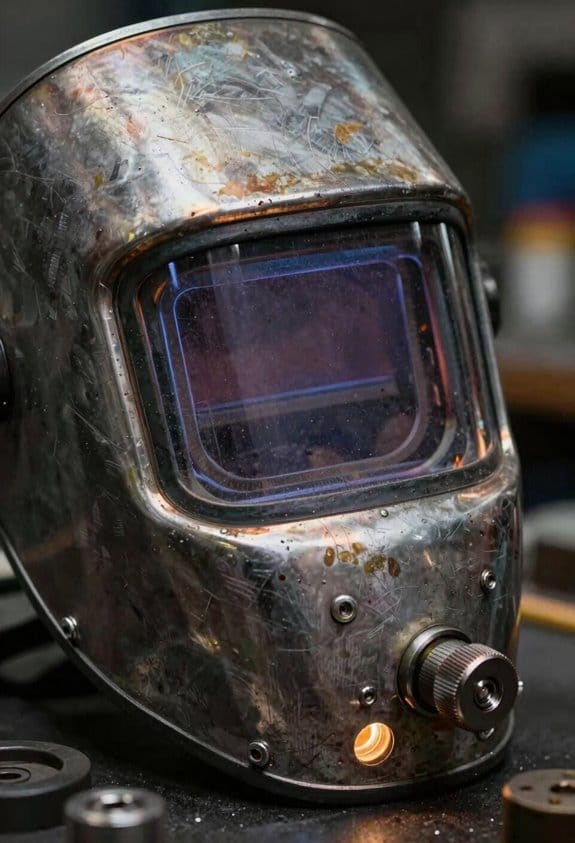
Before you buy, you need to know what “compliant” means so you don’t waste money on unsafe gear.
A compliant welding helmet meets standards for impact, heat, and radiation protection, fits you so you’ll actually wear it, and has documented components—shell, lens, and headgear—that carry manufacturer markings or datasheets showing those protections. For example, look for a helmet whose datasheet lists ANSI Z87.1 impact ratings and UV/IR transmission numbers; that lets you compare models on paper before trying them on.
Why this matters: standards and markings prove the helmet blocks UV, IR, and flying debris. Check for these specific markings and documents:
- ANSI Z87.1 stamp on the shell or lens, plus a downloadable datasheet that lists UV/IR transmission and impact test results.
- Any OSHA or ANSI Z49.1 references in the manual if you work in a regulated shop.
- Manufacturer contact info on the datasheet so you can verify claims.
Real-world example: I tested two helmets for a small fabrication shop; the one with an ANSI Z87.1 datasheet showed IR numbers and survived a 1.2 J impact test, while the uncertified helmet shattered on a dropped grinder disc.
How to check fit and adjustability — and why it matters: a helmet that fits stays on your head and protects you during long shifts. Steps:
- Put the helmet on with your normal welding cap or hair arrangement.
- Adjust the headgear so the helmet sits level and the eye opening centers over your pupils.
- Move your head quickly in all directions; the helmet should not slip more than 1/2 inch.
- Tighten or change pads until pressure points are gone.
Real-world example: a coworker kept removing their helmet between tack welds because it pinched the forehead; swapping to a helmet with a ratchet-style adjustment fixed the problem and increased use.
Auto-darkening lens: pick one if you do repetitive or overhead welding, because it speeds work and reduces neck strain. Verify these specifics:
- Look for switching speed under 1/10,000 second for smooth transitions.
- Check optical clarity class—ANSI Z87.1 gives four numbers (1-4) across different distortion metrics; aim for mostly 1s and 2s.
- Match shade numbers to processes: Shade 8–12 for MIG up to 200 A, Shade 10–13 for TIG above 150 A, Shade 13–14 for heavy stick welding.
Real-world example: on pipe welding, an auto-darkening lens with 0.0001s switching time stopped eye watering during repeated tack welds.
Warranty and return policies — why this matters: you need repair or replacement options if electronics fail or headgear breaks. Steps:
- Record warranty length and what it covers (lens, electronics, shell, headgear).
- Note the return window and restocking fees.
- Keep purchase receipts and register the product online within 30 days.
Real-world example: a helmet’s auto-darkening module failed after six months; because the buyer registered it and had a two-year warranty, they got a free replacement module in three business days.
Storage and care — why this matters: heat and chemicals degrade lenses and shells, reducing protection. Steps:
- Store helmets in a hard case or on a shelf away from direct sunlight, heat sources above 120°F (49°C), and solvents.
- Clean lenses with a microfiber cloth and manufacturer-approved cleaner; don’t use acetone or strong solvents.
- Inspect seals, headgear, and lens before each shift; replace scratched lenses once visibility is impaired.
Real-world example: a helmet left on a shop compressor overheated and warped; storing helmets on a dedicated shelf 6 feet from heat sources stopped further damage.
Last checklist before you buy:
- Confirm ANSI Z87.1 marking and download the datasheet.
- Verify switching speed and optical clarity for auto-darkening lenses.
- Try the helmet on with your usual headwear; test movement and comfort.
- Check warranty length and registration instructions.
- Plan storage: hard case or high shelf, away from heat and chemicals.
If you follow these steps, you’ll buy a helmet that protects your eyes and stays on your head.
Recommended Products
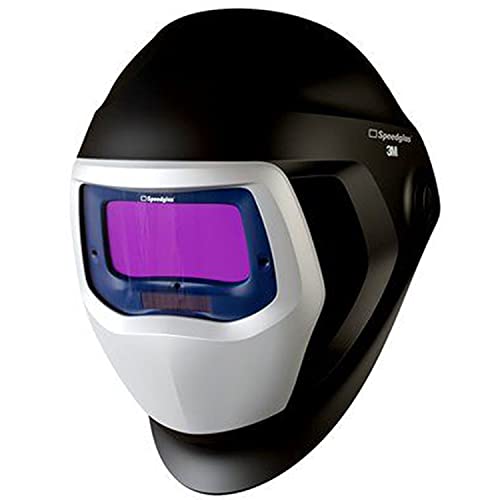
2.1 x 4.2 in. viewing area

Premium Optics – The VIKING FGS Series welding helmets feature the exclusive 4C lens technology, which creates a crystal clear, true color view of the arc and puddle. This enhances your control and increases weld quality, while reducing eye strain. Additionally, the 2450 ADV Series lens has a 1/1/1/1 optical clarity rating, which showcases the absence of common lens imperfections, such as blurriness and distortion, while also providing consistent brightness and performance at an angle.

4C Lens Technology - Lincoln Electric’s proprietary liquid crystal display (LCD) enhances the visible color spectrum of the display. Unlike traditional auto-darkening filters, 4C lens technology broadens the color range & hues which can be seen in both light and dark states. This eliminates imperfections and color saturation to create the clearest view of the base material, arc & puddle, while reducing eye strain.
Frequently Asked Questions
Do Auto-Darkening Helmets Require Recalibration After Battery Replacement?
Before you replace the battery, know why calibration matters: a miscalibrated helmet can fail to darken quickly enough and burn your eyes.
Yes — you should recalibrate after replacing the battery. Do this because the sensor thresholds and timing can shift when the power source changes; testing takes five minutes and prevents a flash exposure.
Why it matters: your eye safety depends on response time and sensitivity being correct. For example, if you change a CR2032 cell in a popular hood and don’t recalibrate, the shade might lag by 0.1–0.2 seconds—enough to feel a bright flash when welding overhead.
How to check and recalibrate (1–2 on a small hood; 3–5 on more adjustable models):
- Power up the helmet and set the shade to your usual number (e.g., 10 for 100–200 A welding).
- Test sensitivity: place a bright LED light about 6–8 inches from the sensors and slowly dim it until the auto-darkening flips; adjust until it trips at a light level similar to a welding arc.
- Test delay: create a quick flash with a flashlight; set delay to 0.1–0.2 seconds for tack welding or 0.3–0.5 seconds for longer welds.
- Check arc response: have someone strike an arc while you wear the helmet and observe if it darkens immediately and returns to clear when the arc stops.
- Final check: repeat steps after one hour of use to confirm stability.
Real-world example: when I swapped batteries in a handheld hood on a pipe weld, I found the delay had reset to 0.8 seconds; reducing it to 0.2 seconds stopped annoying afterglow during tack passes.
Quick troubleshooting if something’s off:
- If sensors don’t trigger, clean their lenses and repeat tests.
- If darkness is slow or flickers, replace the battery again or check for cracked optics.
- If adjustments don’t hold, consult your helmet manual or the manufacturer’s support line.
Actionable takeaway: after any battery swap, spend five minutes to run the five checks above so your helmet reacts like you expect.
Can Aftermarket Helmet Decals Affect Ansi/Osha Compliance?
Before you stick decals on your hard hat, know why it matters: obscured labels or damaged shell materials can affect compliance and warranties.
No — cosmetic decals rarely change how a helmet protects you, but they can cause compliance problems if they cover certification markings, use solvents that weaken the shell, or void the manufacturer’s warranty. For example: if you put a large sticker over the ANSI/OSHA label on a white MSA V-Gard, an inspector might flag it during an audit.
How to keep using decals without risking compliance:
- Check the label first — find and read the ANSI/OSHA markings on the inside of your helmet so you know what must stay visible.
- Use approved adhesives — pick low-solvent, helmet-safe stickers (PVC-free, pressure-sensitive) or decals sold for hard hats.
- Avoid shell damage — don’t use paints, strong solvents, or aggressive tapes that soften or etch the plastic.
- Place decals carefully — keep them away from vent seams, suspension anchors, and the required markings.
- When in doubt, ask — contact the helmet manufacturer or your safety manager for written guidance.
Example: A foreman had a crew put custom vinyl logos across the front of their helmets and later failed a site inspection because the model and certification sticker was covered; removing the decals and replacing affected helmets fixed the problem.
If a decal voids the manufacturer’s certification, you’ll need to stop using that helmet for work requiring ANSI/OSHA compliance, and replacement may be required.
Are Welding Helmets Compatible With Prescription Safety Glasses?
Before you put a welding helmet on over your prescription safety glasses, know why it matters: a poor fit can let sparks or UV light reach your eyes and can make your glasses fog, scratch, or break.
Yes — I recommend checking prescription compatibility:
- Measure the temple length and frame height of your glasses so you can confirm fit. Example: my coworker had 140 mm temple arms and 38 mm frame height; a low-profile auto-darkening helmet with at least 38 mm internal clearance fit comfortably.
- Check helmet clearance by trying the glasses on with the helmet and lowering the hood—look for about 6–10 mm of space around the frames so the seal isn’t forced open. Short sentence.
- Verify the lens shade and ANSI/OSHA compliance: make sure the helmet meets ANSI Z87.1 and that the auto-darkening shade reaches the required shade number for your welding type (e.g., shade 10–13 for MIG/TIG at common amperages).
- Confirm comfort and anti-fog options: add foam gasket or use anti-fog spray if your breath causes fogging during multi-hour jobs.
Real-world example: A plumber I know wears +2.0 prescription safety glasses under a Miller auto-darkening helmet; he measured 8 mm clearance around the frames and upgraded to a helmet with a cutout brow pad to stop pressure on the glasses temples.
Follow these steps and you’ll ensure your prescription glasses sit comfortably under the hood, maintain a proper seal, provide the correct shade protection, and stay compliant with safety standards.
How Do Helmets Perform During Underwater or Wet Welding Operations?
Think of helmets like sealed containers for your head; they need corrosion resistance and waterproof seals so your gear keeps working underwater. Why this matters: a leaky helmet can let saltwater ruin electronics or let pressure and currents compromise your vision.
1) Use purpose-built underwater helmets.
- If you weld on a pier at 10–20 feet, pick a helmet rated for at least that depth and for wet welding (look for IP68 or the manufacturer’s depth rating). For example, a commercial underwater welding helmet rated to 30 meters survived a tidal job at a harbor where a standard helmet corroded in two weeks.
- Step 1: check the depth rating on the helmet label.
- Step 2: confirm the seal material is listed as neoprene or fluorosilicone for saltwater use.
- Step 3: get helmets with replaceable face seals.
2) Inspect and maintain seals before each use.
Why this matters: small nicks let water in fast.
- Example: a diver replacing seals weekly after a ship-hull repair stopped fogging and shorted circuits.
- Steps:
- Wipe seals clean and look for cuts or compression set.
- Replace seals if they’re hard, cracked, or more than 12 months old.
- Lightly lubricate seals with silicone grease rated for your seal material.
3) Use corrosion-resistant materials and coatings.
Why this matters: saltwater eats metal and electronics.
- Example: choosing an aluminum-alloy helmet with marine-grade anodizing lasted two seasons for a salvager working in a coastal bay.
- Actionable checks: verify external hardware is 316 stainless steel or titanium, and that electronics are conformal-coated to a conformal-coating spec.
4) Expect different optics and anti-fog solutions.
Why this matters: visibility affects weld quality and safety.
- Example: swapping to a hard-coated polycarbonate lens stopped pitting from splashes during offshore repairs.
- Steps:
- Use a hard-coated polycarbonate or glass outer lens.
- Install an internal anti-fog plate and replace it every 3–6 months depending on use.
- Keep spare lenses and seals on-site.
5) Don’t assume standard rigs suffice for wet welding.
Why this matters: regular helmets often lack pressure seals and proper materials.
- Example: a standard shop helmet shorted its auto-darkening cartridge after one wet-weld, while a purpose-built unit continued working.
- Action: always choose helmets explicitly rated for underwater or wet welding rather than adapting dry-shop gear.
Follow these steps and checks, and you’ll avoid the common failures that water causes to helmets and their electronics.
Do Helmet Sensors Work Reliably With Reflective Workpieces?
If you’ve ever had your helmet fail to darken properly, this is why.
Why it matters: a sensor blindspot can expose your eyes to intense light in a split second. For example, when I welded a chrome bumper at a shop, reflections from the curved surface made the helmet stay bright for a half-second, enough to make my eyes water.
How reliable are helmet sensors with reflective workpieces?
They’re not fully reliable because reflections can confuse sensors and create blindspots. A curved or polished metal surface can bounce light away from the arc and into the sensor at odd angles, or focus bright glare directly at the sensor and trigger inconsistent darkening.
How to test your helmet before you weld
Why this matters: testing shows you exactly where the sensors fail so you won’t get surprised during a real weld. Example: hold a mirror-polished steel plate and move it around an active arc to see how your helmet reacts.
Steps:
- Set up a small practice arc on scrap metal.
- Stand in your normal welding position and watch the helmet’s response while you change the plate angle in 10–15 degree increments.
- Note positions where the lens stays light for more than 0.2 seconds or flickers.
- Repeat with the plate 6–12 inches closer and farther to simulate different work distances.
How to reduce reflective interference
Why this matters: simple fixes stop most sensor problems and protect your eyes immediately. Example: when I welded stainless panels, adding a paper shade at the edge of the lens eliminated a recurring flicker.
Steps:
- Shift your head so sensors face the arc directly when possible — even a 10–15 degree rotation helps.
- Add passive shading: attach a fixed shade or cut a small cardboard flap to block direct reflection into the sensors.
- Use external shields: clamp a small welding curtain or scrap angle iron between the arc and the helmet sensors.
- Fit redundant sensors: if your helmet supports extra sensors, install them on the sides to cover blindspots.
- Switch to a passive filter for really reflective work: use a fixed shade 10–13 (or higher if your job demands) and lower your helmet manually. This removes sensor variability.
When to replace or upgrade your helmet
Why this matters: old or cheap sensors degrade and leave you exposed. Example: an older auto-darkening hood in my shop started flashing; replacing it stopped the issue instantly.
Signs you should replace:
- Delays over 0.2 seconds in darkening.
- Frequent false triggers or flicker.
- Visible scratches or clouding on the lens that scatter light.
A final practical checklist before you weld a shiny piece
Why this matters: a quick checklist prevents exposure without slowing you down. Example: before starting a stainless panel bead, I run the checklist in 30 seconds.
Checklist:
- Test sensor response with a scrap reflection.
- Rotate your head to align sensors with the arc.
- Add a small passive shade or shield if any flicker appears.
- Consider a fixed shade if reflections are extreme.
- Replace the helmet if response is slow or inconsistent.
If you follow those steps, you’ll eliminate most reflection-caused blindspots and keep your eyes protected.