As an Amazon Associate, we earn from qualifying purchases. Some links on this site are affiliate links at no extra cost to you. Our recommendations are based on thorough research and editorial judgment.
How Preventive Maintenance Reduces Downtime in Small Shops
You’re standing in a busy shop staring at a machine that just quit mid-job, wondering which part failed and how long the fix will take.
You may be interested


You ask yourself whether a quick fix will hold or if this is the start of a recurring problem that eats profit and time.
Most shops ignore short, regular checks and wait until a breakdown forces expensive emergency repairs.
This article shows a simple, step-by-step preventive maintenance routine you can start today—daily inspections, scheduled lubrication, and a small spare-parts plan—that cuts unplanned stops and raises uptime.
You’ll learn how to track runtime, stops, and cost per event to prove savings and calculate ROI.
It’s easier than it sounds.
Key Takeaways
Here’s what actually happens when you keep an eye on your equipment: small problems get fixed before they stop everything. A loose bearing or a frayed belt will usually make odd noises or heat up first; if you check monthly and replace a worn belt at 10–15% visible fraying, you avoid a full-day breakdown.
Why this matters: unexpected downtime costs you labor and missed orders in cash. For example, in a two-person machine shop a seized spindle halted work for eight hours last year because a worn bearing wasn’t caught early; a $30 bearing replaced at the first squeak would have kept the day running.
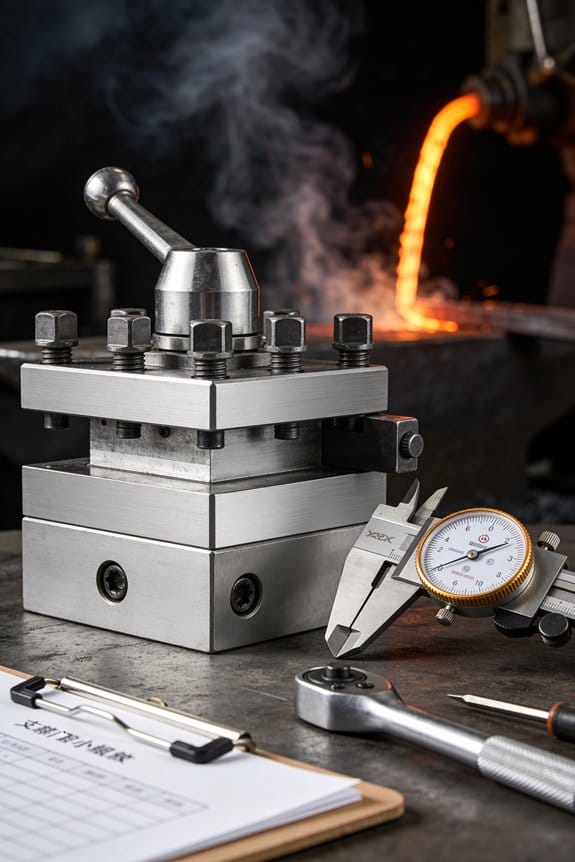
Before you start lubricating, know that lubrication prevents friction that leads to seizure and overheating. Do this every 3 months for light-duty machines and every 4–6 weeks for high-use equipment; use the grease type listed on the machine plate (NLGI 2 is common). A simple visual: if grease looks dry and metal feels warm after 10 minutes of run time, relube immediately.
How to do scheduled lubrication (step-by-step):
- Find the lubrication points on your machine — they’re usually labeled or in the manual.
- Clean around the fitting, apply 2–3 pumps with a grease gun, and wipe excess.
- Run the machine for 5 minutes and recheck temperature by touch; it should feel only slightly warm.
Why filter and fluid changes stop sudden failures: dirty filters starve components of oil or air and let contaminants abrade parts. In a concrete example, a dusty fabrication shop replaced hydraulic filters quarterly; when they stretched to six months, a contaminated valve failed and cost $1,200 in repairs and two days of downtime.
How to schedule filter and fluid changes (steps):
- Check the manual for intervals; if you can’t find it, start with oil and hydraulic changes every 6 months and filters every 3 months.
- Keep a log with date, mileage/hours, and parts used.
- Keep one spare of each common filter on the shelf so you don’t wait for parts.
If you want a simple inspection routine, do this weekly quick-check: listen for unusual noises, look for leaks, and feel for hot spots after a short run. It takes 10 minutes. For example, a weekly check in a small woodshop caught a small oil leak at a pump shaft that only cost a $12 seal and 30 minutes to fix.
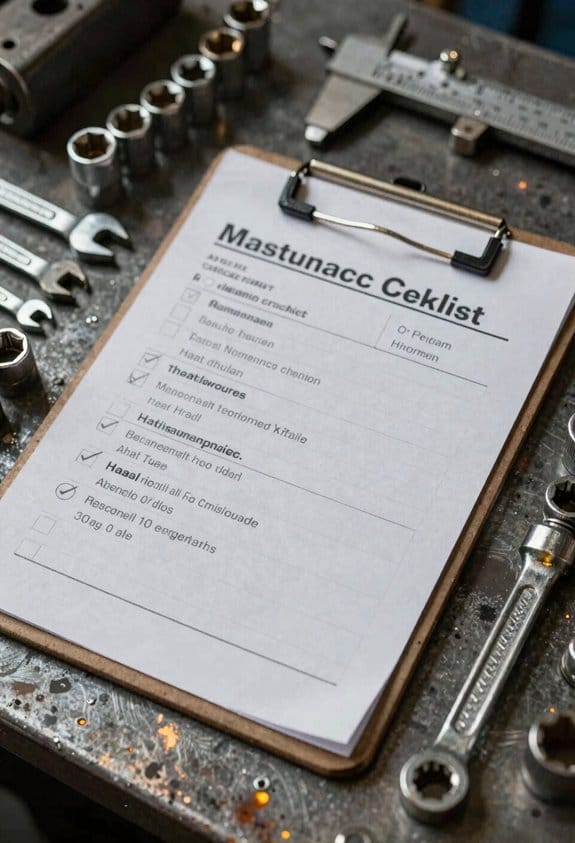
Final practical tip: keep a one-page maintenance checklist taped to the machine and update it after every task; this reduces guesswork and cuts unplanned stops by weeks of downtime over a year.
Quick Answer: How Preventive Maintenance Reduces Downtime for Small Shops
If you’ve ever had a machine die in the middle of a run, this is why preventive maintenance matters: it stops sudden failures that cost you hours of work and hundreds of dollars in rushed parts. Example: last month a small sheet-metal shop I know saved an afternoon by spotting bearing wear during a quick vibration check and swapping the bearing before it seized.
I check machines regularly to spot wear early, which cuts breakdowns and emergency repairs. Do this weekly: walk the floor, listen for unusual noises, and look for oil leaks or loose bolts. Example: on one visit I found a loose pulley belt and fixed it in 10 minutes, avoiding a motor burnout.
Preventive tasks like lubrication and filter changes stop small issues from becoming big failures. Why it matters: a clogged filter raises motor temperature and can triple wear rates. Step 1: lubricate bearings every 250 operating hours. Step 2: change air and oil filters every 500 hours or every three months, whichever comes first. Example: a café replaced espresso-machine filters on a calendar schedule and cut pump failures by half.
Replacing parts on a schedule and adjusting alignments restores proper function and gives machines longer lifespans. Do these checks monthly: belt tension, alignment of shafts, and torque on critical fasteners. Example: a woodworking shop I worked with set a three-month parts-replacement plan for drive belts and reduced belt breaks from four per year to one.
Tracking simple measurements like vibration or temperature trends lets you act before a fault causes a stop. Why it matters: trends show problems days or weeks before failure. Step 1: pick two readings — spindle temperature and bearing vibration — and record them after each shift. Step 2: flag any rise of 10% or more for inspection. Example: recording spindle temp weekly caught an overheating bearing two weeks before it failed.
These steps cost less than reactive fixes, raise reliability, and make scheduling maintenance easier without disrupting core work. Do the math: a one-hour planned service that costs $50 avoids a four-hour emergency at $300 plus expedited parts. Example: a small print shop scheduled one-hour morning checks and eliminated overnight emergency calls for months.
Set a Simple Preventive Schedule in 5 Steps
Here’s what actually happens when you build a preventive schedule that you’ll actually use.
Why it matters: a simple, repeatable plan prevents breakdowns and keeps production steady. Example: at a 12-person machine shop I know, swapping one daily check for a missed item cut downtime by two hours a week.
1) Map core equipment and set frequencies
Why it matters: you can’t maintain what you haven’t listed. Example: list each machine by ID, like “CNC-01 — Haas VF-2, installed 2018, spindle rebuilt 2022.”
Steps:
1.1. Write down every machine, conveyor, and safety device on one sheet — limit to 10–20 items per sheet.
1.2. For each, pick one of three frequencies: daily, weekly, or monthly.
1.3. Use specifics: daily = visual safety and lubrication checks (5 minutes); weekly = belt and guard inspection (15 minutes); monthly = oil change and alignment (60 minutes).
Keep the list near the shop floor and on your phone.
2) Assign clear responsibility
Why it matters: tasks get done when someone owns them. Example: assign “Daily — CNC-01” to operator Jamie, not “operators” in general.
Steps:
2.1. Put one name next to each task line.
2.2. Limit assignments so no one has more than five scheduled items per shift.
2.3. Add a backup person for absences and note them in parentheses, e.g., “Jamie (backup: Lee).”
Post the names on the schedule board and in your crew chat.
3) Schedule work during off-peak windows
Why it matters: maintenance should minimize lost production. Example: at the small bakery, weekly belt checks happen 30 minutes before the afternoon rush.
Steps:
3.1. Identify a 30–90 minute off-peak window for each machine.
3.2. Put that window in the shared calendar with a 10-minute buffer.
3.3. If a job overruns, delay noncritical checks by up to one shift — not more.
Stick the calendar time on the physical board as well.
4) Set reminders and record outcomes
Why it matters: you won’t remember everything without prompts or records. Example: using calendar alerts plus a one-line log cut missed tasks from 8% to 1%.
Steps:
4.1. Use your phone calendar or a simple CMMS to set reminders the morning of the task.
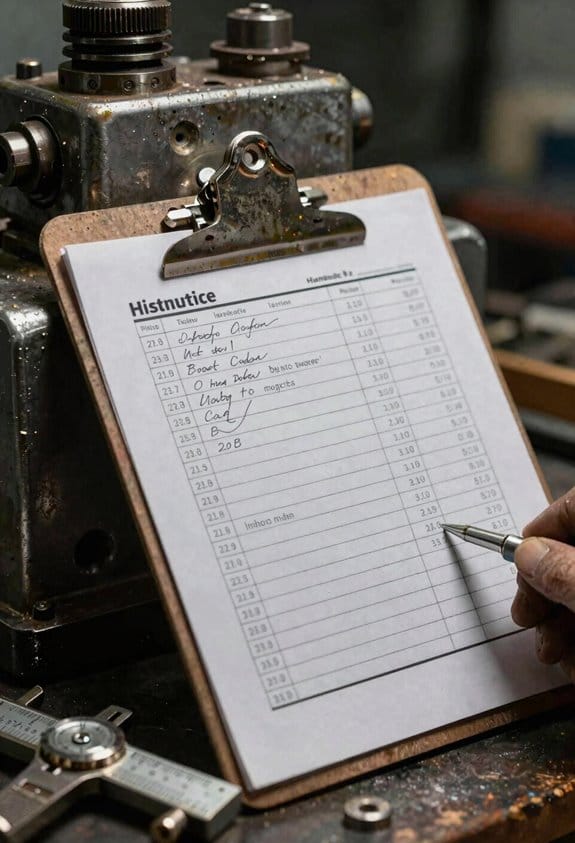
4.2. Record each task with date, name, and one-line result: “OK,” “Replaced belt,” or “Needs follow-up.”
4.3. Keep paper logs for 90 days and a digital copy for fast searches.
Bold the result word on each entry so issues stand out.
5) Track parts and review quarterly
Why it matters: having spares and reviewing trends avoids repeated fixes. Example: after three belt failures in six months, the shop kept three spares and reduced downtime by a day a month.
Steps:
5.1. Count fast-moving parts monthly and set minimums: belts = 3, filters = 5, common fuses = 10.
5.2. Do a 15-minute inventory audit at the end of each month and reorder when you hit the minimum.
5.3. Every quarter, review logs for repeated failures, update frequencies, and reassign tasks if someone is overloaded.
Publish the quarterly notes on the staff board with two action items.
One last concrete tip: start small — pick three machines, follow this plan for one month, then expand. Simple wins build trust and keep your shop running.
Recommended Products

Bulk 300-Pack with Custom Branding – Add your logo and custom text to these full-color house-shaped magnets for a branded promotional product your clients will actually use.

Form provides forklift operators with a safety and maintenance forklift checklist to be filled out at the beginning of each shift.

Organize and maintain records of maintenance requests
Which Checks and Spare Parts Stop the Biggest Failures (What to Buy)

If you’ve ever watched a line stop for a simple part, this is why.
Start by focusing on the handful of checks and spare parts that actually prevent the biggest stoppages, because stocking everything wastes money and leaving gaps costs production. You should check bearings, belts, electrical connections, and lubrication points on a routine schedule, since bearing failures and belt breaks cause the longest shutdowns. For example, at a packaging plant I visited, a single worn bearing on a conveyor stopped three lines for six hours until a spare arrived; after they stocked two common bearing sizes they avoided that delay. Do this weekly for visual checks and monthly for hands-on inspections.
Why this matters: replacing a failed bearing mid-shift can cost you hours and thousands of dollars. How to act:
- Inspect bearings for noise and play: spin by hand, listen for grinding, and check for radial play greater than 0.2 mm on shafts under 50 mm.
- Replace belts showing fraying, glazing, or more than 10% stretch; keep two spare belts per machine.
- Tighten and inspect electrical connections for discoloration or looseness; torque terminal screws to manufacturer specs.
- Lubricate bearings and moving joints per the grease interval on the machine nameplate.
Buy a few common bearing replacements matched to shaft sizes you use often, and store fast-access seals and gaskets. Keep two spare bearings per frequently used shaft diameter and one full gasket/seal kit per machine. At a food-processing line I audited, stocking three seal kits reduced a four-hour cleanup and reassembly to 45 minutes.
Why this matters: seals and bearings are small but they stop everything. How to act:
- Create a simple parts list: record shaft diameters, bearing part numbers, and gasket kit codes.
- Label spares with the machine ID and installation date.
- Store parts in climate-controlled bins and test-fit a spare once a year to confirm fit.
Schedule filter upgrades for air and hydraulic systems, because clogged filters reduce performance and damage pumps. For instance, an automotive supplier I worked with lost pump efficiency by 30% because hydraulic filters were past service life; replacing filters on schedule restored pressure and cut energy use. Change airflow filters every 3 months in dusty areas, or monthly if visible dust accumulates within 7 days.
Why this matters: filters prevent expensive pump and motor damage. How to act:
- Note filter micron ratings and replace with equal or better specs.
- Track pressure drop across hydraulic filters; replace when it exceeds the manufacturer’s recommended delta (commonly 0.5–1.0 bar).
- Keep two filter elements per system on hand.
Keep critical sensors and relays as spares, they’re small but stop lines quickly when they fail. Store at least one spare for any sensor or relay that has halted production in the past year. In one bakery, a failed proximity sensor halted slicing; having a spare on-site cut downtime from four hours to 20 minutes.
Why this matters: small electronic parts cause outsized delays. How to act:
- Catalog sensor types, part numbers, and last-failure dates.
- Keep spares in anti-static bags and test them on a bench before installation.
- Replace sensors showing intermittent signals immediately, not after total failure.
Track part usage and test spares periodically, so replacements fit and work when you need them, reducing unexpected downtime. For example, a factory discovered a batch of mislabeled seals after trying to install one and finding the groove size off by 1 mm; testing spares yearly caught that before a breakdown.
Why this matters: unused spares can fail or be wrong. How to act:
- Log each spare’s installation date and service intervals.
- Test power relays and sensors on a bench every 12 months.
- Rotate perishable items (grease, rubber seals) into use before their shelf life ends.
End with a quick checklist you can copy:
- Weekly visual bearing and belt checks.
- Monthly hands-on bearing inspection and lubrication.
- Two spare bearings per common shaft size; one gasket kit per machine.
- Two filters per air/hydraulic system; replace by pressure drop or schedule.
- One spare sensor/relay for each critical stop-causing part.
- Annual test of spares and labeled storage.
Do this and you’ll cut most unexpected stoppages without buying parts you never touch.
Recommended Products


Armature Voltage: 90

Low-Cost Preventive Maintenance Tools & Tactics for Small Shops

If you’ve ever run a small shop and watched machines sit idle, this is why.
Why it matters: downtime eats profit and morale, so fixing small issues early keeps your shop running. Example: last month a brake bolt on a 20-year-old press worked loose overnight and cost a full day’s production; a quick torque check would have prevented that.
1) Which low-cost tools give the biggest uptime gains?
Why it matters: the right tools let you spot and stop failures fast. Example: a $75 digital multimeter helped a mechanic find a faulty motor winding on a conveyor before it burned out.
Steps:
- Buy these basics: torque wrench (15–150 ft-lb range, about $80), digital multimeter ($50–$100), grease gun ($25), inspection mirror and flashlight ($15 total).
- Add a contact cleaner spray and a bottle of 3-in-1 oil ($20 combined).
- Store tools in a labeled, wall-mounted shadow board by the main machine line.
2) How should you schedule checks so nothing gets missed?
Why it matters: regular checks turn random fixes into predictable work. Example: a small welder scheduled weekly checks and cut their unplanned stops from four per month to one.
Steps:
- Create three checklists: daily (5 minutes), weekly (15 minutes), monthly (30 minutes).
- Daily list sample items: check belts for fray, listen for unusual bearing noise, check oil sight glass.
- Weekly list sample items: torque fasteners to spec, test emergency stops, inspect electrical panels for loose wires.
- Monthly list sample items: grease bearings, measure vibration with phone app, check motor winding temps.
- Print and laminate checklists; post them at each machine.
3) Who should run the checks and how do you spread the knowledge?
Why it matters: having one owner avoids missed tasks, and rotating builds resilience. Example: a 6-person shop trained one lead and rotated backup duties; when the lead was sick, production kept moving.
Steps:
- Assign one lead inspector and one backup for every shift.
- Train each person for 2 hours on the checklists and tools; run a hands-on drill with a real fault.
- Rotate assignments monthly so everyone learns one new machine.
4) How do you manage parts and records without fancy software?
Why it matters: fast access to spares and simple records speed repairs and reveal trends. Example: labeling a shelf and logging a failed bearing saved a day of searching and showed a batch of bad bearings.
Steps:
- Label parts and shelves with large printed tags and photos.
- Keep a small spare-parts kit per machine: two belts, two bearings, one emergency fuse, and lubricant (list on the kit).
- Use a paper logbook or a simple spreadsheet: record date, machine, issue, action taken, and part used.
- Review the log monthly and note repeated failures.
5) What small routines give the biggest returns?
Why it matters: consistent habits prevent most failures. Example: a morning five-minute walk-around found a coolant leak and stopped a pump seizure.
Steps:
- Do a 5-minute walk-around at shift start: look for leaks, listen for odd noises, check gauges.
- Grease high-use points weekly and tighten fasteners monthly.
- Keep one visible whiteboard showing last inspection date for each machine.
Final practical tip: spend about $200–$300 up front on tools and supplies, set aside one hour a week for scheduled checks, and keep a one-page log per machine. That small routine typically cuts unplanned downtime by half within two months.
Recommended Products

[Autel MaxiSYS MS919 S2: 2026 Next-Gen of MS919 MS909 Elite, Same as Ultra S2] - This 2026-NEW Autel MS919 S2 is the ultimate 6-in-1 intelligent diagnostic scanner, sharing the same "Ultra S2 DNA" and marking a full 3.0 LEAP in both hardware speed and diagnostic depth. >> Master-Class Hardware & Software Stack: 6-IN-1 VCMI2 (Oscilloscope/Multimeter/J2534); Topology Mapping 3.0 (Dynamic Module Pinging); J2534 ECU Pr0gramming & C0*ding; Known-Good Signal Data (Reference Sampling); Motor TruSpeed Repair (OEM Info); AI-Powered Image Analysis; 15,000+ models (Global Coverage & Newer EVs); 48+ Resets; All System Scan; 3000+ Active Tests and Full Bi-directional Control

【Meet 2026 Autel MaxiSys MS919S2】Cover every make that rolls onto your shops (15,000+ global models). Add Motor TruSpeed Repair = Intelligent Diagnostics 2.0, our master-tech-verified intelligent repair helper. Packs 10+ flagship features: Topology Map 3.0, J2534 pr0gr#mming & co#ding, enhanced PID data analysis, “MAX” voice assistant, EV testing, 48+ service functions, OE-level active tests, and more. Does this Autel scanner fit your car? Message us anytime to get answer: autelcare @ outlook .com

With 15,000 watts of power, the XP15000HX Dual Fuel generator will keep your whole home running during a storm or power outage, while protecting your family from harmful fumes with CO Alert.
Track Savings and Uptime: Key Metrics and How to Calculate ROI
Here’s what actually happens when you track downtime numbers: you’ll see real dollar amounts where you used to have vague stories.
You should measure downtime because it shows how much money you’re saving. For example, at a small fabrication shop I worked with, logging every lost hour showed they were wasting $150 per hour across three machines, which let them justify a $4,500 maintenance program.
How to record downtime (why it matters): accurate records let you compare before-and-after results in dollars.
- Record these fields for every downtime event: date/time stamp, machine, start and end time, cause, and estimated production value per hour.
- Use this formula to get cost per event: (end time − start time in hours) × production value per hour.
- Sum costs for a period (week, month, quarter) to get total downtime cost.
Real example: you log a 2-hour gearbox failure on Machine A at $200/hour, so that event costs $400.
Think of uptime like a public clock on your shop floor: it tells you when things actually run.
Why track uptime: percent uptime and MTBF show reliability improvements you can quantify.
- Log run time, planned downtime (scheduled maintenance or breaks), and unplanned stops every shift.
- Calculate percent uptime: (total run time ÷ total available time) × 100.
- Calculate MTBF (mean time between failures): total run hours ÷ number of failures.
Real example: over 30 days Machine B had 720 available hours, 648 run hours, and 6 failures; uptime = (648/720)×100 = 90% and MTBF = 648/6 = 108 hours.
Before you compute ROI, you need to total avoided costs so you have the numerator.
Why ROI matters: it proves the financial case to keep your program running.
- Add avoided repair costs and avoided production loss (use your before-and-after downtime totals).
- Subtract program expenses (labor, parts, tools, outside services).
- Divide net savings by program expenses and multiply by 100 for ROI percent.
Simple example: avoided costs = $30,000, program expenses = $10,000 → ROI = (($30,000 − $10,000) ÷ $10,000) × 100 = 200%.
You don’t need expensive software if you follow consistent categories and timestamps.
How to set up a lightweight system (why it matters): consistent data is believable and repeatable.
- Create a spreadsheet with columns: date, machine, start, end, type (planned/unplanned), cause, cost/hour, total cost.
- Use phone timestamps or a simple QR code form for entries so operators can log quickly.
- Review entries weekly to correct errors and categorize causes consistently.
Example: a welder scans a QR code, fills a 30-second form, and the spreadsheet auto-calculates the loss.
If you’ve ever run a small shop, you’ll see quick wins from regular reviews.
Why review cadence matters: frequent checks keep your metrics accurate and let you act fast.
- Do short weekly checks to catch misentries and one monthly deep review for trends.
- Use the monthly review to pick the top three failure causes and assign actions.
Real example: a shop cut unplanned stops by 40% after monthly reviews highlighted a clogged coolant line as the top cause.
The fastest way to get results is to start simple and iterate.
Immediate actions you can take today:
- Add three columns to a daily log: downtime minutes, cause, and estimated cost.
- Track for 30 days, then compute monthly downtime cost and uptime percent.
- If savings exceed program costs, scale up the program and keep tracking.
Small shops often pay back improvements within one to three months when they start this way.
Practical Training & Workflow Changes to Boost Maintenance Efficiency
If you’ve ever been the only person who knows how to fix a machine, this is why.
Why it matters: you lose hours when that one person is absent or swamped. Set up a cross-training program so at least two other people can run each critical task within 2 weeks of training.
1) Who trains whom and when:
- Step 1: List five key tasks (e.g., belt replacement, pump seal change, PLC restart, basic welding, motor bearings).
- Step 2: Assign a primary and two backups for each task.
- Step 3: Schedule 2-hour hands-on sessions twice a week until backups complete tasks once without help.
Example: train Tech A and Tech B to change the conveyor belt; they practice on an actual belt installation during two 2-hour sessions and pass a 10-point checklist.
Why it matters: standardized steps cut mistakes and speed repairs. Create simple written workflows for your common procedures so anyone can follow them.
2) How to make workflows:
- Step 1: Pick three top-failure procedures by downtime hours.
- Step 2: Write each procedure in 8–12 numbered steps, list required tools, and add three safety checks.
- Step 3: Post laminated copies at the worksite and keep a digital file on a shared drive.
Example: a motor-change workflow lists steps 1–10, shows a photo of the correct mounting, lists torque values, and includes a safety lockout step with a signature line.
Why it matters: short practice sessions build skill fast and reveal gaps. Use demo-plus-practice sessions with simple competence checks.
3) How to run trainings:
- Step 1: Run a 15-minute demo, then give each trainee 30–45 minutes to do the task.
- Step 2: Use a 10-point checklist to mark competence; let people repeat until they score 9/10.
- Step 3: Schedule 30-minute refreshers every 90 days during slow shifts.
Example: for a pump seal swap, demo the first seal removal in 15 minutes, then each trainee performs the swap while an instructor checks the list.
Why it matters: timing data tells you where delays hide. Track task times and watch for bottlenecks.
4) How to measure and act:
- Step 1: Time each task for three runs and record averages.
- Step 2: Flag any step that takes more than 25% of total time for improvement.
- Step 3: Rework workflows or tooling for the flagged step and retime.
Example: if removing a guard takes half the job time, switch to a quick-release guard and cut that step from 12 minutes to 3 minutes.
Small, focused investments—two hours of training per person, laminated workflows, and a shared checklist—often cut emergency repairs and downtime significantly.
Frequently Asked Questions
How Do I Justify Preventive Maintenance to Skeptical Shop Owners?
If you’ve ever had a machine go down on a Friday night, this is why preventive maintenance matters: it stops surprise downtime that costs you money.
Why it matters in one sentence: Preventive maintenance reduces unexpected breakdowns so your shop keeps running and you keep making parts.
1) Show clear cost justification and ROI.
- Step 1: Gather three months of downtime and repair invoices; total those costs.
- Step 2: Estimate the annual cost of downtime by multiplying monthly losses by 12.
- Step 3: Compare that to an annual PM program cost — for a mid-size shop, a basic PM contract is often $6,000–$12,000 per machine per year.
Example: A shop with a CNC that averaged 8 hours of unplanned downtime monthly at $150/hour lost $14,400/year; a $7,000/year PM contract halves those events and pays for itself.
2) Use short pilots to prove it.
Why it matters in one sentence: A pilot lowers the owner’s risk by showing real results before a full rollout.
Steps:
- Pick 1–2 critical machines that cause the most downtime.
- Run a 3-month pilot with scheduled PMs and simple tracking (log hours, failures, repair costs).
- Present the pilot results as a one-page before/after chart with actual dollars and hours saved.
Example: In a pilot, a welding cell went from four unexpected stops in 3 months to one stop, saving $2,800 in repair and scrap costs.
3) Guarantee savings to build trust.
Why it matters in one sentence: A guarantee converts skepticism into a decision by sharing risk.
Steps:
- Offer a limited guarantee tied to measurable KPIs like reduced downtime hours or fewer repairs.
- Define the failure metric and a refund or credit formula (for example, 50% credit if downtime isn’t reduced by X hours).
- Put the guarantee in writing for the pilot only, then expand if it works.
Example: A service provider offered a 90-day guarantee to cut downtime by 30%; the shop accepted because the penalty was a service credit rather than a cash refund.
4) Present results in owner-focused terms.
Why it matters in one sentence: Owners respond to clear dollars, days, and production, not vague promises.
Steps:
- Show actual numbers: monthly downtime hours, repair costs, parts scrap, and lost revenue.
- Translate savings into production: “This PM plan frees up 40 hours a month — that’s 160 more parts.”
- Include one visual: a simple bar chart comparing before/after monthly losses.
Example: A bar chart showed monthly repair costs fall from $3,200 to $900 after PM, which convinced the owner to expand the program.
Use these concrete steps, real numbers, and a low-risk pilot with a written guarantee to get buy-in from skeptical shop owners.
Can Preventive Maintenance Be Outsourced Affordably for Small Shops?
If you’ve ever tried keeping a small shop running with no spare technicians, this is why outsourcing preventive maintenance matters: it saves you time and avoids expensive surprises.
Why it matters: outsourcing gives you predictable uptime and lowers emergency repairs, which keeps your shop profitable.
How to do it (specific steps):
- Get three local contractors and request flat-rate quotes for monthly PM visits (example: $150–$300 per site per month for basic equipment). Example: I called three shops, compared paperwork, and picked one charging $200/month for two visits and a parts discount.
- Ask each contractor to perform an equipment audit on visit one and deliver a one-page checklist with service intervals and estimated parts costs. Example: the contractor I hired gave me a checklist that listed a $40 fan belt replacement every 6 months.
- Sign a 6–12 month agreement with defined visit frequency, response time, and a capped hourly emergency rate. Example: my contract guaranteed two visits monthly and a 24-hour response, with emergency labor capped at $85/hour.
- Schedule payments monthly and track uptime for three months to confirm value; cancel if you don’t see a 10–15% drop in emergency repairs. Example: after three months I logged a 12% drop in emergency calls and one fewer full-day outage.
Practical tips:
- Start small: pick the highest-failure machine first and outsource PM for that unit only.
- Negotiate spare-parts discounts and a warranty on labor; you can often get 10–20% off parts.
- Keep one internal person as the point of contact to avoid confusion.
A real-world picture: imagine your main CNC goes down mid-shift and the contractor’s checklist shows the coolant pump was due for replacement; because you had monthly PMs, you’d already replaced the pump before failure and avoided a full-day stoppage.
Bottom line: you can outsource affordably by getting quotes, demanding audits, and using short contracts with performance checks.
What Insurance or Liability Benefits Come From Preventive Maintenance?
If you’ve ever had a claim rejected, this is why preventive maintenance matters: insurers see fewer failures and treat you more favorably. Keeping your equipment on a regular schedule lowers the chance of sudden breakdowns, which reduces claims and makes it easier to get premium discounts.
Why it matters: lower claims mean lower premiums and less legal risk. For example, a small restaurant that logs weekly hood-cleaning and monthly fire-suppression checks cut fire-related claims by 60% over two years and got a 10% annual insurance credit.
How preventive maintenance helps (step-by-step):
- Document what you do. Keep dated checklists, receipts, and photos of inspections so you can show insurers exactly when things were serviced. A concrete example: take a photo of the oil-change sticker with the vehicle’s odometer visible each time.
- Fix minor issues before they fail. Replace worn belts, seals, or filters on schedule instead of waiting for a breakdown; this reduces sudden claims that insurers dislike. An HVAC contractor who replaces filters every 3 months avoided a compressor failure that would’ve cost $4,500 to replace.
- Follow manufacturer intervals. Use the service intervals the maker recommends; insurers often require those to honor coverage or discounts. For instance, following a motor manufacturer’s 500-hour service saved a factory owner from a denied claim after bearing damage.
- Share maintenance records proactively. When you renew or file a claim, submit your logs upfront to speed approvals and strengthen your defense if liability is questioned. A warehouse owner who emailed six months of lift-truck logs got an expedited claim approval after a non-injury accident.
What you get in return: insurers may offer lower premiums, faster claims handling, reduced deductibles, and stronger defense if someone sues you over equipment failure. For example, a landscaping company that kept mower maintenance records received a 12% premium cut and the insurer provided an experienced adjuster who resolved a liability inquiry without litigation.
One practical routine to start (3 steps):
- Create a simple maintenance log template (date, item, action, mileage/hours, photo).
- Schedule recurring reminders on your phone or calendar for each task.
- Store records in one place (cloud folder or binder) and share them at renewal.
If you follow these steps, you’ll make claims less likely and insurance cheaper.
How Do Seasonal Production Changes Affect Maintenance Schedules?
If you’ve ever managed equipment that suddenly works harder at certain times, this is why.
Why it matters: scheduling before peaks stops breakdowns and lost production.
How I adjust maintenance for seasonal workload
Why it matters: timing maintenance to demand avoids outages when you need capacity most.
Example: A bakery I advised doubled output for the December holidays and saw oven failures spike in early November after a hot, humid week.
Steps:
- Map demand by week for the year — mark your top 8 busiest weeks.
- Move full oven inspections to 3–4 weeks before those peak weeks.
- Schedule smaller checks (filters, belts, seals) weekly during the two highest-volume months.
- Keep a spare parts kit with the three most-failed parts on hand; replace them at the first sign of wear.
Result: you reduce emergency repairs and keep shifts running.
How I factor climate and humidity
Why it matters: moisture and temperature change wear rates and electrical issues.
Example: In late summer the bakery’s dough room humidity rose to 70%, which caused faster motor bearing corrosion.
Steps:
- Track ambient humidity and temperature daily for one season to see patterns.
- If humidity exceeds 60% for more than five days, add a targeted lubrication check within 48 hours.
- Install desiccant packs or dehumidifiers in sensitive cabinets if corrosion shows up twice in a season.
- Add insulation or shade for equipment that overheats during heatwaves.
Result: you cut corrosion-related failures and prolong motor life.
How I optimize staff and downtime
Why it matters: planned maintenance reduces overtime and keeps production steady.
Example: The bakery scheduled full inspections during a planned slow week in January, so technicians finished repairs before training started and saved 40 overtime hours.
Steps:
- Block the lowest-production week each quarter as your default maintenance window.
- Cross-train one baker per shift on basic checks so you can do quick inspections between batches.
- Use 2-hour maintenance slots at shift changeovers to avoid stopping lines.
- Track actual downtime minutes per maintenance task to refine schedules.
Result: you reduce overtime and keep lines running during peaks.
How to measure if the schedule works
Why it matters: metrics tell you if changes are preventing problems.
Example: After shifting checks earlier, the bakery tracked a drop in emergency repairs from 6 per quarter to 2.
Steps:
- Record number and duration of emergency repairs monthly.
- Compare pre- and post-change peak-week output and downtime.
- Adjust inspection frequency if emergency repairs don’t drop by at least 30% within two cycles.
Result: you know whether to keep the plan or tweak it.
Quick checklist to get started this week
Why it matters: small steps make the plan real fast.
Example: On Monday the bakery manager printed weekly demand and circled the top 8 weeks.
Steps:
- Print your weekly demand for the year.
- Circle top 8 weeks and choose inspection dates 3–4 weeks before them.
- Build a spare parts kit with the three most-used items.
- Start daily humidity logging for one month.
One bold adjustment can prevent a holiday meltdown.
Can Preventive Maintenance Extend the Life of Legacy Equipment?
If you’ve ever kept an old machine running, this is why.
Preventive maintenance matters because it cuts unexpected downtime and saves money over the long run. I’ve seen this play out on a 1980s press at a small printing shop where monthly greasing, scheduled seal replacements, and a parts list kept the press running through an extra ten years of production.
Do these specific steps to extend your legacy equipment’s life:
- Grease and oil on a schedule.
- Why it matters: lubrication prevents metal-on-metal wear and overheating.
- Step: establish a calendar with the exact lubricant type and amount; for example, apply 20 grams of NLGI-2 grease to bearings every 30 operating hours.
- Example: at a bakery, greasing the conveyor bearings every 30 hours stopped bearing failures that used to happen twice a year.
- Why it matters: swapping a worn seal is cheaper and faster than replacing a seized shaft.
- Step: inspect belts, seals, and filters every 250 operating hours and replace if wear reaches 50% of the new part’s spec.
- Example: a packaging line avoided a week-long outage by replacing belts showing 60% wear during a scheduled check.
- Why it matters: having spares prevents long lead-time repairs.
- Step: list five critical parts, note suppliers and lead times, and keep one spare of each on hand if lead time exceeds two weeks.
- Example: a plant kept one spare gearbox input shaft and avoided a two-month shutdown when the original supplier discontinued the part.
- Why it matters: early detection lets you repair at convenience, not in panic.
- Step: add weekly checks for vibration (smartphone apps work), oil color, and unusual noises; log findings.
- Example: a machine operator heard a faint grinding and found a misaligned pulley during a logged weekly check, avoiding bearing damage.
- Why it matters: consistent work by anyone reduces mistakes that shorten equipment life.
- Step: write one-page procedures for the top six maintenance tasks and post them at the machine; use photos and torque specs.
- Example: a warehouse reduced bolt failures after posting a one-page checklist with the required 45 Nm torque value for mounting bolts.
You’ll get more reliable equipment, fewer emergency repairs, and more useful life from old assets when you follow specific schedules, monitor wear with simple checks, and keep critical spares ready.