As an Amazon Associate, we earn from qualifying purchases. Some links on this site are affiliate links at no extra cost to you. Our recommendations are based on thorough research and editorial judgment.

How AC/DC TIG Machines Support More Material Versatility
You’re staring at a welded joint that won’t take on aluminum but your steel settings seem fine, and you don’t know which current to pick. Or you’ve tried TIG on thin magnesium and got porosity or burned-through spots and wonder if the machine is to blame.
Most people assume one machine setting fits every metal and fail to use AC/DC features correctly. This piece will show exactly when to use AC cleaning pulses versus DC penetration, which balance and frequency tweaks stop oxide or burn‑through, and the amperage ranges for thin non‑ferrous and thick ferrous joints. I’ll give clear, actionable settings you can try on your next weld. It’s easier than it looks.
Key Takeaways
If you’ve ever tried welding aluminum and watched the oxide ruin your bead, this is why AC mode matters: it cleans the surface while you weld so your filler actually bonds. For example, when welding a 3 mm aluminum panel, set AC so the electrode alternates between cleaning and penetrating; you’ll see the brown oxide strip away as you move.
You may be interested


Why it matters: you get deeper welds on steel and similar metals without burning the tungsten. DCEN (straight polarity) puts more heat into the workpiece, so for a 6 mm mild steel plate use DCEN at a tighter arc to get full penetration in one pass. Try 100–150 A per 3 mm of thickness as a starting point.
Adjustable AC balance and frequency let you optimize cleaning, tungsten life, and arc shape for the metal and thickness you’re welding. For example, on 4 mm aluminum increase balance toward cleaning (about 70% electrode positive) to remove oxide, and adjust pulse frequency to 5–10 Hz to narrow the arc when you need a precise bead.
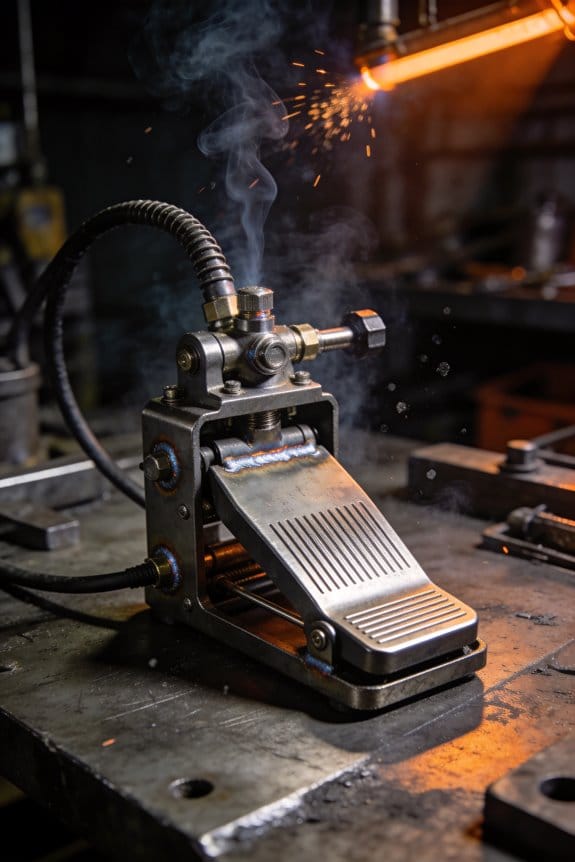
Before you control heat, understand why it matters: poor heat control warps thin parts and undercuts thick ones. Use variable amperage and a foot pedal so you can dial exact heat while you weld. Steps:
- Set base amperage for your plate thickness (rough guide: 30–40 A per mm for aluminum).
- Use the foot pedal to reduce to 30–50% of that when tacking or starting corners.
- Ramp up to full for the run, then back off before stopping the arc.
Gas choice affects weld penetration and travel speed; that’s the practical reason to change mixes. If you’re welding 6–10 mm aluminum and want faster passes, use an Ar/He blend with 25–50% helium to boost heat and travel speed; for reactive metals like titanium stick with pure argon and keep flow at 10–15 L/min to ensure shielding.
Quick-Start: AC/DC TIG Settings for Common Metals
Before you start welding, you need to know how AC vs DC affects the arc so you pick the right mode for the metal. This matters because the wrong polarity will give you poor cleaning or weak penetration. For example, when you weld 3 mm (1/8″) aluminum on an AC TIG, the alternating current removes oxide while still letting you get decent penetration if you set balance around 70% EN (electrode negative).
1) Pick AC or DC
- Use AC for aluminum and magnesium because it cleans oxide; set balance to 60–75% EN and frequency to 60–120 Hz for a focused arc.
- Use DCEN (straight polarity) for steel, stainless, and copper alloys to get deeper penetration; start around 80–120 A for 3–6 mm steel.
Real-world example: welding a 100 mm long seam on a 3 mm aluminum panel with AC at 80 Hz and 70% EN gives a stable puddle and visible oxide cleaning.
Why you need smooth foot pedal control: because you’ll be changing heat on the fly to avoid burn-through. Practice with a pedal so you can modulate amperage from full to about 30% smoothly during a bead.
2) Foot pedal and filler control
Steps:
- Set your machine to the amperage you’d use without the pedal (e.g., 100 A for 4 mm aluminum).
- Start the arc and press the pedal to reach about 80–100% quickly, then back down to 40–60% while adding filler.
- Release at the end to taper the puddle.
Example: when tack-welding thin sheet metal, press to 40% to puddle, add a 1.6 mm filler rod, then lift to cool the end.
Shielding gas choices matter because gas changes arc stability and how much heat reaches the work. Pure argon keeps the arc steady and is usually fine for most jobs. If you need more heat for thicker sections, add helium (start with a 75/25 Ar/He mix) to boost penetration and travel speed.
3) Shielding gas
- For aluminum: pure argon for thin parts; Ar/He 75/25 for thicker sections.
- For steel/stainless: pure argon or 98% Ar/2% O2 for spray-like transfer on some machines.
Real-world example: switching from pure argon to a 50/50 Ar/He mix while welding 8 mm aluminum lets you weld faster with deeper fusion.
How you hold the torch and rod changes puddle shape and weld quality, so get the angles right. Keep the torch nearly vertical and feed the rod into the leading edge of the puddle to control fusion and avoid trapping oxides.
4) Torch angle and filler placement
Steps:
- Hold the torch at about 10–15 degrees from vertical, pointing along the joint.
- Feed the filler rod into the leading edge of the puddle at a 15–20 degree angle toward the direction of travel.
- Maintain a 2–4 mm stick-out from the cup for consistent shielding.
Example: welding a 6 mm fillet, a 12 mm wide puddle formed with these angles gives even fusion and a smooth toe.
Practice these basics before adjusting frequency or balance because those controls are fine-tuning tools, not replacements for good technique. Start with the settings and steps above, weld a few 150–200 mm practice beads, and then tweak frequency or balance in 10 Hz or 5% steps to refine bead shape.
Recommended Products

Multiprocess Aluminum TIG Welder: Amp up your welding skills with the Miller 951684 Syncrowave 210 TIG MIG Spoolmate 150 Package; Our multi process welder tackles MIG, Stick & AC/DC TIG processes with just 1 powerful welding machine; Eliminating the need for multiple welders

The user interface makes machine setup easy. Available features, such as Pulse, which provides a drumbeat-like rhythm for filler metal deposition, make you become a better TIG welder - faster.

True All-Process - excellent performance on MIG, Flux-Cored, STICK (including 6010 electrodes), DC TIG and AC TIG industrial applications
Which Materials Need AC vs. DC : And Why

If you’ve ever wondered which metals need AC versus DC, this is why.
Why it matters: choosing the right current keeps your welds strong and prevents holes or excessive warping. For example, when you weld an aluminum trailer tongue, using the wrong polarity can give you a weak, pitted joint that fails under load.
AC for soft non-ferrous metals
Why it matters: AC helps with surface oxide and gives a more stable pool on reactive metals.
1) Use AC for aluminum and magnesium. Set your TIG machine to around 60–70% EN balance (electrode negative time) and 70–120 A for thin to medium sections (1–6 mm).
2) If you’re using MIG on aluminum, pick AC-compatible equipment or a spool gun and run short-circuit or pulse-spray modes around 12–18 V and 150–250 in/min wire feed, depending on wire diameter.
Real-world example: welding 3 mm aluminum boat plate with TIG at 90 A AC and a 60/40 balance will burn through the oxide and let you weld without grinding off every pass.
Tip: watch the arc for a slightly “choppy” sound — that’s normal with AC on aluminum.
DC for steels, stainless, and thick sections
Why it matters: DC gives steadier arcs and deeper penetration so your joints carry load instead of breaking.
1) Use DC electrode negative (DCEN) for carbon steel and stainless for 1–12+ mm thickness. Start at 80–200 A for TIG and 18–30 V for MIG, scaling with thickness.
2) For titanium, use DCEN with shielding and purge practices; 5–12 mm plate often welds well at 120–200 A TIG DC.
Real-world example: welding a 10 mm carbon steel flange with DCEN at 180 A gives the penetration you need for a pressure-rated joint.
Tip: thin sheets under ~1.5 mm often use lower DC amperage (20–70 A) to minimize burn-through.
Thin sheets and deposition speed
Why it matters: thin material distorts easily and you want faster travel and less heat input.
1) For steels under 1.5 mm, run DC with short arc lengths, 20–80 A for TIG or short-circuit MIG at low wire speeds, and use clamps to minimize warping.
Real-world example: repairing a 1 mm car body panel with DC MIG at 40 A and quick stitch welds keeps the panel flat.
Tip: alternate short welds with cooling pauses.
Electrode and process care
Why it matters: electrode wear and settings affect bead quality and cost.
1) Adjust balance (for AC), amperage, and travel speed to match the metal and thickness; keep tungsten sharp for TIG and replace if eroded more than 0.5 mm.
Real-world example: if your tungsten balls up after a few passes on aluminum, increase EN time slightly and reduce amperage by 10–15% to reduce wear.
Tip: replace contaminated electrodes immediately to prevent porous welds.
Quick reference
Why it matters: a fast pick keeps you from guessing at the machine.
- AC: aluminum, magnesium, thin non-ferrous—use AC TIG at 60–120 A depending on thickness.
- DCEN: carbon steel, stainless, titanium, thick sections—use DC TIG/MIG with amperage scaled to thickness.
- Thin sheets: prefer lower DC amperage and short welds to reduce distortion.
You now have specific settings and examples to start with, so try the recommended amperages and watch how the arc and bead change.
How AC Polarity Removes Oxide Layers in TIG

Here’s what actually happens when you weld aluminum with AC in TIG.
Why it matters: if you don’t remove the oxide, your weld won’t fuse and it’ll crack or look porosity-filled.
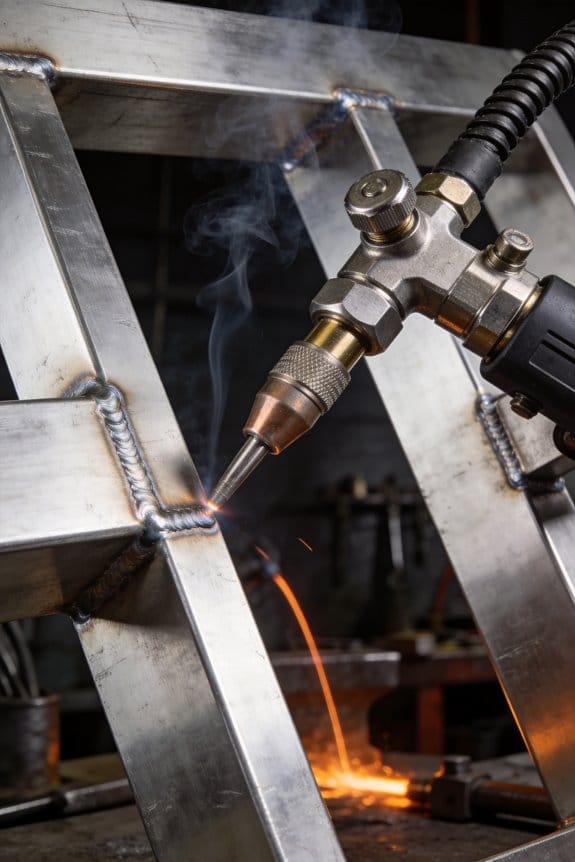
When you use alternating current, the electrode switches polarity hundreds to thousands of times per second, and each switch does one job for your weld. During the positive half-cycle the electrode is positive and pulls electrons from the workpiece; that causes tiny bits of the aluminum oxide to be *sputtered* away by ion bombardment so fresh metal is exposed. For example, when you’re welding a 3 mm aluminum sheet with 120 A and about 60% electrode negative (balance), you’ll visibly get cleaner, shinier metal in the puddle during the positive pulses. The cleaning action happens mostly in the positive portion of the cycle.
The negative half-cycle drives heat into the workpiece because the electrode is negative and electrons flow into it, concentrating heat at the joint and giving deeper penetration. If you set your TIG machine to roughly 60% electrode negative and 40% electrode positive at 120–150 A for a 3–6 mm part, you’ll get a good balance of cleaning and penetration. Too much positive time, like 60% or higher, will speed electrode wear and make the tungsten ball up faster. You’ll see the tungsten degrade after only a few minutes if you run extreme positive balance.
Practical steps to set AC for aluminum:
- Set your current: pick 100–150 A for 2–6 mm thickness as a starting point.
- Set balance: start at about 60% electrode negative (EN) / 40% electrode positive (EP).
- Adjust frequency: try 60–120 Hz; higher frequency narrows the arc and can help control the puddle.
- Watch the tungsten: if it puffs or erodes quickly, reduce EP by 5–10%.
- Test weld: clean a scrap piece and run a bead, look for smooth wet toes and no porosity.
Real-world example: I once welded a 4 mm trailer panel using 130 A, 60% EN, 80 Hz. The oxide cleaned off in short bursts, the puddle wetted well, and I had minimal tungsten wear after a 30 cm bead.
Takeaway: AC polarity alternates cleaning (positive) and penetration (negative), so you dial balance and frequency to match your part thickness and consumable life.
AC/DC TIG: Balance & Frequency for Aluminum and Magnesium
Before you start, know why balance and frequency matter: they control how much oxide you remove and how much heat you put into the joint, which decides whether your weld fuses or blows through.
Think of AC polarity cleaning like toothbrush pressure: too soft, and grime stays; too hard, and you wear the brush. Use this rule of thumb: start with balance at 65%–70% EN (electrode negative) for light cleaning, or 55%–60% EN when you need aggressive cleaning, and adjust from there. Example: on 1/8″ (3 mm) 6061-T6 aluminum with a 2% lanthanated 2.4 mm tungsten and 120 A, try 68% EN and see if the oxide breaks before the puddle floods — if not, move to 63% EN.
Why frequency also matters: it narrows or widens the arc, changing heat concentration and bead shape. For frequency, use numbers: 60–90 Hz for a soft, forgiving arc on thick joints; 120–250 Hz for a tighter arc and finer bead on thin sheet or TIG-rod work. Example: when tacking a 0.063″ (1.6 mm) aluminum panel at 60 A, set 180–220 Hz to keep the arc tight and avoid burn-through.
How to set balance and frequency, step-by-step:
- Pick a baseline amperage for your material thickness and filler size. Example: 1/8″ (3 mm) aluminum around 110–140 A with 2.4 mm filler.
- Set balance to a starting EN%: 68% EN for moderate cleaning; 60% EN for heavy oxide. Wait 5–10 seconds on each weld to judge cleaning.
- Watch the tungsten: if the tip pocks or blunts after a few welds, increase EN% (more electrode negative reduces tungsten etching) by 2–4 points.
- Adjust frequency to shape the arc: 80–100 Hz for a wide puddle on heavy sections, 160–220 Hz for thin sections or tight bead control.
- Make only one change at a time, then run another weld sample and compare bead profile and fusion.
Example real-world check: welding a cracked 3003 aluminum oil pan section using 1.6 mm filler at 65 A — start at 70% EN and 160 Hz, tack, then run a 2″ weld; if oxide remains, drop to 64% EN; if the tungsten erodes quickly, raise EN to 72%.
Quick rules to remember:
- If oxide remains or you get surface pitting, move toward more electrode positive (lower EN% number).
- If your tungsten is eating away, move toward more electrode negative (higher EN% number).
- If the arc is wandering and the puddle is wide, lower frequency to 60–100 Hz.
- If you need a narrow arc and less heat input, raise frequency to 160–250 Hz.
Monitor two things every pass: electrode wear and bead appearance. If the bead is rippled and narrow with good fusion, you’re likely set. If the bead is flat with oxide spots, increase cleaning (lower EN%); if the tungsten blunts, increase EN%.
Final tip: change balance in 2–4% steps and frequency in 20–40 Hz steps, then test. Small steps get you to consistent fusion without wasting consumables.
DC Settings That Boost Penetration for Steel & Titanium

Before you start welding steel or titanium, know that penetration matters because it controls joint strength and distortion.
Dial in DC settings carefully so you get deep, consistent penetration on steel and titanium. Raise your amperage in small steps—10% increments—and watch the puddle; for 3/16″ (4.8 mm) steel, start around 90–110 A and increase to 120–140 A if you need deeper fusion. For titanium up to 1/8” (3 mm), start around 80–100 A, and for 1/4″ (6 mm) titanium you may need 160–200 A with preheat. Use a single short example: weld a 3/16″ steel fillet starting at 100 A, bump to 120 A if the root isn’t filling after two passes.
Why you angle the electrode affects where the heat goes, because arc direction shifts the penetration profile.
Adjust the electrode angle to point the arc into the joint: hold it 10°–20° toward the direction of travel for a push technique on steel, or 15°–25° for titanium when you want deeper root penetration. For flat butt joints on 1/4″ steel, a 15° drag angle with a steady 18–20 ipm travel speed helps. Try this simple shop test: weld a 6″ butt at three angles—10°, 15°, 20°—and cut a cross-section to see which fills best.
You should preheat when thick or reactive titanium parts will crack or warp, because preheat evens temperature and reduces thermal shock.
Step-by-step preheat:
- Measure metal thickness and set preheat temperature: 150–250°F (65–120°C) for titanium under 3/8″, higher for larger sections.
- Use a torch or induction heater and hold for 5–10 minutes for moderate parts.
- Start welding while the piece is within 50°F (28°C) of the set preheat temp.
Example: preheat a 1/4″ titanium plate to 200°F for 8 minutes before tacking and welding.
Shielding gas and flow matter because contamination ruins welds and weakens penetration.
Optimize shielding: use argon for titanium and 75–95% argon with balance CO2 for most steel MIG work; set flow rates to 20–30 scfh for TIG on titanium and 15–25 scfh for TIG on steel, adjusting in drafts. Check gas coverage by watching the cup for turbulence and by doing a bead on scrap—if you see discoloration on titanium, increase flow or improve cup fit. For example, use a trailing shield or purge on a titanium tube to keep the back side bright and uncontaminated.
Keep your hand steady and your travel speed consistent because erratic motion causes uneven heat and inconsistent penetration.
Practical steps:
- Clamp or fixture the parts so you can use both hands if needed.
- Choose a travel speed: for a 1/8″ fillet on steel, aim 18–24 inches per minute; slow down if the weld puddle is shallow.
- Practice a 6″ bead on scrap at your chosen speed and settings, then inspect bead profile.
Example: using a fixture, run three identical beads at 20 ipm to confirm consistent penetration before welding the actual part.
Watch thin sections for burn-through, because higher amps give depth but can destroy thin metal.
If metal is under 1/8″ thick, reduce amperage by 20–30% from your thicker settings, use multiple light passes instead of one heavy pass, or switch to pulse modes if available. Try a back-step technique on a 1/16″ sheet: short overlapping passes at lower amps to avoid holes.
Combine these adjustments—amperage, angle, preheat, shielding, and travel control—to produce predictable penetration, cleaner beads, and stronger joints on steel and titanium.
Switch Modes Fast: Workflow and Gear Checklist
Before you switch welding modes, know why it matters: switching saves time and keeps your shop tidy so you can finish jobs faster.
1) Identify the material (step and why)
- Step 1: Pick the base metal and write it down. Example: 3/16″ 304 stainless sheet.
- Why it matters: AC works better for aluminum; DCEN is usually best for mild steel and stainless.
- Real-world visual: imagine swapping from a 3/16″ aluminum hood panel to a 1/8″ stainless trim piece on the same jig.
2) Set the machine mode (how and why)
- Why it matters: the wrong polarity or mode ruins penetration and tungsten life.
- Steps:
- Select AC for aluminum or when you need cleaning action.
- Select DCEN for steel and stainless for deeper penetration.
- Confirm polarity with a multimeter: probe at the torch, probe at work clamp — you should see the expected polarity.
– Real-world visual: soldering 1/8″ stainless with DCEN and getting full fusion in one pass.
3) Adjust balance, frequency, and amperage (how and why)
- Why it matters: tuning these settings controls heat, bead shape, and cleaning.
- Steps:
- Balance (AC): start at 60% electrode negative for 1/8″ aluminum, then tweak ±5% if you see porosity.
- Frequency: set 100–150 Hz for thin sheet, 150–300 Hz for narrow arc on small parts.
- Amperage: use 90 A for 1/8″ with a 1.6 mm tungsten, 140 A for 3/16″ with a 2.4 mm tungsten as starting points.
– Real-world visual: welding a 1/8″ aluminum bracket at 100 Hz gives a wider, flatter bead that fills the joint cleanly.
4) Gear checklist before you start (how and why)
- Why it matters: the right consumables prevent downtime and bad welds.
- Steps (pack these):
- Tungsten sizes: 1.0 mm, 1.6 mm, 2.4 mm.
- Spare collets and gas lens for your torch model.
- Foot or fingertip control wired and tested.
- Filler rods: separate labeled rods for each alloy (e.g., ER70S-2, ER4043).
- Clean rags, a tungsten grinder, and a spare gas nozzle.
– Real-world visual: you switch from ER4043 to ER70S-2 and reach into a labeled cup for the correct rod without stopping the clock.
5) Tool maintenance before shifts (how and why)
- Why it matters: small fixes stop big problems mid-job.
- Steps:
- Inspect torch liner for kinks and replace every 6 months or 500 hours.
- Check gas flow: set pure argon to 15–20 CFH for TIG on thin parts.
- Clean collets and threads; torque finger-tight plus one quarter-turn.
– Real-world visual: you pull a lint ball from the gas lens and remove tiny flow fluctuations that caused porosity on the last run.
6) Safety checklist (how and why)
- Why it matters: safety prevents injuries and keeps the job moving.
- Steps:
- PPE: helmet with shade 8–13, leather gloves, and cotton clothing.
- Ventilation: push 100–150 CFM of local exhaust when welding stainless.
- Gas: confirm cylinder valves are closed and regulators set (argon 50–60 psi supply).
- Machine grounding: verify continuity from chassis to shop ground with a meter.
– Real-world visual: you fit a snorkel hood over a small fixture and eliminate fumes while keeping full visibility.
7) Quick mode-change practice and documentation (how and why)
- Why it matters: rehearsed changes cut swap time to under a minute and reduce mistakes.
- Steps:
- Run a timed drill: change from AC 100 Hz, 90 A to DCEN 140 A in 60 seconds flat — do this three times.
- Create a one-page cheat sheet: material → mode → balance → frequency → amperage → tungsten size.
- Tape the cheat sheet to the machine and photograph settings for your phone.
– Real-world visual: during a service call you flip to DCEN, set 140 A, switch to a 2.4 mm tungsten, and start welding in under a minute.
Final tip: practice the whole routine once a week until it feels automatic.
Recommended Products

Standard features include: high frequency start, lift arc tig start, automatic downslope, pulse, repeat (latch) function, memory function and automatic gas management

All-in-One Capability: Enjoy the freedom to weld any process & take on more projects with the Miller 907757 Multimatic 220 AC/DC Multiprocess Welder; Tackle flux-cored, MIG, Stick & TIG processes like a champ with 1 powerful & easy-to-use Miller welder machine

Auto-Set for Faster Setup: The Miller Syncrowave 212 Air Cooled Package features Auto-Set technology; Just select your process, material, joint type & tungsten size, & recommended parameters are automatically applied for confident TIG welding
Practical Welding Parameters by Material and Thickness (Quick Table)
Here’s what actually happens when you pick welding settings by feel instead of numbers: your first passes will either burn through thin metal or leave weak, cold beads on thick parts.
Aluminum — why this matters: aluminum oxidizes fast, so you need AC and cleaning action to get a good fusion. Example: welding a 0.125″ (3.2 mm) 6061-T6 hood patch on a car.
1) Set your machine to AC.
2) Balance: about 60% EN (electrode negative) for oxide cleaning.
3) Frequency: 100–150 Hz.
4) Amperage: roughly 1 amp per 0.001″ of thickness — so for 0.125″ use ~125 A.
5) Filler: ER4043.
6) Fit-up: keep the joint tight, gap under 0.020″ to avoid contamination.
Keep your torch moving smoothly.
Steel — why this matters: steel needs deeper penetration with DCEN so the joint has strength. Example: repairing a 3/16″ (4.8 mm) mild steel bracket.
1) Set polarity to DCEN.
2) Frequency: low or no high-frequency; use a steady arc.
3) Amperage: 1.2–1.5 A per 0.001″ — for 3/16″ (~0.187″) use 225–280 A.
4) Filler: ER70S series.
5) Gap: keep a consistent root gap, about 1–2 mm for cap-and-root passes.
Watch for warpage on long welds.
Stainless — why this matters: stainless needs lower heat input to avoid sensitization and maintain corrosion resistance. Example: patching a 0.060″ (1.5 mm) stainless kitchen sink flange.
1) Use DCEN with slightly reduced amperage versus carbon steel.
2) Lower travel speed or backing gas if you need complete root shielding.
3) Match filler alloy to base metal.
4) Amperage: reduce to about 0.9–1.2 A per 0.001″ for thin grades.
Use gas lens and clean gas for better shielding.
Thin sheets vs thick sections — why this matters: thin metal overheats and thick metal needs penetration, so your technique and settings must change. Example: joining a 0.030″ foil to a 1/4″ bracket.
1) For thin (≤0.040″): use pulse or higher frequency, lower amps — around 1 A per 0.001″ or slightly less, fast travel, small-diameter electrode (1.6 mm).
2) For thick (≥0.187″): use higher amperage and a focused arc, larger electrode (2.4–3.2 mm), slower travel to achieve full penetration.
3) For mixed thickness, stitch weld or use backing bar to manage heat.
Control heat input with shorter welds and intermittent cooling.
Practical tips you can use right away — why this matters: starting with repeatable, specific settings saves you time and scrap. Example: setting up a small bike frame repair.
1) Clean the metal surface of oils and oxides before welding.
2) Start with the amperage calculated from thickness, then adjust ±10–15% after a test bead.
3) Keep filler on hand matched to base metal.
4) Document one successful setting per joint and note torch angle and travel speed.
Record the amperage, polarity, frequency, and filler for the next time.
If you follow those steps, you’ll have reproducible starting points and less guesswork.
Common AC/DC TIG Defects and How to Fix Them
Here’s what actually happens when you inspect TIG welds: problems usually point to one specific thing you can fix right away. Before I tell you how, know why this matters — fixing the root cause saves you time and scrap.
Porosity — why it matters: porous welds leak and weaken the joint. Example: on a stainless steel food tank repair, tiny gas pockets let liquid seep through after pressure testing.
1) Clean the electrode and cup: grind the tungsten to a smooth point for DC (20–30°) or a balled tip for AC, and change the gas cup if it’s gouged.
2) Set argon flow to 15–20 CFH for a standard 1/4 in cup at atmospheric conditions; check for drafts by holding a lit smoke pencil in the puddle area — the smoke should be pushed away steadily.
3) Replace contaminated filler or re-bead the weld if porosity is internal.
If porosity persists, swap to a new tungsten and run a short purge cycle of 5–10 seconds before welding.
Lack of fusion — why it matters: poor fusion leaves the joint brittle and unsafe. Example: when joining an aluminum frame for a trailer, a lack of fusion at the toes caused the first road test to reveal cracks.
1) Confirm polarity: use DCEN (straight) for steel and stainless with a pointed tungsten; use AC for aluminum.
2) Adjust settings: on AC machines, set balance to 60–70% electrode negative (EN) to improve cleaning while keeping weld penetration; on DC, increase amperage by 10–20% if you’re undercutting penetration.
3) Slow your travel speed by about 20–30% and run a slightly hotter, wider arc for better wetting.
Tungsten inclusion — why it matters: a piece of tungsten in the weld acts like a hard spot and can cause failure. Example: a valve body I repaired split at the bead where a tungsten shard sat in the fillet.
1) Trim the tungsten to a clean tip every time you dip the puddle; grind along the length, not across, to avoid porosity from grooves.
2) Keep the tungsten out of the weld puddle — hold the arc 1/8–1/4 in off the puddle and move the torch so the filler melts in, not the tungsten.
3) If you touch the puddle, stop, grind a new tip, and remove the contaminated weld metal.
Undercut and burn-through — why it matters: too much heat thins your joint and reduces strength. Example: on a thin car body panel, I burned through a 0.7 mm panel by running 60 A when 30–35 A was appropriate.
1) Reduce amperage: for steel, drop 10–25% from your current setting if you see undercutting; for thin sheet metal, use a pulsed or TIG with lower baseline current (e.g., 20–35 A).
2) Increase travel speed by 10–30% and use a smaller cup (No. 5 or 6) to concentrate the arc.
3) Add backing material or run multiple light passes rather than one heavy pass on thin sections.
Start with a visual inspection — why it matters: you’ll identify obvious problems fast and avoid repeating the same mistake. Example: after a job on a pressure vessel, a quick visual check found oxidation and poor shielding before any pressure test, saving a costly rework.
1) Look for undercut, porosity, and inconsistent bead width under good lighting and 2x magnification if available.
2) Mark defects with a grease pencil and note machine settings from that pass.
3) Fix one variable at a time — for example, change gas flow first, then re-test a bead — so you know what solved the problem.
Follow these targeted steps, and you’ll fix the common TIG problems you see on the first or second try.
Recommended Products

All HP cylinders come with a 10 year hydrotest date stamped.

Welding Gas to Your Door - Get PrimeWeld's industrial grade 75 %Argon 25% CO2 gas cylinder delivered right to your door. We offer different mixtures for any application, and you can purchase a tank without worrying about costly rental fees or wasted trips out to your local welding supply shop.
Buying Guide: What to Look for in an AC/DC TIG Machine
If you’ve ever bought a welder that couldn’t handle a job, this is why.
Start by checking the power range — why it matters: you need enough amps to move between thin and thick metals without changing machines. For example, look for a machine that goes down to 5–10 amps for thin stainless foil and up to 200–250 amps if you plan to weld 1/4″ carbon steel plate; that range covers most hobby and light-fabrication work. A specific test: clamp the machine to 150 amps and try a 1/8″ steel bead; if the arc stalls or surges, you need more stable output.
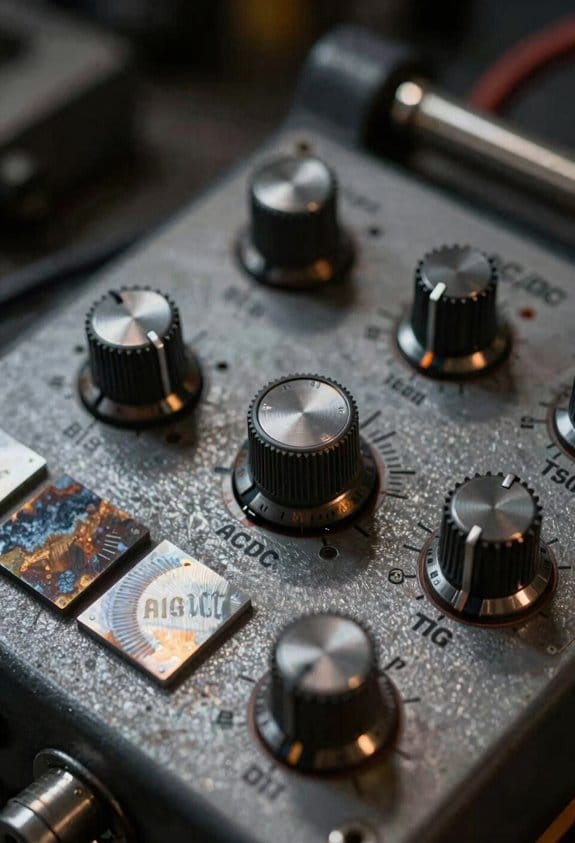
Before you pick a machine for aluminum, you need to know how AC frequency and balance control affect cleaning versus penetration. Why it matters: AC settings change how much oxide the arc removes and how deep it melts aluminum. Example: on a TIG with adjustable AC frequency, increasing frequency to 100 Hz tightens the arc for narrow welds on 1/8″ aluminum, while balance control set to 60% electrode-negative (EN) gives stronger penetration with just enough cleaning. Steps to check controls: 1) Set frequency to 60 Hz, balance to 50/50 and weld a 1/8″ test coupon; 2) Increase frequency to 100 Hz and retest; 3) Adjust balance toward EN in 10% jumps and observe penetration.
You’ll want reliable cooling and duty cycle specs because these determine whether the machine runs long enough for a part without overheating. Why it matters: a low duty cycle forces you to stop every few minutes and cool parts, which ruins efficiency. Example: a 200 A machine rated at 60% duty cycle at 200 A can weld for 6 minutes in a 10-minute window without pause; compare that to a 200 A / 30% machine where you get only 3 minutes. Steps to evaluate duty cycle: 1) Match duty cycle rating to your typical weld duration; 2) Prefer water-cooled torches for runs over 10 minutes; 3) Check blower and coolant reservoir access.
Think of ergonomics like seat fit in a car. Why it matters: a comfortable torch and reachable controls let you weld precisely for longer periods. Example: test the torch in your hand for 10 minutes while simulating a steady bead; if your wrist tires or controls are hard to reach, you’ll lose quality on long seams. Steps to check ergonomics: 1) Hold the torch and mimic a 1/8″ bead for ten minutes; 2) Reach every front-panel control from your natural working position; 3) Verify torch cable length suits your workspace.
Before you commit, check warranty details because coverage affects your repair costs later. Why it matters: a longer warranty with parts and labor can save hundreds to thousands if key components fail. Example: a unit with a 3-year parts-only warranty but no labor can still leave you paying for shop time on a $400 repair, while a 2-year parts-and-labor warranty may cost less overall if a board fails in year two. Steps to compare warranties: 1) Note length for parts and for labor separately; 2) Ask which components are excluded (e.g., torches, consumables); 3) Get clarification on repair turnaround time.
Finally, remember to match features to the jobs you actually do instead of buying the fanciest model. Try a practical test like welding a scrap piece that matches your usual workpiece: if the machine can produce a clean, uniform bead without constant adjustment, it’s probably the right fit.
Recommended Products

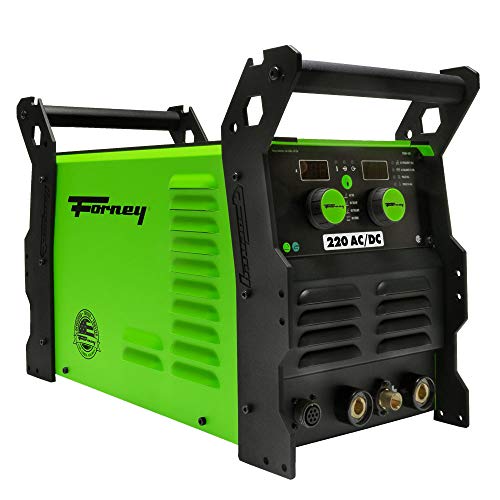
Multi-Process Capable - Welds MIG, Flux-Cored, Stick, and AC/DC TIG.


NEW 2024 MODEL: Features advanced digital microprocessor control for improved reliability and reduced maintenance
Save Time and Money: Replace Two Machines With One
If you’ve ever moved heavy parts between two benches, this is why.
You want to save money and floor space by replacing an AC-only and a DC-only TIG machine with one AC/DC unit, because you’ll cut equipment costs and simplify maintenance. A single machine stops you buying duplicate torches, regulators, and spare parts, and it reduces service calls by roughly half if you’ve been paying per unit for annual maintenance.
Why this matters: you’ll spend less time swapping jobs and more time welding. Example: a small fabrication shop I worked with went from two benches to one AC/DC unit and reduced setup time by 20 minutes per job, saving about 8 hours a week on a two-welder shop.
What to look for when buying an AC/DC TIG that actually replaces two machines
Why it matters: the right features determine whether one machine truly does both jobs.
1) Put the controls and features first, not the brand.
2) Look for balance and frequency controls for AC cleaning when welding aluminum; aim for +/- 50% balance and 60–120 Hz frequency control.
3) Choose machines with clear, one-switch or one-dial mode switching between AC and DC; if switching requires menus and rebooting, it defeats the point.
4) For steel and stainless, make sure the DC mode offers pulse and adjustable peak/current settings for penetration — target a pulsed TIG that can hold pulse rates from 0.5–200 Hz.
Example: a mid-size AC/DC unit with 200 A max, adjustable AC balance, and a 120 Hz option cleaned 1/8″ 6061-T6 joints faster than their old AC-only machine while giving the DC arc needed for 1/4″ mild steel.
How to consolidate your shop in three steps
Why it matters: a stepwise plan stops downtime and keeps production steady.
1) Inventory what you weld and how often. Count hours spent welding aluminum, magnesium, and steels over a month; if aluminum work is 20% or more, AC capability is required.
2) Choose a machine sized for your thickest common workpiece plus 25% headroom — e.g., if you regularly weld 3/16″ steel, buy a 200 A unit, not a 150 A unit.
3) Reconfigure the bench: move gas, fume extraction, and tooling so one station handles both materials; label regulators and set up one torch holder per welder.
Example: a prototyping shop tracked monthly hours and discovered aluminum jobs clustered on two days; after consolidation they scheduled aluminum runs back-to-back to minimize setup and changed flowmeters to labeled quick-connects.
Daily workflow changes that save labor and time
Why it matters: mode-switching is only useful if your workflow matches it.
1) Batch similar material jobs together to minimize mode changes; plan aluminum runs together and steels later the same shift.
2) Train welders to use presets: create and save one preset per common thickness/material combination, and require using them.
3) Keep one small kit of spares (tungstens, collets, cups) labeled AC or DC at the station.
Example: on a production run of 40 brackets, batching aluminum cuts torch swaps to one morning session and reduced per-piece labor by about 12%.
What features save you service calls and spare parts
Why it matters: easy maintenance keeps the machine running and lowers costs.
- Look for accessible consumable compartments and common OEM consumables so you can stock one set of parts.
- Choose units with protective fans or dust filters if your shop is dusty; a $50 filter replacement is cheaper than a board repair.
Example: one shop avoided a $900 repair by swapping a clogged intake filter monthly on a machine rated for dusty environments.
Quick checklist before you buy
Why it matters: checking these avoids impulse buys that don’t replace both machines.
1) Does it switch AC/DC instantly? (Yes/No)
2) AC balance and frequency adjustable? (Yes/No — target +/-50% and 60–120 Hz)
3) DC pulse with adjustable rate and peak current? (Yes/No)
4) Rated amperage at duty cycle that covers your thickest work (target +25% headroom).
5) Consumables compatibility with your current torches and regulators? (Yes/No)
If you answer “No” to more than one item, it won’t fully replace two machines.
Final tip: start small and verify. Buy one AC/DC, run your busiest week, track setup and welding hours, and compare costs to running two machines. If your setup time drops and spare parts shrink, you made the right call.
Recommended Products
POWERFUL- Welds up to 1/2" (12 7mm) Mild Steel with up to 220 AMPs of welding power Output power for Stick welding is 120V 40% @ 85A and 230V 35% @ 200A TIG welding output power 120V 40% @ 130A and 230V 35% @ 220A
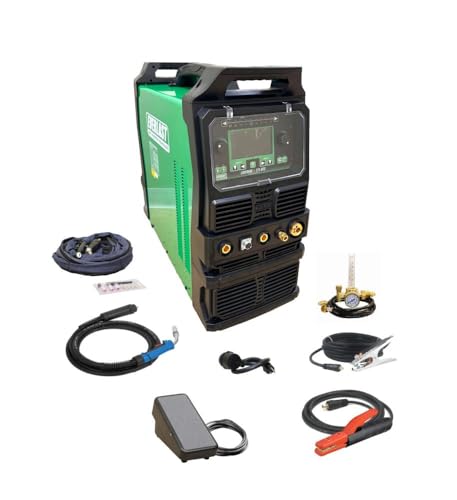
Fully revised PowerSET function for easy MIG, AC-DC TIG, and DC Stick Setup Large, easy to read 5.1 720 HD TFT resolution TFT Digital Screen

COMES WITH: NOVA Rigid-Neck 9 Series Air-Cooled TIG Torch 12.5FT, NOVA Rota-Flex 20 Series Water-Cooled TIG Torch 12.5FT, NOVA Foot Pedal TIG 7 Pin
Frequently Asked Questions
Can Ac/Dc TIG Machines Weld Dissimilar Metal Joints Reliably?
Before you try TIG-bonding dissimilar metals, know why this matters: the wrong combination or technique makes a joint crack or corrode fast.
Yes — you can reliably TIG bimetal bond dissimilar metals if you control alloy shifts, joint design, filler, and technique; AC/DC machines give the control you need for cleaning and penetration. For example, when welding 6061 aluminum to 304 stainless, using AC for cleaning the aluminum surface and DCEN for controlled heat on the stainless reduces oxide problems and warping.
Why AC/DC matters: AC polarity alternates cleaning and penetration every 120 times per second, while DC lets you push heat one way. If you have an AC/DC machine, set AC balance to more cleaning when the aluminum is dirty, and drop frequency to 60–90 Hz for wider weld pools on thicker parts.
How to pick alloys and filler (why this step matters in one sentence): choosing compatible metals and filler prevents brittle intermetallics.
- Match base metals by thermal expansion where possible; avoid pairing high-expansion aluminum directly to low-expansion steel without an intermediate.
- Use a transition alloy when needed — for example, braze or use a nickel-based filler like ERNiCu-7 for aluminum-to-steel bimetal where direct fusion would form brittle layers.
- Test with a small coupon first: weld a 1″ lap, cut, and etch to inspect the interface.
How to design the joint (why this step matters in one sentence): proper joint shape controls dilution and stress.
- Prefer lap or stepped joints to butt joints when joining dissimilar metals; they distribute stress.
- Make the overlap 1–2 times the sheet thickness for thin materials, and add a 1–2 mm chamfer on the thicker side to control penetration.
- Clamp tightly and use backing bars to keep alignment; for example, clamp a 3 mm aluminum plate over a 3 mm stainless plate with a 2 mm overlap and a copper backing to sink heat.
How to set your machine and technique (why this step matters in one sentence): correct settings control melting, cleaning, and dilution.
- Use AC for aluminum-involved joints: set balance to 55–65% electrode positive for stronger cleaning, frequency 60–120 Hz depending on weld width, and amperage at about 80–100 A per 3 mm of aluminum thickness.
- For steel-to-nickel or stainless ends, switch to DCEN with filler matching the nickel content and set amperage to 60–80 A per 3 mm of steel thickness.
- Hold a short arc, move steadily at a pace that forms a smooth 2–3 mm wide bead; pause if puddles get aggressive.
A practical example: welding a 4 mm 6061 plate to a 4 mm 304 plate, you’d start AC at ~120–160 A with 60% cleaning, then taper to DCEN and add nickel filler to bridge toward the stainless.
How to avoid intermetallics and cracking (why this step matters in one sentence): controlling heat and dilution limits brittle phases.
- Keep heat input low: lower amperage, faster travel, and larger copper backing to draw heat away.
- Limit dilution by adding filler that favors one side (use nickel-rich filler when going toward steel) and avoid full fusion across a sharp composition boundary.
- Post-weld, stress-relieve if needed — for thicker parts, a 300–350°C bake for an hour can reduce residual stresses in some alloys.
Example: a transition weld on a 6 mm assembly used a copper backing and 20% faster travel to prevent cracks after 10 thermal cycles.
Final checklist before you weld:
- Clean both surfaces to bare metal; use a stainless brush for stainless and acetone for aluminum.
- Pick a filler: aluminum filler for aluminum-to-aluminum, nickel filler for aluminum-to-steel or steel-to-nickel transitions.
- Set AC/DC, balance, frequency, and amperage per thickness (see steps above).
- Clamp and back with copper where possible.
- Make a test coupon and inspect the cross-section.
You’ll get reliable bimetal joints if you follow these specific choices and test before committing to the final part.
How Does Ac/Dc Welding Affect Consumable Lifespan?
If you’ve ever wondered why your consumables seem to disappear faster on certain settings, this matters because shorter electrode life raises your welding cost per joint.
AC tends to increase electrode erosion because each polarity reversal creates a short, cleaning-heavy burst at the arc root; for example, when you weld aluminum with AC and 60 Hz frequency, you’ll see pitting on the tip after a few 10-inch beads. Use AC if you need oxide cleaning, but expect roughly 20–50% faster consumable wear compared with DC for similar heat input.
Before you change settings, know that DC gives a steadier arc and usually longer electrode life; welders running DCEN at 150–200 A on mild steel often get twice the tip life versus AC at the same amperage. Try DC for carbon steel when you don’t need the cleaning action.
Why gas matters: shielding gas and polarity affect how the arc transfers metal and wears the electrode. For example, switching from pure CO2 to an 80/20 Ar/CO2 mix at 220 A can reduce spatter and extend tip life by about 30% in a MIG setup. Use mixed gas for longer consumable life on steel.
How to reduce wear in practice — follow these steps:
- Match polarity to material: use AC for aluminum (oxide cleaning), DCEN for most steels.
- Set frequency and balance (for AC): increase AC frequency to 120–200 Hz and shift balance toward electrode to reduce cleaning spikes; test with 6–12-inch beads and inspect tip after each pass.
- Adjust amperage: lower your current in 10–20 A increments until you hit acceptable penetration and reduced erosion.
- Choose gas: pick Ar-rich mixes for less spatter on steel, and pure argon for aluminum with AC.
- Inspect regularly: after every 3–5 beads, check the tip for pitting or mushrooming and change it when erosion exceeds 10–15% of original diameter.
Real-world example: a sheet-metal shop switched from AC MIG on mild steel to DC with an 80/20 Ar/CO2 mix and lowered wire feed by 10%; their wire tips lasted from one shift to three shifts, cutting consumable spend roughly in half.
If you’re troubleshooting quickly, try this: run a 12-inch test bead at your normal settings, then run the same bead with DC and mixed gas; compare tip condition and spatter visually. You’ll see the difference within minutes.
One final practical note: if you’re welding aluminum and need AC cleaning, minimize wear by using higher frequency (above 100 Hz) and a balance setting that favors the workpiece, not the electrode.
Can Beginners Safely Learn AC TIG Without Prior DC Experience?
Before you start TIG on AC, know why it matters: using AC wrong can burn through thin aluminum and ruin your first weld.
Yes — you can safely learn AC TIG as a beginner if you follow specific safety steps and master basic techniques first. You’ll start on 1″ square aluminum practice coupons, use a TIG torch with a sharpened 3/32″ (2.4 mm) 2% thoriated or ceriated tungsten, and set your machine to 60–90 amps for 1/8″ thick stock or 30–40 amps for 1/16″ thin pieces. Wear a shade 10–12 helmet, leather gloves, a long-sleeve cotton shirt, and closed-toe boots, and keep a fire extinguisher rated for class B and C within 10 feet.
Why this safety routine matters: electrical arcs and hot metal can cause burns or fires in seconds. Example: I saw a beginner skip eye protection and get temporary flash burn after a 4-second stray arc when the torch slipped.
How to start practicing safely — you’ll do these steps in order:
- Prepare your workspace: clear 3 feet around your bench, clamp coupons to a grounded work clamp, and ventilate with a shop fan blowing fumes away from your face.
- Set the machine: AC, square wave if available, balance around 60% EN (electrode negative) for deeper penetration, frequency 60–120 Hz to concentrate the arc; start low and increase if your puddle wanders.
- Choose filler and rod angle: use 4043 or 5356 aluminum filler depending on strength needs; feed filler with your non-dominant hand at a 15–20° angle.
- Strike and control the arc: use high-frequency or scratch start; hold the torch 1/8″–3/16″ from the work and move at about 1/4″ per second for 1/8″ joints.
- Cool and inspect: let the weld rest 30–60 seconds between passes, then check for porosity and good fusion.
Why supervised feedback matters: an experienced eye catches heat, travel speed, and tungsten contamination problems before they become costly. Example: my mentor corrected a 45° torch angle to 15°, which stopped tungsten from dipping into the puddle.
Practice plan — do this for four weeks:
- Week 1: 10 coupons, single-pass butt joints at 1/8″ stock, focus on arc length and travel speed.
- Week 2: 10 lap joints with filler rod, practice 30° torch angle and consistent feed.
- Week 3: Thin material (1/16″) with pulsed AC, adjust frequency to avoid burn-through.
- Week 4: Two multi-pass welds on 3/16″ pieces, grind between passes and inspect bead profile.
Why PPE and tool care matter: contamination from oil or a rounded tungsten ruins welds and can create unsafe arcs. Example: a greasy coupon produced porosity across half the bead until it was solvent-cleaned.
Quick troubleshooting tips (each fixes one common issue):
- Porosity: clean with acetone, increase gas flow to 20–25 CFH, and keep tungsten sharp.
- Tungsten contamination: regrind to a sharp point and check that filler rod doesn’t touch the tungsten.
- Burn-through: reduce amps 10–20% and increase travel speed.
You’ll build confidence faster if you get supervised sessions at least twice during the month and record your settings and outcomes in a simple notebook.
Do Ac/Dc TIG Machines Require Special Power Hookups?
Before you hook up an AC/DC TIG, know why the power matters: without the right circuit you’ll get poor arc behavior or could damage the machine.
Yes — you usually need a dedicated 240V circuit for most AC/DC TIG welders; think of a big electric furnace drawing steady current. For example, a 200‑amp TIG might advertise 60–80% duty cycle at 200 A and will often require a 50–60 amp breaker and 6 AWG copper conductors on a 240V two‑pole breaker at the panel. If your welder’s manual lists a 50A minimum breaker, wire and breaker must match that spec.
If your workshop runs on a portable generator, check compatibility because generators vary in output quality and phase stability. A small 3,000–5,000 watt generator typically won’t keep a 200‑amp TIG stable; use a generator rated at least 1.5–2× the welder’s max draw and one that provides clean, inverter‑friendly power. For instance, a 10 kW inverter generator with 240V output and low THD will usually work; a cheap non‑inverter set likely won’t.
How to verify and prepare your hookup:
- Read the machine’s nameplate and manual to get the exact voltage, amperage, and recommended breaker size — that tells you what you need.
- Have a licensed electrician install a dedicated 240V two‑pole breaker and run the correctly sized conductors (for example, 6 AWG copper for 50–60A circuits).
- If you use a generator, match its continuous wattage and voltage waveform to the welder’s requirements and confirm it can handle the startup and peak loads.
A concrete example: I installed a 240V, 60A circuit with 6 AWG copper and a two‑pole breaker for a 180 A TIG; the electrician also put the outlet on its own subpanel so no other tools share the circuit. The TIG ran at clean arc stability and reached rated duty cycles.
Final checks before you weld:
- Confirm polarity and connections are tight.
- Measure voltage at the outlet under load; expect within ±5% of rated 240V.
- Keep the ground connection solid and use the recommended cable size for leads.
If you follow the machine specs, use the right breaker and wire, and verify generator compatibility, your AC/DC TIG will run reliably and safely.
How Portable Are Dual-Mode TIG Machines for Field Work?
If you’ve ever needed to weld on a farm, this is why portability matters. Why it matters: you save time hauling gear and can finish jobs between rainstorms. I like dual-mode TIG units that weigh 25–35 pounds so you can lift them into a pickup without help.
You can run both TIG and stick on-site, and that flexibility matters because jobs change fast. For example, I once switched from TIG aluminum on a trailer bracket to stick on a rusted hitch pin mid-job; carrying one 30 lb unit and a small rod holder saved a 45‑minute trip back to the shop.
How to pick a dual-mode TIG for field work (specific steps):
- Check weight — aim for 20–35 pounds for true hand-lift portability.
- Verify power options — choose models that accept 120V, 240V, and external battery packs.
- Confirm duty cycle — pick at least 40% at your working amperage (for example, 100 A at 40% means 4 minutes welding, 6 minutes rest).
- Look for an adjustable pulse and AC balance if you weld aluminum outdoors.
- Include a small cart or shoulder strap to ease carrying over rough ground.
Real-world example: I used a 32 lb unit with a 120V adapter and a 12 V battery inverter to weld a bent aluminum gate hinge in a muddy field; the inverter handled short runs and the unit’s AC balance kept the weld clean.
What to pack for a day of field welding. Why it matters: the right extras keep you working when conditions change.
- Bring a 20–30 ft heavy-duty extension rated for outdoor use, and a 240V adapter if you might need more power.
- Pack a small foldable work table and a clamp kit to stabilize pieces.
- Carry at least two spare tungsten electrodes (2% thoriated 1/16″ or 3/32″ depending on job) and a handful of filler rods for both aluminum and steel.
Real-world example: On a roadside repair, the extension cord reached a generator 40 feet away and the clamp kit let me tack from the driver’s seat.
Tips for battery compatibility and on-site power. Why it matters: without the right power, you can’t weld.
- Confirm the machine’s inverter input range and parallel capability.
- Match battery capacity — for short TIG jobs, a 12 V, 100 Ah battery with a proper inverter can supply brief bursts; for longer work, use a 24 V or dual-battery setup.
- Use a pure sine-wave inverter rated above your welder’s surge draw.
Real-world example: I ran a 30 lb dual-mode TIG off a dual 12 V battery bank with a 2,500 W inverter to finish a trailer corner patch; the setup handled three 2–3 minute welds before recharge.
Practical on-site workflow for switching modes. Why it matters: switching fast keeps you productive.
- Shut off the machine.
- Swap leads and change torch if needed.
- Set welding parameters: amperage, polarity, and preflow/postflow times.
- Do a quick arc test on scrap for 10–15 seconds.
Short and safe.
Real-world example: I switched from DCEN stick at 80 A to AC TIG for a 0.090″ aluminum brace in under five minutes using labeled cables.
Final quick checklist before you leave the shop. Why it matters: forgetting one item stops the job.
- Machine, power cords, adapters.
- Torch(s), ground clamp, extra tungs and rods.
- PPE: helmet, gloves, jacket.
Take a photo of your hookup once set.