As an Amazon Associate, we earn from qualifying purchases. Some links on this site are affiliate links at no extra cost to you. Our recommendations are based on thorough research and editorial judgment.
How Power Flexibility Became a Major Topic in Portable Welding
You’re standing at a jobsite with a battery pack, a small generator, and mains power available—and you can’t decide which to run for a clean, continuous weld.
You may be interested


The exact question is: will the battery give enough amps for the duty cycle, or will the generator overheat the inverter or cause voltage drop?
Most people assume any power source will work if it can reach the stated amperage, and they skip checking headroom, cable size, or cooling needs.
This article shows you how to match battery, generator, or mains to the welder so you keep a steady DC arc, avoid overheating, and hit your finish time.
You’ll get clear rules for sizing generators with 20–25% headroom, choosing proper cables, and tuning amperage.
It’s easier than it sounds.
Key Takeaways
If you’ve ever landed on a jobsite with the wrong power, this is why.
Why it matters: having the right input options keeps your work from stopping for hours. For example, a remodel job in a suburban home might lose access to mains for a day while the panel gets upgraded, and you’ll want a machine that switches to generator or battery without fuss.
1) Jobs that need multiple power options
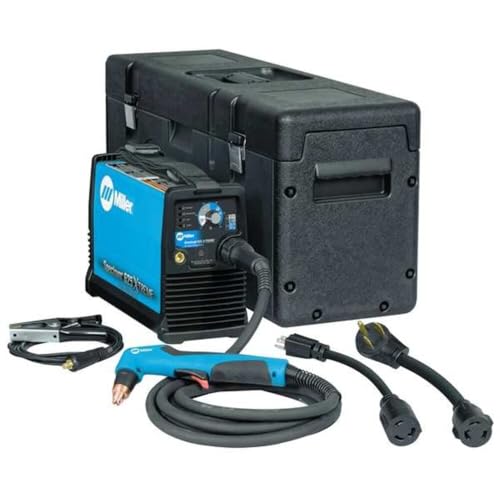
- Your jobsite might be remote, a house, or a factory, and each one has different power limits; pick a machine rated for mains 120/240 V, common portable generators (3–7 kW), and battery packs if you work off-grid.
- Real-world: on a remote fence installation you used a 5 kW generator and still kept a steady arc by limiting weld size to 3/16″ plate.
- Tip: check the welder’s input range and label it as mains/generator/battery capable.
Why it matters: lighter machines mean you can carry them between crawlspaces and roofs without hiring help. For example, an inverter unit under 35 lb makes a two-person lift possible on a roof truss job.
2) Inverter and hybrid design benefits
- Inverter and hybrid welders cut weight while letting you use more than one input; pick models that list both generator compatibility and battery input on the spec plate.
- Real-world: swapping a 60 lb transformer welder for a 30 lb inverter let you carry it up three flights of stairs solo.
- Tip: look for units that advertise steady DC arc control and show duty cycle curves at 25%, 60%, and 100% loads.
Why it matters: better batteries give you real minutes of welding instead of just powering lights. On-site, that means finishing a gate plate rather than waiting for a crew to bring a generator.
3) Battery improvements that enable welding
- Battery packs now offer higher watt-hours and hot-swap capabilities; choose packs with at least 2,000–3,000 Wh if you need several welds off-grid, and plan on swapping when the pack hits 20–30% state-of-charge.
- Real-world: using two 2,500 Wh hot-swap packs you completed three 6″ fillet welds on 1/4″ steel before swapping.
- Tip: carry spares and a portable charger rated to recharge between jobs.
Why it matters: generators and mains behave differently and will trip equipment or breakers if not matched; understanding ratings prevents downtime. On a job, mismatched power caused a welder to trip a GFCI when a pure mains unit would have kept running.
4) Generator and mains compatibility
- Check input ratings: match voltage (120/240 V), waveform (true sine), power factor, and breaker types; choose welders that list generator-ready or have a generator mode for unstable inputs.
- Real-world: a 3 kW inverter generator produced enough clean power for a small TIG setup, but a cheap, unloaded generator produced voltage spikes that forced you to stop welding.
- Tip: if you use a generator, run a load bank or two lights on it first to stabilize the engine and avoid high-voltage spikes.
Why it matters: cooling, duty cycle, and cable choices change how long you can weld without overheating or voltage drop. If you ignore them, you’ll be swapping cables or resting the machine more than welding.
5) Duty cycle and practical tradeoffs
- Know the duty cycle at the amperage you need, and plan cooling and cable runs: for example, a 60% duty cycle at 200 A means 6 minutes welding, 4 minutes rest in a 10-minute period.
- Real-world: welding a 1/4″ fillet at 170 A on a unit with a 40% duty cycle meant you did two short passes then let the machine cool for the remainder of each 10-minute block.
- Tip: use heavier cables (e.g., 2/0 for runs over 10 ft at high amps) and keep the fan intake clear to hit continuous output more often.
Quick takeaway: match your machine to the job by checking input options (mains/generator/battery), duty cycle at the amps you need, and carrying the right batteries or spare packs so you don’t lose an entire workday.
Why Power Flexibility Matters in Portable Welding (Quick Answer)
If you’ve ever shown up to a job with the wrong power, this is why.
Why power flexibility matters: it lets you match the welder to the site so you can finish the job on schedule. For example, if you’re welding a gate at a remote ranch with no outlets, choosing a battery-powered mode lets you work for 4–6 hours on a single pack instead of hunting for a generator.
How to choose between battery and mains, and why each helps:
Why it matters: choosing the right source saves time and fuel.
1) Battery mode — use when there’s no mains or when noise must be low. Real-world example: welding handrails in an apartment building at night; a 48V battery pack keeps noise down and avoids upsetting neighbors.
Steps:
- Check the battery capacity (Ah) and expect about 60–80% of rated output for continuous welds.
- Bring at least one spare pack for a half-day job.
- Monitor charge with the welder’s display; plan a 30–60 minute charge break if you hit 20–30% remaining.
2) Mains power — use when outlets are available to avoid running out mid weld. Real-world example: repairing a farm plow in the shop using a 230V outlet — you get continuous output and can weld thicker metal without load sag.
Steps:
- Confirm outlet type and breaker rating (120V@20A or 230V@30A typical).
- Use a surge-protected extension only if it’s rated for the machine’s amperage.
- If you need more amps, switch to 230V or add a generator rated at least 25% above peak draw.
Why stable power delivery matters: a steady arc gives consistent welds and fewer repairs. For example, welding thin sheet metal with fluctuating power makes burn-through more likely, so you want stable voltage.
How to maintain it:
- Inspect and tighten cable connections before you start.
- Keep cable runs short; add 25% extra length only if necessary since voltage drop increases with length.
- Use cables rated for the amperage — 2/0 for 200–250A, 1/0 for 150–200A, 2 AWG for 100–150A.
Why arc diagnostics matter: they help you spot problems fast so you don’t waste welds or material. Real-world example: a machine with arc-stability readout warned you of intermittent ground contact during a trailer repair. You fixed the clamp and avoided redoing three joints.
How to use diagnostics:
- Check error codes at startup.
- Run a short test bead and watch the display for arc stability percentage.
- If instability shows, clean ground and torch contacts, then retest.
Why flexible amperage control matters: it lets you switch between thin and thick metals without swapping machines. For example, switching from 30A for 18-gauge sheet to 180A for 1/4″ plate on the same job speeds work and reduces trips to the truck.
How to adjust:
- Match amperage to thickness (rough guide: 20–40A per 0.030″ for MIG or TIG).
- Use short test welds to fine-tune settings.
- Keep a cheat sheet taped inside the machine cover with common thickness-to-amp settings.
Why reliable cables matter: they prevent power loss and inconsistent arcs that waste weld wire and time. For example, worn cables on a construction site caused repeated porosity; swapping to fresh 1/0 cables fixed it.
How to manage cables:
- Inspect for cracks and exposed conductors daily.
- Replace connectors if resistance increases or they get hot.
- Coil and store cables off the ground to avoid damage.
Final practical checklist before you start:
- Decide power source (battery vs mains).
- Verify outlet/generator rating or battery state.
- Inspect and size cables for amperage.
- Run diagnostics and a test bead.
- Pack at least one spare battery or a generator with 25% headroom.
Keep this routine and you’ll reduce downtime, save energy, and finish jobs cleaner and faster.
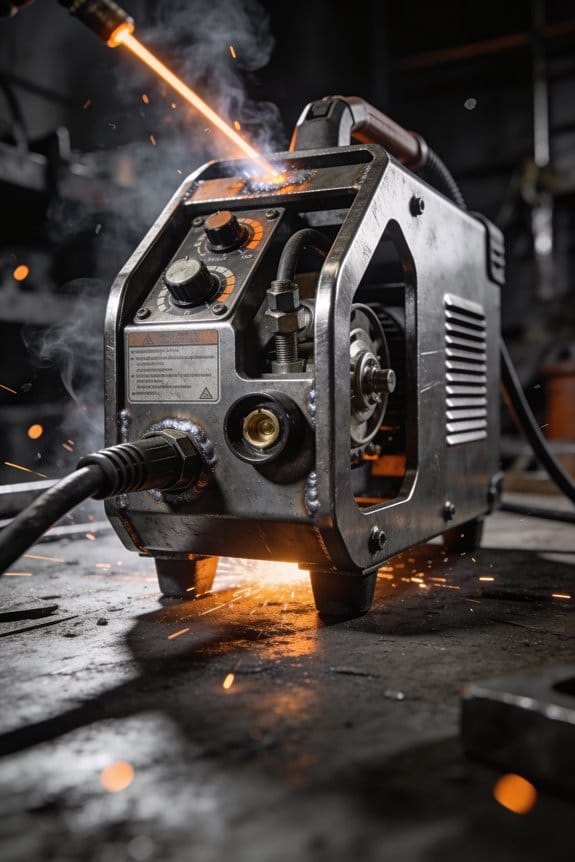
Portable Welder Power Systems: Inverter and Hybrid Advances
If you’ve ever worked with a balky generator on a cold site, this is why choosing the right portable welder matters: matching power to the job keeps your arc stable and your work moving.
Modern inverter and hybrid systems make that match a lot easier and save fuel and time. Inverters shrink heavy parts so your welder can be lighter — think a 25–35 lb chassis instead of a 60–80 lb box — while still producing steady DC output that improves arc stability and cuts wasted energy. Example: a 120 A inverter rig you can lift into a truck bed without help versus the old transformer unit that needed two people.
Why hybrids matter: they let you switch between mains, a generator, and a battery so you keep welding during outages and avoid hauling an oversized generator. Hybrid rigs commonly accept 120–240 V AC and a 48 V lithium pack; some will run 150–200 A off battery for short bursts. Example: on a roadside repair, you can plug into site power, switch to a small 2 kW inverter generator, then finish the welds off a battery when the generator runs out.
Before I explain how they work, here’s why the tech changes help you: higher frequency control equals faster response, cleaner arcs, and better fuel economy.
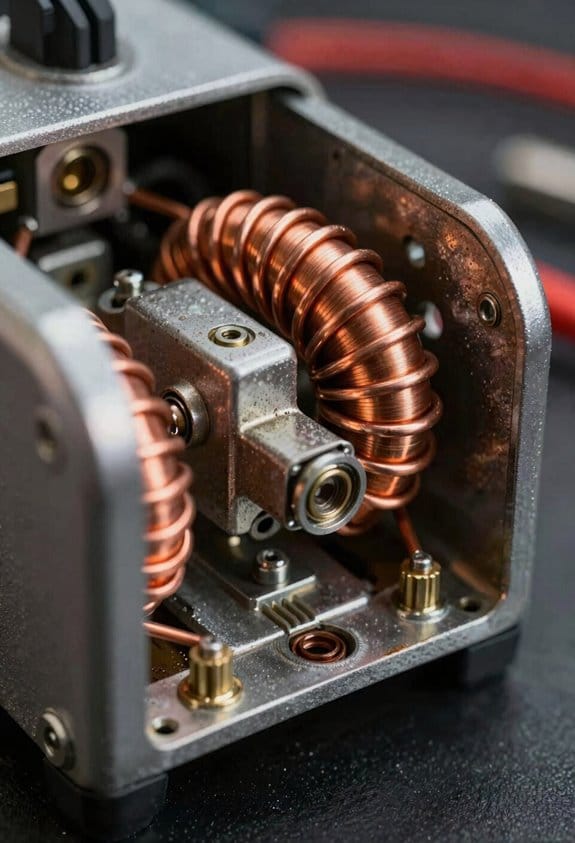
How inverters work (short, practical steps):
- AC from mains or generator is rectified to DC.
- That DC is switched at high frequency (often 20–100 kHz) through lightweight transformers.
- Output is converted to controlled DC tailored to the welding process.
This gives you finer control of current and voltage and improves efficiency by 10–30% compared with old iron-core designs. Example: a TIG bead that used to sputter now stays tight at low amperage because the inverter responds in milliseconds.
How hybrids are set up and used:
- Check input compatibility: confirm your unit accepts the voltages you’ll have (for example, 120/240 V AC and 48 V battery).
- Plan duty cycles: pick cooling and duty ratings that match your expected use (e.g., 60% at 150 A for continuous jobs, 30% at 200 A for short tack welding).
- Use mode switching: switch to battery for up to 10–15 minutes of high-current bursts, then back to generator or mains to recharge.
Example: repairing a skid-steer bucket on a farm, you can weld two 3/8-inch beads at 180 A on battery for 5–7 minutes, then let the generator recharge the battery while you prep the next section.
Practical buying and setup checklist (numbered):
- Choose clear mode switching: look for labeled switches or a simple digital menu.
- Match cooling to duty cycle: for daily 150 A work, pick a unit rated 60% or higher at that amperage.
- Inspect connectors: get IP-rated plugs and DINSE-style welding leads for field use.
- Verify charger specs: if you’ll recharge battery on a generator, the charger should accept the generator’s output at its rated wattage.
- Test before the job: run a 5–10 minute weld session at your expected amperage to confirm heat, arc behavior, and cooling.
If you follow those steps you’ll avoid surprises on site.
Recommended Products
Occupational Health & Safety

Made in United States
Occupational Health & Safety
How Adjustable Amperage Improves Portable Welder Performance
If you’ve ever adjusted a tool and wondered whether the change mattered, this is why.
Why adjustable amperage matters: it lets you match heat to the metal so you get the weld you want, not one that ruins the part.
How amperage changes weld behavior
Why it matters: the current controls how much metal melts and how fast.
1) Lower amperage = less heat, smaller puddle, thinner penetration. Use 30–60 amps for 18‑gauge sheet steel; that prevents burn‑through when you’re tacking a thin panel. Example: when I welded a car door inner panel, dropping from 80 to 45 amps stopped the holes I kept making.
2) Higher amperage = more heat, wider puddle, deeper fusion. Use 120–180 amps for 3/16″ plate to get full penetration with one pass. Example: on a trailer frame repair, raising the setting to 150 amps let me fuse through the rusted edge in one pass.
Tip: change settings in 10–20 amp steps and watch the puddle for 2–3 seconds before you commit.
How to set amperage on a portable welder (step-by-step)
Why it matters: following steps keeps you from guessing and wasting power.
- Identify metal thickness with a caliper or ruler.
- Pick a base amperage: roughly 40 A per mm of mild steel thickness (so 2 mm ≈ 80 A).
- Start 10–20% below that if the piece is painted or has surface contamination.
- Make a 2‑inch test bead on scrap at that amperage.
- Inspect bead: if it’s too convex and the edges don’t wet, raise 10 A; if it’s burning through or thin, lower 10–20 A.
Example: for a 1.5 mm bracket I set 60 A, ran a 2‑inch test, then dropped to 50 A to stop a slight burn‑through.
Preventing warping and preserving metal properties
Why it matters: heat management keeps parts straight and strong.
- Use lower amperage and faster travel on thin sections to limit heat input.
- Tack every 1–2 inches, then stitch welds no longer than 3–4 inches apart and let cool between stitches.
Example: welding a thin sheet shelf, I tacked every 1.5 inches, used 45 A and 12–15 inches/min travel speed, and the shelf stayed flat.
Saving battery and extending runtime on portable battery/hybrid units
Why it matters: you get more repairs per charge without sacrificing quality.
- Match amperage to the task instead of running max output.
- Use pulse or eco modes when available; they drop average current while keeping peak fusion.
Example: on a battery welder repairing a gate, reducing average amperage by 20% stretched my runtime from three to five tacks before a recharge.
Quick troubleshooting guide
Why it matters: small adjustments fix common problems fast.
- Spatter and a narrow bead: lower amperage 10–20 A or increase travel speed.
- Lack of fusion or convex bead edges: raise amperage 10–20 A or slow down.
- Burn‑through: reduce amperage 15–30 A, or make shorter welds and cool between passes.
Example: when my bead kept sinking on thin tubing, dropping 25 A and increasing travel speed solved it immediately.
Final practical checklist before you weld
Why it matters: a short routine prevents common mistakes.
- Measure thickness.
- Set base amperage (40 A per mm guide).
- Run a 2‑inch test on scrap.
- Adjust in 10–20 A steps based on the test.
- Use tacks and short stitch lengths for heat control.
Keep your adjustments simple and measurable: amps, travel speed, and tack spacing. Use the numbers above, test on scrap, and you’ll get repeatable results every time.
Recommended Products
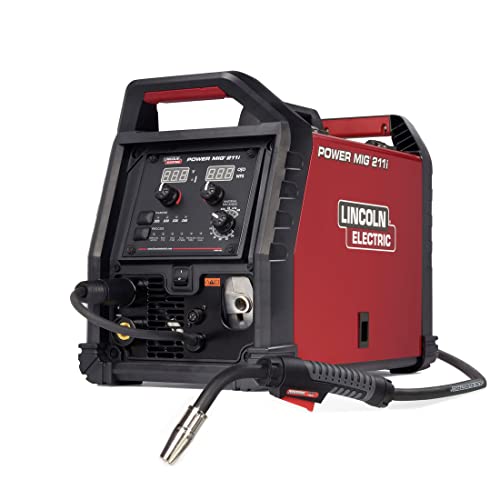
INTUITIVE DIGITAL CONTROLS: Seven-segment display with easy-turn knobs for fast setup of voltage and wire speed.

RELIABLE IGBTs: Ensures stable inverter performance for consistent and smooth operation.
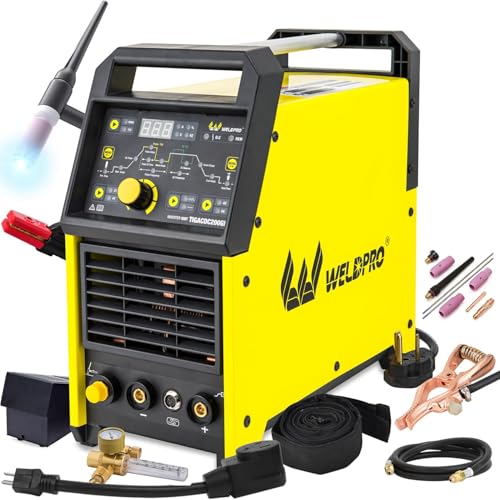
INDUSTRY-PREFERRED 200A AC/DC TIG WELDER: This professional-grade ac/dc tig welder comes with the industry-famous CK17 tig torch, trusted by seasoned welders for its ultra-flexible superflex cable, ergonomic grip, and widely available replacement parts. The 200A high-frequency output delivers stable arc ignition, making it the top choice for precision welding on aluminum, stainless steel, and non-ferrous metals, whether for home DIY or professional fabrication
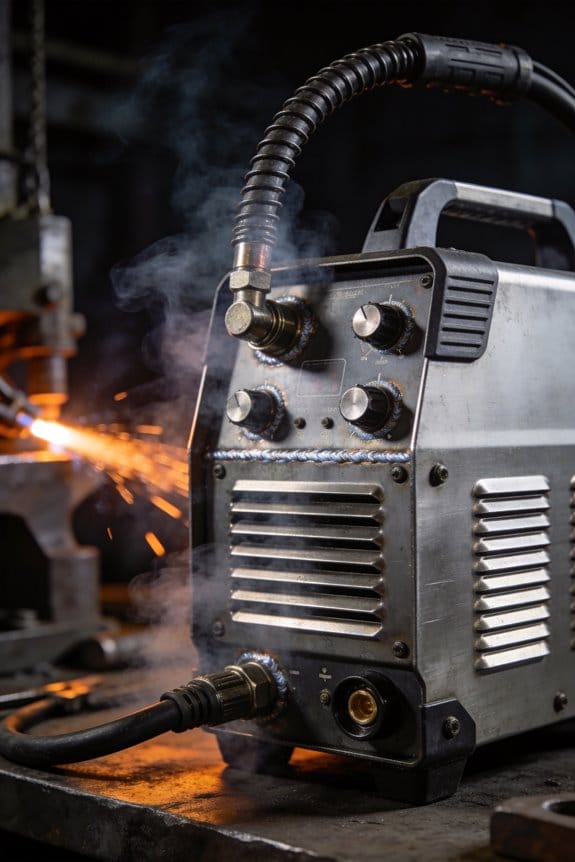
Cooling, Duty Cycle, and Runtime Trade-Offs for Field Use
If you’ve ever had a portable welder overheat on a job, this is why.
Why this matters: overheating halts work and can ruin the machine. Air-cooled units stay light but have shorter run times, while water-cooled units run longer but weigh more and need upkeep. Example: weld a 6-inch structural bracket outdoors with an air-cooled inverter at 120 A and you’ll likely need a 5–10 minute pause after every 3–5 minutes of welding to avoid thermal trips.
How cooling affects duty cycle and runtime
Why this matters: duty cycle tells you how long you can weld without a break. Duty cycle is expressed as a percentage — for example, 60% at 100 A means you can weld 6 minutes out of every 10 at that amperage. If your inverter is rated 60% at 100 A and you weld at 150 A, expect the duty cycle to drop sharply (often under 30%), so plan shorter welds or lower the current. Example: welding a 24-inch seam at 150 A will require breaking the seam into 3–4 short passes with cool-downs between.
How to choose amperage for heat control and weld quality
Why this matters: the wrong amperage makes welds weak or overheats the unit. 1) Match amperage to material thickness: 70–90 A for 1/8″ steel, 120–160 A for 1/4″ steel, 200+ A for thicker plates. 2) Use pulse mode if you have it: set peak current 10–20% above your steady amperage and background current 40–60% of peak to reduce average heat. Example: when welding a 3/16″ HVAC bracket, set steady 110 A or pulse 140 A peak / 60 A background for less warping.
Practical steps to balance job length, cooling, and duty cycle
Why this matters: planning prevents thermal trips and downtime. 1) Check your machine plate for duty cycle ratings at specific amps before starting. 2) Break long seams into timed segments: weld 3–6 minutes, then rest 4–7 minutes for air-cooled units; for water-cooled units you can often weld 10–20 minutes before resting. 3) Reduce travel speed slightly to lower amperage needs rather than cranking current. 4) Keep airflow and radiator fins clean; a clogged fan or cooler reduces duty cycle dramatically. Example: at a remote job building a steel gate, schedule 10-minute weld blocks for an air-cooled unit and bring a spare fan and a spray bottle to clear dust.
Maintenance and field tips to extend runtime
Why this matters: simple upkeep keeps you welding longer. 1) Check fan operation and clean intake screens daily. 2) For water-cooled machines, inspect hoses and coolant level before each shift and change coolant per the manufacturer schedule. 3) Use short ground leads and clean clamps to reduce electrical loss and heat. Example: on a dusty farm site, wiping the cooler fins and replacing a clogged intake screen cut thermal trips from every 20 minutes to once per afternoon.
Quick decision guide for field choices
Why this matters: picking the right machine saves time and weight. – If you’ll do short repairs and need mobility, choose an air-cooled unit under 30 lbs and plan frequent rests. – If you weld long seams on-site and can handle extra weight, pick a water-cooled unit and carry basic coolant and spare hose clamps. Example: a pipe fitter working all day on buried lines should prefer water cooling; a fence repair crew that moves from post to post should take air-cooled gear.
Follow these concrete steps and you’ll keep your welder running and avoid surprise thermal shutdowns.
Real-World Uses: When Portability Beats Stationary Rigs
If you’ve ever been stuck on a pipeline with only a wheelbarrow of tools, this is why portable welders matter. They’ll let you finish the job when dragging a full shop to the site is impossible, and that’s the most common situation where portability beats a stationary rig.
Why this matters: getting a pipe back online fast saves time and avoids costly downtime. I once took a 120 V inverter welder out to a remote pipeline valve box where the road was too narrow for a truck; I welded a 3/16″ fillet in two passes and left before sunset.
How portable machines do it
Why this matters: knowing how they work helps you pick the right one. Portable, inverter-based units give a stable arc and let you dial in amperage precisely, so your weld quality stays high even when you’re moving around the part.
- Choose the right output: use 60–140 A for light structural and pipeline handwork, and 140–220 A for thicker sections.
- Match duty cycle to run time: a 140 A unit with a 30% duty cycle at 40°C handles intermittent 3–5 minute beads; for long continuous beads pick a 60%+ unit.
- Use short, flexible leads: 10–15 ft cables keep you mobile without losing control.
Real-world example: on a lateral repair I brought a 140 A inverter set to 120 A and ran three 4-minute beads with 2-minute cools, keeping the weld heat input consistent.
Power options and setup
Why this matters: without the right power you stop working. Battery or hybrid power keeps you going when mains power isn’t available, and flexible setup reduces time fiddling with gear.
- If mains is available, use 120/240 V input to avoid adapters.
- For remote sites, bring a generator rated at least 20% above the welder’s max input (e.g., 5 kW generator for a 4 kW welder).
- For battery setups, check run time: two battery packs that each deliver 30–40 minutes at your chosen amperage let you swap without cooling downtime.
Real-world example: on an off-grid farm barn repair I used a hybrid unit with two hot-swap batteries; each pack gave 35 minutes at 110 A, so I swapped once and finished the root pass without the generator.
Tradeoffs and what to expect
Why this matters: you won’t get unlimited continuous welding from a portable unit. Portable machines trade some continuous duty for mobility, so plan your passes and cool-downs.
- Expect shorter duty cycles: plan beads under 5–10 minutes for most mid-range portables.
- Use modern cooling: fans and thermal cutouts keep performance reliable for short to medium tasks; just avoid burying intake vents.
- Match machine to material: 1/8″–1/4″ steel does fine on 60–140 A units; for 3/8″ and up, use 140–220 A.
Real-world example: on a remote fabrication of a 3/8″ bracket I ran 160 A for 6-minute beads, then let the unit cool 8 minutes between passes to stay within the duty cycle.
Quick checklist before you head out
Why this matters: a short checklist prevents wasted trips.
- Confirm amperage needs vs. material thickness.
- Check duty cycle against expected bead lengths.
- Pack power: mains adapter, generator sized +20%, or charged batteries (2× recommended).
- Bring 10–15 ft flexible leads, a ground clamp, and spare consumables (contact tips, electrodes).
Real-world example: on weekend emergency fixes I’ve avoided returns by packing two spare tips and a 12 ft ground clamp; those two items fixed 90% of the on-site consumable problems.
Pick machines that match the materials and expected run times, and you’ll be able to bring the shop to the job without sacrificing weld quality.
How to Pick a Portable Welder: Specs That Show True Power Flexibility
If you’ve ever been stuck with the wrong gear, this is why specs matter.
Start with amperage range — why it matters: you need correct heat control so welds don’t burn through thin sheet metal or fail to penetrate thick plate. Look for a machine that goes from about 20–200 amps for real versatility; that’s enough to handle 18‑gauge sheet up to 1/2″ mild steel with different electrodes or wire. Example: when welding a rusty 1/4″ trailer tongue, setting 90–120 A gives good penetration without excessive spatter.
Before explaining how long you can run, here’s why duty cycle matters: it tells you how many minutes out of 10 the unit can weld at a given output before cooling. Step 1: check the duty cycle at the amperage you plan to use — for example, a 30% duty cycle at 200 A means 3 minutes welding, 7 minutes resting. Example: on a 10‑minute job welding a hitch bracket at 150 A, a 60% duty cycle lets you weld continuously for 6 minutes and finish without a forced cooldown.
Think of battery capacity like a fuel tank for battery or hybrid welders — why this matters: capacity equals runtime and fewer interruptions when you’re on a remote job. Look for battery ratings in watt-hours (Wh); aim for 1000 Wh+ if you want several hours of light welding or one to two hours of continuous MIG at low amperage. Example: replacing a bent roll cage tube at a track, a 1500 Wh pack will get you through multiple small welds without swapping batteries.
The difference between cheap and efficient inverters comes down to inverter efficiency — why that matters: higher efficiency means less wasted power and a more stable arc. Check for quoted efficiency percentages (above 85% is solid) and look for inverter designs with power-factor correction if you plug into generators. Example: using a small inverter welder on a campsite generator, an 88% efficient unit drew less generator fuel and held a steady arc on thin exhaust tubing.
Before you buy, inspect cable flexibility and connector quality — why you care: stiff cables make awkward positions harder and increase the chance of a bad connection that kills the arc. Tip 1: bend the leads; they should flex without kinking. Tip 2: look for branded connectors or M8/M10 hardware over cheap stamped clamps. Example: welding under a raised ATV, a 1.5 m supple lead lets you reach axle mounts without reorienting the machine.
You don’t need extra weight if you can’t carry it — here’s why cooling and overall portability matter: active cooling (fans) usually lets smaller units run harder but adds weight and noise; passive cooling keeps things light but limits continuous output. If you move between sites on foot, target a unit under 20 lb with at least a 35% duty cycle at 120 A. Example: a 16 lb inverter with a fan handled fence-post brackets all day on a farm when plugged into a 2 kW generator.
Quick checklist (3 steps) for choosing:
- Match amperage range to materials you weld (20–200 A covers most hobby and light professional needs).
- Verify duty cycle at the amps you’ll use (30% at high amps is common; 60%+ is better for long runs).
- Confirm battery Wh, inverter efficiency (>85%), and lead/connectors quality before you buy.
These concrete checks help you pick a portable welder that actually works where you do.
Recommended Products

Built-in Power Beast: Engineered with a massive 288Wh battery, this welder delivers 3X longer runtime than standard models. Tackle 20-28 welds (3/32'') or 10-12 welds (1/8'') on a single charge—perfect for emergencies, remote job sites, or outdoor projects. No battery swaps needed; just plug in via AC 220V and get back to work fast

5 Minute Quick Start Spot Welder: We use a wide voltage input of 100-240V and an adapter of 15amp high current for fast charging Connect the spot welding machine to the power supply using our adapter, and quickly reach the spot welding mark within 5 minutes (the display screen shows OK for spot welding), which can be used anywhere in the world.

5 Minute Quick Start Spot Welder: We use a wide voltage input of 100-240V and an adapter of 15amp high current for fast charging Connect the spot welding machine to the power supply using our adapter, and quickly reach the spot welding mark within 5 minutes (the display screen shows OK for spot welding), which can be used anywhere in the world
Frequently Asked Questions
Can Portable Welders Charge Batteries or Power Tools On-Site?
Think of a portable welder like a small power station with welding added on.
Yes — you can often charge batteries and run power tools on-site with a portable hybrid welder, and knowing how matters because it saves time and avoids carrying extra gear. For example, I used a 5 kW-rated hybrid welder on a farm to jump-start a dead tractor battery and run a 1,200 W circular saw while welding a gate.
How it powers things and what to check
Why this matters: using the wrong output can damage batteries or tools.
1) Check the welder’s nameplate for these numbers: continuous DC output (amps/volts), AC inverter rating (watts), and duty cycle percentage.
2) Confirm the welder has a dedicated DC charging port or an AC outlet with a clean sine inverter if you need to run sensitive tools.
3) Make sure your battery chemistry matches the charger settings (12 V lead‑acid vs 12.8 V LiFePO4).
Example: if your welder lists 120 V AC, 3,000 W inverter and 60% duty cycle at 200 A, you can run a 1,500 W table saw for short periods while welding intermittently.
Steps to safely charge a battery on-site
Why this matters: improper charging risks fire, ruined batteries, or poor starts.
1) Turn off welding and isolate outputs.
2) Connect the charger/clamps to the battery terminals—positive to positive, negative to negative.
3) Set the welder’s charging mode or limit current to the battery’s recommended charge rate (typically C/10 for lead‑acid; for example, a 100 Ah battery charges at 10 A).
4) Monitor voltage and temperature every 15 minutes for the first hour.
Example: charging a 100 Ah lead‑acid at 10 A from 50% SOC takes about 5 hours; watch the welder’s display for current and voltage.
Steps to run power tools from the welder
Why this matters: tools draw startup surges that can trip or overload the inverter.
1) Check the tool’s running watts and peak (startup) watts—motors often need 2–3× running watts.
2) Ensure the welder’s inverter peak or surge rating exceeds the tool’s startup draw.
3) Start the tool first with no welding load, wait until current stabilizes, then begin welding if needed.
Example: a drill rated 600 W running, 1,800 W starting, needs a welder with at least a 2,000 W surge capacity.
Practical limits and duty-cycle planning
Why this matters: welders have limits and you’ll reduce welding performance if you overload them.
1) Calculate combined load: add welding amperage converted to watts plus tool AC watts.
2) Stay below the welder’s continuous rating and respect its duty cycle (for example, 200 A at 35% duty means 3.5 minutes on, 6.5 minutes cooling every 10 minutes).
Example: if welding at 150 A uses roughly 4,000 W and your inverter is 3,000 W, you can’t run both simultaneously without tripping.
Safety tips (quick)
Why this matters: electrical faults on job sites are common.
1) Use properly rated cables and clamps.
2) Keep the welder and battery dry and ventilated.
3) Fuse or breaker-protect any auxiliary connections at the source.
Example: use 4/0 battery cable for high-amp DC charging runs shorter than 5 feet to avoid overheating.
Bottom line: most modern hybrid portable welders can charge batteries or run tools, but you must match voltages, check inverter surge ratings, limit combined loads, and follow safe charging steps.
How Do Portable Welders Perform in Extreme Cold or Heat?
Before you rely on a portable welder outdoors, you need to know how temperature changes its performance.
They handle extremes, but you should take specific steps to keep them working. In cold weather you must keep the battery at or above its recommended operating temp — usually between 0°C and 20°C (32°F–68°F) for lithium packs — or you’ll lose output and run time. For example, if you’re welding a fence on a January morning at 0°C, put the battery in an insulated bag with a 10–15 W heating pad for 30–60 minutes before use to restore normal voltage. Use a simple thermometer to confirm the pack reaches at least 5°C (41°F) before welding.
High ambient heat forces the inverter and battery to derate, which reduces duty cycle and can trigger thermal shutdown. That matters because on a 40°C (104°F) summer day while repairing a tractor, you might find your 30% duty cycle drops to 15% within 20 minutes. To prevent that, pick a unit with an ambient rating above 40°C and use one of these steps:
- Choose water‑cooled torches or add a small 12 V fan to blow across the inverter housing to keep case temps below the specified maximum.
- Park the welder in the shade and keep airflow clear of vents.
- Reduce current by 10–20% and make shorter welds with planned cool-off intervals.
You’ll get better reliability if you choose specific hardware. For cold jobs, buy insulated battery packs or models with built-in battery heaters; for hot jobs, prefer water‑cooled torches and welders rated for at least 45°C. A practical example: a construction crew in Montana swapped to water‑resistant, insulated packs with heating for a week of subzero installs and maintained expected duty cycles.
If you want a simple checklist before heading into extremes, follow these steps:
- Check the manufacturer’s operating temp range for both battery and inverter.
- If temp < 5°C, preheat the battery to 5–20°C for 30–60 minutes using an insulated bag and low‑watt heating pad.
- If temp > 35°C, prioritize shade, add forced air or water cooling, and reduce weld current by 10–20%.
- Monitor case and battery temps with a cheap infrared thermometer every 15–30 minutes.
- Keep spare insulated packs or a backup unit on hand if you expect sustained extreme temps.
A final practical tip: when you’re working in cold, store spare batteries in an insulated cooler kept near a heat source so you can rotate warm packs into service; in heat, keep backups in a shaded, ventilated cooler.
Are Portable Welders Compliant With Jobsite Safety Standards?
Before you use a portable welder on a jobsite, know why compliance matters: you can avoid fines, reduce injury risk, and keep your crew working.
You can meet OSHA rules with a portable welder if you follow specific, concrete steps. I enforce these on jobs all the time: ground the machine to clean, bare metal with a clamp and a continuous ground wire at least 8 AWG; wear a welding helmet with shade 10–13 depending on amperage, flame-resistant jacket, leather gloves, and ear protection; inspect cables and leads before every shift for cracks, exposed conductors, or loose connections; and follow the manufacturer’s maintenance intervals—every 50 hours for basic checks and every 250 hours for deeper inspections on many models. Example: on a bridge-repair job, we tagged out a welder after a frayed lead was found during the 0500 inspection and swapped it before work started.
Why grounding matters: a poor ground causes shock and stray current that can injure people and damage equipment. Use a clamp on the structure within 6–10 feet of the weld area, clean the metal to bare steel, and test continuity with a multimeter—aim for near zero ohms; replace the clamp or cable if resistance climbs above a few ohms. Example: I once measured 12 ohms on a ground connection and changing to a new 6 AWG cable dropped it below 0.5 ohms and stopped intermittent arc failures.
Why PPE matters: sparks and UV will burn skin and eyes in seconds. Wear a shade-rated helmet, leather gauntlets, long sleeves, and leather boots; carry a flame-resistant blanket for hot slag. Example: on a pipeline tie-in, one worker’s cuff caught a spark; because he had gauntlets and no exposed skin, the burn was only a small blister.
Why inspections matter: small defects become big hazards fast. Do these three steps every day before welding:
- Visually check leads, clamps, and insulation for cuts or exposed wire.
- Verify control switches and interlocks operate and are not sticking.
- Look for oil, grease, or flammable materials within a 35-foot radius and remove them.
Example: a daily inspection found oil-soaked rags beside a machine, and removing them eliminated a major fire risk.
Why follow the manual: manufacturers list duty cycles and cooling requirements that prevent overloads. If your welder’s duty cycle is 60% at 200 A, that means run 6 minutes, rest 4 minutes—exceeding that overheats the unit and may void warranties or create hazards. Example: on a fabrication run, we set a timer to enforce duty-cycle rests and extended the machine’s lifespan by months.
If you want a quick checklist to keep your crew compliant:
- Ground clamp on clean metal within 10 feet.
- 8 AWG or heavier ground and supply leads for most portable units.
- PPE: helmet (shade 10–13), leather gloves, FR jacket, boots, ear protection.
- Daily inspection steps 1–3 above.
- Follow duty cycle and maintenance intervals from the manual.
You’ll stay compliant if you do these things consistently; skip one and you boost risk substantially.
What Maintenance Extends Portable Welder Lifespan in Field Conditions?
If you’ve ever had gear fail on a job, this is why.
Why this matters: keeping your welder running prevents costly downtime and keeps your crew safe. One time on a windy construction site a generator-tied welder fouled up because its cooling fan was clogged, and the whole shift waited three hours for a backup.
1) How should you clean the welder?
Why this matters: dirt and metal dust block vents and cause overheating.
Steps:
- Shut the unit off and disconnect power.
- Use a soft brush and low-pressure compressed air (20–30 psi) to blow dust from vents and the fan intake.
- Wipe exterior surfaces with a damp cloth and a mild detergent; dry within 10 minutes.
Example: After a day of cutting on a bridge deck, blow out the intake and you’ll reduce fan strain immediately.
2) How often should you inspect moving parts and terminals?
Why this matters: worn parts and loose terminals cause arcing and reduced performance.
Steps:
- Inspect moving parts and terminals every 50 operating hours or monthly, whichever comes first.
- Look for loose bolts, frayed cables, corrosion, and cracked insulation.
- Tighten bolts to the torque values in your manual or snug them if you don’t have values.
Example: On a mobile repair van I use two of the clamps on the lead showed light corrosion after a month; swapping that clamp saved a day of troubleshooting.
3) How do you lubricate moving parts?
Why this matters: proper lubrication prevents wear and keeps connectors working smoothly.
Steps:
- Use a lithium or machine oil recommended by the manufacturer.
- Apply a thin film to hinges, clamps, and mechanical linkages every 100 operating hours.
- Wipe away excess oil so it doesn’t attract dust.
Example: Lubing the clamp hinge every 2–3 weeks on a farm job stopped squeaks and reduced clamp failure.
4) How do you protect terminals and connections?
Why this matters: insulated covers stop shorts and limit corrosion.
Steps:
- Fit insulated terminal covers over exposed studs and terminals immediately after any maintenance.
- Spray lightly with a corrosion-inhibiting contact protectant once every 3 months.
- Replace cracked boots or covers right away.
Example: On a rainy site, adding a silicone boot to the positive terminal kept the unit from arcing during a storm.
5) How should you monitor cooling systems and duty cycle?
Why this matters: heat is the main failure cause in field conditions.
Steps:
- Check fans run freely during startup and that vents aren’t blocked before each shift.
- Track weld-on time against the rated duty cycle (for example, 60% at 200A = 6 minutes weld, 4 minutes rest).
- If you hit duty limits, pause welding and let the unit cool for the recommended rest period.
Example: On a pipeline job, using a timer to obey 50% duty cycle prevented repeated thermal shutdowns.
6) How do you manage battery health (if your unit has one)?
Why this matters: a weak battery can leave you stranded on site.
Steps:
- Check battery voltage monthly and after cold nights; keep it above the manufacturer’s minimum (often ~12.4V for 12V batteries).
- Clean terminals and apply a thin coat of dielectric grease.
- Store batteries fully charged during long idle periods and recharge after heavy use.
Example: Recharging a welder battery each evening on a winter job avoided a cold-morning failure.
7) How do you secure connections and cables?
Why this matters: loose or damaged cables reduce output and can spark.
Steps:
- Inspect cable jackets for cuts every job start.
- Replace cables with broken insulation or exposed conductors immediately.
- Keep cable connectors tight and use strain relief to prevent pull-out.
Example: Clamping the ground cable so it couldn’t rub on a sharp edge prevented insulation wear on a metal fabrication site.
8) How should you store units between jobs?
Why this matters: moisture and dust during storage speed corrosion and electrical faults.
Steps:
- Store the unit in a dry case or a weatherproof cabinet with silica gel packs.
- Remove electrodes and covers, and keep leads coiled off the floor.
- If long-term storage, run the unit under load for 5 minutes every 30 days.
Example: Storing a unit in a sealed box with a desiccant on a trailer prevented fried electronics after a week of rain.
Follow these specific steps and you’ll lengthen your welder’s life in the field and avoid preventable failures.
Can Portable Welders Be Upgraded With Future Battery Tech?
If you’ve ever packed gear for a job that ran out of power, this is why upgrading portable welders matters: you won’t have to buy a new machine every time batteries get better.
Yes — you can plan for future battery tech, and here’s how to make that work for you. Pick a portable welder with modular battery compartments and swappable packs so you can adopt higher-capacity cells, faster charging, or new chemistries without replacing the whole unit. For example, choose a model that accepts 18–54V packs with an industry-standard connector so you can swap a 5Ah pack for a 10Ah pack when denser cells arrive.
Why modular design matters: it saves money and landfill. I once saw a maintenance shop swap six 5Ah packs for four 10Ah packs and double shift time without buying new welders.
How to set yourself up (exact steps):
- Check compatibility: confirm the welder uses a standard voltage range (for example, 18–54V) and a common connector like Anderson or XT60.
- Buy swappable packs: start with at least two packs so you can hot-swap; aim for 5–10Ah each depending on your weld current needs.
- Watch charging specs: get a charger rated for the pack chemistry and able to charge at 0.5–1C for reasonable times (a 5Ah pack charges in ~1–2 hours at 1C).
- Plan for future chemistries: prefer packs with replaceable cells or vendors who sell upgraded cells separately (e.g., moving from LiFePO4 to higher-energy NMC later).
- Keep firmware/upgrades in mind: choose welders from manufacturers that provide firmware updates so the inverter can accept new battery parameters.
Example: a pipe welder on a remote site used two 7Ah packs at 40V for 90 minutes of welding. After upgrading to two 14Ah packs with the same connector and voltage, run time increased to about 3 hours and charging stayed compatible with the original charger.
A few practical cautions: verify the inverter can handle higher energy density and different discharge curves, check warranties before swapping cell chemistries, and label packs with voltage and chemistry. If you follow the steps above, you’ll be able to upgrade batteries as technology improves without buying a whole new welder.