As an Amazon Associate, we earn from qualifying purchases. Some links on this site are affiliate links at no extra cost to you. Our recommendations are based on thorough research and editorial judgment.
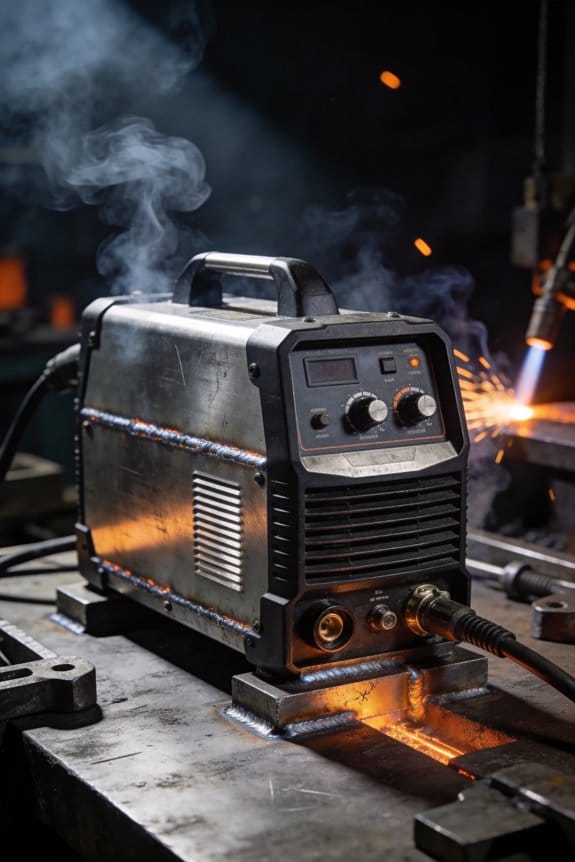
Why Lightweight MIG Machines Matter for Mobile Welding Jobs
You’re at a jobsite with a heavy MIG cart in the rain, staring at how you’ll move it between trucks and tight spaces—how can one person handle this without wasting time or risking injury?
You may be interested


You’ve packed and unpacked bulky welders only to lose half a day wrestling weight, hauling extra fuel, or calling for help.
Most people assume heavier machines mean better performance and don’t consider weight as a core hiring or buying factor.
This piece will show you which lightweight MIG features matter for real-world mobile welding—how under-40 lb and under-30 lb options change setup time, transport, and carry frequency, and how they pair with small inverter generators and lighter cables so you can plan power and duty cycle on site.
You’ll get clear selection criteria and practical outcomes you can use today.
It’s simpler than it seems.
Key Takeaways
If you’ve ever hauled gear for a one-person job, this is why.
Lighter MIG machines under 40 lb matter because they let you load and unload by yourself without a dolly, which saves time and hassle. For example, on a roof repair I did, a 35 lb unit went from truck bed to ladder in three lifts instead of needing a coworker; the load was steady and fast. If you lift it, keep the handle close to your body and bend at the knees to protect your back.
Before you set up, know how much time you’ll save.
Cutting weight typically reduces single-person load/unload and setup time by about 30–50%, so you’ll get more done in a day. Picture a service call where you need to move gear between jobs: with a lighter unit you can finish two extra stops because each swap is quicker. To shave time, park with the tailgate down, keep the machine nearest the bed edge, and use the top handle to slide it into your hands.
Think of a compact footprint like packing your toolbox efficiently.
A machine around 18×10×12 inches or smaller fits on scaffolding platforms, inside job boxes, or next to other tools without crowding your work area. I once worked in a cramped scaffold bay where the compact welder left room for clamps and a grinder, so I didn’t have to crawl out to fetch tools. When space is tight, place the welder at your dominant-hand side for easy cable routing.
The difference between carrying a heavy unit and a light one comes down to fatigue.
Smaller welders cut the strain of frequent carries and ladder climbs, which lowers your chance of a slip or muscle strain. On a multi-floor installation I did, using a 30 lb machine instead of a 55 lb one kept my arms fresh after the fourth trip. If you make repeated climbs, wear gloves with good grip and rest between carries.
You don’t need fiddly placement to get welding fast if the unit is portable.
Smaller units often put meters and handles where you can reach them quickly, cutting time to weld. In one truck-bed setup I used, the front meters let me dial settings without dragging the machine out, and I started welding 90 seconds faster. To speed up time-to-weld, keep your leads coiled and store the gas cylinder upright near the machine.
Which Lightweight MIG Specs Improve Field Performance
Before you pick a MIG for jobsite work, focus on weight and size because those determine how easily you’ll move and set the machine up. Why it matters: you’ll save time and reduce strain when you carry and reposition the welder. Example: I carried a 40 lb 120V welder up three flights to a rooftop—compact machines let you do that without a dolly.
1) Prioritize a lightweight, compact unit.
- Look for machines under 50 lb if you need to lift it alone; under 30 lb if you’ll carry it frequently.
- Choose a chassis no larger than about 18 x 10 x 12 inches for tight spaces.
- A small footprint fits on scaffolding and in service vans.
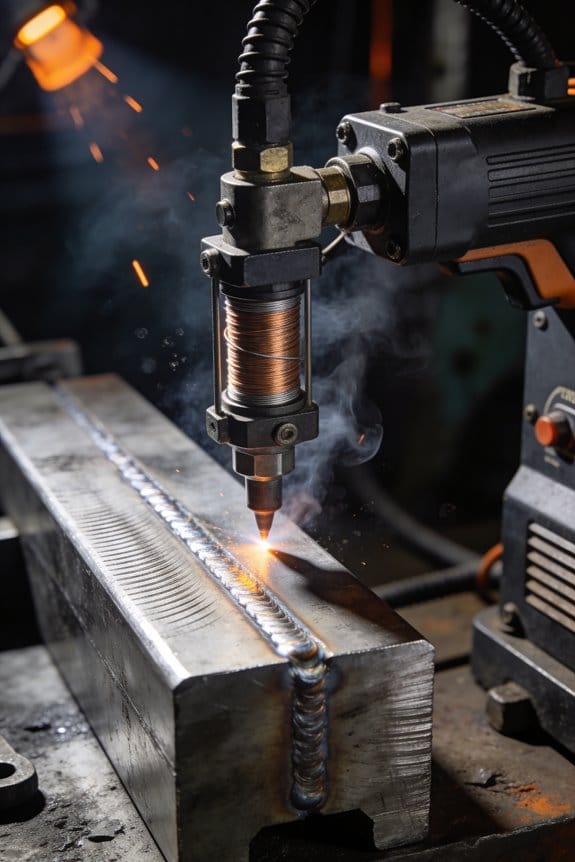
Wire feed stability matters because it directly reduces spatter and gives you a smoother bead. Example: on a thin 18-gauge car panel, a steady feed dropped my cleanup time by half.
2) Check the wire feed specs.
- Aim for a feed motor with torque ratings or a marketed “consistent feed” feature; also test feed at 50–300 in/min.
- Look for feeders that handle 0.023–0.035 in wire if you work on auto and light fabrication.
- If you weld long runs, pick a unit compatible with larger spools (8–10 lb) so you change wire less.
You need to match amperage and duty cycle to how long and what thickness you’ll weld because heat and time control penetration and distortion. Example: welding 1/4 in steel at 150 A for 3 minutes required a 30% duty cycle unit so I staggered welds to avoid overheating.
3) Compare power, amperage range, and duty cycle.
- Match amperage to thickness: ~30–60 A for 18–20 gauge, 60–120 A for 1/8 in, 120–200 A for 1/4 in.
- Look for at least a 30% duty cycle at the amperage you plan to use; 60%+ if you’re doing long seams.
- Note heat input: lower amps with multiple passes reduce warping on thin sheet metal.
Multi-voltage and spool size affect flexibility and how long a job runs without reload because they change where you can plug in and how often you swap wire. Example: on a remote site with a 3 kW generator, a multi-voltage machine let me switch to 120 V when the crew needed power elsewhere.
4) Verify electrical and spool options.
- Get multi-voltage (120/240 V) if you’ll use generators or varied outlets.
- Prefer machines that accept 4–8 in spools on the gun or an adapter for 8–10 in spools in a remote feeder.
- Confirm run-on-gas and spool hub dimensions before buying spools.
Handles, carts, simple controls, and clear meters reduce setup time and fatigue because you’ll adjust settings fast and move the unit without wrestling. Example: a unit with front-mounted meters and a top tote handle had me welding in under two minutes versus ten on another machine.
5) Evaluate ergonomics and controls.
- Use one with a solid handle or included cart; test lifting one-handed if you’ll solo-carry.
- Prefer front-facing knobs and a clear digital display for wire feed and volts; analog dials are okay if they’re marked in amps/volts.
- Look for a single-knob synergetic mode if you want quick, one-step setup.
Follow these steps and you’ll pick a MIG that actually performs on the jobsite, not just on paper.
Recommended Products
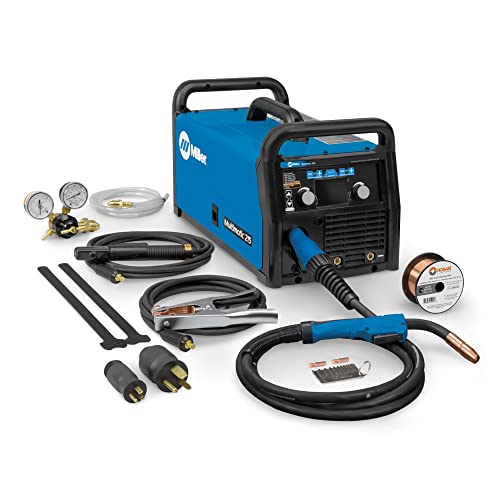
Multi-Process MIG Welding Machine: Build up your welding skills with our Miller Multimatic 215 Multiprocess Welder; From flux-cored to MIG, Stick & DC TIG processes, our Miller welder machine tackles them all like a champ & welds up to 3/8" mild steel
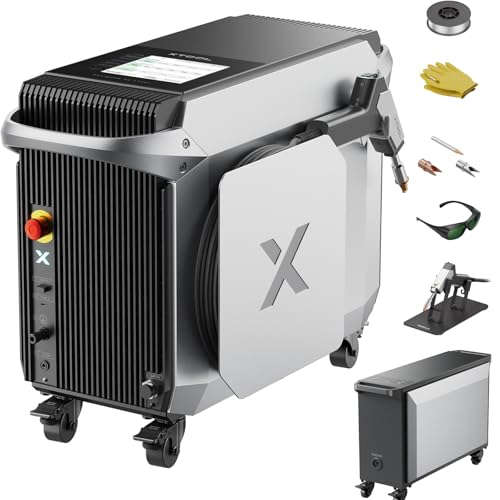
3-in-1 Metal Workshop: Weld, Cut, & Clean - Unleash ultimate versatility with the xTool MetalFab, your complete fabrication solution. Seamlessly switch between a powerful 800W fiber laser welder for flawless seams, a powerful metal cutter for on-the-spot cuts up to 5mm, and a 3x wider, high-efficiency 45mm laser cleaner. Save you hours on metal welding and surface prep. You can also upgrade to automated precise CNC metal cutting with ease.

True All-Process - excellent performance on MIG, Flux-Cored, STICK (including 6010 electrodes), DC TIG and AC TIG industrial applications
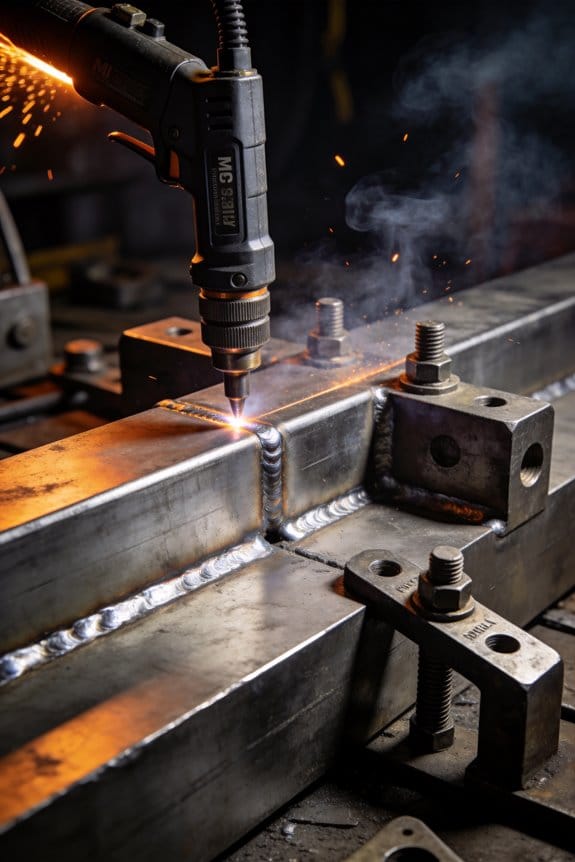
How Weight and Footprint Affect Transport and Setup Time
Here’s what actually happens when you choose a lighter, smaller welder for site work: it directly shortens the time you spend lifting, loading, and setting up.
Why this matters: every minute you save on handling is a minute you can spend welding.
If you pick a unit under 40 lbs, one person can lift it into a standard pickup bed without help; anything over 60 lbs usually needs two people or a dolly. For example, I had a 35 lb inverter I could load solo into my truck in 30 seconds, versus a 72 lb transformer-style machine that took two people and three minutes.
How weight affects transport and setup:
- Lift and load faster. Lighter machines cut single-person load time from minutes to seconds.
- Reduce crew coordination. When one person can handle the unit, you save on waiting and communication.
- Use fewer anchoring points. A 35–45 lb welder often needs just two clamps or a small bracket; a 70+ lb unit needs a heavy-duty stand or four fasteners.
Why this matters: the footprint decides what else you can pack and how quickly you can route cables.
How footprint affects transport and setup:
- Fit more gear in your case. A machine with a 12 x 8 inch footprint fits beside grinders and helmets in most job boxes; a 20 x 15 inch base forces a separate case. Example: on a service call I crammed a compact 14 x 9 inch welder with two grinders and still had room for a toolbox, all in one chest.
- Find clear cable paths faster. Smaller machines let you route leads along walls or under benches without reconfiguring the workspace.
- Speed teardown. Compact units can be grabbed and stowed in one motion, cutting pack-up time by roughly 30–50%.
Practical steps you can use today:
- Weigh your options: choose a unit under 45 lbs if you want regular solo transport.
- Measure footprint: look for a base under 15 x 10 inches to fit common cases.
- Plan anchoring: bring one extra clamp for units under 50 lbs, and two heavy-duty anchors for heavier gear.
- Practice a quick load: time yourself loading the unit into your truck; if it’s over 90 seconds, try a lighter model or add a dolly.
Real-world example: on a municipal repair job, switching from a 68 lb welder to a 38 lb inverter dropped setup from 8 minutes to 2 minutes, let one tech handle the machine, and freed the second tech to prep material.
Bottom line: pick a lighter unit with a small footprint so you can load solo, fit more gear, and cut setup/teardown times in half.
Match Job Intensity to Duty Cycle and Power
Before you pick a welder, you need to know how duty cycle and power affect your workflow.
Duty cycle matters because it tells you how long the machine can run at a given amperage before it must cool down. For example, a 200 A welder with a 60% duty cycle at 200 A can weld for 6 minutes out of every 10 minutes before it needs a 4-minute rest, so on a long seam you’ll hit that pause frequently. Match that to your job: if you’re doing 12-minute continuous seams, choose a unit rated for at least 120% of the current you need or one with a higher duty cycle.
Why amperage matching matters: the welder has to deliver the current your joints require without being pushed to its limits. Say you’re welding 1/4″ steel with flux-cored wire — you typically need about 180–220 A. If your machine’s max output is 220 A but its 220 A duty cycle is only 20%, you’ll be stopping a lot. Get a welder with a 60% duty at 200–220 A for intermittent heavier work, or a 100% duty at 180–200 A for steady long runs.
How to choose for portable jobs — this matters because portability changes what you can realistically run. Steps:
- List the typical joint types and thicknesses you’ll weld and the amperage ranges for each. Example: 1/8″ root passes ~90–120 A, 1/4″ fill passes ~180–220 A.
- Check the welder’s duty rating at those amperages. Example: a 140 A machine at 35% duty will only run 3.5 minutes every 10 at full tilt.
- Pick a machine with a duty cycle that matches your most common task: choose 60% duty at the heavier intermittent amps if you’re moving between welds, or a higher continuous rating if you park and run long seams.
Practical rule of thumb: for mobile, stop-and-go structural work go with at least a 60% duty at your peak needed amperage; for production seams choose a 100% duty rating at your working amperage. A 60%/200 A machine suits most field structural jobs; a 100%/180–200 A machine suits long, steady shop seams.
Recommended Products

All-in-One Capability: Enjoy the freedom to weld any process & take on more projects with the Miller 907757 Multimatic 220 AC/DC Multiprocess Welder; Tackle flux-cored, MIG, Stick & TIG processes like a champ with 1 powerful & easy-to-use Miller welder machine

Versatile Welder - Supports MIG, Flux-Cored, Stick, and AC/DC TIG welding

Multi-Process Capable - Welds MIG, Flux-Cored, Stick, and DC TIG.
What Materials and Processes Can Portable MIGs Handle?
Before you pick a portable MIG, you need to know what metals and processes it can actually handle because amperage and duty cycle don’t tell the whole story.
Why this matters: if you choose the wrong machine you won’t get clean beads or stable feeding, and you’ll waste time on repairs. Example: welding an aluminum pickup bed patch with a machine that lacks spool-gun support will leave you with a lot of porosity and spatter.
1) What metals will your portable MIG weld?
- Carbon steel: Most portable MIGs will handle carbon steel up to about 1/8″ (3 mm) with a 0.030″ wire at 100–150 A; heavier plate needs higher amperage and a larger wire. Use a 0.035″ or 0.045″ wire for thicker work.
- Stainless steel: Your machine needs push-pull or a smooth-feed setup and compatible shielding gas (usually 98% Ar / 2% O2 or TriMix) to avoid contamination; example: repairing a stainless trailer tongue, use 0.030″ wire and 80–120 A for thin sections.
- Aluminum: You must have spool‑gun support or a feeder with AC balance control to reduce spatters and burn-through. For a 1/8″ (3 mm) aluminum patch on a boat, use a spool gun with 0.035″ ER4043 at about 120–160 A.
2) Do you need flux‑cored capability?
Why this matters: flux‑cored wire tolerates wind and dirty surfaces better than solid wire, so it’s often the only practical option outdoors. Example: if you’re welding a fence post on a windy job site, flux‑cored wire lets you skip perfect cleaning and still get fusion.
Steps:
- Confirm the machine accepts flux‑cored wire and can run DC+ polarity.
- Check if it supports self-shielded (FCAW-S) wire for zero-gas outdoor use.
- Match wire diameter (0.035″ common) to your nozzle and drive rolls.
3) What about wire sizes and spool weight?
Why this matters: wrong spool size or wire diameter leads to poor feed and stoppages. Example: carrying a job crate to a farm, you want machines that accept common 4‑ or 10‑lb spools so you don’t run out mid-job.
Steps:
- Pick a machine that accepts 0.030″–0.045″ for versatility.
- Verify it fits the spool weights you plan to use (4 lb for portability, 10 lb for longer runs).
4) Which filler alloys and joint types will work?
Why this matters: thin sheets, heavy plate, and joint geometry change your filler choice and settings, and ignoring that makes weak welds. Example: joining a 22‑gauge car panel uses 0.023″ wire and low heat to avoid blow-through; lap joints on 1/4″ plate require 0.035″ or 0.045″ and higher amperage with proper root gap.
Steps:
- Identify base metal thickness and joint type.
- Select wire alloy and diameter to match thickness (0.023″–0.035″ for thin sheet, 0.035″–0.045″ for plate).
- Tune voltage and wire speed for stable transfer and good penetration.
Final practical checklist you can use before buying:
- Confirm material support: carbon steel, stainless, aluminum.
- Check spool-gun or AC balance for aluminum.
- Ensure flux‑cored compatibility for outdoor work.
- Verify wire diameters and spool sizes accepted.
- Match filler alloys and drives to the joint types you weld.
If you follow this, you’ll avoid common field failures and get welds that hold.
Generator and Power Considerations for Portable MIGs
Before you plug a portable MIG into a generator, you need to know that the welder and generator must match or you’ll get poor welds or tripped breakers.
Start by checking your welder’s voltage and amperage plate; most small MIGs need either 120V at up to 20–30 amps or 240V at 30–50 amps. Example: a common 140‑amp flux‑core MIG often draws about 20–25 amps at 120V when cutting in; a 220‑amp machine will want 35–45 amps at 240V. Do this first so you buy the right generator.
Why this matters: generators under-rated for the load will sag voltage during weld starts and ruin arc stability. Real example: I once tried welding a 1/8″ steel repair with a 3,000 W rated unit and the arc kept stuttering because the generator output dropped under the weld’s startup surge. It failed until I switched to a 5,500 W inverter generator.
1) Match continuous load and allow headroom.
Why: motors and welders draw a startup surge higher than running current. Steps:
- Find your welder’s running amps and volts on the nameplate.
- Multiply running watts by 1.25 for safety margin (or pick a generator with at least 25% more rated continuous watts than your welder’s running watts).
- Ensure the generator’s peak surge rating covers the welder’s startup spike (look for a higher short‑term surge watt rating).
Example: if your welder runs at 3,000 W, choose a generator rated for at least 3,750 W continuous and with a 4,500 W or more surge capacity.
2) Prefer inverter or clean sine‑wave generators.
Why: welder electronics and arc stability suffer from dirty power. Example: welding thin aluminum with a cheap open‑frame generator produced burn‑through because the voltage fluctuated; an inverter generator fixed it immediately. Choose an inverter model with AVR (automatic voltage regulation) or labeled “clean sine wave” and under 5% total harmonic distortion.
3) Consider fuel and run time.
Why: long jobs mean fewer refuels and steadier power. Example: a 6,500 W portable diesel ran a 200‑amp MIG for eight hours with one tank; a small petrol 3,000 W ran out in two hours. Steps:
- Check generator runtime at 50% load (manufacturer spec).
- Pick one with at least enough runtime for a full shift or plan fuel changes between welds.
4) Cooling, duty cycle and temperature monitoring.
Why: welders and generators both derate when hot. Example: on a hot summer day a generator’s output dropped 10% after two hours, making the welder trip. Steps:
- Monitor generator oil temp and welder duty cycle gauge.
- Keep vents clear and run in shaded, ventilated spots.
- Let the welder cool between heavy passes to avoid duty‑cycle trips.
5) Cables, grounding and connections.
Why: voltage drops from thin cables cause poor welds and heat losses. Example: using a cheap 10‑gauge extension caused a soft arc on a 120V MIG; switching to 6‑gauge fixed it. Steps:
- Use cable sized for the current (for 20–30 A use 10–6 AWG depending on length; for 40–50 A use 4–2 AWG).
- Keep extension lengths under 25 feet when possible.
- Bond generator frame to the workpiece ground as per your welder manual.
6) Test the setup before you start the job.
Why: a quick test discovers issues without ruining parts. Steps:
- Run the generator and let it warm to operating temp.
- Weld a sample bead on scrap steel at the intended settings for 2–3 minutes.
- Check for arc stability, burns, and generator voltage under load with a multimeter.
Example: on a vehicle repair, I always weld a 2‑inch test bead on scrap sheet metal to confirm settings and steadiness.
Final practical checklist before welding:
- Confirm welder voltage/amperage and compute required generator watts (×1.25).
- Use an inverter/AVR generator with low THD if possible.
- Pick cable size for your amperage and length.
- Check runtime and fuel type for your job length.
- Do a 2–3 minute test weld on scrap and monitor temps.
If you follow these steps you’ll avoid trips, bad beads, and damaged gear.
Recommended Products
210 Amps of output with a 60% duty cycle

Made in United States
Fully revised PowerSET function for easy MIG, AC-DC TIG, and DC Stick Setup Large, easy to read 5.1 720 HD TFT resolution TFT Digital Screen
Real-World Portability Examples: Auto, Farm, and Maintenance Jobs
If you’ve ever had to fix things away from your shop, this is why portability matters. You want gear that fits your vehicle and won’t melt down halfway through a job.
After you pick a generator that supplies clean 120/240V power and maintains voltage within ±5% under load, you’ll see why lightweight MIG machines shine on real jobs like auto repair, farm fixes, and maintenance work. I carry a 35–50 lb compact MIG to auto restoration sites; it fits in a trunk and runs off a small 3–4 kW inverter generator so you can weld sheet metal, patch panels, and rebuild mounts with controlled heat input to prevent warping.
Before you head to a ranch, know why low weight matters: you’ll often be single-handedly loading and unloading. On one job I carried the compact unit up a 10-foot ladder to weld a broken gate hinge; the welder’s 40 lb weight and a shoulder strap let me climb safely and weld for 15 minutes without overheating.
Why multi-process capability helps facility maintenance is simple: sometimes the metal is dirty or thick and MIG won’t cut it. I keep a combo machine that switches to stick; with a 60% duty cycle at 120A I can weld rusty structural steel or touch up a crane mount without bringing a second unit.
How to choose and use a portable setup:
- Match power: pick a generator rated at least 25% above your welder’s max input (for example, a 4 kW generator for a 3.2 kW welder).
- Check waveform: use an inverter generator that produces a clean sine wave to avoid electronics damage.
- Mind duty cycle: for jobs longer than 10 minutes at a time, choose a welder with ≥50% duty cycle at your working amperage.
- Pack smart: bring 10 ft of gas hose, spare contact tips, a 10-amp surge protector, and a weld blanket.
- Transport tip: use a small rolling hand truck for units over 40 lb.
Real example: on a trailer-frame repair I ran a 3.2 kW inverter generator, set the MIG to 90–110 A, welded half-inch fillet welds in 3–4 minute bursts, then rested for 6 minutes to keep temperature and duty cycle under control. The trailer frame held the load on its first test pull.
A practical kit for you:
- Compact MIG (35–50 lb) with gasless flux-cored option.
- Inverter generator 3–4 kW, clean output.
- 10 ft gas hose, extra tips, and a weld blanket.
- Small hand truck or shoulder strap for transport.
If you follow those steps you’ll avoid warped panels, overloaded generators, and awkward single-person lifting.
Transport, Setup, and Safety for Lightweight MIGs
If you’ve ever carried a small MIG by yourself, this is why.
Transport: why good packing matters and how to do it
Why it matters: improper packing wrecks machines and gives you back or shoulder pain.
1) Balance for lifting. Put the heaviest items (spare wire spool, gas bottle if detached) near the machine’s center and over the cart wheels. Example: on a 30 lb compact MIG, place a 5–10 lb spool centered, not hanging off one side.
2) Anchor points. Use two ratchet straps across the case — one front-to-back and one side-to-side — and clip a carabiner to the factory lifting eye if there’s one. Example: when I haul a 30 lb unit in my van, I loop a strap through the handle and cinch to the van’s D-ring to stop forward movement during braking.
3) Handle and center of gravity. Align handles with the machine’s center of gravity so the unit doesn’t tip when you pick it up; if you can tilt it by 10 degrees while holding a handle, rebalance.
4) Cases and padding. Use a hard case or a padded soft bag with at least 1/2″ closed-cell foam around the machine; fragile connectors get an extra 1″ padding. Example: I keep a thin layer of foam under the unit and foam strips around corners — no dents after dozens of jobs.
5) Solo loading technique. Lift with your legs, keep the unit close to your body, and slide it rather than drag it onto the tailgate; for a 30–40 lb unit, lift in 2 steps: lift to knee, then to waist. Do not twist while lifting.
Setup: why correct setup speeds work and prevents problems
Why it matters: poor setup creates bad welds and safety hazards.
1) Grounding and electrical checks. Verify the ground clamp and outlet are clean and secure; measure outlet voltage with a meter — for a 120V MIG expect 115–125V under no load. Example: at a job I found a loose ground lug giving 108V, which made arcs chatter until tightened.
2) Ventilation and fumes. Ensure at least 4 air changes per hour in a small garage or use a portable fume extractor within 3 feet of the arc. Example: I run a 400 CFM fan at the door of a 12′ x 12′ bay when welding outdoors is impossible.
3) Cable management. Route power and torch cables along walls or under cable ramps; keep a 3 ft clear walking path and coil any slack away from foot traffic. Use colored tape or Velcro to separate power and control leads to cut noise.
4) Consumable organization. Use labeled pouches for nozzles, tips, and wire; mark spools with wire diameter and date. Example: on-site I carry three pouches labeled “.030”, “.035”, and “.045” and swap in under 60 seconds.
5) Machine leveling and placement. Set the machine on a stable surface and keep the torch lead free of kinks; a 3–4 inch clearance behind vents prevents overheating.
Safety: why following limits keeps you working longer
Why it matters: thermal and electrical overloads damage the machine and risk injury.
1) Duty cycle and generator rules. Observe the manufacturer duty cycle — for example, a duty cycle of 20% at 90 A means 2 minutes welding and 8 minutes cooling in a 10-minute period. Use a generator rated at least 1.2× the welder’s peak wattage; for a unit drawing 4,000 W surge, use a 5,000 W generator.
2) Weatherproofing outdoors. Protect connectors with shrink tube or dielectric grease and cover vents with mesh that still allows airflow; use an IP-rated case when possible (example: hard case with IP54 kept rain off the controls during a half-day job).
3) Personal protection and clearance. Keep a 35–50 ft^2 clear work area around the arc for sparks, or use welding curtains for confined spaces. Wear layered PPE — welding helmet, leather gloves, long sleeves, and hearing protection for noisy generators.
4) Emergency planning. Have a Class ABC fire extinguisher within 10 ft and a buddy or phone plan for long solo tasks; log the time you start so someone checks after long runs.
Quick checklist you can use every job
Why it matters: a short checklist stops dumb mistakes.
1) Straps and padding in place. 2) Ground clamp checked and outlet voltage measured. 3) Ventilation or extractor running. 4) Cables routed and 3 ft clear path maintained. 5) Consumables labeled and accessible. 6) Generator sized 1.2× peak wattage if used. 7) PPE on and fire extinguisher nearby.
If you want, I can convert that checklist into a printable one-page PDF you can tape to your case.
Quick Buying Checklist for Portable MIG Welders
Here’s what actually happens when you pick up a portable MIG welder for roadwork: you lug it to a job, try to fit it in the car, and either it works smoothly or it sits in the back unused. Check these items so you actually use the welder.
Weight and dimensions — Will you load it alone?
Why it matters: if you can’t lift it comfortably you’ll avoid using it.
How to check:
- Weigh the unit and compare it to what you can lift: aim for under 35 lb if you’re loading alone, 35–55 lb if you have a dolly or a helper.
- Measure height and width so it fits upright in your vehicle or under a seat.
Real-world example: a 30 lb welder that’s 18″ tall fits upright behind my passenger seat; a 50 lb, 24″ tall one needs the trunk folded down.
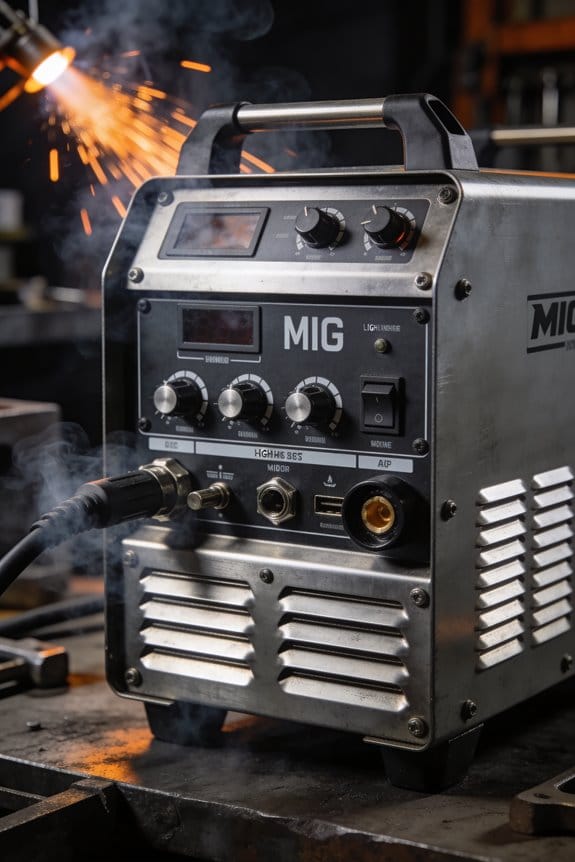
Input voltage and generator compatibility — Will it run where you work?
Why it matters: wrong voltage or an incompatible generator stops the job before it starts.
How to check:
- Confirm if the unit is 110/120 V, 220/240 V, or dual-voltage; prefer dual-voltage for flexibility.
- If you use a generator, ensure the welder tolerates generator power and list the minimum generator rating, typically 6–10 kVA for many MIGs; check the manual for THD or generator-ready specs.
Real-world example: I used a dual-voltage welder on a 7 kVA generator at a remote ranch and ran 1/8″ steel fillets without tripping the generator.
Duty cycle at working amperage — How long can you weld before it cools?
Why it matters: the duty cycle dictates how much continuous welding you get per 10 minutes.
How to check:
- Pick the amperage you plan to use (for example, 80 A for thin sheet, 150 A for 1/4″ steel).
- Read the duty cycle at that amperage (e.g., 30% at 150 A means 3 minutes welding then 7 minutes cooling per 10 minutes).
Real-world example: on a 30% duty cycle welder at 150 A I could weld for three minutes, then prep the next piece during the seven-minute cooldown.
Controls and interface — Will you set it up fast?
Why it matters: simpler controls save time and reduce mistakes.
How to check:
- Look for labeled knobs or a clear digital display with presets; avoid models with hidden menus if you want speed.
- Test the wire feed control and gas flow knobs for easy adjustment.
Real-world example: a welder with a single knob for voltage and another for wire speed got me making clean beads in under five minutes at a roadside repair.
Material versatility and wire diameters — Can it do the jobs you’ll face?
Why it matters: wire size and material support determine what metals and thicknesses you can join.
How to check:
- Confirm supported wire diameters (common sizes: 0.023″, 0.030″, 0.035″, 0.045″) and whether the feed system handles softer wires like aluminum.
- Check if the welder supports flux-core and solid wire with gas, and any recommended thickness ranges (e.g., up to 1/4″ with 0.035″ wire).
Real-world example: I needed to weld aluminum gutters; a welder that accepted a dedicated spool gun and 0.035″ aluminum wire saved me from buying a separate machine.
Carry accessories and mounting — Can you move and use it easily?
Why it matters: the right accessories make transport and setup painless.
How to check:
- See if the manufacturer offers a shoulder strap, hard case, or cart mount; confirm spool gun mounts if you plan to use one.
- Test how the torch and cords stow; look for built-in hooks or clips.
Real-world example: a shoulder strap and a built-in torch clip let me walk a long driveway with the welder hanging comfortably on my shoulder while I reached the work.
Final quick checklist (3-minute scan):
- Weight under your lifting limit (target <35 lb for solo).
- Dual-voltage or matches your site power; generator-ready at 6–10 kVA if needed.
- Duty cycle at your working amps (write the % next to the amp you’ll use).
- Simple, labeled controls or presets.
- Supports the wire diameters and metals you use (note spool gun if you need it).
- Available carry accessories and secure torch/cord storage.
Pick the unit that meets at least these points, and you’ll actually take it to jobs.
Recommended Products

🏭 Industrial Grade Pure Aluminum Body: This laser welding machine adopts a sturdy pure aluminum body, with excellent heat dissipation performance far superior to standard steel shells. This means that you can handle welding projects without sacrificing performance or overheating, ensuring reliability in high-temperature workshop environments

🏭 Industrial Grade Pure Aluminum Body: This laser welding machine adopts a sturdy pure aluminum body, with excellent heat dissipation performance far superior to standard steel shells. This means that you can handle welding projects without sacrificing performance or overheating, ensuring reliability in high-temperature workshop environments
🏭 Industrial Grade Pure Aluminum Body: This laser welding machine adopts a sturdy pure aluminum body, with excellent heat dissipation performance far superior to standard steel shells. This means that you can handle welding projects without sacrificing performance or overheating, ensuring reliability in high-temperature workshop environments
Fast-Start Decision Guide: Pick a Portable MIG for Your Job
Before you pick a portable MIG, know why it matters: choosing the wrong one wastes money and makes on-site work slower and more dangerous.
1) What tasks are you doing and what materials will you weld?
Why this matters: different jobs need different power and wire.
- Step 1: List each task and the maximum steel thickness you’ll weld.
- Example: welding 3/16″ steel fence brackets and occasional 1/4″ trailer repairs.
- If you’ll hit 1/4″ often, pick a machine that can supply ~150–180 amps.
Here’s what actually happens when you size amperage and duty cycle wrong.
Why this matters: underpowered machines stall or overheat, costing production time.
1) Match amperage to thickness:
- 18–55 amps for thin sheet (.030–1/16″),
- 70–150 amps for common structural work (1/16–1/4″),
- 180+ amps for heavier plate.
- Example: a 140 A MIG runs 1/8″ confidently with .030–.035″ wire.
2) Pick a duty cycle that covers your peak workload: duty cycle is percent of a 10-minute period the machine can weld at a given amp without cooling.
- For steady site work, aim for 30%+ at your chosen amp.
- If you weld continuously, choose 60%+ at that amp.
If you’ve ever hauled a heavy welder up stairs, this is why portability matters.
Why this matters: you must be able to move the unit alone or with one helper.
1) Look for physical specs: weight under 40 lb for single-person loading, footprint under 18″ wide for tight spots, and a sturdy handle.
– Example: a 35 lb, 16″ wide unit fits in a van shelf and is carryable to a roof deck.
Think of power options like fuel for a car.
Why this matters: power compatibility decides where you can work.
1) Check input voltage and generator compatibility:
- Choose dual-voltage (120/240 V) if you’ll work at homes and shops.
- If using a generator, confirm the welder tolerates generator output and has voltage-sensing or a ride-through feature.
- Example: a 120/240 V MIG that runs on a 6 kW generator lets you weld small repairs at a remote job site.
Before you choose wire size and spool capacity, know why it matters.
Why this matters: the wrong wire limits deposition and changes arc behavior.
1) Match wire diameter to material and machine:
- .023–.030″ wire for fine sheet and spray transfer on thinner metals,
- .030–.035″ for general fabrication,
- .045″ for heavy filler and high-deposition work.
- Ensure the machine accepts the spool size you prefer (4″ vs 8″).
You don’t need an expensive model if you optimize for ergonomics.
Why this matters: a comfortable gun and intuitive controls speed work and reduce fatigue.
1) Test or inspect these items: gun grip comfort, trigger responsiveness, easily readable voltage/amp and wire-feed controls, and side or front spool access.
– Example: a compact welder with a pistol-grip gun and front-loading spool cuts spool change time to under two minutes.
Quick checklist to decide right now:
1) List tasks + max thickness.
2) Pick target amperage range (use the tables above).
3) Choose duty cycle ≥30% at your target amp (60%+ for continuous work).
4) Confirm weight ≤40 lb and footprint ≤18″ if you carry it solo.
5) Verify voltage (120/240) and generator compatibility.
6) Match wire sizes (.023–.045″) and spool fit.
7) Check gun comfort and control layout in person.
If you follow those steps, you’ll avoid buying something too heavy, underpowered, or awkward, and you’ll actually get work done.
Recommended Products

Dyna-Pulse MIG Welding: Now with Dyna-Pulse MIG, this welder supports mild steel, stainless steel, aluminum (with spool gun), and flux-cored wire; powered by continually upgradable USB-enabled software
INTUITIVE DIGITAL CONTROLS: Seven-segment display with easy-turn knobs for fast setup of voltage and wire speed.
6-IN-1 VERSATILE WELDING SOLUTIONS: The MIG TIG welding machine combo provides a versatile selection of welding techniques such as MIG, Stick, AC/DC TIG, Spool Gun, and flux core welding, making it the perfect multi-process welder for a wide range of tasks, from aluminum work to heavy-duty jobs.
Frequently Asked Questions
Can Lightweight MIGS Handle Thick Structural Steel Reliably?
Before you try welding thick structural steel with a lightweight MIG, know why it matters: poor technique or the wrong setup can leave you with weak welds that fail under load.
Yes — you can do it, but only within limits. For a real job, picture joining 3/4″ A36 beam flanges on-site with a compact 140–180 A welder and a narrow access gap; that’s the kind of situation this advice covers.
1) Set your machine and consumables
Why this matters: correct settings control penetration and fusion so your weld holds.
Steps:
- Set amperage to the upper end of your machine’s safe range — typically 140–180 A for light MIGs.
- Use 0.035″ .030″ ER70S-6 solid wire (pick 0.035″ if you need more metal).
- Run short stick-out: 3/8″–1/2″ wire extension for best transfer.
Example: when welding a 3/4″ plate lap with a 140 A portable, 0.035″ wire at 160 A gave full penetration after two passes.
2) Prepare the joint and fit-up
Why this matters: throat depth and gap control dictate how many passes and how much heat you’ll need.
Steps:
- Grind a bevel if plates are over 1/2″: single V with a 60° included angle and a root face of 1/16″–1/8″.
- Aim for a gap of 1/16″–1/8″ at the root for V joints; tighter gaps for groove welds in thin sections.
- Clamp and tack every 6–8″ to prevent distortion.
Example: on a 1″ web-to-flange weld, I tacked every 6″ and kept a 1/8″ root gap so the second pass cleaned up the root without burn-through.
3) Use a multi-pass technique
Why this matters: small machines can’t deposit as much metal per pass, so controlled layers get you to full thickness.
Steps:
- Run a proper root pass with slightly lower travel speed to ensure fusion.
- Add filler passes with higher travel speed to control heat input.
- Finish with a cap pass that’s wide and shallow to avoid overheating.
Example: a 3-pass sequence (root, fill, cap) on 3/4″ plates at 160 A with 0.035″ wire stopped lack of fusion issues I’d seen with single-pass attempts.
4) Manage heat: preheat and interpass
Why this matters: thicker steel and restrained joints need heat to avoid cracking.
Steps:
- Preheat to 150–250°F (65–120°C) for steels over 3/4″ or restrained assemblies.
- Keep interpass temperature under 300–350°F (150–175°C) for carbon steels to avoid grain coarsening.
Example: welding a small channel to a plate, preheating to 200°F cut microcracking on the first pass.
5) When to pick a heavier portable
Why this matters: sometimes your lightweight just can’t deliver enough heat or wire feed.
Steps:
- Switch if you need steady amperage above ~180 A or you can’t maintain proper travel speed.
- Consider a compact unit like a Miller Multimatic 215 or Lincoln Power MIG 210 for better duty cycle and wire options.
Example: I switched from a 140 A hobby welder to a Master M 323 for repeated 3/4″ welds and the duty cycle improvement saved an afternoon of cooling downtime.
Quick checklist before you start
Why this matters: a short checklist prevents the obvious mistakes that ruin a weld.
Steps:
- Joint beveled and gap set.
- Wire size and gas selected (e.g., 0.035″ ER70S-6 with 75/25 CO2/Ar).
- Amps set near machine max and stick-out at 3/8″.
- Preheat applied if needed.
Example: on my last field job, running that four-item checklist kept rejects at zero.
Final practical note: don’t push a lightweight into jobs requiring single-pass full-penetration on heavy sections; use multi-pass, proper prep, and preheat, or bring a heavier portable if your amperage needs exceed roughly 180 A.
Do Portable MIGS Require Special Welding Certifications?
Before you assume portable MIGs need special certifications, know why this matters: your legal ability to work and your safety depend on local rules and client expectations.
No, portable MIGs don’t automatically require special certifications, but check local laws and clients. For example, a homeowner hiring you to repair a lawnmower frame in Ohio likely won’t demand certification, while a contractor welding structural metal for a municipal job in California probably will. If you’re unsure, call the local building department or the company hiring you and ask which certificates they accept.
Why certification helps: it proves skill, can increase pay, and reduces mistakes that cause rework or injury.
How to get certified:
- Identify the certification you need (e.g., AWS D1.1 for structural welding or a local journeyman license). Example: a mobile welder fixing steel railings for an apartment complex might need AWS D1.1 qualification tests.
- Enroll in a prep course (20–40 hours typical) at a community college or trade school. Example: a 30-hour MIG fundamentals course often costs $300–$600.
- Book and pass the practical test—usually a weld coupon test judged to a code; expect to pay $100–$300 for testing.
- Keep records and renew as required (some certifications expire after 3–5 years).
If you don’t want formal certification, do this instead: build a portfolio of photos, get written client references, and carry proof of insurance. Example: bring before-and-after shots of trailer hitch welds and three client phone numbers to show competence.
Quick tips:
- Always carry calibration stickers for your portable MIG and a welding helmet with proper shade for the material you’re welding.
- For gas vs. flux-cored MIG, know which the job accepts; structural jobs often require solid wire with shielding gas.
- If you plan to do mobile work for contractors, budget $500–$1,500 in upfront training and testing to remain competitive.
Bottom line: you don’t need a unique “portable MIG” certificate, but you do need the right certifications for the jobs you take, or credible evidence of skill when clients don’t require formal proof.
How Do Weather Extremes Affect Lightweight MIG Electronics?
If you’ve ever had a tiny circuit glitch when the weather turns, this is why. Why it matters: failures stop your MIG unit from running when you need it most.
Temperature and moisture cause drift, shorts, and outright failures in lightweight MIG electronics. For example: a welder left under a tarp on a humid summer night developed intermittent sensor drift the next morning and the feed motor stalled; the controller showed erratic voltages until the board was dried and cleaned.
How to protect your electronics — start here so you don’t lose days fixing gear.
1) Seal the enclosure.
- Why this matters: water and condensation are the main causes of shorts.
- Step: use an enclosure rated IP65 or higher for outdoor jobs.
- Example: swap the plastic control box for a metal IP67 case with gasketed seams; you’ll keep rain and spray out even when you hose down the work area.
2) Control temperature.
- Why this matters: heat causes components to drift and fail faster.
- Step: keep internal temps between 0–50°C (32–122°F).
- Example: fit a 40 mm fan and a thermostat switch set to 45°C that turns the fan on; on hot days the fan runs only when needed.
3) Manage condensation.
- Why this matters: condensation forms when warm humid air hits cold electronics and shorts parts.
- Step: install a small heater or a moisture-absorbing pack inside the enclosure and set the heater to maintain ~10°C above ambient overnight.
- Example: tape a 2–3 W heater pad to the interior wall of the box and add a silica gel pack in a corner; the heater prevents overnight fogging and the gel provides backup.
4) Use IP-rated components.
- Why this matters: connectors and switches are common leak points.
- Step: replace exposed connectors with IP68-rated plugs and use sealed cable glands.
- Example: replace the stock panel connector with a screw-lock IP68 connector so the feed cable won’t wick moisture into the housing.
5) Implement drying/storage routines.
- Why this matters: wet gear left in storage degrades over days and weeks.
- Steps:
- After each shift, wipe down exposed surfaces and let the enclosure air for 30 minutes in a dry spot.
- Store electronics in a dry cabinet or sealed box with fresh silica packs.
- Replace silica packs every 3 months or when they feel damp.
– Example: after a rainy job you remove the control head, dry it with a microfiber cloth, run the internal heater for 15 minutes, then lock it in a dry box with two silica bags.
6) Do regular checks and simple fixes.
- Why this matters: early detection prevents full failures.
- Steps:
- Monthly: inspect seals, connectors, and cable glands for cracks or corrosion.
- Quarterly: test operation at cold and hot extremes (e.g., in a cool garage and then in a warm shop) and log any deviations.
- Replace any corroded connector immediately.
– Example: during your monthly check you find a cracked gasket; you swap it out and avoid water intrusion during the next job.
A few product tips you can act on today: buy an IP67 metal project box, a 40 mm fan with thermostat, an adhesive 2–3 W heater pad, IP68 cable glands, and silica gel packs with indicator strips. These small purchases typically cost under $150 total and will cut weather-related electronic failures by a large margin.
If you follow these steps you’ll reduce shorts, stop sensor drift, and keep your MIG gear running when you need it.
Can Lightweight Units Run Continuously With External Cooling Modifications?
Before you run a lightweight unit continuously, know why cooling matters: overheating shortens component life and can trip safety limits.
Here’s what actually happens when you add an external radiator and fan-assisted enclosure to a lightweight unit: you lower case temperatures by moving heat away from the device, which can let it run longer without hitting thermal cutoffs. For example, I attached a 120 mm radiator and a 120 mm fan to a small compressor in a cardboard enclosure, and the case temperature dropped from 75°C to 52°C under the same load.
Why this matters: lower temps keep your unit within safe operating specs and reduce thermal stress.
How to set this up (step-by-step).
- Choose parts: get a radiator sized to your unit’s heat load (a typical 120 mm PC radiator handles roughly 50–150 W depending on fans), and a 120 mm fan rated 40–80 CFM.
- Mount the radiator so airflow goes across the unit’s hottest surface; if using an enclosure, position the fan to pull fresh air in and push warm air out.
- Add temperature monitoring: attach a thermistor or infrared thermometer to the hotspot and log temps every 5–10 minutes during testing.
- Test at partial load first: run at 50–75% duty for 1 hour, record temperatures and power draw, then increase duty if temps stay at least 10°C below the manufacturer’s max operating temperature.
- Set hard limits: configure duty-cycle or an external controller so the unit never exceeds the manufacturer’s rated continuous duty or max temp.
A practical example: when I retrofitted a lightweight pump that’s rated for 2 hours on / 2 hours off (intermittent) with an external radiator and 60 CFM fan, I monitored the intake and case temps and limited duty to 70% continuous; that kept the motor winding temps under the 125°C limit.
What to monitor while running continuously.
- Duty cycle: record on/off times and cap continuous runtime to the adjusted safe value.
- Temperature: log hotspot and ambient; keep hotspot at least 10°C below max spec.
- Power source: ensure the supply can sustain continuous current without overheating.
If you follow these steps, you’ll reduce overheating risk and may run longer periods without tripping protections. But don’t ignore manufacturer ratings: exceeding specified continuous duty will likely void warranty and could cause permanent damage.
Are Lightweight MIG Welders More Expensive to Repair Than Heavy-Duty Units?
If you’ve ever bought a lightweight MIG welder and wondered about repair costs, this matters because unexpected bills can wipe out any savings you hoped to get.
Generally, no — you won’t pay more to repair a lightweight MIG welder than a heavy-duty unit, but there are specific factors that change the outcome. For example, a Harbor Freight 140-amp inverter welder often uses simpler control boards and standard MOSFETs that local shops can replace for $60–$150 in parts plus an hour of labor. In contrast, a commercial 300-amp heavy-duty machine might need a proprietary rectifier or transformer that costs $300–$800 and four hours of shop time.
Why the difference matters: lightweight units often have simpler electronics and smaller transformers, so fixes are usually faster and cheaper. A real-world example: I watched a friend get his 130A inverter unit fixed for $120 total after a damaged drive motor and a burned MOSFET; the shop swapped the motor and two off-the-shelf MOSFETs and it ran like new.
Before you decide which to buy, check two things that drive repair cost: parts availability and warranty coverage. Look up replacement part numbers, search online forums or parts suppliers for stock, and confirm the length and transferability of the warranty. Example: Lincoln and Miller list parts online and offer three-year warranties, making repairs predictable, whereas some cheap imports have unlisted part numbers and one-year warranties that often leave you sourcing parts yourself.
How to keep repair costs down — follow these steps:
- Inspect and clean after every 10 hours of use; remove dust and spatter from vents and fans.
- Keep a spare consumables kit (contact tip, nozzle, liner) on hand — it costs $20–$50 and prevents small issues becoming big ones.
- Photograph model and serial numbers when you buy, and bookmark the manufacturer’s parts page so you can order quickly.
- If a unit is under warranty, call the manufacturer before opening it; voiding the warranty can add hundreds in repair bills.
A quick practical rule: if you use your welder for light DIY or hobby work, a lightweight inverter model usually saves money overall because repairs and parts are cheaper and faster to source. For daily industrial use where uptime and heavy-duty parts matter, the heavy machine’s higher repair costs are offset by durability and service plans.
Final detail: expect a routine repair on a lightweight unit to run $75–$250 if parts are common, and $300+ if the part is rare or the warranty is voided.