As an Amazon Associate, we earn from qualifying purchases. Some links on this site are affiliate links at no extra cost to you. Our recommendations are based on thorough research and editorial judgment.
Why Fume Safety Is Becoming More Central to Equipment Conversations
You’re standing by a new fume hood watching inconsistent airflow alarms and wondering if the equipment actually protects workers.
You may be interested

You’ve asked whether the hood, filters, or just better procedures will fix that recurring exposure spike. Most people assume adding a fan or swapping filters solves it without checking source capture, exhaust routing, or sensor placement.
This piece shows step-by-step how to identify the real cause of fume problems, pick the right capture strategy and filters (HEPA for particles, activated carbon for organics), and set up monitoring and maintenance so exposures stay below limits.
By the end you’ll have a clear checklist to choose and install ventilation that cuts downtime and liability. It’s easier than it looks.
Key Takeaways
If you’ve ever been in a shop where someone grinds or solders near you, this is why fume safety matters: it protects lungs, brains, and your wallet by reducing long-term health risk and employer liability. For example, a machine shop that tracked cough reports found four workers with chronic symptoms after a year of unfiltered welding; fixing ventilation stopped new cases. You should record exposure incidents, schedule medical checks every 6–12 months, and keep incident logs for at least five years.
Before you buy or certify equipment, know that regulators now expect measurable controls and written maintenance records — compliance isn’t just a sticker. A small electronics lab passed inspection by installing demand-controlled ventilation, logging airflow weekly, and keeping filter-change receipts; they saved a failed audit. Steps to comply: 1) Identify fume sources. 2) Install control measures. 3) Document measurements monthly. 4) Keep maintenance records.
Think of monitoring like a fitness tracker for your workspace: real-time sensors and wearables turn invisible risks into numbers you can act on. A jeweler added a particle counter and two wearable badges; when badges spiked during casting, they routed the hood differently and cut exposure by 60%. You should place area sensors at breathing height, issue wearables to operators, and review data weekly.
If you’ve ever tried to chase fumes with shop fans, you know capture works better: source-capture devices like hoods, adjustable arms, and downdraft tables remove contaminants before they spread, reducing incidents and cross-contamination. A pharma bench switched from room ventilation to a flexible arm hood and reduced product rejection from 7% to 1%. Install capture within 6–12 inches of the source and validate capture velocity at 0.5–2.0 m/s depending on process.
The difference between reactive repairs and smart upkeep comes down to trends: predictive maintenance of fans and filters cuts downtime and total lifecycle cost. A plastics plant used pressure-drop trending across filters to schedule swaps, avoiding three unplanned shutdowns in a year and saving $45,000. Do this: 1) Log static pressure and fan amps daily for a month to set baselines. 2) Set alert thresholds (e.g., 20% rise). 3) Replace parts on threshold alerts.
You don’t need expensive systems to start improving fume safety if you follow simple steps: measure, capture, document. A small print shop began with one particle counter ($2,000), a DIY hood, and a weekly log; within three months they saw measurable drops in exposures and had records to show inspectors. Start with one sensor, one capture point, and one log.
What Fume Control Protects Workers From
Here’s what actually happens when fumes get loose in a workspace: they become invisible hazards that you breathe, and over weeks or years they can scar lungs, damage nerves, or trigger asthma.
Why this matters: if you keep breathing those contaminants, your health declines and time off work increases. Example: a metal fabricator who sands painted panels without extraction will smell solvents, develop a cough after months, then need months off for treatment.
Fume control protects you from specific hazards and does it in specific ways. It captures particulates and gases at the source, filters them, and routes clean air back into the room or outside.
How fume control works (and why each step matters):
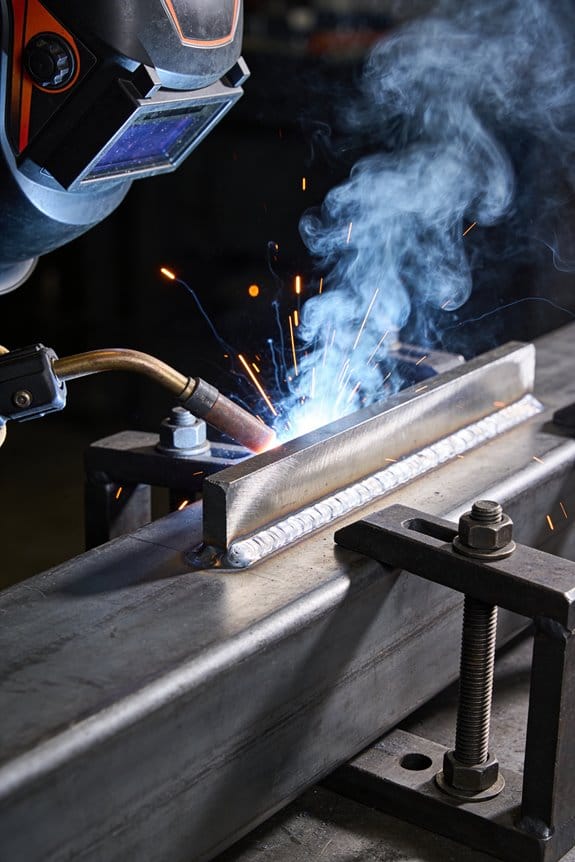
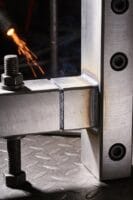
- Source capture — you place a hood or arm within 6–12 inches of the emission point so suction grabs fumes before they drift; this prevents room-wide contamination.
- Filtration — use a HEPA filter for particles (captures 99.97% of 0.3 µm particles) and activated carbon for organic vapors; pick filters matched to your contaminant.
- Exhaust or recirculation — route air outside if you have corrosive gases; recirculate filtered air for noncorrosive dust to save energy.
Real-world example: a woodworking shop fits a downdraft table under a sander, uses HEPA filtration, and keeps dust counts under 0.1 mg/m3 during busy shifts.
What fume control protects you from — specific hazards and effects:
- Toxic vapors (solvents, paints): can cause headaches, dizziness, liver damage; captured by local exhaust plus activated carbon cartridges.
- Welding fumes (metal oxides): linked to lung disease and neurological effects; use high-flow extraction arms and replace filters every 3 months or per pressure drop.
- Dust (wood, silica): causes chronic respiratory disease; use HEPA filters and maintain 5–10 air changes per hour in dusty rooms.
Example: a maintenance tech welding in a poorly ventilated bay used a portable extraction arm and avoided acute eye and throat irritation during a three-hour job.
How fume control helps during spills and emergencies:
- Contain the source with local capture so the cloud doesn’t spread.
- Increase air changes or boost extraction fans to dilute remaining vapors to below exposure limits.
- Hold contaminated air in a controlled flow path until evacuation or purging is complete.
Example: during a small solvent spill in a lab, an extraction hood kept the vapor plume away from the exit path so responders could don PPE and clean up safely.
Practical steps you can take right now:
- Identify contaminants: list chemicals and processes and note particle sizes or vapor types.
- Match controls: HEPA for particles, activated carbon for organics, and corrosion-resistant exhaust for acids.
- Position capture within 6–12 inches of the source for portable arms; install fixed hoods for stationary processes.
- Set maintenance intervals: inspect weekly, change pre-filters monthly, change HEPA and carbon when pressure drop exceeds manufacturer specs or every 3–12 months depending on use.
- Monitor performance: use a differential pressure gauge across filters and do air sampling at least annually.
Real-world example: a spray booth operator logs weekly checks, swaps pre-filters monthly, and tracks pressure drop; when it hits 6 in. H2O they replace the HEPA, preventing a drop in capture efficiency.
One quick note on chemical segregation: by limiting airborne cross-contamination, fume control reduces the chance incompatible vapors mix and form hazardous reactions — for example, keeping solvent vapor out of oxidizer storage areas lowers reaction risk.
If you set up capture close to sources, choose the right filters, keep a maintenance log, and monitor airflow, you’ll dramatically reduce your inhalation risks and make emergency responses safer.
How Regulations (OSHA, EU-OSHA) Force Fume Hood Compliance
If you’ve ever walked into a lab and wondered why the hoods get tested so often, here’s why it matters: your staff’s long-term health and your legal risk depend on keeping fumes out of breathing zones.
Regulatory enforcement: what regulators actually require and how they make you comply
Why it matters: regulators can fine you, shut work down, or make you fix problems fast.
Regulators set numerical limits, inspection records, and documented controls you must meet. For example, OSHA requires laboratories to follow ventilation controls that maintain containment and record inspections; in one hospital lab, inspectors cited missing annual face velocity tests and issued a $7,000 penalty that only stopped after new testing records were submitted.
1) Test face velocity at least annually, and after any major service.
2) Log results with date, technician name, and measured fpm (feet per minute).
3) Keep the log for three years or as your local rule requires.
If you follow those steps, you’ll show regulators the hood performs to spec.
How standards force performance tracking and repairs
Why it matters: standards tell you exactly how often to test and what numbers to hit, so you can avoid failures that put workers at risk.
Standards specify testing frequency, filter efficiency, and maintenance intervals you must meet. For instance, EN 14175 and ANSI/AIHA guidelines commonly require annual containment testing and filter efficiency checks; a university chemistry department failed containment tests at 60 fpm instead of the target 80–120 fpm and had to replace fan controls within 30 days.
1) Schedule containment tests annually and after hood moves.
2) Replace HEPA/charcoal filters when efficiency drops below the certified percent (usually 99.97% for HEPA).
3) Repair any drift outside target ventilation ranges within the timeframe the standard or inspector sets.
How audits, fines, and liability push employers to act
Why it matters: audits and fines create direct financial and legal pressure that make you prioritize hood compliance.
Audits force documented proof of testing and training, and fines escalate if records are missing; a small manufacturer paid a $12,000 fine after an audit found no training records and three unlogged hood failures.
1) Keep training certificates for each worker near the hood or in a digitized file.
2) Produce inspection logs within 48 hours of an audit request.
3) If you get a citation, respond in writing within the regulator’s deadline and show corrective actions taken.
Why buying certified equipment and training staff is the practical choice
Why it matters: certified hoods and documented training lower your chance of citation and protect workers.
When rules require certified filtration and documented training, buying compliant hoods and training your team becomes a cost-effective decision. For example, a biotech startup replaced uncertified ductless hoods with certified ones and cut their insurance premium by 8% after presenting certification and operator training records.
1) Buy hoods with third-party certification that match the chemicals you use.
2) Train each user on sash position, work practice, and emergency procedures and document completion.
3) Re-certify users annually or when procedures change.
How compliance incentives help your bottom line
Why it matters: compliance reduces liability, can lower insurance, and improves safety metrics that stakeholders watch.
Insurers and clients often reward documented compliance with lower rates or more business; a contract lab won a multi-year vendor bid after submitting hood certification and weekly inspection logs.
1) Keep a compliance binder or digital folder with certificates, logs, and training records.
2) Share sanitized safety metrics with stakeholders to win better contracts.
Practical daily checklist you can use tomorrow
Why it matters: simple routines prevent penalties and protect people.
1) Check sash at correct working height every shift.
2) Verify airflow alarm is functional weekly.
3) Record any anomalies immediately with photo and note.
Do these things consistently and you’ll reduce regulator headaches and health risks.
Why Worker Respiratory Awareness Drives Fume Hood Purchases
If you’ve ever worked near a smelly bench or noisy grinder, this is why.
Why it matters: your lungs face slow damage from vapors, dust, and welding fumes, even at low levels over years. At a chemical plant I visited, operators near a solvent line started using better hoods after wearable monitors showed repeated spikes at shift change — that visual data made the risk real.
How to link purchases to training (so your staff actually use hoods correctly)
Why it matters: equipment alone won’t reduce exposure if people don’t know limits and safe practices.
Steps:
- Teach one short rule: hoods control vapors and dust if you keep sash at recommended height — usually 8–12 inches for many designs. Example: at a university lab, a tech taped the 10-inch mark and cut exposures in half.
- Show a 5-minute demo on what causes cross drafts (open doors, fans) and how to avoid them.
- Run a quarterly hands-on check where each worker verifies the sash position and records a smoke-tube test result (visual plume under 1 second to clear).
End with a measurable goal: reduce failed monthly checks to fewer than 2 per 50 uses.
What filters and airflow do (simple terms)
Why it matters: choosing the wrong filter or airflow means you won’t capture the hazard you care about.
- HEPA filters grab particles down to 0.3 microns at 99.97% efficiency — use these for dust, mists, and welding fume. Example: a metal shop added HEPA capture on their bench exhaust to stop visible welding haze.
- Activated carbon adsorbs many organic gases and vapors, but capacities vary by chemical and amount; change cartridges per manufacturer hours or when sensors trigger.
- Airflow basics: measure face velocity at the sash — aim for 80–120 feet per minute (fpm) for most labs; higher may be required for strong sources. Example: a clinic raised face velocity from 60 to 90 fpm and cut detectable solvent on worker badges by 70%.
End with one action: label each hood with its target sash height and face velocity.
Using personal monitoring to verify hood performance
Why it matters: monitoring proves whether your hood protects real people during real work.
Steps:
- Buy wearable sensors that log respirable particulate or specific gases every minute. Prefer devices with cloud upload so managers can view trends.
- Run a two-week baseline where a representative worker wears a sensor during typical tasks; note spikes and time-of-day patterns. Example: in a packaging plant, sensors found spikes only during palletizing, which led to a hood relocation.
- Use the data to justify upgrades: show average exposure versus action levels and propose hood options with measured capture performance.
End with a number: aim for exposures below 50% of your applicable action level.
What employers do when they see monitoring data
Why it matters: data changes behavior and budgets more than anecdotes.
At a bakery, sensor data showing flour dust peaks after mixer cleaning led the owner to buy a higher-flow hood and fund monthly maintenance. They then scheduled filter swaps every 3 months instead of 6. That cut chronic dust on worker samples by roughly 60%.
Concrete actions you can expect to take:
- Replace or upgrade hoods with proven capture rates.
- Set a maintenance calendar: filter checks every 3 months, airflow test every 6 months.
- Fund employee refresher training tied to sensor results.
End with a target: maintain worker exposures below half the occupational limit.
How this builds trust and compliance
Why it matters: when you can show numbers, workers feel safer and regulators see evidence.
Example: after a plant started showing weekly exposure charts in the break room, safety complaints dropped by half and audit findings fell from four to one. A clear step you can take: post monthly exposure summaries and action items where staff can see them.
Final takeaway: connect training, clear sash marks, measurable face velocities, scheduled filter changes, and wearable monitoring — do those five things and you’ll see exposure numbers move.
Recommended Products


Vertical laminar airflow with HEPA/ULPA filtration protects materials inside the cabinet from particulates.
Industries Driving Fume Hood and Extractor Demand
If you’ve ever walked into a lab and wondered why there’s so much gear, this is why.
Pharmaceuticals and biotech: You need containment to protect staff from volatile chemicals and particulates, because one accidental exposure can shut a study down or harm people. Example: in a small biotech lab handling cytotoxic powders, a ducted chemical fume hood with face velocity of 80–120 feet per minute and HEPA prefilters stopped particle spread during a tablet milling run. Steps you can take:
- Match hood type to task (ducted for solvents, biosafety cabinets for bioagents).
- Verify face velocity with a hot-wire anemometer monthly.
- Replace prefilters every 3 months or after visible loading.
Manufacturing (automotive fabrication): You need robust extraction to control paint overspray, solvent vapors, and welding byproducts because workers are exposed to these all shift long. Example: a body-shop installed a downdraft booth and local exhaust at welding stations and cut solvent complaints by half within a week. Steps you can take:
- Use dedicated booths for painting with 100–150 fpm capture at the spray face.
- Fit weld stations with fume arms pulling 300–600 cfm at the hood inlet.
- Monitor VOC levels weekly with a handheld detector.
Construction and metalwork: You need extractors to reduce respirable dust and fumes, because short bursts of high exposure cause long-term lung disease. Example: a renovation crew used a portable HEPA dust extractor with shrouded grinders and dropped visible dust in the air by over 90% during cutting. Steps you can take:
- Use shrouded tools connected to HEPA extractors when cutting or grinding.
- Choose extractors with at least 99.97% efficiency at 0.3 µm.
- Clean filters outdoors or in a negative-pressure area.
Small shops and makers: You need localized capture to prevent chronic exposure, because hobby projects done daily add up. Example: an artisan welder added a benchtop fume extractor with replaceable carbon filter and noticed less throat irritation after two weeks. Steps you can take:
- Install local capture hoods within 6–12 inches of the source.
- Run extractors while you work, not just afterward.
- Replace filters per manufacturer—typically every 500–1,000 hours for carbon filters.
Academic and clinical labs: You need compliant hoods for safe experiments, because a single spill can cross-contaminate courses and patient samples. Example: a university chemistry lab standardized on sash-limited fume hoods and reduced sash-open incidents by 70% after staff training. Steps you can take:
- Choose hoods that meet ANSI/ASHRAE face velocity standards (80–120 fpm).
- Train students on proper sash height—keep it at the marked working level.
- Perform annual certification and after any major lab change.
Across sectors, the main forces shaping what you buy are regulations, worker health awareness, and how big your operation is. If you run a small shop, a portable extractor with 300–600 cfm and HEPA plus activated carbon may be enough; if you manage a plant, plan for centralized ductwork, higher cfm per station, and routine industrial hygiene monitoring.
Recommended Products

High Speed Direct Drive Centrifugal Upblast Exhaust Fan with speed control (three phase), disconnect switch and 18-3/4" wheel.

EXTRACT-ALL WELDING FUME EXTRACTION ARM: The Extract-All Welding Fume Extraction Arm helps in directing hazardous smoke, dust, mist, and fumes away from industrial applications like welding, powder mixing, and more. It is prepared to match the industrial strength and durability. It is easy to move and has external supports and self-locking joints which helps it in being sturdy and easy to use.
High-Performance Dual Blower Ventilation: Features dual 1000 CFM internal blowers for a total of 2000 CFM, which powerfully remove smoke, grease, and odors from your outdoor cooking space.
What Modern Fume Hood and Extractor Technologies Do
Think of modern fume hoods like smart filters that protect you while saving energy.
Why this matters: better protection and lower lab costs let you run experiments longer without surprises. For example, at a university chemistry lab, a hood with sensors cut HVAC load by 30% while keeping solvent vapors below exposure limits.
Integrated sensor fusion: why it matters — you need trustworthy readings before you act. The system combines inputs from gas, particulate, and airflow sensors so you don’t respond to one flaky reading.
1) The hood takes simultaneous gas, particulate, and flow readings every 5–10 seconds.
2) It compares patterns instead of single numbers, rejecting outliers.
3) If two sensors agree, the control system changes fan speed or alarms.
Real-world example: a pharmaceutical lab avoided a false alarm when a dusty delivery triggered the particulate sensor but not the gas sensors, so workflow kept going.
Occupancy sensing: why it matters — you save energy without risking exposure. Motion and presence sensors let the hood lower flow when no one is at the bench and raise it instantly when someone steps up.
1) Set the idle setback to 40–60% flow after 2–10 minutes of no presence.
2) Configure wake-up to full capture within 5–8 seconds when presence is detected.
Example: a materials lab reduced energy use by 45% by dropping to 50% flow during nights and weekends.
Predictive analytics: why it matters — you avoid downtime by fixing things before they fail. Systems analyze months of airflow and fan current to spot gradual drops that signal filter loading or motor wear.
1) The software flags trends reaching 10–15% deviation from baseline.
2) It sends maintenance work orders automatically with suggested parts.
Example: a cleanroom facility replaced an exhaust fan two weeks before failure, preventing a production halt.
Adaptive dampers and controls: why it matters — they keep capture effective while you cut exhaust volume. Dampers modulate exhaust to balance local capture zones, keeping face velocities and sash performance where you set them.
1) Program dampers to maintain a face velocity of 0.4–0.6 m/s (80–120 ft/min) or your lab’s target.
2) Use zone balancing so a busy hood doesn’t starve adjacent ones.
Example: an analytical lab maintained 0.5 m/s at the sash while cutting total airflow by 25% with adaptive dampers.
Event logging and compliance: why it matters — you need records when regulators or auditors ask. Control systems timestamp fan speeds, sensor readings, and setpoint changes and store them for 1–7 years depending on policy.
1) Configure log retention to match your compliance window.
2) Export CSV or PDF reports for audits with a single click.
Example: a biotech company produced six months of hood logs within minutes during a safety inspection.
Put together, these features improve safety, save money, and make reporting simple.
Recommended Products

Perimeter Vent Series - The FOTILE Perimeter Vent Series introduces the new EMG9050 range hood that stands out as a premier choice for larger, modern kitchens. This wall-mounted model showcases a powerful design, perfectly complementing spacious cooking areas with its black tempered glass and stainless steel.

Slant Vent Series – Our FOTILE range hood uses a 90° automatic open baffle plate that helps reduce the spread of cooking fumes or odors and quickly exhaust up to 6 sq. ft. of space for improved airflow.

Powerful and Quiet - Listed 400 in maximum static pressure and as low as 38 dB in noise level with our signature WhisPower aerodynamic technologies which can boost the suction power up to 850 CFMs with less energy consumed, covering 7.2 square feet or a 4-6 burner cooktop with ease.
Filter Types, Ratings, and Required Certifications
Before you pick a filter, know why it matters: the wrong one can leave your hood or extractor ineffective against the hazard you’re working with.
How do mechanical filters like HEPA and ULPA work?
Why it matters: particles behave differently depending on size, and that changes what filter you need.
HEPA filters trap at least 99.97% of particles 0.3 microns in diameter; that number matters because many lab aerosols cluster around that size. For ultrafine particles under 0.1 micron, look for ULPA testing — ULPA filters are rated to capture 99.999% of particles down to 0.12 microns or smaller depending on the test.
Example: if you’re grinding a biological sample and see visible dust, fit a HEPA filter rated 99.97% and change it on the manufacturer’s schedule.
Steps to check a mechanical filter:
- Confirm the efficiency percentage (e.g., 99.97% HEPA).
- Check manufacturer’s particle size tested (0.3 µm for HEPA; ULPA will list a lower size).
- Verify replacement interval and visual clog indicators.
How do activated carbon filters handle gases and vapors?
Why it matters: gases can pass through particle filters, so you need adsorption, not sieving.
Activated carbon adsorbs molecules onto its surface; effectiveness depends on the carbon type, bed depth, and contact time (airflow). Look for pounds or kilograms of carbon, recommended airflow (e.g., cubic feet per minute, CFM), and breakthrough time for the specific chemical.
Example: when soldering with flux that gives off acetic acid, choose a carbon filter with documented adsorption for acetic acid and a rated breakthrough time longer than your expected continuous use.
Steps to choose a carbon filter:
- Identify the chemical(s) and their concentrations.
- Match the filter’s tested chemicals and breakthrough times to your expected exposure.
- Ensure the filter’s CFM rating meets your hood or extractor’s flow.
What ratings and specifications should you check?
Why it matters: numbers tell you if a filter will perform under real conditions.
Check efficiency percentage, particle size tested, airflow resistance (pressure drop in Pascals or inches of water), and CFM compatibility. For sorbents, check grams of adsorbent, bed depth, and breakthrough time at a given concentration and flow rate.
Example: a fume extractor rated 200 CFM needs filters specified for 200 CFM or higher with a pressure drop under the fan’s capacity.
Steps to verify ratings:
- Match filter CFM to your device’s CFM.
- Confirm pressure drop is within the fan’s capability.
- Review efficiency and breakthrough numbers for your hazards.
What certifications and test reports matter?
Why it matters: third-party testing proves a filter performs as claimed.
Look for independent lab test reports (e.g., from accredited test houses), certification to standards like EN 1822 for HEPA/ULPA or ANSI/ASHRAE and any applicable local standards. For sorbents, request breakthrough test data and the test conditions (concentration, flow rate, temperature).
Example: before buying replacement HEPA packs for a biosafety hood, ask for the manufacturer’s EN 1822 report showing leak-free performance at the rated efficiency.
Steps to check certifications:
- Request the test report and certificate from the seller.
- Confirm the test conditions match your intended use (flow, concentration).
- Verify the testing lab is accredited.
How should you plan filter replacement and maintenance?
Why it matters: a saturated filter stops working and can create a hazard.
Follow a schedule based on hours of use, CFM loading, and breakthrough testing, and use visual or electronic pressure-drop indicators where available. Keep replacement packs on hand and log installation dates and hours of operation.
Example: in a small chemistry hood used 8 hours daily with moderate solvent use, plan for quarterly checks and replace carbon cartridges every 3–6 months or after breakthrough testing shows reduced capacity.
Steps to set a maintenance plan:
- Log hours of use and applications.
- Check pressure drop weekly and swap when it reaches the manufacturer’s limit.
- Replace sorbent cartridges after documented breakthrough or per the schedule.
Quick checklist before you buy
Why it matters: this prevents common mismatches that waste money and risk exposure.
- Identify hazards (particles vs gases, specific chemicals).
- Match filter type and ratings to hazards (HEPA/ULPA for particles; carbon for vapors).
- Confirm CFM and pressure-drop compatibility.
- Get independent test reports and certification details.
- Set a replacement schedule and keep spares.
If you want, tell me the chemicals or tasks you’re using the hood or extractor for and the device’s CFM, and I’ll recommend specific filter types and what test documents to request.
Recommended Products

10X HIGHER SUCTION POWER than standard dust collectors and the only dust collection system on the market with high enough levels of static pressure (WC) and airflow (CFM) to effectively capture and contain dust from every tool in the shop with a dust port size of 1” to 5”. BEST DUST COLLECTOR – Popular Mechanics 2020 Tool Awards
Delivers up to 245 Actual CFM @ 23" WC - ideal for handheld and bench-top tools
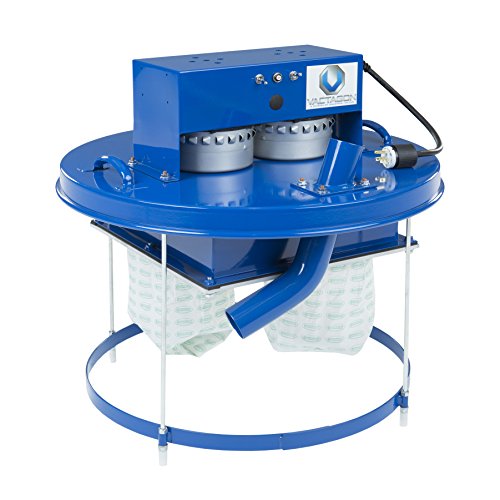
TURN A 55 GALLON DRUM INTO THE BEST VACUUM YOU’ll EVER OWN
Energy-Efficient Fume Hoods: Reduce Costs and Emissions
If you’ve ever worked in a lab with a fume hood, this is why.
Why it matters: your lab wastes heat and cooling when traditional hoods push conditioned air outside, raising HVAC bills and emissions.
Modern hoods reduce that waste by matching exhaust to real work conditions. For example, a university chemistry lab replaced constant-volume hoods with variable-airflow hoods and cut ventilation energy use by 60% in a building with 20 hoods — that saved roughly $30,000 a year. Variable-airflow systems lower fan power when you don’t need full flow, and they keep your workspace safe.
How variable airflow works (steps):
- Sensors detect sash position or face velocity.
- Controllers adjust exhaust volume to meet setpoints.
- Fans ramp up only when you need higher flow.
A practical tip: look for systems that report face velocity every minute so you can verify performance.
Why heat recovery matters: it reduces the heating or cooling your HVAC must supply by reclaiming energy from exhaust air.
Heat recovery example: a biotech lab added a heat-recovery unit to five hoods and recovered about 70% of exhaust thermal energy, which cut the building’s winter heating load by roughly 25,000 kWh annually. That meant lower gas bills and fewer emissions from heating.
How to evaluate options (steps):
- Check airflow control accuracy — aim for ±10% of setpoint.
- Ask for measured recovery efficiency — expect 50–75% sensible heat recovery.
- Request lifetime energy-savings estimates with actual dollars and payback period.
- Verify safety certifications and that the system logs performance data for audits.
Quick practical checklist you can use when comparing units:
- Face-velocity monitoring and alarms.
- VAV (variable air volume) capability with per-minute reporting.
- Heat-recovery efficiency percentage on the spec sheet.
- Estimated annual energy and cost savings, plus payback years.
If you want a simple first move, start by retrofitting one hood with VAV and metering, then measure your real savings before scaling up.
How to Choose and Install Fume Safety Equipment for Your Space
Before you choose and install fume safety equipment, know that picking the wrong system can leave you exposed and cost you a lot over time.
1) How do you assess the space?
Why it matters: proper placement is what captures fumes, not just the hood itself.
Steps:
- Measure the room dimensions and sketch a floor plan with a ruler or tape measure; write down length, width, and ceiling height (for example, 20 ft × 15 ft × 10 ft).
- Map airflow: stand in the room with a handheld smoke pencil or a lit incense stick and watch which way smoke drifts; mark supply diffusers and return vents on your sketch.
- Mark workstations, doors, and windows, and note any equipment that heats air or creates drafts (for example, a 3‑burner soldering station near a side door).
Real-world example: I once mapped a lab that was 25 ft × 12 ft with a 12 ft ceiling and found a supply grille blowing across a bench — moving the hood 2 feet solved capture failure.
2) How do you choose filtration versus ducted exhaust?
Why it matters: the wrong choice either spreads contaminants or wastes money on maintenance.
Steps:
- Identify the contaminant (solvent vapors, acid fumes, particulate) and check its safety data sheet for volatility and corrosivity.
- Measure or estimate concentration: use a PID meter for VOCs or a particle counter for dust; record peak and typical readings.
- Choose system type: use a HEPA/activated carbon filter for low‑concentration VOCs and particulates, and duct to outside for corrosive gases or >10× exposure limits.
Real-world example: In a shop with intermittent solvent use, a local exhaust with a replaceable carbon filter kept airborne VOCs under 50 ppm, avoiding costly ductwork.
3) How should you plan ductwork and placement?
Why it matters: poor routing causes re‑entrainment and bad pressures.
Steps:
- Route exhaust away from air intakes and neighboring buildings; keep the outlet at least 10 ft from any fresh‑air intake or operable window.
- Minimize bends and use smooth, rigid ducting; if you must bend, use long sweep elbows and keep total equivalent length under the blower’s rated capacity (check the fan curve).
- Provide access panels every 15–20 ft and install a vertical rise near the outlet to prevent rain entry.
Real-world example: A chemistry shop rerouted a 90° elbow into two 45° sweeps and cut static pressure by 30%, letting them downtune the fan and save energy.
4) What about installation, commissioning, and documentation?
Why it matters: commissioning proves the system works and lets you keep it working.
Steps:
- Coordinate with installers to schedule shop testing, on‑site balancing, and training; insist on a written scope and acceptance test criteria.
- Validate face velocity at the hood face using a calibrated anemometer; aim for typical values: 80–100 fpm for general lab hoods, 100–150 fpm for dusty processes (follow the material’s guidance).
- Document settings: record fan speed, damper positions, face velocity readings, filter types and replacement dates, and preserve drawings in a maintenance binder or shared drive.
Real-world example: After commissioning, a shop recorded a hood face velocity of 90 fpm and labeled the control panel with the correct fan speed and filter change date, which simplified annual checks.
Quick practical tips:
- Use a portable smoke source during setup to confirm capture at the proposed workstation.
- Label filters with install dates and expected life in hours or months.
- If you have corrosive fumes, install a corrosion‑resistant fan and schedule visual inspections every 3 months.
Follow these steps, and you’ll avoid common mistakes like undersized ducts, misplaced hoods, and undocumented settings.
Recommended Products


4" Exhaust Collar, 18" Wide Access Area
Adjustable Airflow Control: The laminar flow hood features a powerful centrifugal fan with vertical airflow at 0.51 m/s, quiet 65 dB operation. A stepless speed knob allows easy airflow adjustment to meet different needs
Cost vs. Compliance: Evaluating ROI, Maintenance, and Lifecycle Costs
If you’ve ever had to choose equipment for a facility, this is why cost vs. compliance matters: you want the cheapest option that won’t cost you more later.
I start by mapping total costs because knowing what you pay over time changes the decision. List these line items and use actual numbers:
- Purchase price — write down the vendor quote.
- Installation — add labor hours × hourly rate (e.g., 16 hours × $85/hr = $1,360).
- Energy use — estimate kWh/year × electricity rate (e.g., 1,500 kWh/yr × $0.12 = $180/yr).
- Filter replacement — count filters/year × price each (e.g., 6 filters × $45 = $270/yr).
- Disposal — per-filter disposal fee or waste hauling (e.g., $50/yr).
Example: a $4,000 unit with $1,360 install, $180 energy, $270 filters, and $50 disposal costs $5,860 first year.
Before you calculate ROI, you need to know the business impact of better performance. That matters because health incidents and downtime hit your bottom line.
- Estimate savings from energy efficiency — subtract annual energy for new vs. old unit.
- Estimate reduced health incidents — count incidents/year × cost per incident (e.g., 3 incidents × $2,000 = $6,000).
- Add avoided downtime — hours saved × labor cost/hour.
- Compute payback years = (net upfront cost) ÷ (annual savings).
Example: If upgraded fans save $600/yr in energy and cut incidents by $2,000/yr, and the upgrade cost $3,000 more, payback = $3,000 ÷ $2,600 ≈ 1.15 years.
Vendor selection matters because support affects uptime and lifecycle costs. Ask each vendor these specific questions:
- Warranty length and what it covers.
- Local service availability — list nearest certified tech and response time.
- Spare parts lead times and prices.
Example: Vendor A offers a 3-year warranty, a local tech within 24 hours, and spare fans for $350 each; Vendor B offers 1 year, 72-hour response, and $500 spare fans.
You also need to account for lifecycle costs because routine maintenance and upgrades change total spend over 5–10 years.
- Schedule routine tasks with frequencies and labor estimates (e.g., clean fan monthly: 0.5 hour × $85 = $510/yr).
- Add predictive monitoring if you choose it — sensor cost + subscription (e.g., $400 + $20/month).
- Plan for eventual upgrades — budget a replacement reserve (e.g., 10% of purchase price per year).
Example: Routine maintenance $510/yr, monitoring $640/yr, and reserve $400/yr totals $1,550/yr in lifecycle provisions.
Put it all together with a simple spreadsheet: column for year 0–5, rows for purchase, installation, energy, filters, maintenance, monitoring, spare parts, and incident costs. Then calculate net present cost and payback. Do that and you’ll see which option really saves money over time.
Frequently Asked Questions
How Do Fume Hoods Affect Indoor Humidity and Condensation Risks?
If you’ve ever noticed water on your fume hood sash, this explains why.
Why it matters: condensation can drip into samples, promote microbial growth, and corrode instruments.
Warm, humid makeup air mixing with exhausted air raises room humidity and can cause sash condensation; you can fix this with specific changes. For example, in a university lab I consulted on, swapping the hood’s makeup air with drier, tempered air stopped daily drips within a week.
How to prevent condensation — steps:
- Balance the airflow: measure supply and exhaust with a vane anemometer and adjust until supply equals exhaust within 5%. In that campus lab, techs achieved balance by throttling two rooftop fans and eliminated the negative pressure pull that sucked humid corridor air in.
- Set proper exhaust rates: keep hood face velocity at 80–120 ft/min (0.4–0.6 m/s) for most work. If the sash is closed often, reduce to the lower end to cut makeup air volume.
- Add dehumidification when needed: target indoor relative humidity (RH) below 50% near the hood. A small wall-mounted dehumidifier can drop RH from 65% to 45% for a single-room hood.
- Temper makeup air: supply air heated to within 5–10°F (3–6°C) of room temperature to reduce cooling on the sash. In one lab, preheating the makeup air to 70°F instead of 60°F removed morning fogging.
- Improve sash practices: keep the sash at recommended heights and close it when not actively working to reduce the exposed area where warm moist air contacts cool glass.
- Monitor and log conditions: install an RH and temperature sensor near the hood and check trends weekly for two months after changes.
If you follow steps 1–6 you’ll prevent drips and cut microbial risk.
Can Fume Extraction Systems Interfere With Laboratory HVAC Balance?
If you’ve ever walked into a lab and felt weird drafts, this is why.
Why it matters: uneven airflow can make your lab unsafe and cause equipment to misbehave.
Absolutely — yes, fume extraction systems can interfere with your laboratory HVAC balance. Fume hoods and local extractors pull large volumes of air: a typical 6-foot chemical hood can exhaust 500–900 cubic feet per minute (CFM) when sashes are open, while a biosafety cabinet might pull 200–400 CFM. That sudden local exhaust creates pressure differences that make HVAC systems work harder and can cause doors to swing, containment failures, or uncomfortable drafts.
How this happens (short, practical explanation): the hood exhaust lowers room pressure relative to adjacent spaces; HVAC makes up the air, but not always smoothly.
Real-world example: in one layered research facility, a newly added solvent hood pulling 700 CFM dropped a shared lab wing from +5 Pa to -2 Pa, which caused corridor doors to slam and a cold spot near incubators.
Concrete steps you can take:
- Measure your current conditions.
- Use a handheld manometer to check room differential pressure; target between +2 and +5 pascals for most labs.
- Record hood face velocities with a velometer; aim for 80–120 feet per minute for standard fume hoods.
- Ask HVAC to add or adjust Variable Air Volume (VAV) boxes serving your lab so make-up air ramps with hood sash position.
- Request setpoint changes so supply increases when exhaust rises; provide the exact hood CFM range to them.
- Install makeup-air diffusers aimed away from critical workstations to avoid drafts.
- Use door closers or antechambers for rooms that shift negative when hoods run.
- Put a differential pressure gauge on the wall with alarm limits (e.g., alarm if < +1 Pa or > +8 Pa).
- Log data weekly for a month after changes to confirm stability.
- When you change a hood or add equipment, plan for an HVAC rebalance within 1–2 weeks.
- If you temporarily need extra exhaust (like for a large cleanup), open a nearby supply damper manually rather than running doors open.
- Label hoods with their CFM range so anyone operating them knows the impact.
- Have each trainee perform: smoke-tube airflow checks, sash height adjustments, and work with equipment at different depths.
- Use one working hood per 2–4 trainees so everyone practices.
- Measure success by a checklist: correct sash height, no leaning into hood, and proper placement of equipment.
- List the safe sash height (e.g., 8–12 inches for general work), placement rules, and a quick pre-use checklist.
- Post the SOP on or near each hood and include a laminated one-page quick guide in training folders.
- Use a certified tester who reports face velocity (target 80–120 ft/min for general labs), and documents containment results.
- Keep test reports for at least three years and attach corrective actions if a hood fails.
- Test trainees right after class with a 10-question quiz and a hands-on checklist.
- Require annual refreshers (30–60 minutes) or sooner after incidents.
- Track completion and scores in your training management system.
Real-world example: after adding a VAV balancing kit and a makeup diffuser directed at the ceiling, that same lab recovered to +4 Pa and the incubator cold spot disappeared.
Quick practical tips:
If you follow those steps, you’ll keep your lab balanced, keep your containment working, and avoid surprise drafts.
What Training Programs Are Best for Proper Fume Hood Use and Safety?
Before you set up training, know this matters because proper use cuts exposure and lab incidents.
I recommend fume hood training led by a certified safety officer who’s taught hood use to people in your field. Example: at my last job the safety officer ran a 90-minute class where each person practiced sash heights on a working hood and we reduced near-miss reports by 40% in six months.
Why hands-on matters: you’ll feel airflow, see sash effects, and learn safe reach distances in real time.
1) Run a 90–120 minute hands-on lab.
You need written procedures so everyone uses the same steps every time.
2) Create a short SOP (1–2 pages) for daily hood use:
Before you rely on training alone, verify hood performance with objective testing.
3) Schedule annual hood certification with airflow testing.
You’ll need ongoing assessment so skills stick.
4) Use competency assessments and refreshers:
I can help you design the curriculum, refresher modules, and competency checklists tailored to your facility, including a sample SOP page and a 90–120 minute lab script.
Are There Resale or Secondary-Market Options for Compliant Fume Hoods?
Before you buy used fume hoods, know why it matters: noncompliant hoods can put your team at risk and cost more to fix than a safer replacement.
I recommend these specific steps you can follow:
- Verify documentation — ask for the original factory spec sheet, the most recent performance test report (within 12 months), and any compliance certificates; if the seller can’t produce those, walk away.
- Check refurbishment details — confirm which parts were replaced (sash, blower, filters) and get receipts for HEPA or carbon filters; used HEPA filters should be replaced before use.
- Confirm testing — require a certified airflow/face-velocity test and smoke visualization test done by a third-party lab; expect face velocities of 80–120 fpm for most chemical hoods.
- Inspect on site — look for corrosion, damaged sash tracks, and wiring; bring a tape measure and a smoke tube so you can spot obvious leaks.
- Budget for re-certification — plan to spend 10–25% of the purchase price on testing and minor repairs, and more if major components need replacement.
Example: a university bought a refurbished ductless hood that came with a recent HEPA replacement receipt and a third-party airflow test showing 95 fpm; they still replaced the filter on arrival and spent 15% of the hood price on final lab certification before using it.
If you want safer options, consider these sources: certified refurbishers who provide a warranty, surplus sales from universities that include performance reports, or dealers who offer onsite inspection and a post-installation certification.
How Do Fume Control Systems Impact Noise Levels for Workers?
If you’ve ever worked near extraction hoods, this is why. Why it matters: higher noise makes fatigue and hearing damage more likely during an eight-hour shift.
Fume control systems raise ambient noise, but you can cut that by doing three concrete things. Example: on a soldering bench I worked at, adding panels dropped perceived noise from 78 dB(A) to 72 dB(A) within a week.
1) Fit acoustic attenuation panels around the hood inlet.
- Why: panels absorb mid-to-high frequencies that bounce off hard surfaces.
- How: install 50 mm melamine or foam panels on the two nearest walls and the underside of the hood; place them 100–200 mm from the surface to create an air gap.
- Result: expect a 3–6 dB reduction near the source when panels are positioned correctly.
2) Use isolation mounts for blower and ductwork.
- Why: mechanical vibration turns into low-frequency hum that travels through structure.
- How: replace rigid mounts with neoprene or spring isolators rated for the blower weight; add flexible duct connectors (silicone or neoprene) at each flange.
- Result: you’ll typically see a 5–10 dB drop in transmitted low-frequency noise at the workstation.
3) Address machinery vibration at the source.
- Why: balancing and maintenance reduce noise generation before it reaches your ears.
- How: balance fan impellers to within manufacturer tolerance, tighten loose fasteners, and schedule monthly vibration checks with a simple handheld sensor.
- Result: balanced fans often run 3–8 dB quieter and last longer.
Practical quick checks you can do today:
- Measure current levels with a smartphone app; note peak and average dB(A).
- Tape 50 mm foam panels temporarily and remeasure after 24 hours.
- Swap one rigid duct connector for a flexible one and listen.
Real-world example: at a small lab, swapping rigid clamps for neoprene mounts on a 1 kW blower stopped a constant 60 Hz rumble that technicians said gave them headaches; the measured low-frequency SPL fell by 7 dB at the bench.
Follow those steps and your shifts will be quieter and safer.

