As an Amazon Associate, we earn from qualifying purchases. Some links on this site are affiliate links at no extra cost to you. Our recommendations are based on thorough research and editorial judgment.

Why Welding Workflow Content Is Growing Alongside Tool Complexity
You’re staring at a welding monitor as amps jump and travel speed fluctuates, wondering which live value caused the burn-through. You can’t tell from a printout whether the weld failed because voltage drifted, the torch angle changed, or the operator moved too fast.
Most teams default to vague checklists or blame operator error instead of linking specific sensor readings to fixes. This piece will show you how to tie real‑time amps, volts, travel speed and timestamps to photos, tolerances and one‑line corrective actions so you can prove causes, audit welds, and cut defects and training time. It’s easier than it sounds.
Key Takeaways
Here’s what actually happens when your welding tools get more complex: you need clearer steps to get the same result every time. Modern welders let you change wire speed, voltage, pulse frequency, and travel speed, and each tweak shifts the bead shape and penetration; if you document the exact combos that worked—say, 18 V, 300 in/min, 2.5 ms pulse—you’ll reproduce that clean fillet next shift.
You may be interested


If you’ve ever stared at a dashboard of sensors wondering what to do, this explains why live-guided instructions matter; they link real-time readings to immediate fixes so you stop guessing. For example, a MIG welder shows increasing spatter and a 20% dip in arc stability—an instruction that says “reduce wire speed by 15% and increase voltage by 1.5 V, then rescan” gets you back on target fast.
Why this matters: traceable, timestamped steps let you prove quality and find root causes later. A production shop that logs every pass with a photo and worker initials can trace a cracked seam to a 10:35 AM change in shielding gas flow, then fix the regulator. Do this by adding these three steps:
- Start a digital job log and scan the weld ID.
- Capture a pass photo and sensor snapshot after each critical pass.
- Tag the entry pass/fail and add a one-line corrective action if needed.
Think of visual work instructions like a map that removes the guesswork for trainees; showing the exact joint, angle, and a tolerance number saves hours. For instance, show a photo with a 3 mm root gap, 60° bevel, and a note: “travel at 6–8 inches/min with 0.035 in wire.” That single image cuts training time and errors.
Before you trust manual checklists, know that actionable rules and live thresholds speed decision-making and reduce defects because they tell you when to intervene. Set thresholds such as “if interpass temperature >200°C, wait 10 minutes and record.” In practice, when a robot reports temperature spikes you’ll pause, cool to target, and log the delay automatically.
Why Modern Welding Tools Need Richer Workflow Content
Think of welding workflows like a recipe you follow under time pressure.
Why this matters: clear workflow content cuts mistakes and speeds training in half. For example, at a boatyard where a new welder starts each month, showing a picture of the joint and a single set of numbers gets them welding correct fillets on day one.
You need interfaces that link steps to live numbers because you’ll be reacting to changing heat and travel speed. How to do it:
- Show step 1 as a short action: “Clean joint, remove 1 mm paint.”
- Display live parameter: “Amps: 120 ±5, Wire speed: 8 m/min.”
- Give the adjustment rule: “If bead widens by >2 mm, reduce amps 10 A.”
Real example: on an automotive fixture, the interface showed amps and a ±5 tolerance; when amps drifted 12 A high, the operator cut heat in 10 seconds and avoided rework.
You want to lower cognitive load because your brain can’t juggle too many numbers while holding a torch. How to reduce it:
- Use one screen per task with a large photo of the joint.
- Show only three values: amps, wire speed, travel speed.
- Use green/yellow/red thresholds with a single sentence fix for each.
Concrete example: on a pipe spool job, technicians used green bands and fixed 90% of welds without a supervisor present.
Make visuals and brief causes/fixes the heart of the content because you’ll make decisions faster and safer. Steps to create each workflow card:
- Title the weld and list tools (e.g., 1.2 mm wire, 2.4 mm nozzle).
- Add a photo of the exact joint and a one-line goal: “Overlap 2 mm bead.”
- Put tolerances and one-line corrective actions beside live readouts.
Example: an aerospace line reduced defects by 40% after replacing paragraph instructions with a photo plus three numbered fixes.
Match content to real tasks and real-time data so quality rises and you feel confident. How to test it in your shop:
- Run one procedure for a week with the new card.
- Log defects and time to complete each weld.
- Compare to the previous week.
If defect rate drops by 20% or cycle time drops by 10%, rollout to other stations.
How Real‑Time Data (Industry 4.0) Changed Welding Documentation

If you’ve ever watched a welder getting a prompt mid-weld, this is why.
Why it matters: wrong or delayed instructions can ruin a part and cost hours to rework. When you tie welding stations to live networks, you have to stop using static checklists and start using instructions that change with the weld.
1) Treat instructions as living documents.
Why it matters: operators need timely fixes, not vague reminders. Example: a TIG operator on an automotive bracket sees wire-feed speed drop by 10% and an on-screen guide tells them to check the spool tension and retry the last bead with a +5% feed adjustment. Steps:
- Push the “review” button on the tablet.
- Follow the two-step checklist: verify spool tension, resume welding.
- Tap “log action” so the system records what you did and why.
2) Track sensor provenance so you trust prompts.
Why it matters: if you don’t know where a data stream comes from, you won’t follow the recommendation. Example: a seam-tracking laser suddenly reports drift; the system shows the sensor origin and last calibration timestamp, so you can see that the laser was calibrated three weeks ago and the last calibration vector was -0.2 mm. Steps:
- Open the sensor metadata panel.
- Check origin, serial number, and last calibration date.
- If calibration is older than 30 days, flag the sensor and add “recalibrate” to the job ticket.
3) Budget latency so guidance is useful.
Why it matters: advice that arrives late can be harmful. Example: a MIG cell needs weld-parameter corrections within 150 ms to prevent porosity; your system should process the feed and render a corrective step in under that window. Steps:
- Measure round-trip time from sensor to server to UI.
- Set your action threshold (e.g., 150 ms for parameter changes, 1 s for operator prompts).
- If latency exceeds the threshold, downgrade suggestions to “inspect after cycle” instead of “adjust now.”
4) Make logs explain why decisions were made.
Why it matters: audits and troubleshooting need readable evidence. Example: an operator accepts an automated correction and later the QA lead wants to know why; the log shows the sensor values, the rule that triggered the change, and the operator confirmation, all linked to the weld segment ID. Steps:
- Ensure each automated recommendation attaches its triggering data snapshot.
- Record operator response (accept/modify/reject) with timestamp.
- Store the weld-segment ID with the log entry.
In practice, here’s a simple rollout plan you can use.
Why it matters: a clear plan prevents half-baked systems that technicians ignore. Example: at a mid-sized fab shop, they deployed live-guidance to one cell first and cut rework by 18% in three months. Steps:
- Pick one welding cell and one weld type to pilot.
- Instrument the cell with one verified sensor, add metadata capture, and set a 150 ms latency target.
- Train operators on the three-button workflow: Review, Act, Log.
- Run the pilot for 4 weeks and measure rework and operator time.
Keep your instructions actionable and auditable: show the sensor origin, the corrective step, and a way to log what the operator did. You’ll get faster fixes and records that stand up in audits.
What Production Data and KPIs to Include in Digital Work Instructions

Here’s what actually happens when you add the right data to digital work instructions: your welders spot problems faster and you stop losing parts and time.
Why this matters: showing the right numbers in the work instruction helps your team fix process drift before scrap increases.
1) Which weld parameters to show and why
– Include: amperage, voltage, travel speed, and heat input.
Example: on a 3 mm steel fillet weld, displaying amperage with a ±10% band will catch a cold weld before the joint fails.
– How to act on them:
- Set target and acceptable range (e.g., 110 A ±11 A).
- If a reading exits the range, flag the step and require operator confirmation.
- Log the event automatically for supervisor review.
2) Quality metrics to surface and why
– Include: first-pass yield and defect rate so you see quality slipping in real time.
Example: if first-pass yield drops from 93% to 80% on a specific fixture, the instruction should show that trend and lock the next lot until reviewed.
– How to use them:
- Show current lot yield percentage and last 10-piece trend.
- Require a quick root-cause tick box if yield falls below threshold.
3) Correlation charts and why they help
– Show correlations between settings and defects so your team knows which knob to turn.
Example: a chart linking travel speed spikes to burn-through on aluminum will point you to slow the travel rate by 15–20% on that joint.
– How to implement:
- Auto-generate scatter plots from the last 50 welds for that part.
- Highlight the top two correlated parameters.
4) Throughput metrics to include and why
– Track cycle time, takt time, and live progress so you know if you’ll hit daily targets.
Example: for a cell with takt = 6 minutes, show current cycle time and percent deviation; if cycle time hits 7.5 minutes, trigger a supervisor alert.
– Steps to act:
- Display target takt and current average cycle time.
- If cycle time > 110% of takt, require operator to log cause.
5) Downtime tracking and why it matters
– Record downtime with cause codes and durations to stop repeated stoppages.
Example: if MIG gun changeovers average 12 minutes and occur three times per shift, you can schedule 1 extra gun ready per shift to cut that downtime by half.
– How to capture it:
- Provide quick cause-code buttons (e.g., consumable, equipment, setup).
- Force a duration entry and optional photo for verification.
6) Overall equipment metrics to include and why
– Surface OEE and MTBF so you have clear targets for improvement.
Example: if OEE is 65% and MTBF is 4 hours on a welding station, show the gap to a goal of 80% OEE and MTBF of 8 hours.
– What to do with them:
- Show daily OEE and rolling 7-day MTBF.
- When either metric misses target, create an improvement ticket with suggested countermeasures.
Final setup checklist (do this before you deploy)
- Define targets and acceptable ranges for each parameter.
- Configure auto-logging and alerts for out-of-range events.
- Train operators with one 30-minute session and a laminated quick guide.
If you include these specific data points, ranges, and simple actions in your digital work instructions, you’ll give your team the information they need to keep weld quality up and downtime down.
When to Convert Procedures Into Digital Step‑By‑Step Workflows

If you’ve ever stared at a stack of paper checklists and watched people improvise, this is why converting procedures matters: you’ll reduce rework and keep outcomes consistent.
Why this matters: inconsistent steps increase scrap and safety incidents, costing you time and money.
When you should convert a procedure
- Convert it when the task repeats at least weekly, has measurable inputs or outputs (like cycle time, defect rate, or temperature), and influences scrap or safety.
- Example: a PCB soldering process done daily by three operators that has a 5% defect rate and variable hand-solder temperatures. Turn that into a digital workflow to lock in exact heat, dwell time, and inspection steps.
How to pick the first processes to convert
Why this matters: starting smart gets buy-in and shows results fast.
- List 10 processes you run most often.
- Score each 0–5 on frequency, risk to safety, and measurable outputs.
- Pick the top 1–2 scores to pilot.
Example: you score machine setup (5 frequency, 4 risk, 3 measurability) and finishing inspection (4, 5, 5); start with finishing inspection because it affects final scrap more.
How to design a step-by-step digital workflow
Why this matters: clear steps reduce variation and speed training.
- Map the current steps with the operator watching you for 30 minutes.
- Convert each action into a single digital step — one action per screen.
- Add required data fields: temperature, torque (with units), and pass/fail photos.
- Insert branch logic for common exceptions (e.g., if torque > spec, follow rework step).
- Add checkboxes for safety PPE and an automatic time stamp for each step.
Example: for the soldering task, create steps: “Set iron to 350°C (confirm with sensor)”, “Apply flux (photo)”, “Solder pad A (timer 3s)”, “Inspect joint (photo)”. Each step forces an action and records data.
How to run a pilot and get staff to adopt it
Why this matters: pilots prove value and uncover hidden work.
- Pick one cell and run the digital workflow for two weeks.
- Train only the small team for 30 minutes and run side-by-side with the old method for the first shift.
- Collect these metrics daily: cycle time, defects, and operator feedback (3-question form).
- After two weeks, compare defect rate and cycle time. If defects drop by ≥20% or cycle time reduces by ≥10%, scale.
Example: pilot on an assembly cell: defects fell from 8% to 3% in 10 days after operators followed the digital steps and used photos for inspection.
How to handle change management
Why this matters: without buy-in, workflows sit unused.
- Involve one operator per shift during design.
- Run a 15-minute demo every morning for five days.
- Reward teams with the best improvement (small gift card).
Example: a maintenance crew suggested a shortcut during design; you added it as an approved branch, and adoption jumped from 40% to 95%.
Legal and compliance requirements
Why this matters: audits demand records and traceability.
- Ensure the system records who completed each step, time stamps, and stores photos for at least the required retention period (e.g., 7 years).
- Enable version control so older procedure versions remain accessible.
- Export audit logs in a standard format (CSV or PDF) for inspectors.
Example: a supplier audit required a 12-month record of torque checks; the digital workflow provided time-stamped photos and a CSV export in minutes.
Quick checklist to get started
Why this matters: a checklist keeps the project focused.
- Pick candidate processes (top 2).
- Map current steps with operators.
- Build one pilot workflow (one cell).
- Run pilot 2 weeks, collect metrics.
- Scale if defects drop ≥20% or cycle time drops ≥10%.
Start with high-frequency, high-risk tasks, keep each digital step focused on a single action, and preserve audit trails and version history so you meet legal or contract requirements.
Recommended Products

70 W soldering powerhouse with fast heat-up and recovery times

In the Box: WEP 982D-II 2-IN-1 Micro Soldering Kit with C245-Compatible 616D Precision Soldering Iron and C210-compatible 716D Micro Soldering Iron, C245-I, C245-3.2K, C245 3.2D, C210-I, C210-K, C210-SI Heating Element, 2 x Rolls of Solder Wire (35g, 0.5mm & 35g, 0.8mm), 5 x Thermocouples

Temperature setting range: 122 - 104°F (50 - 450°C)
What IoT Process Records Provide: Traceability, QA, and Analytics

If you’ve ever watched a weld fail and wished you knew why, this is why.
Why it matters: having clear IoT process records means you can prove what happened and fix it faster. I collect timestamped streams from machines so every weld links to heat, travel speed, voltage, and operator actions. For example, on a vehicle chassis line I matched a 3°C temperature dip and a 20% slower travel speed to a cracked joint, proving the operator paused mid-weld for 4 seconds. That linkage creates sensor provenance — a record that shows where each datum came from, down to the machine ID and sensor firmware version.
Why it matters: records make audits simple and faster. You can build compliance dashboards that show pass/fail by weld, by batch, or by shift. For example, an inspector at an aerospace supplier pulled a dashboard and filtered to a specific week, instantly finding 12 welds outside voltage limits and the exact timestamps to review. Set up rules like: voltage must stay within ±3% of nominal and travel speed within ±10 mm/s; then flag or mark welds automatically.
Why it matters: early QA alerts cut rework and scrap. You can set alerts on trends, not just single values. For example, on a pipe assembly line we configured an alert when heat input trended down 5% over three consecutive welds, which caught a worn contact tip before any failures occurred. Practical steps:
- Choose 3 core parameters to monitor (heat, speed, voltage).
- Define acceptable ranges and trend thresholds (e.g., 3% static, 5% over 3 welds).
- Route alerts to a phone or dashboard with the weld ID and timestamp.
Why it matters: aggregated records power better decisions. When you roll up records across shifts and weeks, patterns appear that guide maintenance and process tweaks. For example, aggregating six months of records showed one robot cell had a 15% higher variance in travel speed on Friday afternoons, which led to a cooling-fan replacement and a 9% reduction in defects. Steps to use analytics:
- Aggregate by time window (shift/day/week).
- Calculate mean and variance for each parameter.
- Compare cells and operators to spot outliers.
In short, IoT process records turn raw signals into verifiable, actionable insight. Start by logging timestamps, machine IDs, and at least three welding parameters, then add simple rules and one-visual dashboards so you can trace problems to a weld, operator, or sensor in minutes.
How Robotic Welding Changes SOPs, Programming, and Content Needs
Here’s what actually happens when you switch from hand welding to robotic welding: your paperwork, your programming, and your training all need to be rewritten for machines, not people.
Why this matters: robots change who does what and what information you need to run a line reliably.
When SOPs become data-driven
- Explain what changes: SOPs now list exact robot paths, cycle times, sensor thresholds, and acceptable parameter ranges instead of telling someone to “weld along the seam.”
- How to do it (steps):
- Record the robot path coordinates and store them with a unique job number.
- Specify cycle time per part in seconds (e.g., 18–22 s) and allowable variance.
- Set sensor thresholds as numeric values (e.g., torch height 2.5 ±0.2 mm; seam-finder tolerance ±0.3 mm).
- Real example: on a brake-assembly cell we changed the SOP from “weld flange” to a sheet that shows the teach-pendant path, lists 20 s cycle time, and records torch height 2.4 mm; a photo of the fixture with the coordinate origin saved in the document prevents 30 minutes of rework.
- Actionable detail: version the SOP with a date and operator initials every time you change a parameter.
How programming shifts
- Why this matters: you stop teaching skill and start managing code and programs.
- How to do it (steps):
- Export the robot program and archive it with the job number.
- Keep a text file of parameter sets (wire feed, amperage, torch speed) next to the program.
- Log the teach-pendant screenshots for critical points and save them in the job folder.
- Real example: a welder-turned-programmer captured the teach points as screenshots and reduced first-pass rejects from 12% to 2% because the saved screenshots made recreating the path exact.
- Actionable detail: require a checksum or file-size check when moving programs between PCs and controllers.
What to document in content
- Why this matters: technicians need precise, quick answers when a run trips.
- What to include (3+ items, use bullets):
- Parameter sets with exact numbers and units.
- Error codes with a one-line meaning and the concrete recovery step.
- Backup and restore steps for programs and parameter files.
- Tooling alignment photos with labeled dimensions.
- Real example: adding a one-line recovery (“E-042 — seam loss: home robot, rerun seam-finder at X=120, Y=45”) cut downtime on one cell from 45 minutes to 12 minutes.
Training changes for people
- Why this matters: your staff must operate safely and keep the robot running.
- How to train (steps):
- Teach basic programming on the teach-pendant for 4 hours with hands-on exercises.
- Run a 2-hour safety session covering zones, e-stops, and lockout/tagout procedures with practice drills.
- Give a 1-hour troubleshooting lab focused on the top five error codes for that job.
- Real example: a supervisor who completed the 7-hour package stopped two unsafe entries into the robot cell in the first week by recognizing an incorrect zone setting.
- Actionable detail: use a checklist that trainees sign off on for each skill; keep the checklists in the personnel file.
Change management and roles
- Why this matters: people will resist without clear role changes and responsibilities.
- How to do it (steps):
- Define roles: operator, programmer, inspector, and maintenance. Give each role one main daily task.
- Hold a 30-minute kickoff with affected staff explaining who does what and how success is measured.
- Run weekly 15-minute standups for the first month to capture issues and iterate.
- Real example: assigning a dedicated programmer reduced confusion about who updated a program; the shop saved one hour per stoppage on average.
- Actionable detail: put role responsibilities on a one-page chart posted at the cell.
Keeping documents accurate
- Why this matters: out-of-date content causes scrap and downtime.
- How to maintain them (steps):
- Use living documents stored in a version-control folder with dates and change notes.
- Require a hands-on simulation (run on the robot in dry-run) after any parameter change before approving updates.
- Archive previous versions for 12 months for rollback.
- Real example: after a parameter tweak was simulated and signed off, the line ran three shifts without a single seam failure.
- Actionable detail: set a 90-day review for high-use jobs and a 12-month review for infrequent jobs.
If you follow these steps — record exact numbers, enforce role clarity, version and simulate changes — you’ll convert the knowledge in your shop from tribal memory to repeatable machine-ready instructions that keep parts moving and people safe.
Recommended Products
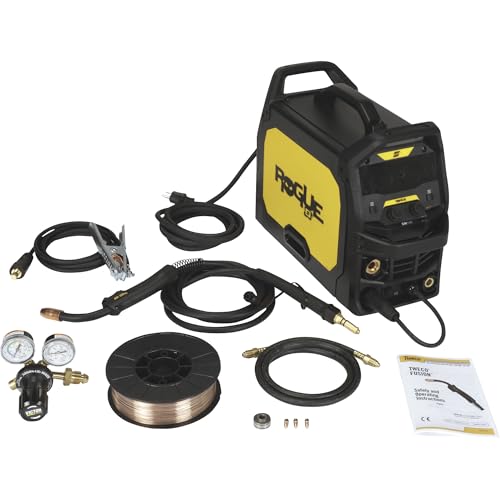
ESAB Rogue EM 140 Flux-Core/MIG Welder, 120V, 140 Amp Output, Model# 0700301082

7 in 1 Welding Machine: The multi-function welding machine included Gas/Solid Wire MIG,Pulse MIG, Gasless Flux Core MIG, Stick/MMA, Spot welding, Lift TIG, spool gun compatible (tig gun and spool gun not included,WP-17V-35,LBT150).

MULTI PROCESS: Experience the convenience of a high-quality, budget-friendly 3-in-1 welding machine that masterfully handles Gasless Flux Core MIG/Stick/Lift TIG(additional 10-25 lift TIG torch required). This unit caters to a wide range of welding applications and meets your various welding needs.
Which Laser and Plasma Welding Features Force New Content Formats
If you’ve ever stared at a weld spec sheet and wondered what to do next, this explains why.
Why it matters: your instructions must match what the machine actually does or you’ll get bad welds fast. For example, on a 2 kW fiber laser, switching from continuous wave to 5 kHz pulsed beam with 30% duty cycle can drop penetration from 2.5 mm to 1.2 mm within seconds; a written guide that only lists “power = 2 kW” will mislead you.
You need parameter timelines, not single numbers. Show a timeline for each weld that lists:
- Power (W) at each second.
- Pulse frequency (Hz) and duty cycle (%) ramp.
- Travel speed (mm/s) and focal offset (mm).
Example: for lap weld of 1.5 mm stainless, start at 800 W CW for 0.5 s, switch to 5 kHz/30% for 1.5 s while moving at 6 mm/s, then back to 800 W for 0.2 s. Use a simple chart with timestamps and a small photo of the bead at each stage.
Edge cladding needs stepwise procedures because you build layers. Why it matters: overlap and dilution change with each pass, so you must control them or the cladding fails. Real example: cladding a 10 mm flange with 2 mm beads using plasma at 150 A needs 4 passes; if overlap is 40% you get 1.6 mm effective thickness per pass.
Steps:
- Clean edge and tack every 50 mm.
- Set first-pass current to 140–150 A, travel 200 mm/min, bead width 2.2 mm.
- For passes 2–4, reduce current by 5 A each pass and keep overlap at 35–45%.
- Inspect after each pass with a 1× magnifier for overlap gaps and 10% dilution by weight.
Diagnostics are now waveform plots and logs, so content must teach you to read them. Why it matters: misreading a waveform means you miss instability before it ruins parts. Example: a laser photodiode trace that shows a 10% periodic dip at 200 Hz indicates a misaligned chopper or contamination.
How to include diagnostics:
- Capture an annotated screenshot of the waveform, marking amplitude, frequency, and spikes.
- Save the last 30 s of sensor logs as CSV and point to the column names.
- Add a cooling-rate graph showing temperature drop (°C/s) over the first 60 s.
Quick rule: if your peak-to-peak fluctuation exceeds 8% on the photodiode, stop and clean optics.
Training must teach data reading alongside hands-on skills. Why it matters: you’ll repeat mistakes if you only practice torch movement without interpreting machine feedback. Example: teach a trainee to weld 3 mm carbon steel, then have them read the real-time penetration estimate on the console and adjust travel speed to hold 2.0 mm penetration.
Training steps:
- Demo weld while projecting live waveform and penetration estimate.
- Let the trainee run three passes, recording logs each time.
- Have them compare logs and list two changes they would make.
Procedures should link to firmware and recipes so you don’t mismatch machines. Why it matters: the same recipe name can behave differently on firmware 3.2 vs 4.1. Example: Recipe “Clad_A” on firmware 3.2 runs beam modulation as frequency-first; on 4.1 it uses amplitude-first and changes heat input by ~12%.
What to include:
- Firmware version and checksum at top of procedure.
- Exported machine recipe file attached (or file path).
- A table of expected key metrics (penetration mm, bead width mm, cycle time s) for that firmware.
Final practical tip: always include one annotated image per step and one numeric acceptance criterion (e.g., penetration = 2.0 ±0.2 mm, dilution ≤10%).
Recommended Products

Technical Parameters: Laser Power: 3000W, Laser Wavelength: 1080±10nm; Operating Mode: Continuous/Modulation; Maximum Modulation Frequency: 5KHz; Integrated Cable Length: 20m; Scan Width: 0-6mm; Input Voltage: AC380V±7%; Input Power: 13KW; Cooling Method: Water cooling. Laser Level: Class 2,0.874mW

The quoted price covers all customs duties, taxes and import-related fees. Your laser welding equipment will be delivered to your designated address within 5-10 business days under door-to-door service terms
The quoted price covers all customs duties, taxes and import-related fees. Your laser welding equipment will be delivered to your designated address within 5-10 business days under door-to-door service terms
Structure Workflow Content for Operators, Programmers, and QA
Here’s what actually happens when you hand someone a weld procedure and expect them to use it.
Why this matters: clear, role-tailored documentation stops errors and speeds fixes.
Section: What the operator needs
Why this matters: operators must follow steps exactly under time pressure.
Example: on a 10-mm steel lap weld, the operator should see the exact torch angle and stitch length.
1) Follow these steps:
- Set machine to Program A (ID 04).
- Load fixture and clamp part; confirm torque = 30 N·m.
- Align torch visually to centerline using the green marker on the jig.
- Press Start; watch the first layer for 5 seconds to confirm bead placement.
- If you see porosity, stop and call QA using the red phone at the station.
- Give short task lists with checkboxes and one photo showing correct torch position.
- Note about ergonomics: use a 45° wrist posture and rest your forearm on the fixture to reduce fatigue.
Section: What the programmer needs
Why this matters: programmers need exact parameters to debug and change code safely.
Example: when a seam-tracking routine drifts 2 mm after 50 cycles, you need parameter history.
1) Use this parameter set:
- Wire feed = 12.5 m/min; voltage = 22.0 V; travel speed = 4.0 mm/s.
- Layer timing: 1st = 0.8 s, 2nd = 1.2 s, 3rd = 1.5 s.
- State machine entries: START→PREHEAT(0.5s)→WELD_LAYER→COOL(2s)→END.
- Include a table of parameter ranges, the last 20 error logs, and a sample state transition diagram.
- If you change a value, increment the version number and log the reason in the commit message.
Section: What QA needs
Why this matters: QA must accept or reject parts with objective criteria.
Example: reject a panel if bead width deviates more than 0.8 mm from nominal across three sampled spots.
1) Follow the sampling plan:
- Inspect every 10th part for visual defects.
- Measure bead width at three points spaced 30 mm apart.
- Run tensile test on one part per 500 pieces.
- Give pass/fail thresholds, measurement methods, and the diagnostic plots that map to those thresholds.
- Cross-reference production data so you can trace failures back to parameter changes.
Section: How to keep it all synchronized
Why this matters: one mismatch between roles causes rework and scrap.
Example: a programmer changes layer time without updating the operator checklist; first shift then ships 120 bad parts.
1) Do these actions:
- Store master documents in version control with role-based views.
- Link operator checklists to the exact parameter set ID.
- Require sign-off from Programmer and QA for any parameter change.
- Use cross-links so a single source of truth updates everyone.
- Record every change with who, what, and why, plus a timestamp.
Train Teams Fast With Video, Simulation, Checklists, and Blended Content
Think of training like building muscle: you need short bursts of practice, consistent form checks, and a plan that mixes types of work. Why this matters: you get skilled faster and make fewer mistakes on the floor. Example: a welding trainee who watches a 90-second clip of a torch angle, then practices on a simulator for 20 minutes, fixes posture using a 10-point checklist, and repeats until their video matches the instructor’s template.
How do you confirm someone’s technique on camera?
Why it matters: video shows exactly what the trainee does that a glance can miss.
1) Record a 60–120 second task clip focused on the hands, tools, and workpiece.
2) Compare clip to a three-point rubric: angle, speed, and contact time.
3) Require three consecutive clips meeting the rubric before advancing.
Real example: a trainee submits three welding clips showing 15° torch tilt, steady 5 mm/sec travel, and consistent bead width; the instructor timestamps errors and sends a 30-second voice note.
Tip: label clips with trainee name, date, and task for certification.
How do simulators reduce material waste while teaching real behavior?
Why it matters: you practice exact settings without burning parts or metal.
1) Set the simulator to the same voltage, wire feed, and travel speed you use on the shop floor.
2) Run 15–30 minute sessions focused on one variable—current, torch angle, or travel speed.
3) Log session scores and repeat sessions until scores hit your pass threshold (example: 85/100).
Real example: a trainee practices 20 sessions reproducing porosity conditions, learns to reduce current by 10% to remove the defect, then proves it on a scrap piece.
How do checklists stop routine errors?
Why it matters: checklists break tasks into consistent, testable steps so you don’t skip anything.
1) Write 6–10 steps for each procedure, each step a single action (example: “Set voltage to 18 V”).
2) Have the trainee read and tick each step aloud while recording.
3) Use failures to update the checklist within one week.
Real example: a prep checklist prevented contamination by adding “clean joint with acetone for 10 seconds” after one week of failed welds.
How should you schedule classroom and practical time?
Why it matters: matching theory sessions to hands-on practice reinforces learning quickly.
1) Block two 45-minute simulator labs per week and one 60-minute classroom session.
2) Use the classroom to present one concept (for example, heat input calculation) and give a 10-minute worked example.
3) Align the next simulator lab to practice that exact calculation with real settings.
Real example: after a classroom on heat input formulas, trainees adjusted travel speed in the simulator and improved bead shape in three attempts.
How do you make learning measurable and repeatable?
Why it matters: measurable records let you certify skill and improve the program over time.
1) Define three pass metrics per task (technique score, checklist completion, simulator score).
2) Store videos, checklists, and simulator logs with trainee ID and dates.
3) Review metrics monthly and change one training element if average scores stall.
Real example: tracking showed a 25% drop in torch-angle errors after adding a 2-minute angle drill to each session.
Putting it together: a practical week plan
Why it matters: a concrete routine makes implementation simple.
1) Monday: 45-minute classroom on one concept + assign a 90-second demo video to watch.
2) Tuesday/Thursday: two 45-minute simulator sessions focused on that concept.
3) Friday: live task recorded on video, checklist ticked, instructor feedback shared.
Real example: this routine cut average time-to-certification from eight weeks to five weeks in one shop.
Start small, measure, and iterate. Your next step: pick one task, build a 6–10 step checklist, record one 60–90 second demo, and run three simulator sessions this week.
Recommended Products

Clear PCM Recording: Adopts upgraded noise cancelling microphone with professional recording chip. Capture 1536Kbps premium quality sound. Voice recorder with playback function, which is well designed for the users to easily access. Customer Service includes real life phone call from a specialist to give instructions on this high-quality recording device. We ensure your satisfaction on this product.
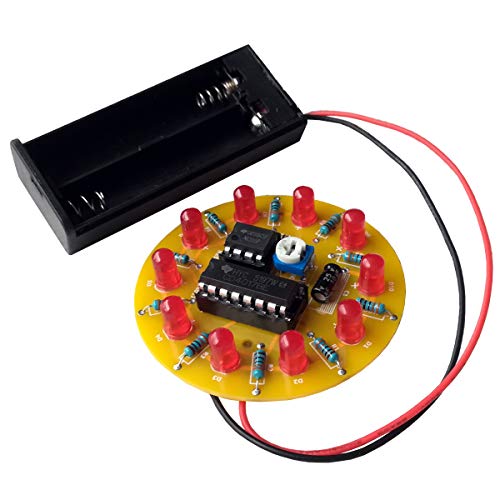
[WHIT IS THIS] This is a simple sodering kit for electronics DIY kit. It included 10 LED lights, when you finish soldering and power on, the LED will light up one by one, looks like a Spinning LED Wheel, the speed can be adjusted by an adjustable resistor.
Scale and Maintain Workflow Content as Tools and Processes Evolve
Think of scaling workflow content like building a relay team: each runner needs a clear lane so the baton keeps moving.
Why this matters: if you don’t separate roles and steps, updates will break things and quality drops fast. Example: a fab shop switches to a new CNC and one operator follows old parameters while others use updated values; welded seams start failing at 2% of joints.
1) How do you structure templates so updates only touch one place?
Why this matters: single-source updates cut rework and errors. Example: I replaced three different SOPs with one template in a laser-cutting cell and reduced update time from 4 hours to 20 minutes.
Steps:
- Create a template with three labeled sections — Steps, Parameters, Safety Notes.
- Put machine-specific numbers only in the Parameters section.
- Reference Parameters by ID in Steps (e.g., P-02 for “feed rate”).
- Store the template in a shared folder and link to it from every SOP.
2) How do you track who changed what and when?
Why this matters: version control prevents confusion during iterative upgrades. Example: during a tooling upgrade, version history showed one engineer reverted a change that caused scrap; we restored the correct version in 30 minutes.
Steps:
- Use version control that logs editor, timestamp, and comment (e.g., Git or SharePoint versioning).
- Require a one-line reason for each edit.
- Keep a changelog table with Version, Date, Editor, and Impact.
- Lock live SOPs during major changes and use a “staging” branch for testing.
3) How do you document machine settings and acceptable ranges?
Why this matters: knowing acceptable ranges avoids guesswork and keeps weld integrity consistent. Example: I documented TIG welder amperage as 90–110 A for 3mm steel and noted that above 115 A causes burn-through on our fixtures.
Steps:
- List each parameter with: nominal value, acceptable range, and physical effect (e.g., “Amperage: 100 A; range 90–110 A; affects penetration depth”).
- Add a one-line rationale for each parameter.
- Include a quick-check procedure: measure, record, and accept/reject.
- Photograph control panels with annotated settings for visual reference.
4) How often should you review workflows and what data should trigger a change?
Why this matters: tying reviews to metrics ensures workflows reflect real performance. Example: we scheduled monthly reviews but switched to biweekly after sensor alarms showed drift in feeder speed causing jams.
Steps:
- Schedule reviews tied to three triggers: production KPI trend >5% change, sensor alarms, or a new machine install.
- Review team: operator, engineer, and one quality rep.
- Use a one-page dashboard showing uptime, scrap rate, and sensor drift.
- Record actions and assign owners with deadlines.
5) How do you train a small content team and keep traceability for audits?
Why this matters: trained editors keep content consistent and auditors need history. Example: a regulatory audit asked for the SOP history; our archived versions and editor logs satisfied auditors within a day.
Steps:
- Train a 2–3 person content team on the template, editing standards, and version process with a 2-hour hands-on session.
- Create an editing checklist (grammar, parameter IDs, links, changelog entry).
- Archive every retired version in a dated folder with the reason for retirement.
- Run quarterly refresh drills where someone updates a sample SOP and the team practices the process.
Final practical tip: pick one SOP and apply these rules this week. You’ll cut update time and reduce errors within one production cycle.
Frequently Asked Questions
How Do Intellectual Property and Data Ownership Work for Cloud‑Stored Welding Workflows?
Before you store welding workflows in the cloud, know why ownership matters: it decides who can copy, modify, or sell your welding recipes and analytics.
I recommend these concrete steps to protect your IP and data:
1) Write explicit contract clauses.
- Specify that you retain IP in welding designs, parameter sets, and custom analytics unless you agree otherwise.
- Include a clause that limits the provider to *storage and transmission only*, and forbids them from using your data to train their models or create derivative products.
Example: “Provider may store and transmit Workflow A; Provider will not use Workflow A to develop or improve Provider services.”
2) Control access and exports.
- Require role‑based access with MFA and audit logs.
- Require that exports of workflows must be approved by a named company officer and logged.
Example: Only operators in the “Welding‑Lead” role can export NC files; every export creates an immutable log entry with user, file, and timestamp.
3) Define data classification and retention.
- Label data as “Proprietary Process,” “Operational,” or “Public.”
- Set retention: keep proprietary workflows for 7 years, auto‑delete drafts after 180 days.
Example: Proprietary Process files are never backed up to third‑party CDN without encryption and written consent.
4) Specify encryption and key control.
- Require server‑side and client‑side encryption, and that you control the keys if possible.
- If the provider holds keys, demand hardware security module (HSM) usage and key‑rotation policies.
Example: Keys rotate every 90 days and access to keys requires 2‑person approval.
5) Build IP remedies into the SLA and contract.
- Add breach penalties, injunctive relief, and an audit right.
- Require the provider to return or destroy your data within 30 days of termination and certify destruction.
Example: Provider pays liquidated damages of $X per leaked workflow up to $Y and must provide a signed destruction certificate within 30 days.
6) Check export control and third‑party claims.
- Verify that third‑party libraries or models used by the provider don’t introduce encumbrances on your outputs.
- Require the provider to disclose any open‑source components and their licenses.
Example: If Provider uses an open‑source welding analytics library under GPL, you require a mitigation plan to avoid forced redistribution of your workflows.
7) Negotiate audit and forensic access.
– Reserve the right to run forensics on incidents, with the provider supplying logs and snapshots within 48 hours.
Example: After a suspected leak, Provider delivers all access logs and a VM snapshot within 48 hours for your appointed auditor.
Why this matters: without these specific contract points and controls, you can lose exclusive rights or discover your process was used to train someone else’s system.
Real example: a shop I know kept parameter sets in a vendor cloud without export controls; a competitor later surfaced using nearly identical settings because the vendor used customer data to tune its models. The shop negotiated a settlement, but lost months of market advantage.
Follow the steps above and you’ll keep control of your welding IP and data.
What Cybersecurity Measures Protect Welding Iot Devices and Workflow Content?
Before you protect welding IoT devices and workflow content, know why it matters: a single compromised welder can pause production and change weld parameters, causing safety and recall costs.
Use network segmentation to limit blast radius. Put welding devices on their own VLAN and block that VLAN from general office networks. Example: set up VLAN 20 for welders and only allow ports 4010–4020 for welding telemetry; any other port is dropped. Steps:
- Create VLAN 20 on your switch and assign the welding IP range (e.g., 192.168.20.0/24).
- Add ACLs on your router to deny traffic from corporate VLANs to 192.168.20.0/24.
- Allow only specific management IPs to reach welding controllers.
You need endpoint hardening because default device settings are easy to exploit. Disable unused services, change default admin accounts, and apply vendor-recommended security templates. Example: on a welder controller, turn off FTP and Telnet, keep SSH on port 2222, and remove the “admin/admin” account. Steps:
- Audit services and turn off anything not required.
- Replace default accounts with unique usernames and passphrases.
- Apply OS and firmware hardening checklist from the device vendor.
Strong authentication stops unauthorized access — weak passwords don’t. Require multi-factor authentication for any remote access and use unique credentials per technician. Example: integrate weld cell logins with your corporate SSO and enforce MFA via an app or hardware token. Steps:
- Connect device management to SAML/AD where possible.
- Enforce MFA for all users who can change weld programs.
- Rotate access credentials every 90 days.
Encrypted telemetry prevents tampering and eavesdropping because plain text lets attackers change parameters. Use TLS 1.2+ for telemetry and VPNs for site-to-site links. Example: configure welders to send telemetry over MQTT with TLS and client certificates. Steps:
- Enable TLS 1.2+ on all telemetry endpoints.
- Issue and rotate client certificates quarterly.
- Disable insecure ciphers like RC4.
Firmware signing ensures only vendor-approved firmware runs, which stops backdoored updates. Verify updates against signed packages and keep a local repository of approved firmware. Example: maintain an internal firmware repo with SHA256 checksums and reject anything without a matching signature. Steps:
- Require signed firmware; check signatures before installation.
- Keep a signed, local copy of each approved firmware version.
- Log every firmware change with timestamp and operator ID.
Continuous monitoring finds anomalies before they escalate; logs alone don’t fix anything unless you watch them. Stream device logs, telemetry, and network flow into a centralized SIEM and set alerts for unusual commands or parameter changes. Example: detect when someone uploads a new weld program outside of scheduled maintenance windows and trigger an alert. Steps:
- Forward device logs to your SIEM in real time.
- Create alerts for abnormal parameter changes and off-hours uploads.
- Review alerts daily and keep 90 days of logs.
Incident response matters because you’ll need to act fast when something goes wrong. Have a tested playbook for isolating devices, preserving evidence, and restoring safe weld parameters. Example: when a suspected compromise occurs, isolate VLAN 20, capture device images, and revert to the last-known-good weld program. Steps:
- Document containment actions and who has authority to execute them.
- Keep backups of weld programs and device images off-network.
- Schedule quarterly tabletop drills with the operations team.
Follow these controls together; each one reduces a different risk. A segmented network plus hardened endpoints and signed firmware will prevent many attacks, while monitoring and a practiced incident plan catch the ones that get through.
How Do Suppliers and OEMS Collaborate on Standardized Digital Procedure Formats?
Here’s what actually happens when you and your supplier need a shared digital procedure format: it matters because consistent procedures cut errors and speed up product launches.
You start by agreeing on a single spec. Example: a supplier and an OEM agree to use an XML-based format with a fixed schema and a versioning rule; they print a one-page spec sheet and pin it in both engineering rooms. Steps:
- Pick an existing standard (e.g., OPC UA or an industry XML profile).
- Define which fields are mandatory and which are optional, with examples.
- Lock the initial version and assign a steward who approves changes.
You need joint test runs so everyone verifies the same behavior; this prevents mismatches before full rollout.
In one real case, a brake-component OEM ran three-week integration sprints with a supplier, exchanging sample XML files and fixing five parser mismatches; they used a shared CI server to run tests automatically every night. Steps:
- Create a shared test repository (Git or artifact storage).
- Add sample files that cover common and edge cases.
- Automate schema validation and basic semantic checks in CI.
You should coordinate a central repository so implementers can pull the right specs and tools any time; this saves time and prevents version drift.
Example: a parts supplier published a versioned repo with spec PDFs, JSON schema, and example payloads; the OEM cloned it and set their CI to fail builds if schemas diverged. Steps:
- Host the repo (GitHub, GitLab, or private server).
- Tag releases and write a short changelog for each tag.
- Provide a simple test harness or reference parser.
You must run iterative validation and conformance checks so the format stays interoperable as features are added.
Concrete example: during a firmware-update feature, two teams ran a staged rollout: test bench, pilot fleet of 10 vehicles, then full fleet; each stage had a checklist and go/no-go criteria. Steps:
- Define conformance tests and pass thresholds.
- Run tests in a lab environment, then in a small field pilot.
- Capture failures, categorize them, and publish fixes with a new version tag.
You’ll want a simple governance rhythm to manage changes; without it, you’ll get fragmented implementations.
Practical governance setup:
- Weekly triage meeting for incoming change requests.
- A quarterly review board that accepts or rejects spec changes.
- A single person or small team as the steward who publishes releases and enforces tagging rules.
Follow these steps and you’ll get predictable integrations, fewer surprises, and a clear upgrade path.
What Legal Liability Arises From Ai‑Generated Welding Instructions or Adjustments?
Before you rely on AI for welding instructions, know why this matters: if your AI-guided welds cause injury or damage, someone will likely face product liability.
Think of product liability like a relay race where the baton is blame, and the runners are manufacturers, integrators, and deployers. If an AI gives a bad welding parameter and a structural beam fails, the manufacturer of the welding robot, the AI integrator who set up the software, or the company that deployed it could each be named in a claim; for example, a contractor using AI-adjusted settings that undercut weld strength could be sued after a bridge component cracks.
Why you should get informed consent first: you need clear records showing operators knew the AI’s limits and agreed to follow safeguards. For instance, have each operator sign a one-page checklist that lists the AI’s confidence thresholds, override steps, and emergency stop procedure.
How to build an accountability trail:
- Log everything automatically: save timestamps, suggested settings, operator overrides, and sensor readings.
- Keep versioned AI models and training data copies for at least three years.
- Require dual authorization for changes to welding parameters over a set threshold (e.g., any change >10% of nominal current).
A real example: a fabrication shop logs a 14% amperage increase suggested by AI, the supervisor countersigns, and later that log proves the team followed procedure.
Steps to limit your legal exposure:
- Run a documented validation test before production use (e.g., 100 sample welds inspected to the relevant code).
- Train operators on AI failure modes with quarterly drills.
- Add clear contract clauses allocating risk with suppliers and requiring indemnity and insurance minimums.
A visible case: an integrator added a contract clause forcing the AI vendor to carry $2M per-occurrence coverage, which paid for repairs after a faulty update caused weak lap joints.
If a claim happens, preserve evidence immediately: stop automatic data purges, capture system images, and get legal counsel. One shop that did this preserved six months of logs and avoided a negligent-practice finding.
You’ll reduce risk if you combine technical controls, operator consent, and contract language—start by making a one-page consent form, automated logging rules, and a template indemnity clause.
How Do Small Shops Affordably Retrofit Legacy Equipment for Digital Workflows?
If you’ve ever run a small shop with older machines, this is why retrofitting matters: you’ll cut downtime and save money while getting digital data for better decisions.
Why add IoT gateways and sensors?
- Why it matters: you get real-time machine status so you stop guessing about failures.
- Example: a CNC mill with a vibration sensor that flags bearing wear two days before failure, letting you schedule a 2-hour repair instead of a full-day emergency fix.
Steps:
- Pick one machine to pilot (choose a high-use or failure-prone unit).
- Buy a cheap gateway (~$150–$400) and 2–3 sensors (vibration, temp, RPM: ~$30–$120 each).
- Install sensors with zip ties and adhesive mounts; wire the gateway to the machine’s control panel or use clamp-on CTs for power readings.
- Verify data in a free cloud trial for 30–90 days.
Result: you’ll see measurable alerts within a week.
How do open-source controllers help you save?
- Why it matters: you cut license fees and get flexibility to customize without expensive vendor lock-in.
- Example: a shop switched an antiquated PLC for a Raspberry Pi-based controller running open-source ladder logic and saved $2,000 on hardware and yearly licenses.
Steps:
- Identify the control function to replace (e.g., conveyor on/off or simple interlock).
- Choose hardware: Raspberry Pi ($35–$75) or Arduino ($10–$40) plus industrial I/O modules ($50–$300).
- Use open-source software like Node-RED or Wago-PLC alternatives and follow a tested sample flow from the community.
- Test on a bench rig before connecting to the actual machine.
Result: you’ll have a working controller in 2–4 weeks.
What does it mean to phase installations?
- Why it matters: phasing spreads cost and limits production disruption.
- Example: a bakery upgraded one oven per quarter, maintaining output while evaluating sensor placement and ROI each cycle.
Steps:
- Create a 3–6 month plan with monthly or quarterly milestones.
- Start with monitoring (non-invasive sensors) then add control retrofits on the most reliable pilot machine.
- Budget $500–$2,000 per phase depending on complexity.
- Review metrics (uptime, scrap rate) after each phase and adjust.
Result: you’ll avoid a big upfront hit and learn before scaling.
How can you leverage cloud trials affordably?
- Why it matters: trials let you validate data value before paying for services.
- Example: a metal shop used a 60-day cloud trial to confirm that energy monitoring saved 8% on monthly power, then subscribed for $50/month.
Steps:
- Sign up for free trials from two vendors that accept MQTT or REST data.
- Send sample data from your gateway for 30–60 days.
- Compare dashboards, alerting, and export features.
- Cancel the one you don’t like; negotiate price with the preferred vendor.
Result: you’ll know which platform gives the most ROI before committing.
How should you train staff without losing production?
- Why it matters: trained staff maintain and troubleshoot new systems so upgrades don’t become liabilities.
- Example: a shop ran two 2-hour hands-on sessions with operators, teaching basic sensor checks and reboot steps, which cut vendor calls by half.
Steps:
- Run two short, hands-on sessions (2 hours each) with operators and maintenance techs.
- Create a one-page cheat sheet for common fixes and a 3-step reboot procedure.
- Schedule shadowing: have one operator own the pilot for one month.
Result: you’ll reduce external support calls and speed up recoveries.
Final practical budget example:
- Pilot gateway + 3 sensors: $250–$700.
- Open-source controller bench kit: $100–$400.
- Cloud trial: free for 30–90 days.
- Training session (2×2 hours): low-cost internal time or $200 for a local trainer.
Total first-phase budget: roughly $550–$1,500, depending on sensors and hardware.
If you follow a single rule: start small, measure one clear metric, then expand.